标签:load cat 优化器 python dev 手写 tps als read
Python基础
import tensorflow as tf
import tensorflow.examples.tutorials.mnist.input_data as input_data  # 导入下载数据集手写体
mnist = input_data.read_data_sets(‘../MNIST_data/‘, one_hot=True)


class RNNNet:  # 创建一个RNNNet类
    def __init__(self):
        self.x = tf.placeholder(dtype=tf.float32, shape=[None, 28, 28], name=‘input_x‘)  # 创建数据占位符
        self.y = tf.placeholder(dtype=tf.float32, shape=[None, 10], name=‘input_y‘)  # 创建标签占位符

        self.fc_w1 = tf.Variable(tf.truncated_normal(shape=[128, 10], dtype=tf.float32, stddev=tf.sqrt(1 / 10), name=‘fc_w1‘))  # 定义 输出层/全链接层 w
        self.fc_b1 = tf.Variable(tf.zeros(shape=[10]), dtype=tf.float32, name=‘fc_b1‘)  # 定义 输出层/全链接层 偏值b

    # 前向计算
    def forward(self):
        cell = tf.nn.rnn_cell.BasicLSTMCell(128)  # 创建128个LSTM的RNN结构(细胞结构)
        state1 = cell.zero_state(100, dtype=tf.float32)  # 初始化细胞的状态为 0, 传入初始化批次 和数据类型

        self.rnn_ouput, self.state = tf.nn.dynamic_rnn(cell, self.x, initial_state=state1, time_major=False)  # 将细胞cell 和数据 self.x 初始化状态传入RNN细胞结构 获得两个返回值 output 和 状态state
        self.fc1 = tf.matmul(self.rnn_ouput[:, -1, :], self.fc_w1) + self.fc_b1  # 取rnn_output的输出状态的 每个输出的最后一行 进行全链接计算
        self.output = tf.nn.softmax(self.fc1)  # 将全链接计算后的结果进行 softmax分类

    # 后向计算
    def backward(self):
        # 求出网络的 cost值(损失)
        self.cost = tf.reduce_mean(tf.nn.softmax_cross_entropy_with_logits(labels=self.y, logits=self.fc1, name=‘cost‘))
        # 使用AdamOptimizer优化器优化 self.cost
        self.opt = tf.train.AdamOptimizer().minimize(self.cost)

    # # 计算测试集识别精度
    def acc(self):
        # 将预测值 output 和 标签值 self.y 进行比较
        self.acc1 = tf.equal(tf.argmax(self.output, 1), tf.argmax(self.y, 1))
        #  最后对比较出来的bool值 转换为float32类型后 求均值就可以看到满值为 1的精度显示
        self.accaracy = tf.reduce_mean(tf.cast(self.acc1, tf.float32))


if __name__ == ‘__main__‘:
    net = RNNNet()  # 启动tensorflow绘图的RNNNet
    net.forward()  # 启动前向计算
    net.backward()  # 启动后向计算
    net.acc()  # 启动精度计算
    init = tf.global_variables_initializer()  # 定义初始化tensorflow所有变量操作
    with tf.Session() as sess:  # 创建一个Session会话
        sess.run(init)  # 执行init变量内的初始化所有变量的操作
        for i in range(10000):  # 训练10000次
            ax, ay = mnist.train.next_batch(100)  # 从mnist数据集中取数据出来 ax接收图片 ay接收标签
            ax_batch = ax.reshape([-1, 28, 28])  # 将取出的 图片数据 reshape成 NSV 结构
            loss, output, accaracy, _ = sess.run(fetches=[net.cost, net.output, net.accaracy, net.opt], feed_dict={net.x: ax_batch, net.y: ay})  # 将数据喂进RNN网络
            # print(loss)  # 打印损失
            # print(accaracy)  # 打印训练精度

            if i % 10 == 0:  # 每训练10次
                test_ax, test_ay = mnist.test.next_batch(100)  # 则使用测试集对当前网络进行测试
                test_ax_batch = sess.run(tf.reshape(test_ax, [-1, 28, 28]))  # 将取出的 图片数据 reshape成 NSV 结构
                test_output = sess.run(fetches=net.output, feed_dict={net.x: test_ax_batch})  # 注意fetches=[net.output]加了中括号返回值会变为list    # 将测试数据喂进网络 接收一个output值
                test_acc = tf.equal(tf.argmax(test_output, 1), tf.argmax(test_ay, 1))  # 对output值和标签y值进行求比较运算
                test_accaracy = sess.run(tf.reduce_mean(tf.cast(test_acc, tf.float32)))  # 求出精度的准确率进行打印
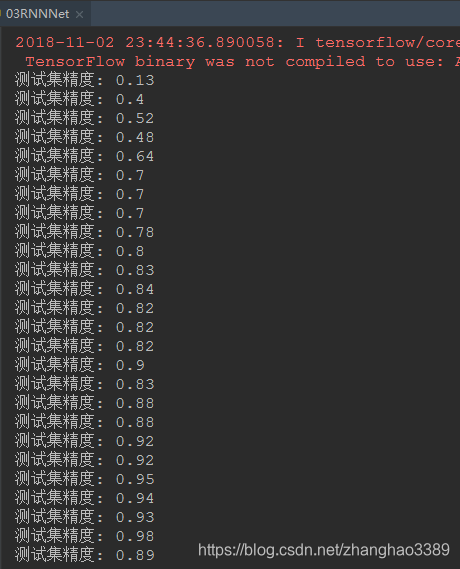
                print(test_accaracy)  # 打印当前测试集的精度

标签:load cat 优化器 python dev 手写 tps als read
原文地址:https://www.cnblogs.com/Mrzhang3389/p/9899149.html