标签:页面 lint 配置文件 arm exp fill ref read nod
本教程基于Angular7,更新时间2018-11-05.
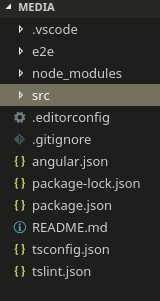
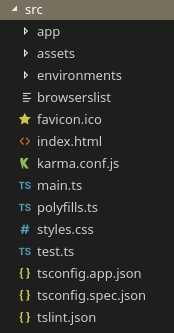
首先打开项目脚本的入口文件main.ts文件,内容如下:
import { enableProdMode } from ‘@angular/core‘;
import { platformBrowserDynamic } from ‘@angular/platform-browser-dynamic‘;

import { AppModule } from ‘./app/app.module‘;
import { environment } from ‘./environments/environment‘;

if (environment.production) {
 enableProdMode();
}

platformBrowserDynamic().bootstrapModule(AppModule)
 .catch(err => console.error(err));
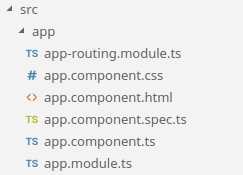
其中的语句 import { AppModule } from ‘./app/app.module‘;表示引用了AppModule,路径是./app/app.module,就是app目录下的app.module.ts文件。
app.module.ts的文件内容如下:
import { BrowserModule } from ‘@angular/platform-browser‘;
import { NgModule } from ‘@angular/core‘;

import { AppRoutingModule } from ‘./app-routing.module‘;
import { AppComponent } from ‘./app.component‘;

@NgModule({
  declarations: [
    AppComponent
  ],
  imports: [
    BrowserModule,
    AppRoutingModule
  ],
  providers: [],
  bootstrap: [AppComponent]
})
export class AppModule { }
其中的import { AppComponent } from ‘./app.component‘表示引用了AppComponent组件,即为app目录下的app.component.ts文件。
app.component.ts文件内容如下:
import { Component } from ‘@angular/core‘;

@Component({
  selector: ‘app-root‘,
  templateUrl: ‘./app.component.html‘,
  styleUrls: [‘./app.component.css‘]
})
export class AppComponent {
  title = ‘app‘;
}
index.html文件内容如下:
<!doctype html>
<html lang="en">

<head>
 <meta charset="utf-8">
 <title>Media</title>
 <base href="/">

 <meta name="viewport" content="width=device-width, initial-scale=1">
 <link rel="icon" type="image/x-icon" href="favicon.ico">
</head>

<body>
 <app-root></app-root>
</body>

</html>
其中的body标签中的app-root标签即为app.component.ts中定义的选择器名称。
Angular教程-02-Angular项目目录及基本文件说明
标签:页面 lint 配置文件 arm exp fill ref read nod
原文地址:https://www.cnblogs.com/dwllm/p/9912076.html