标签:完成 type sha serve 1.3 http cto 静态nat 简易
实验名称:一个简易的nat实验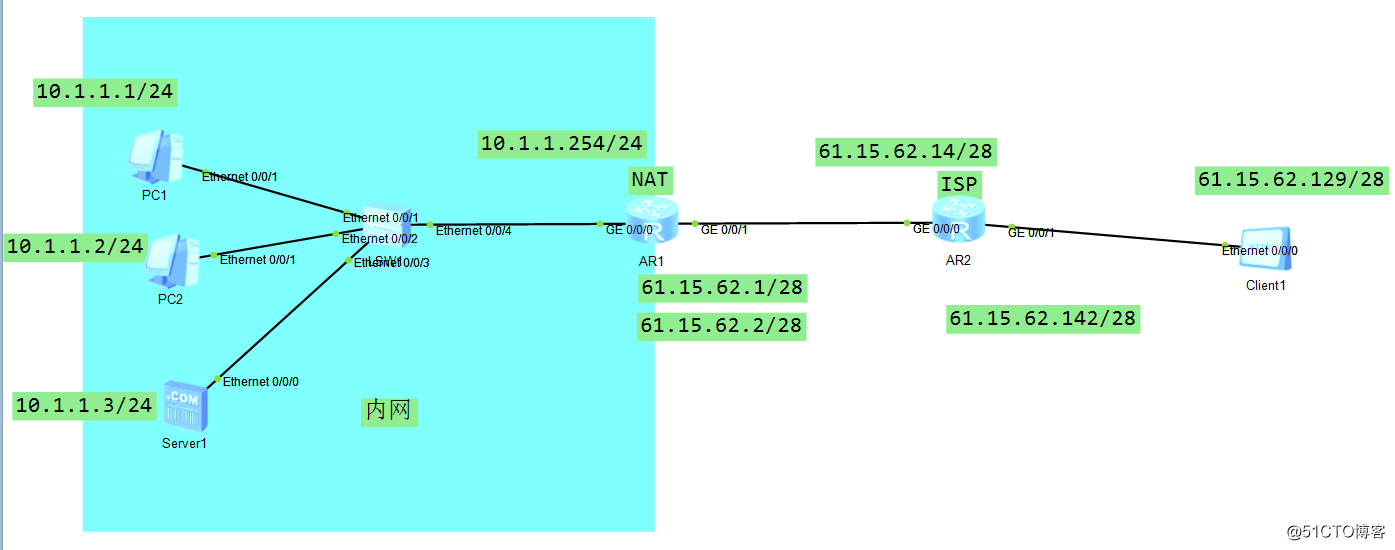
实验需要:
-将内部地址10.1.1.1/24 , 10.1.1.2/24 用动态NAT的方式,转换成公网地址 61.15.62.1/28,以便可以访问外网
-将内部地址10.1.1.3/24的80端口 映射到公网地址 61.15.62.2/28 的8080端口,以便被外网访问;
步骤:
1、按图中配置各个终端设备。
  pc1-2 以及server 网关为 10.1.1.254
  client1 的网关配置为 61.15.62.142

2、配置网络设备

   #配置作为内网与外网边界的NAT  R1
     acl 2000
     rule 5 permit source 10.1.1.0 0.0.0.255        //配置ACL
     ip route-static 0.0.0.0 0.0.0.0 61.15.62.14     //指向外网的静态路由条目
     interface g0/0/0
     ip add 10.1.1.254 24

     interface g0/0/1
     ip add 61.15.62.1 28
     nat static enable
     nat server protocol tcp global 61.15.62.2 8080 inside 10.1.1.3 80
     nat outbound 2000
                                           // 配置连接到外网的接口上的动态与静态nat
     #配置 作为ISP 的R2

      interface g0/0/0
         ip add 61.15.62.14 28
      interface g0/0/1
         ip add 61.15.62.142 28

完成标签:完成 type sha serve 1.3 http cto 静态nat 简易
原文地址:http://blog.51cto.com/14029008/2328647