标签:开放源代码 保护 设计 sig 选项 资源 tcp通信 指定 libs
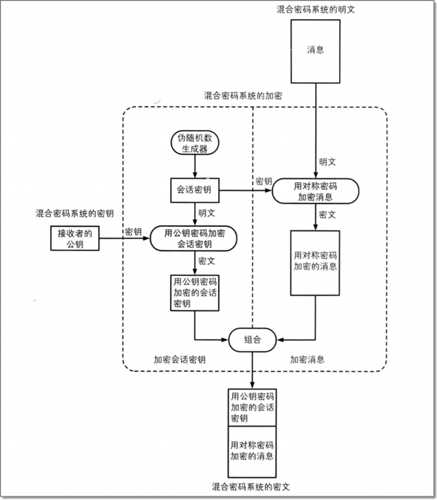
在Ubuntu中实现对实验二中的“wc服务器”通过混合密码系统进行防护
Linux下OpenSSL的安装与测试
tar xzvf openssl-1.1.0j.tar.gzcd openssl-1.1.0-pre1./config
$ make
$ make test
$ make install #include <stdio.h>
#include <openssl/evp.h>
int main(){
OpenSSL_add_all_algorithms();
return 0;
}test_openssl:-o test_openssl test_openssl.c -L/usr/local/ssl/lib -lcrypto -ldl -lpthread[注]:-L选项——指定链接库的文件夹地址;-lcrypto——导入OpenSSL所需包;-ldl选项——加载动态库;-lpthread选项——链接POSIX thread库
./test_openssl;echo $?,结果正确显示0
测试AES算法
int AES_set_encrypt_key(const unsigned char *userKey, const int bits,AES_KEY *key);int AES_set_decrypt_key(const unsigned char *userKey, const int bits, AES_KEY *key);AES_ecb_encrypt(const unsigned char *in, unsigned char *out, const AES_KEY *key, const int enc);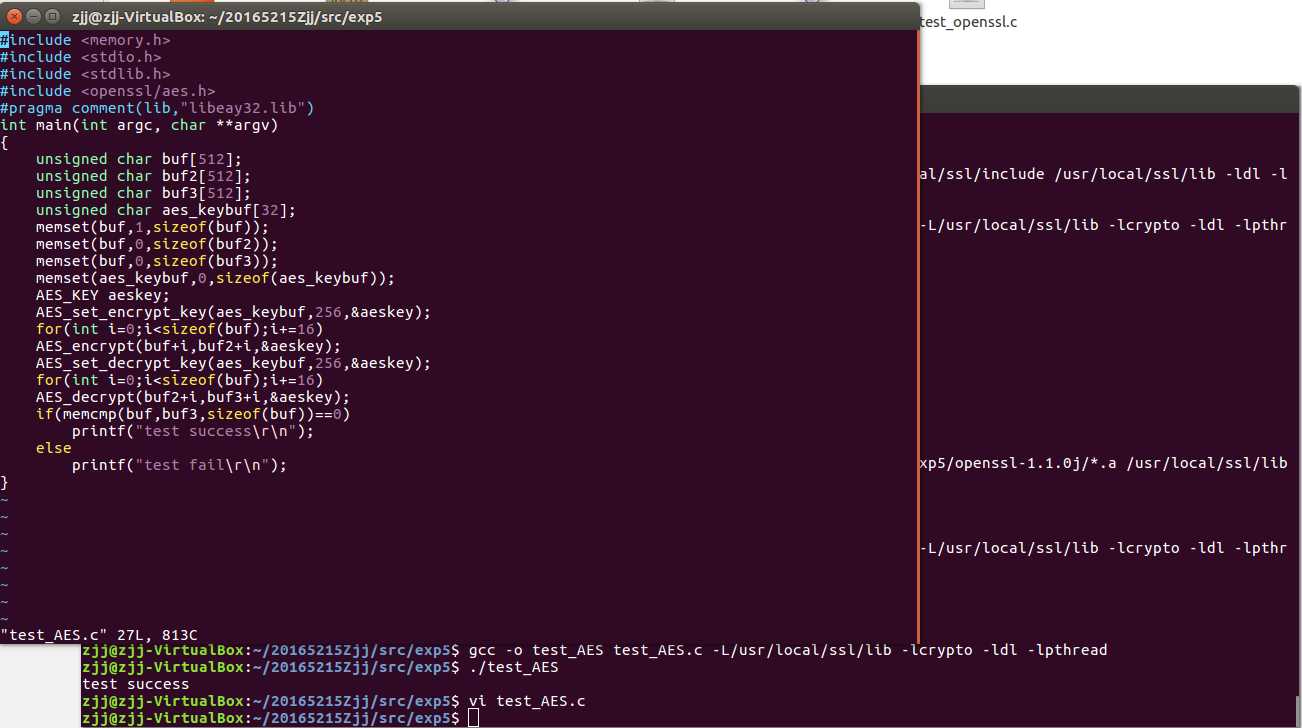
测试RSA算法
openssl genrsa -out prikey.pem 1024,这个文件包含了公钥和密钥两部分,-out指定生成的文件名,后面的1024是生成密钥的长度openssl rsa -in prikey.pem -pubout -out pubkey.pem,其中-in指定输入文件openssl rsautl -encrypt -pubin -inkey pubkey.pem -in a.text -out b.textopenssl rsautl -decrypt -inkey prikey.pem -in b.text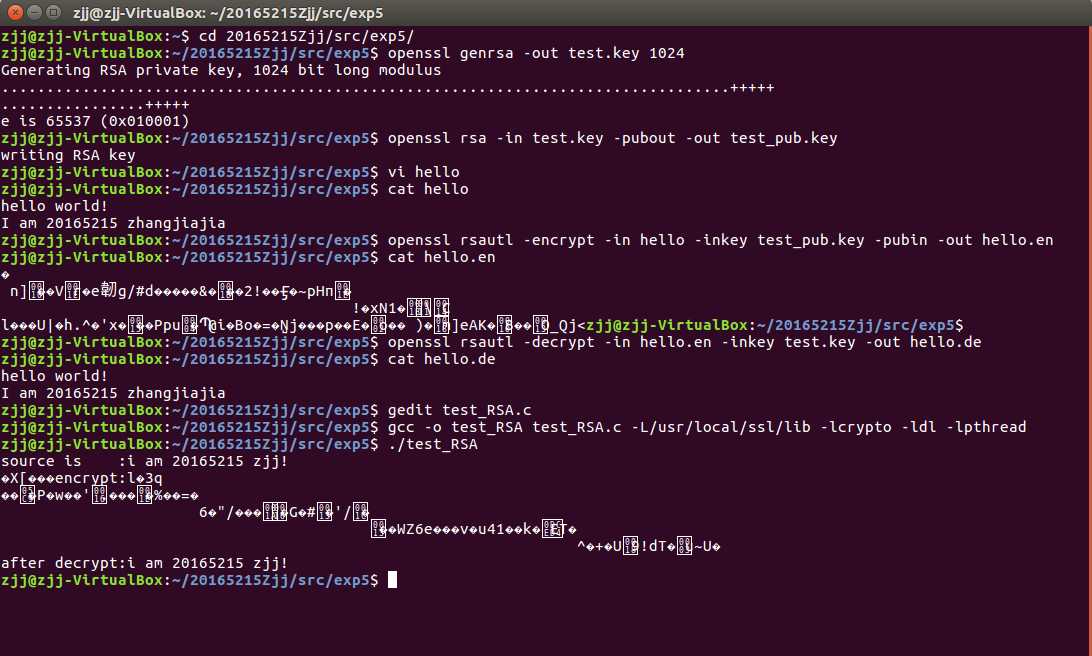
测试MD5算法
int MD5_Init(MD5_CTX *c);int MD5_Update(MD5_CTX *c, const void *data, size_t len);int MD5_Final(unsigned char *md, MD5_CTX *c);unsigned char *MD5(const unsigned char *d, size_t n, unsigned char *md);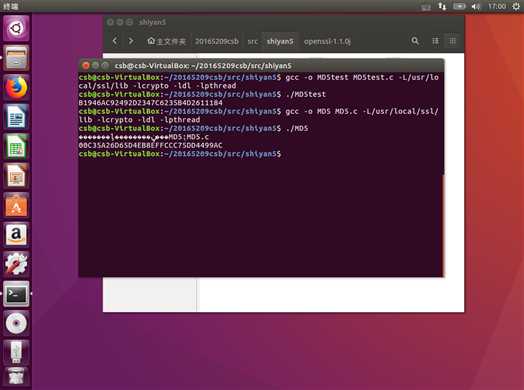
实现TCP通信
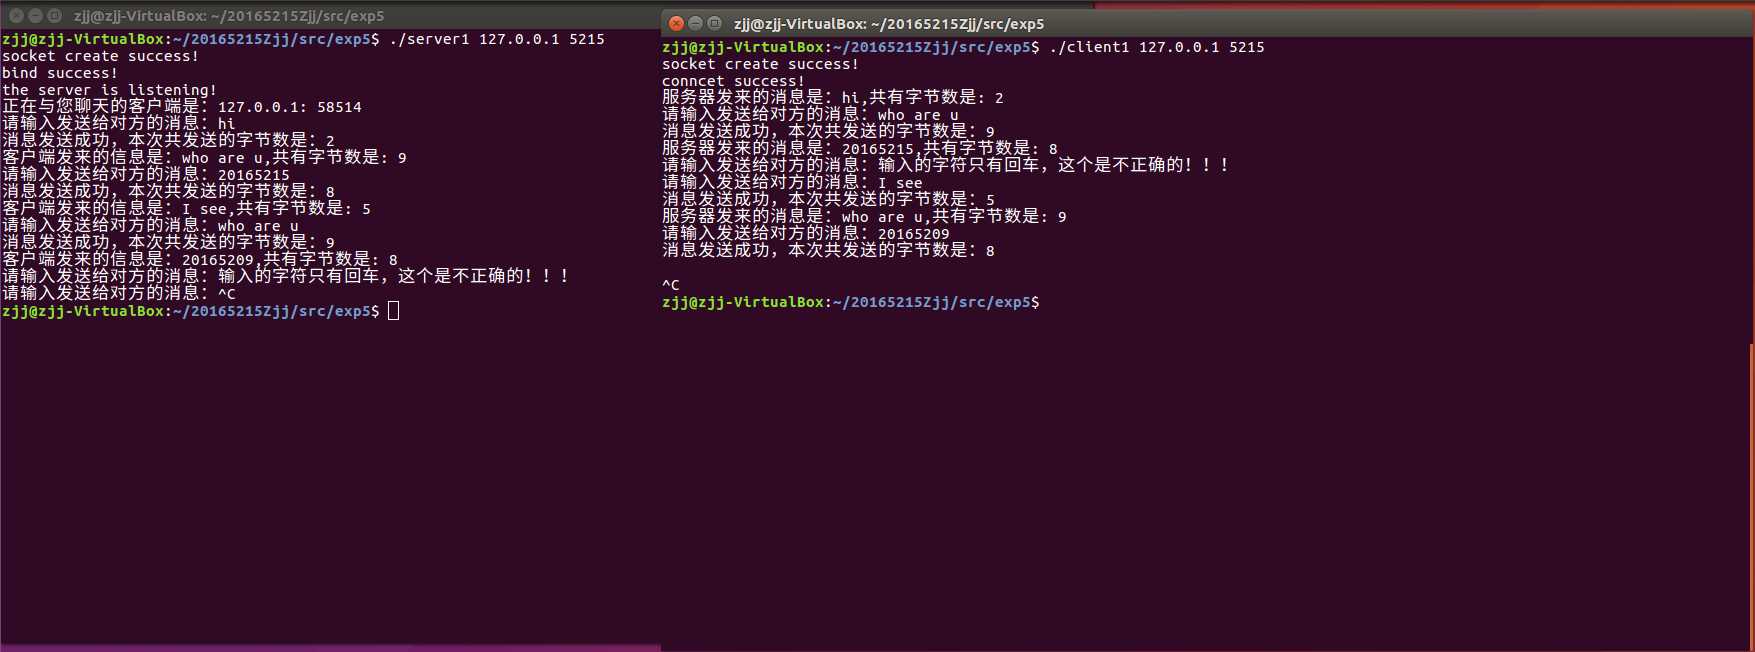
相关知识
#include <openssl/ssl.h>
#include <openssl/err.h>int SSL_library_int(void);实现SSL_CTX *SSL_CTX_new(SSL_METHOD * method);int SSL_CTX_set_verify(SSL_CTX *ctx,int mode,int(*verify_callback),int(X509_STORE_CTX *));SSL_CTX_load_verify_location(SSL_CTX *ctx,const char *Cafile,const char *Capath);SSL_CTX_use_certificate_file(SSL_CTX *ctx, const char *file,int type);SSL_CTX_use_PrivateKey_file(SSL_CTX *ctx,const char* file,int type);int SSL_CTX_check_private_key(SSL_CTX *ctx);来验证私钥和证书是否相符:SSL *SSl_new(SSL_CTX *ctx);//申请一个SSL套接字
int SSL_set_fd(SSL *ssl,int fd);)//绑定读写套接字
int SSL_set_rfd(SSL *ssl,int fd);//绑定只读套接字
int SSL_set_wfd(SSL *ssl,int fd);//绑定只写套接字SSL_connect( )来完成握手过程:int SSL_connect(SSL *ssl);int SSL_accept(SSL *ssl);X509 *SSL_get_peer_certificate(SSL *ssl);来实现X509_NAME *X509_get_subject_name(X509 *a);得到证书所用者的名字进行数据传输
int SSL_read(SSL *ssl,void *buf,int num);
int SSL_write(SSL *ssl,const void *buf,int num);
结束SSL通信
int SSL_shutdown(SSL *ssl);//关闭SSL套接字
void SSl_free(SSL *ssl);//释放SSL套接字
void SSL_CTX_free(SSL_CTX *ctx); //释放SSL会话环境
运行
gcc -o server server.c -I /usr/local/ssl/include -L/usr/local/ssl/lib -lssl -lcrypto -ldl -lpthread

gcc -o telent telent.c -I /usr/local/ssl/include -L/usr/local/ssl/lib -lssl -lcrypto -ldl -lpthreadopenssl genrsa -out privkey.pem 1024
openssl req -new -x509 -key privkey.pem -out CAcert.pem -days 1095./server 1509 1 CAcert.pem privkey.pem
./telent 127.0.0.1 1509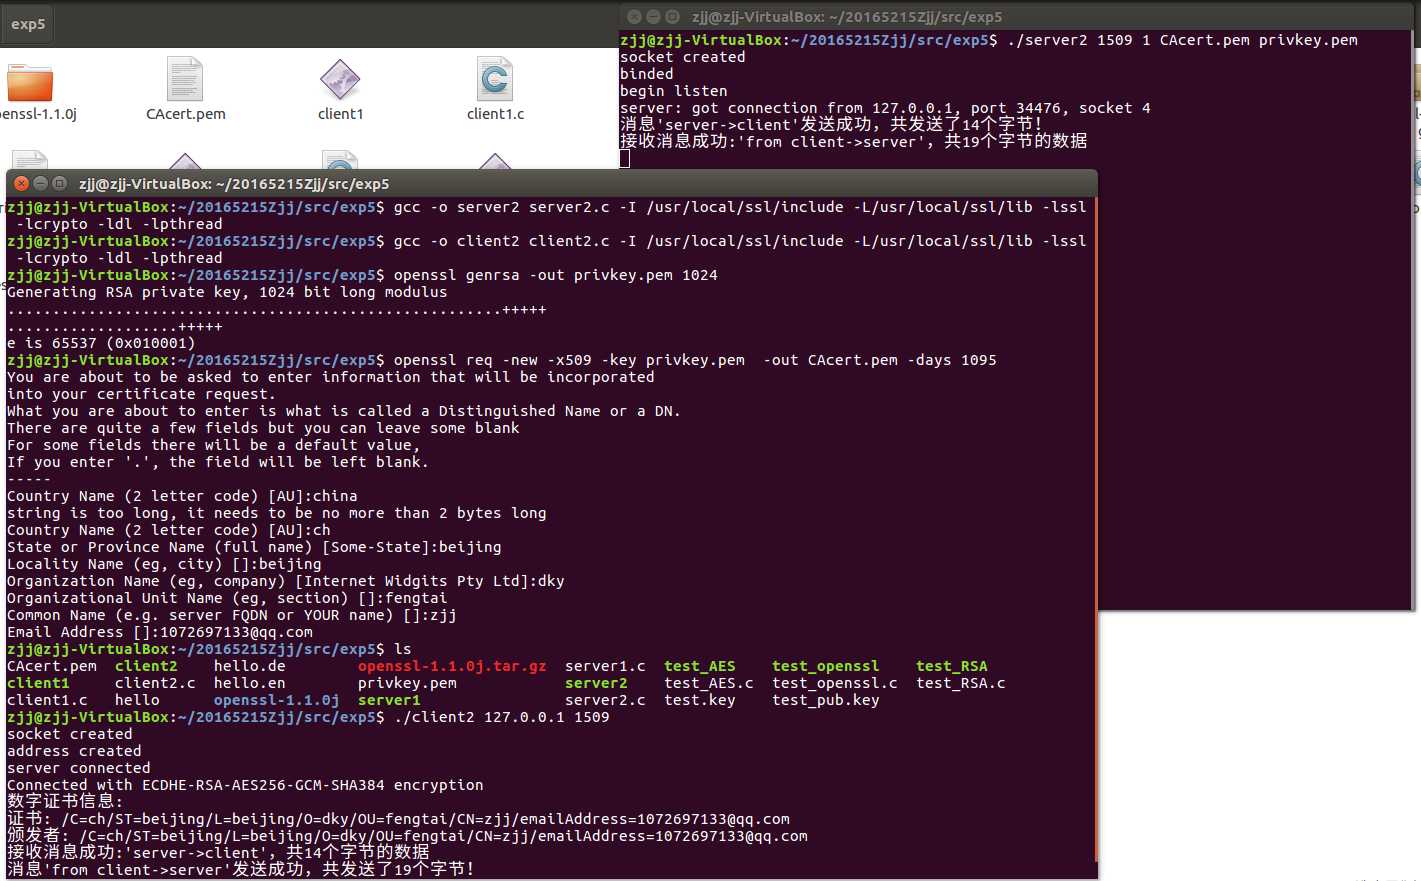
遇到的问题及解决方法
./test_openssl;echo $?,结果显示错误


sudo ln -s /usr/local/lib/libssl.so.1.1 /usr/lib/libssl.so.1.1和sudo ln -s /usr/local/lib/libcrypto.so.1.1 /usr/lib/libcrypto.so.1.1后即可生成
2018-2019-1 20165209 20165215 实验五 通讯协议设计
标签:开放源代码 保护 设计 sig 选项 资源 tcp通信 指定 libs
原文地址:https://www.cnblogs.com/fyss/p/10122268.html