标签:png com html res 安装完成 cal div nginx配置文件 访问
准备工作:
关闭防火墙 systemctl stop firewalld && systemctl disable firewalld
禁用selinux setenforce 0 ----临时关闭
sed -i "s/SELINUX=enforcing/SELINUX=Disabled/g" /etc/selinux/config
安装nginx:
yum install nginx -y
安装完成后,验证nginx页面可以访问

设置nginx文件服务器:
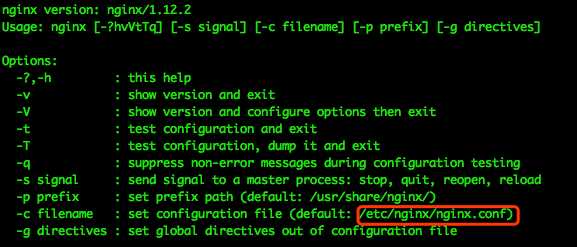
首先需要查看nginx是通过哪个配置文件启动
nginx -h
修改nginx配置文件:
vim /etc/nginx/nginx.conf 添加内容如下:

:wq 保存并退出
重启nginx
systemctl restart nginx
登陆ip:8080
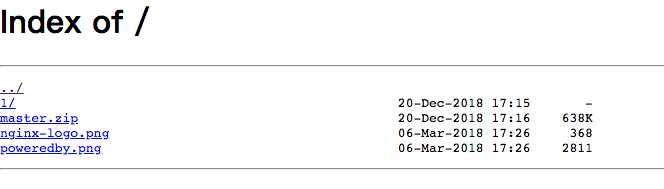
显示这个说明已经安装成功了!!!
标签:png com html res 安装完成 cal div nginx配置文件 访问
原文地址:https://www.cnblogs.com/king-LL/p/10155026.html