标签:device line creat ret src tom 详情 sys tps

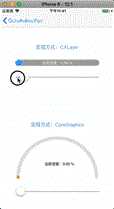
第一种实现方案:使用图层layer实现
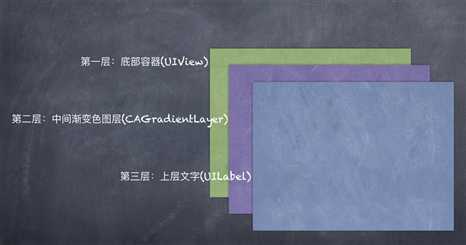
层级结构如图所示:

构建过程如下:
//添加渐变色图层gradientLayer
let gradientLayer = CAGradientLayer()
gradientLayer.colors = [UIColor(hex: "4DABF4").cgColor, UIColor(hex: "9B30C1").cgColor]
//(I.e. [0,0] is the bottom-left corner of the layer, [1,1] is the top-right corner.)
gradientLayer.startPoint = CGPoint(x: 0, y: 0)
gradientLayer.endPoint = CGPoint(x: 1, y: 0)
gradientLayer.position = CGPoint(x: width*0.5, y: height*0.5)
gradientLayer.bounds = CGRect(origin: CGPoint.zero, size: CGSize(width: width, height: height))
self.layer.insertSublayer(gradientLayer, at: 0)
 lazy var contextLabel: UILabel = {
        let label = UILabel()
        label.text = " %"
        label.font = UIFont.systemFont(ofSize: 12)
        label.textColor = UIColor.white
        label.textAlignment = NSTextAlignment.center
        label.backgroundColor = UIColor.clear
        return label
    }()

 contextLabel.frame = CGRect(x: 0, y: 0, width: width, height: height)
self.addSubview(contextLabel)
func maskLayer() {
    let temp = CGPoint(x: 0, y: 0)
    let bez = UIBezierPath()
    bez.move(to: temp)
    bez.addLine(to: CGPoint(x: progressWidth, y: 0))
    bez.addArc(withCenter: CGPoint(x: progressWidth, y: height*0.5), radius: height*0.5, startAngle: -CGFloat(M_PI_2), endAngle: CGFloat(M_PI_2), clockwise: true)
    bez.addLine(to: CGPoint(x: 0, y: height))
    bez.close()

    msLayer.path = bez.cgPath
    bottomLayer!.mask = msLayer
}
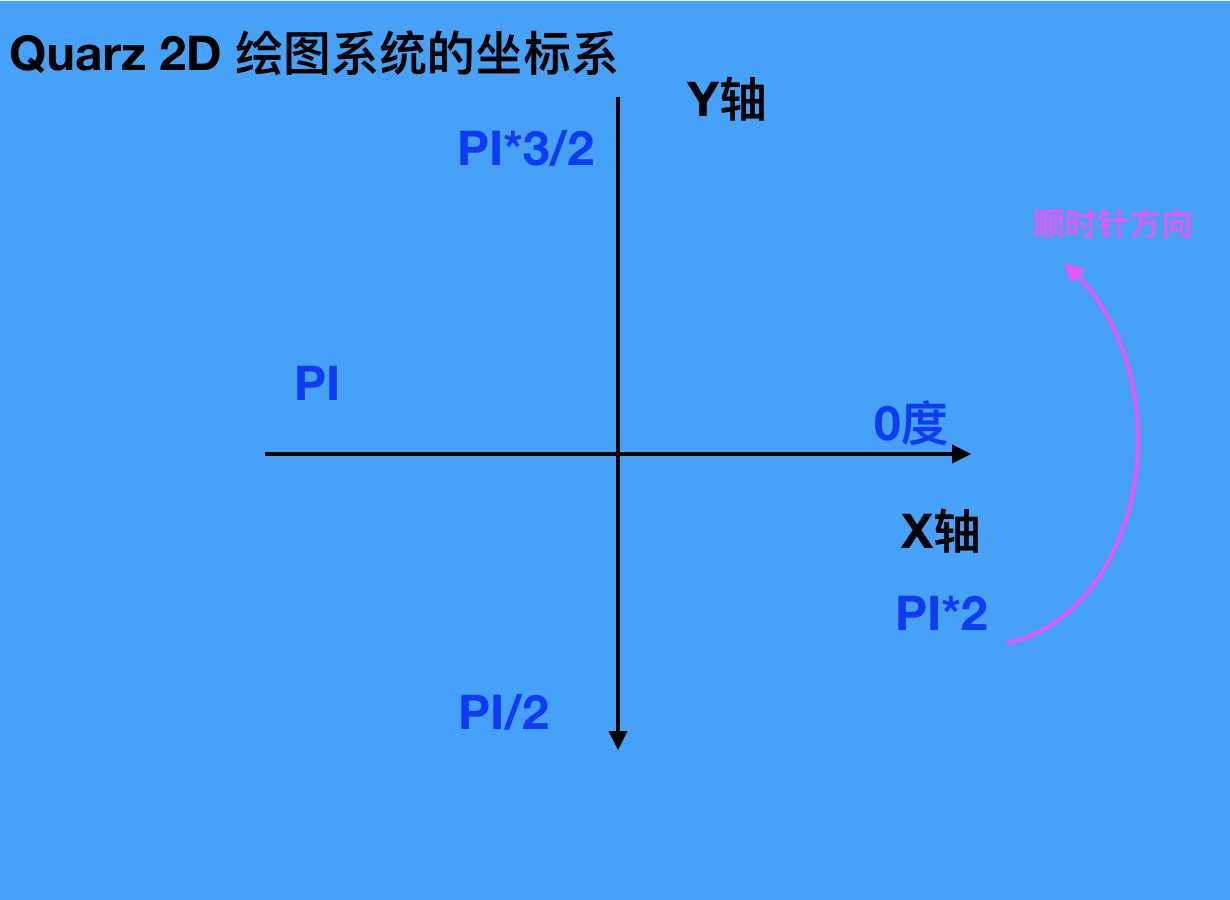
画弧时顺时针方向问题:
CoreGraphics的坐标系弧度,与顺时针方向如图所示,注意不要用错了:

let context = UIGraphicsGetCurrentContext()
//渐变色
let colorSpace = CGColorSpaceCreateDeviceRGB()
let locations:[CGFloat] = [0,1]
let startC = UIColor(hex: "EEA13A")
let endC = UIColor(hex: "B1283C")
let colors = [startC.cgColor,endC.cgColor]
let gradient = CGGradient(colorsSpace: colorSpace, colors: colors as CFArray, locations: locations)
context?.drawLinearGradient(gradient!, start: CGPoint(x: 0, y: 0), end: CGPoint(x: rect.size.width, y: 0), options: CGGradientDrawingOptions.drawsBeforeStartLocation)

//渐变色弧
context?.saveGState()
context?.addRect(rect)
context?.move(to: CGPoint(x: width-edgeDistance, y: bigOuterRadius))
context?.addArc(center: arcCenter, radius: bigOuterRadius, startAngle: 0, endAngle: CGFloat(M_PI), clockwise: true)
context?.addArc(center: CGPoint(x: smailRadius+edgeDistance, y: arcCenter.y), radius: smailRadius, startAngle: CGFloat(M_PI), endAngle: CGFloat(M_PI*2), clockwise: true)
context?.addArc(center: arcCenter, radius: bigInnerRadius, startAngle: CGFloat(M_PI), endAngle: CGFloat(M_PI*2), clockwise: false)
context?.addArc(center: CGPoint(x: width-smailRadius-edgeDistance, y: arcCenter.y), radius: smailRadius, startAngle: CGFloat(M_PI), endAngle: CGFloat(M_PI*2), clockwise: true)
context?.setFillColor(UIColor.white.cgColor)
context?.fillPath()


//灰色弧
context?.restoreGState()
let context1 = UIGraphicsGetCurrentContext()
var endAng =  CGFloat(M_PI*2) - (_progressValue * CGFloat(M_PI))
context1?.move(to: CGPoint(x: width-edgeDistance, y: bigOuterRadius))
context1?.addArc(center: arcCenter, radius: bigOuterRadius, startAngle: 0, endAngle: endAng, clockwise: true)

let midSmallX: CGFloat = arcCenter.x + cos(endAng)*(bigOuterRadius-smailRadius)
let midSmallY: CGFloat = arcCenter.y + sin(endAng)*(bigOuterRadius-smailRadius)

context1?.addArc(center: CGPoint(x: midSmallX, y: midSmallY), radius: smailRadius, startAngle: endAng, endAngle: endAng-CGFloat(M_PI), clockwise: false)

context1?.addArc(center: arcCenter, radius: bigInnerRadius, startAngle: endAng, endAngle: CGFloat(M_PI*2), clockwise: false)
context1?.addArc(center: CGPoint(x: width-smailRadius-edgeDistance, y: arcCenter.y), radius: smailRadius, startAngle: CGFloat(M_PI), endAngle: CGFloat(M_PI*2), clockwise: true)
context1?.setFillColor(UIColor(hex: "e7e3e3").cgColor)
context1?.fillPath()
标签:device line creat ret src tom 详情 sys tps
原文地址:https://www.cnblogs.com/zhou--fei/p/10182351.html