标签:14. action 集合 leo ima over png 地址 描述
前言:以下内容基于React全家桶+AntD实战课程的学习实践过程记录。最终成果github地址:https://github.com/66Web/react-antd-manager,欢迎star。
一、按钮Button
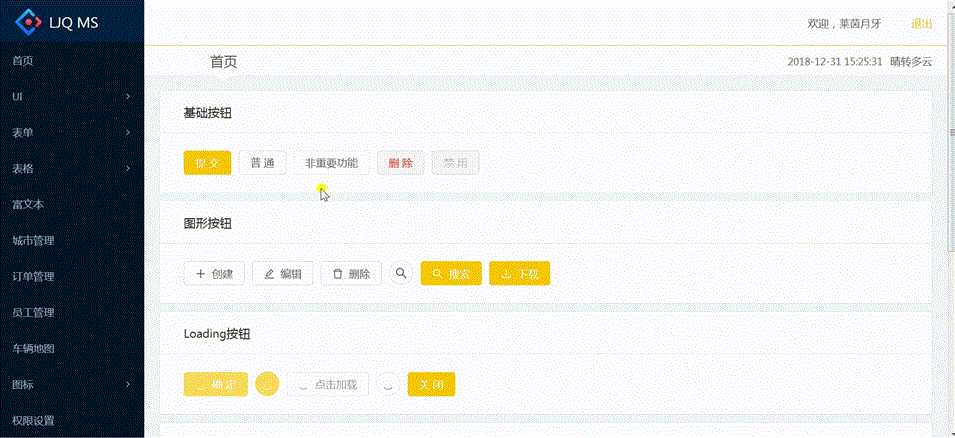
import React from ‘react‘;
import {Card, Button, Radio} from ‘antd‘
import ‘./ui.less‘

class Buttons extends React.Component{

  state = {
      loading: true,
      size: ‘default‘
  }

  handleCloseLoading = () =>{
      this.setState({
          loading: false
      })
  }

  handleChange = (e) => {
      this.setState({
          size: e.target.value
      })
  }

  render(){
      return(
          <div>
              <Card title="基础按钮" className="card-wrap">
                    <Button type="primary">提交</Button>
                    <Button>普通</Button>
                    <Button type="dashed">非重要功能</Button>
                    <Button type="danger">删除</Button>
                    <Button disabled>禁用</Button>
              </Card>
              <Card title="图形按钮" className="card-wrap">
                    <Button icon="plus">创建</Button>
                    <Button icon="edit">编辑</Button>
                    <Button icon="delete">删除</Button>
                    <Button shape="circle" icon="search"></Button>
                    <Button type="primary" icon="search">搜索</Button>
                    <Button type="primary" icon="download">下载</Button>
              </Card>
              <Card title="Loading按钮" className="card-wrap">
                    <Button type="primary" loading={this.state.loading}>确定</Button>
                    <Button type="primary" shape="circle" loading={this.state.loading}></Button>
                    <Button loading={this.state.loading} >点击加载</Button>
                    <Button shape="circle" loading={this.state.loading}></Button>
                    <Button type="primary" onClick={this.handleCloseLoading}>关闭</Button>
              </Card>
              <Card title="按钮组" style={{marginBottom:10}}>
                    <Button.Group>
                        <Button type="primary" icon="left">返回</Button>
                        <Button type="primary" icon="right">前进</Button>
                    </Button.Group>
              </Card>
              <Card title="按钮尺寸" className="card-wrap">
                    <Radio.Group size={this.state.size} onChange={this.handleChange}>
                        <Radio value="small">小</Radio>
                        <Radio value="default">中</Radio>
                        <Radio value="large">大</Radio>
                    </Radio.Group>
                    <Button type="primary" size={this.state.size}>Imooc</Button>
                    <Button size={this.state.size}>Imooc</Button>
                    <Button type="dashed" size={this.state.size}>Imooc</Button>
                    <Button type="danger" size={this.state.size}>Imooc</Button>
              </Card>
          </div>
      );
  }
}
export default Buttons;
e.target.value)
二、弹框Modal
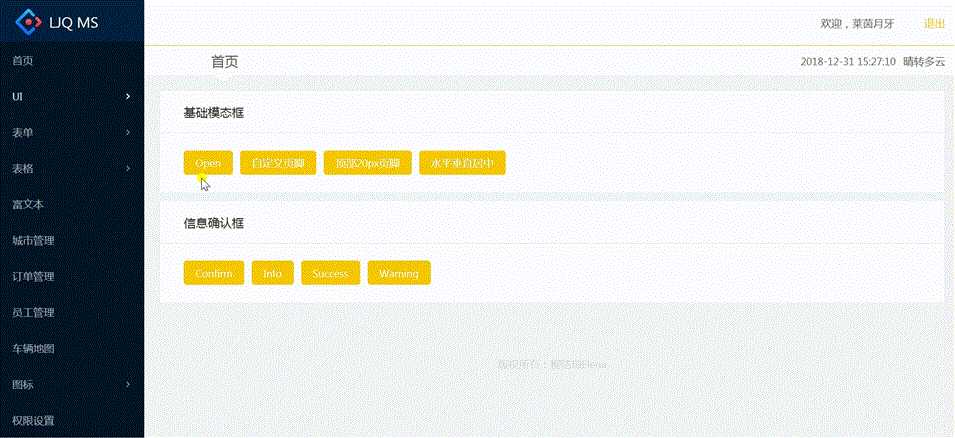
import React from ‘react‘;
import {Card, Button, Modal} from ‘antd‘
import ‘./ui.less‘

export default class Buttons extends React.Component{
    state = {
       showModal1: false,
       showModal2: false,
       showModal3: false,
       showModal4: false
    }
    handleOpen = (type) => {
        this.setState({
           [type]: true
        })
    }
    handleConfirm = (type) => {
        Modal[type]({
            title: ‘确认?‘,
            content:‘你确认你学会了React了吗?‘,
            onOk() {
                console.log(‘ok‘)
            },
            onCancel() {
                console.log(‘Cancel‘)
            }
        })
    }
    render(){
        return (
            <div>
                <Card title="基础模态框" className="card-wrap">
                    <Button type="primary" onClick={() => this.handleOpen(‘showModal1‘)}>Open</Button>
                    <Button type="primary" onClick={() => this.handleOpen(‘showModal2‘)}>自定义页脚</Button>
                    <Button type="primary" onClick={() => this.handleOpen(‘showModal3‘)}>顶部20px页脚</Button>
                    <Button type="primary" onClick={() => this.handleOpen(‘showModal4‘)}>水平垂直居中</Button>
                </Card>
                <Card title="信息确认框" className="card-wrap">
                    <Button type="primary" onClick={() => this.handleConfirm(‘confirm‘)}>Confirm</Button>
                    <Button type="primary" onClick={() => this.handleConfirm(‘info‘)}>Info</Button>
                    <Button type="primary" onClick={() => this.handleConfirm(‘success‘)}>Success</Button>
                    <Button type="primary" onClick={() => this.handleConfirm(‘warning‘)}>Warning</Button>
                </Card>
                <Modal
                    title="React"
                    visible={this.state.showModal1}
                    onCancel={() => {
                        this.setState({
                            showModal1: false
                        })
                    }}>
                    <p>欢迎使用柳柳版弹框</p>
                </Modal>
                <Modal
                    title="React"
                    visible={this.state.showModal2}
                    okText="好的"
                    cancelText="算了"
                    onCancel={() => {
                        this.setState({
                            showModal2: false
                        })
                    }}>
                    <p>欢迎使用柳柳版弹框</p>
                </Modal>
                <Modal
                    title="React"
                    style={{top:20}}
                    visible={this.state.showModal3}
                    onCancel={() => {
                        this.setState({
                            showModal3: false
                        })
                    }}>
                    <p>欢迎使用柳柳版弹框</p>
                </Modal>
                <Modal
                    title="React"
                    wrapClassName="vertical-center-modal"
                    visible={this.state.showModal4}
                    onCancel={() => {
                        this.setState({
                            showModal4: false
                        })
                    }}>
                    <p>欢迎使用柳柳版弹框</p>
                </Modal>

            </div>
        )
    }
}
{true|false},为true则显示,false则不显示handleConfirm = (type) => {
Modal[type]({
title: ‘确认?‘,
content:‘你确认你学会了React了吗?‘,
onOk() {
console.log(‘ok‘)
},
onCancel() {
console.log(‘Cancel‘)
}
})
}
onClick={() => this.handleConfirm(‘confirm‘)}
传递的参数如果想作为对象的键时,需要用[]进行包裹,如果没包裹直接放置键的位置则视为变量而报错
三、加载中Spin
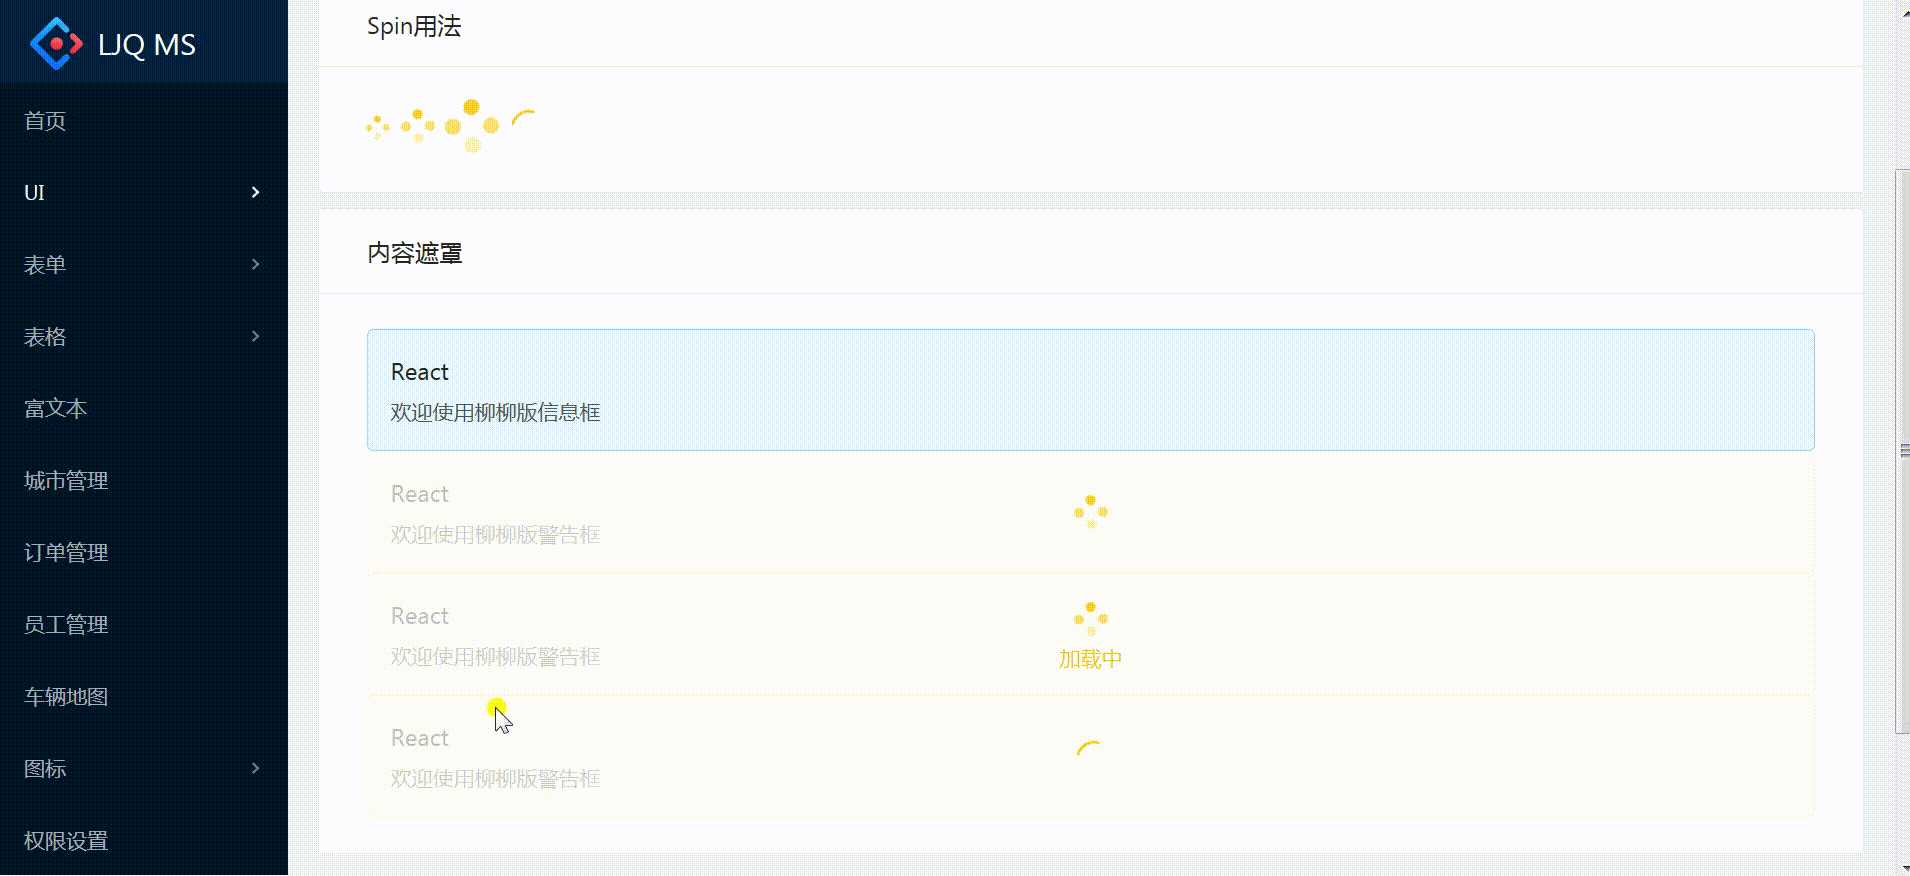
import React from ‘react‘;
import {Card, Spin, Icon, Alert} from ‘antd‘
import ‘./ui.less‘

export default class Loadings extends React.Component{
    render() {
        const icon = <Icon type="loading" style={{fontSize:24}}/>
        return (
            <div>
                <Card title="Spin用法" className="card-wrap">
                    <Spin size="small"/>
                    <Spin style={{margin:‘0 10px‘}}/>
                    <Spin size="large"/>
                    <Spin indicator={icon} style={{marginLeft:10}}/>
                </Card>
                <Card title="内容遮罩" className="card-wrap">
                    <Alert
                        message="React"
                        description="欢迎使用柳柳版信息框"
                        type="info"
                    />
                    <Spin>
                        <Alert
                            message="React"
                            description="欢迎使用柳柳版警告框"
                            type="warning"
                        />
                    </Spin>
                    <Spin tip="加载中">
                        <Alert
                            message="React"
                            description="欢迎使用柳柳版警告框"
                            type="warning"
                        />
                    </Spin>
                    <Spin indicator={icon}>
                        <Alert
                            message="React"
                            description="欢迎使用柳柳版警告框"
                            type="warning"
                        />
                    </Spin>
                </Card>
            </div>
        )
    }
}
const icon = <Icon type="loading"/>;
<Spin indicator={icon}/>
tip:"加载中"
四、通知提醒Notification
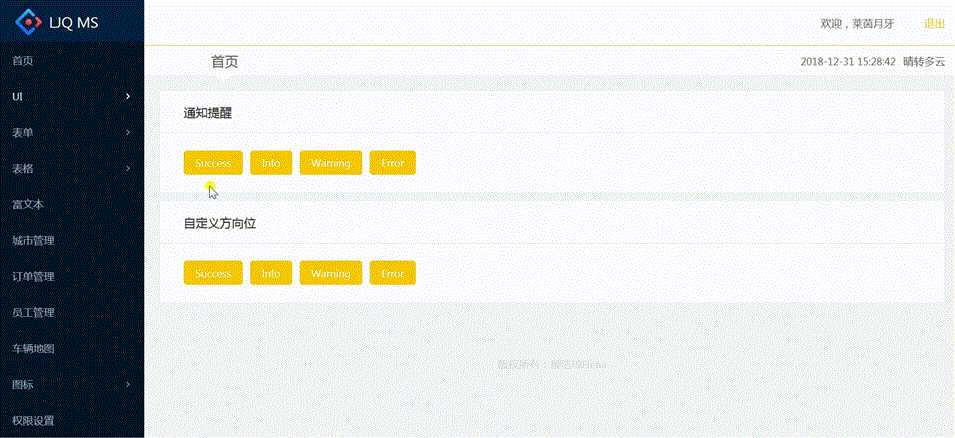
import React from ‘react‘;
import {Card, Button, notification} from ‘antd‘
import ‘./ui.less‘

export default class Notice extends React.Component{
    openNotification = (type, direction) => {
        if(direction){
           notification.config({
               placement: direction
           })
        }
        notification[type]({
            message:‘发工资了‘,
            description:‘上个月考勤22天,迟到12天,实发工资2500,请笑纳‘
        })
    }
    render(){
        return (
            <div>
                <Card title="通知提醒" className="card-wrap">
                    <Button type="primary" onClick={() => this.openNotification(‘success‘)}>Success</Button>
                    <Button type="primary" onClick={() => this.openNotification(‘info‘)}>Info</Button>
                    <Button type="primary" onClick={() => this.openNotification(‘warning‘)}>Warning</Button>
                    <Button type="primary" onClick={() => this.openNotification(‘error‘)}>Error</Button>
                </Card>
                <Card title="自定义方向位" className="card-wrap">
                    <Button type="primary" onClick={() => this.openNotification(‘success‘,‘topLeft‘)}>Success</Button>
                    <Button type="primary" onClick={() => this.openNotification(‘info‘,‘topRight‘)}>Info</Button>
                    <Button type="primary" onClick={() => this.openNotification(‘warning‘,‘bottomLeft‘)}>Warning</Button>
                    <Button type="primary" onClick={() => this.openNotification(‘error‘,‘bottomRight‘)}>Error</Button>
                </Card>
            </div>
        )
    }
}
notification.config(options) openNotification = (type, direction) => {
if(direction){
notification.config({
placement: direction
})
}
notification[type]({
message:‘发工资了‘,
description:‘上个月考勤22天,迟到12天,实发工资2500,请笑纳‘
})
}
五、全局提示框Message
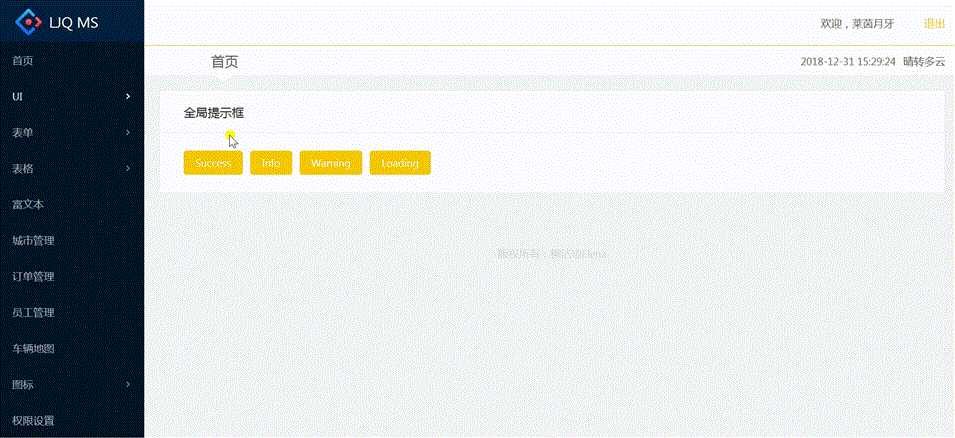
import React from ‘react‘;
import {Card, Button, message} from ‘antd‘
import ‘./ui.less‘

export default class Messages extends React.Component{
       showMessage = (type) => {
           message[type]("恭喜你,React课程晋级成功");
       }
       render(){
           return (
               <div>
                   <Card title="全局提示框" className="card-wrap">
                        <Button type="primary" onClick={() => this.showMessage(‘success‘)}>Success</Button>
                        <Button type="primary" onClick={() => this.showMessage(‘info‘)}>Info</Button>
                        <Button type="primary" onClick={() => this.showMessage(‘warning‘)}>Warning</Button>
                        <Button type="primary" onClick={() => this.showMessage(‘loading‘)}>Loading</Button>
                   </Card>
               </div>
           )
       }
}
六、页签Tab
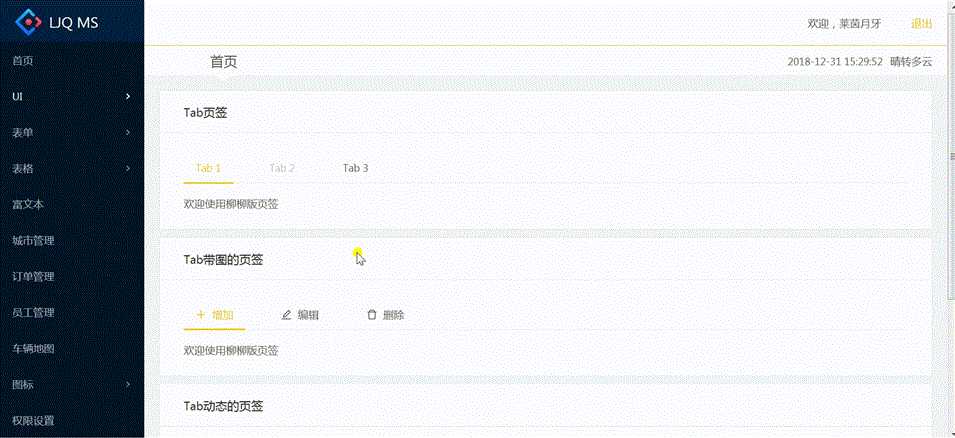
import React from ‘react‘;
import {Card, Tabs, message, Icon} from ‘antd‘
import ‘./ui.less‘

const TabPane = Tabs.TabPane;

export default class Tab extends React.Component{
    handleCallBack = (key) => {
        message.info("Hi,您选择了页签:"+key)
    }
    componentWillMount(){
        this.newTabIndex = 0;
        const panes = [
            {
                title: ‘Tab 1‘,
                content: ‘欢迎使用柳柳版页签‘,
                key: ‘1‘
            },
            {
                title: ‘Tab 2‘,
                content: ‘欢迎使用柳柳版页签‘,
                key: ‘2‘
            },
            {
                title: ‘Tab 3‘,
                content: ‘欢迎使用柳柳版页签‘,
                key: ‘3‘
            }
        ]
        this.setState({
            panes,
            activeKey: panes[0].key
        })
    }
    onChange = (activeKey) => {
        this.setState({
            activeKey
        })
    }
    //onEdit、add、remove直接从官网复制过来即可
    onEdit = (targetKey, action) => {
        this[action](targetKey);
    }
    add = () => {
        const panes = this.state.panes;
        const activeKey = `newTab${this.newTabIndex++}`;
        panes.push({ title: activeKey, content: ‘Content of new Tab‘, key: activeKey });
        this.setState({ panes, activeKey });
    }
    //activeKey:当前激活的key, targetKey:当前删除的Key
    remove = (targetKey) => {
        let activeKey = this.state.activeKey;
        let lastIndex;
        this.state.panes.forEach((pane, i) => {
          if (pane.key === targetKey) {
            lastIndex = i - 1;
          }
        });
        const panes = this.state.panes.filter(pane => pane.key !== targetKey);
        if (lastIndex >= 0 && activeKey === targetKey) {
          activeKey = panes[lastIndex].key;
        }
        this.setState({ panes, activeKey });
    }

    render() {
        return (
            <div>
                <Card title="Tab页签" className="card-wrap">
                    <Tabs defaultActiveKey="1" onChange={this.handleCallBack}>
                       <TabPane tab="Tab 1" key="1">欢迎使用柳柳版页签</TabPane>
                       <TabPane tab="Tab 2" key="2" disabled>欢迎使用柳柳版页签</TabPane>
                       <TabPane tab="Tab 3" key="3">欢迎使用柳柳版页签</TabPane>
                    </Tabs>
                </Card>
                <Card title="Tab带图的页签" className="card-wrap">
                    <Tabs defaultActiveKey="1" onChange={this.handleCallBack}>
                       <TabPane tab={<span><Icon type="plus" />增加</span>} key="1">欢迎使用柳柳版页签</TabPane>
                       <TabPane tab={<span><Icon type="edit" />编辑</span>} key="2">欢迎使用柳柳版页签</TabPane>
                       <TabPane tab={<span><Icon type="delete" />删除</span>} key="3">欢迎使用柳柳版页签</TabPane>
                    </Tabs>
                </Card>
                <Card title="Tab动态的页签" className="card-wrap">
                    <Tabs
                        onChange={this.onChange}
                        activeKey={this.state.activeKey}
                        type="editable-card"
                        onEdit={this.onEdit}
                    >
                        {
                            this.state.panes.map((panel) => {
                                return <TabPane
                                     tab = {panel.title}
                                     key = {panel.key}
                                >{panel.content}</TabPane>
                            })
                        }
                    </Tabs>
                </Card>
            </div>
        )
    }
}
type="editable-card" 时有效type="editable-card" 时有效Tabs.TabPane
const TabPane = Tabs.TabPane;
tab属性:选项卡头显示文字
key属性:对应activeKey
forceRender属性:被隐藏时是否渲染 DOM 结构
tab={<span><Icon type="plus" />增加</span>
Tabs动态页签
JS变量循环显示:定义生命周期方法componentWillMount执行
type="editable-card":指定样式为可编辑的卡片样式
onChange事件:设置页签改变时调用方法,设置激活的key
七、画廊gallery
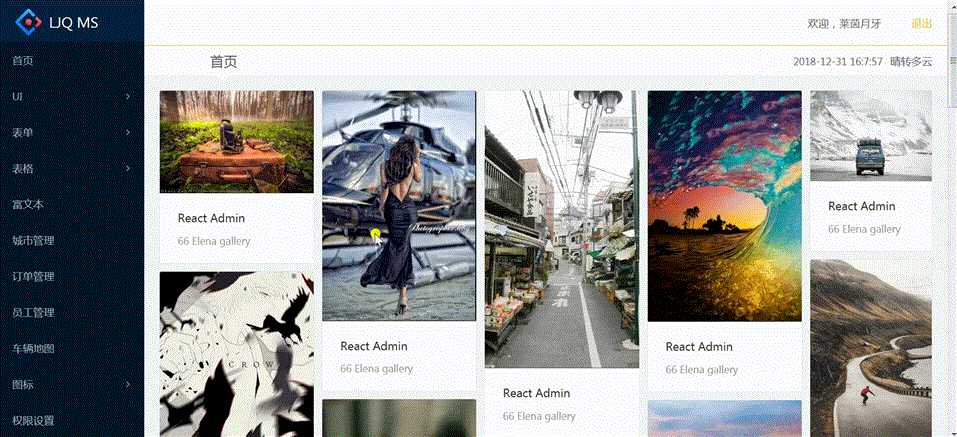
import React from ‘react‘;
import {Card, Row, Col, Modal} from ‘antd‘
import ‘./ui.less‘

export default class Gallery extends React.Component{
    state = {
        visible: false
    }
    openGallery = (imgSrc) => {
        this.setState({
            visible: true,
            currentImg: ‘/gallery/‘+imgSrc
        })
    }
    render(){
        const imgs = [
            [‘1.png‘,‘2.png‘,‘3.png‘,‘4.png‘,‘5.png‘],
            [‘6.png‘,‘7.png‘,‘8.png‘,‘9.png‘,‘10.png‘],
            [‘11.png‘,‘12.png‘,‘13.png‘,‘14.png‘,‘15.png‘],
            [‘16.png‘,‘17.png‘,‘18.png‘,‘19.png‘,‘20.png‘],
            [‘21.png‘,‘22.png‘,‘23.png‘,‘24.png‘,‘25.png‘]
        ]
        const imgList = imgs.map((list) => list.map((item) =>
            <Card
               style={{marginBottom:10}}
               cover={<img src={‘/gallery/‘+item} onClick={() => this.openGallery(item)}/>}
            >
                <Card.Meta
                    title="React Admin"
                    description="66 Elena gallery"
                />
            </Card>
        ))
        return (
            <div className="card-wrap">
                <Row gutter={10}>
                   <Col md={5}>
                       {imgList[0]}
                   </Col>
                   <Col md={5}>
                       {imgList[1]}
                   </Col>
                   <Col md={5}>
                       {imgList[2]}
                   </Col>
                   <Col md={5}>
                       {imgList[3]}
                   </Col>
                   <Col md={4}>
                       {imgList[4]}
                   </Col>
                </Row>
                <Modal
                    width={300}
                    height={500}
                    visible={this.state.visible}
                    title="图片画廊"
                    onCancel={() => {
                        this.setState({
                            visible: false
                        })
                    }}
                    footer={null}
                >
                    {<img src={this.state.currentImg} style={{width:‘100%‘}}/>}
                </Modal>
            </div>
        )
    }
}
Card.Meta
Row 的 gutter 属性,常使用(16+8n)px作为左右间隙(n为自然数)<Card
style={{marginBottom:10}}
cover={<img src={‘/gallery/‘+item} onClick={() => this.openGallery(item)}/>}
>
<Card.Meta
title="React Admin"
description="66 Elena gallery"
/>
</Card>
点击查看大图
onClick点击事件:使用箭头函数,传递 item
关闭底部按钮:footer={null}
设置Modal宽高:width={300} height={500}
控制Modal显示:设置visible, onCancel
八、轮播Carousel
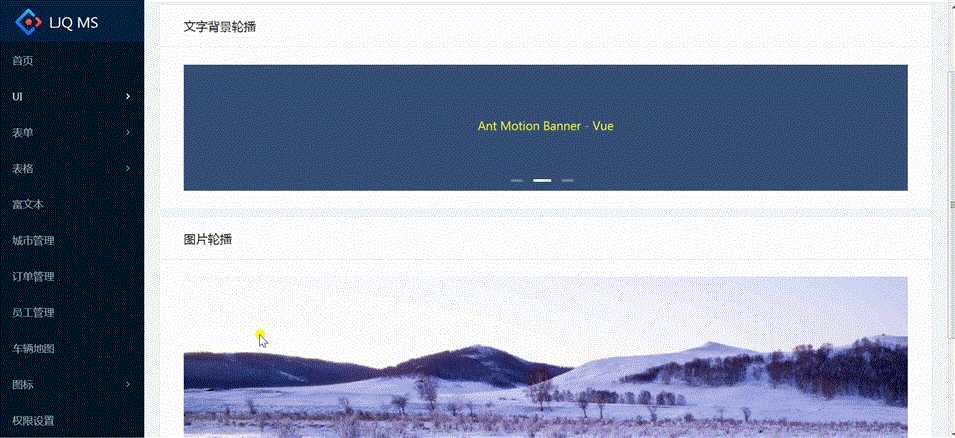
import React from ‘react‘;
import {Card, Carousel} from ‘antd‘
import ‘./ui.less‘

export default class Carousels extends React.Component{
    render(){
        return (
            <div>
                <Card title="文字背景轮播" className="card-wrap">
                    <Carousel autoplay effect="fade">
                        <div><h3>Ant Motion Banner - React</h3></div>
                        <div><h3>Ant Motion Banner - Vue</h3></div>
                        <div><h3>Ant Motion Banner - Angular</h3></div>
                    </Carousel>
                </Card>
                <Card title="图片轮播" className="card-wrap slider-wrap">
                    <Carousel autoplay>
                        <div><img src="/carousel-img/carousel-1.jpg"/></div>
                        <div><img src="/carousel-img/carousel-2.jpg"/></div>
                        <div><img src="/carousel-img/carousel-3.jpg"/></div>
                    </Carousel>
                </Card>
            </div>
        )
    }
}
/* Carousel For demo */
 .ant-carousel .slick-slide {
  text-align: center;
  height: 160px;
  line-height: 160px;
  background: #364d79;
  overflow: hidden;
}

.ant-carousel .slick-slide h3 {
  color: rgba(246, 250, 33, 0.966);
}
// 图片轮播
.slider-wrap .ant-carousel .slick-slide {
  height: 240px!important;
}
九、路由及样式
import React from ‘react‘
import {HashRouter, Route, Switch} from ‘react-router-dom‘
import App from ‘./App‘
import Login from ‘./pages/Login‘
import NoMatch from ‘./pages/NoMatch‘
import Admin from ‘./admin‘
import Home from ‘./pages/Home‘
import Buttons from ‘./pages/ui/buttons‘
import Modals from ‘./pages/ui/modals‘
import Loadings from ‘./pages/ui/loadings‘
import Notice from ‘./pages/ui/notice‘
import Messages from ‘./pages/ui/messages‘
import Tabs from ‘./pages/ui/tabs‘
import Gallery from ‘./pages/ui/gallery‘
import Carousel from ‘./pages/ui/carousel‘

export default class IRouter extends React.Component{

    render() {
        return (
           <HashRouter>
               <App>
                  <Route path="/login" component={Login}></Route>
                  <Route path="/admin" render={() =>
                      <Admin>
                          <Switch>
                            <Route path="/admin/home" component={Home}></Route>
                            <Route path="/admin/ui/buttons" component={Buttons}></Route>
                            <Route path="/admin/ui/modals" component={Modals}></Route>
                            <Route path="/admin/ui/loadings" component={Loadings}></Route>
                            <Route path="/admin/ui/notification" component={Notice}></Route>
                            <Route path="/admin/ui/messages" component={Messages}></Route>
                            <Route path="/admin/ui/tabs" component={Tabs}></Route>
                            <Route path="/admin/ui/gallery" component={Gallery}></Route>
                            <Route path="/admin/ui/carousel" component={Carousel}></Route>
                            <Route component={NoMatch}></Route>
                          </Switch>
                      </Admin>
                  }></Route>
                 <Route path="/order/detail" component={Login}></Route>
               </App>
           </HashRouter>
        )
    }
}
.card-wrap{
    margin-bottom: 10px;
    button{
        margin-right: 10px;
    }
}
/* modals */
/* use css to set position of modal */
.vertical-center-modal {
    text-align: center;
    white-space: nowrap;
  }

  .vertical-center-modal:before {
    content: ‘‘;
    display: inline-block;
    height: 100%;
    vertical-align: middle;
    width: 0;
  }

  .vertical-center-modal .ant-modal {
    display: inline-block;
    vertical-align: middle;
    top: 0;
    text-align: left;
  }

 /* Carousel For demo */
 .ant-carousel .slick-slide {
  text-align: center;
  height: 160px;
  line-height: 160px;
  background: #364d79;
  overflow: hidden;
}

.ant-carousel .slick-slide h3 {
  color: rgba(246, 250, 33, 0.966);
}

// 图片轮播
.slider-wrap .ant-carousel .slick-slide {
  height: 240px!important;
}
注:项目来自慕课网
【共享单车】—— React后台管理系统开发手记:UI菜单各个组件使用(Andt UI组件)
标签:14. action 集合 leo ima over png 地址 描述
原文地址:https://www.cnblogs.com/ljq66/p/10198088.html