标签:x64 错误 wget count 环境 ada jpg pop 默认
官方文档:
https://www.elastic.co/guide/en/elasticsearch/reference/6.0/getting-started.html
日志:
https://www.elastic.co/guide/en/kibana/6.6/xpack-logs.html
启动并运行:
https://www.elastic.co/guide/en/infrastructure/guide/6.6/install-infrastructure-monitoring.html#install-beats-for-infra-UI
本机地址:192.168.0.205
该文档的 E L K 是在同一台机器上安装的
下载安装包:
注:安装该包之前需要先安装JDK环境
wget https://artifacts.elastic.co/downloads/logstash/logstash-6.6.0.tar.gz \
https://download.oracle.com/otn-pub/java/jdk/8u201-b09/42970487e3af4f5aa5bca3f542482c60/jdk-8u201-linux-x64.tar.gz?AuthParam=1549421622_81c2065faa76ac5da3dfe5cc20911a42 \
https://artifacts.elastic.co/downloads/elasticsearch/elasticsearch-6.6.0.tar.gz \
https://artifacts.elastic.co/downloads/kibana/kibana-6.6.0-linux-x86_64.tar.gz
#解压所有包
for i in `ls *.gz`;do tar -zxvf $i;done
然后将ELK各解压后的包mv到/etc下
#安装jdk环境
mv jdk1.8.0_201/ /usr/local/jdk1.8
echo "JAVA_HOME=/usr/local/jdk1.8/" >> /etc/profile
echo "CLASSPATH=.:$JAVA_HOME/lib/tools.jar:$JAVA_HOME/lib/dt.jar" >> /etc/profile
echo "PATH=\$JAVA_HOME/bin:\$HOME/bin:\$HOME/.local/bin:\$PATH" >> /etc/profile
source /etc/profile
java -version
#安装elasticsearch
#注:这里启动时不能使用root用户来启动,每个进程最大同时打开文件数太小
echo "* soft nofile 65536" >>/etc/security/limits.conf
echo "* hard nofile 65536" >>/etc/security/limits.conf
#修改最大线程个数
echo "* soft nproc 4096" >> /etc/security/limits.conf
echo "* hard nproc 4096" >> /etc/security/limits.conf
echo "vm.max_map_count=262144" >> /etc/sysctl.conf
sysctl -p
#修改完以上配置以后,用户退出后重新登录生效
cd elasticsearch-6.6.0/bin/
useradd zhangsan
echo "123456"|passwd --stdin zhangsan
chown -R zhangsan.zhangsan /etc/elasticsearch-6.6.0/
cat /etc/elasticsearch-6.6.0/config/elasticsearch.yml |grep -v ^#
cluster.name: my-app-opop
node.name: node-001
path.data: /data
path.logs: /var/log/elasticsearch_logs
network.host: 192.168.0.205 #这里是本机地址
http.port: 9200
#创建上面文件中定义的目录文件
mkdir /var/log/elasticsearch_logs/ -p
touch /var/log/elasticsearch_logs/my-app-opop.log
chown -R zhangsan.zhangsan /var/log/elasticsearch_logs/
mkdir /data
chown -R zhangsan.zhangsan /data/
#切换用户并启动
su - zhangsan
/etc/elasticsearch-6.6.0/bin/elasticsearch &
#启动示例
/etc/elasticsearch-6.6.0/bin/elasticsearch --help
-E <KeyValuePair>配置设置
-V, - version打印elasticsearch版本信息并退出
-d, - damonmonize在后台启动Elasticsearch
-h, - help显示帮助
-p, - pidfile <Path>在start时在指定路径中创建pid文件
-q, - quiet关闭在控制台中记录的标准输出/错误流
-s, - silent显示最小输出
-v, - verbose显示详细输出
#测试:
curl 192.168.0.205:9200
{
"name" : "node-001",
"cluster_name" : "my-app-opop",
"cluster_uuid" : "KzYecJy9RTy8VVKP5ealdQ",
"version" : {
"number" : "6.6.0",
"build_flavor" : "default",
"build_type" : "tar",
"build_hash" : "a9861f4",
"build_date" : "2019-01-24T11:27:09.439740Z",
"build_snapshot" : false,
"lucene_version" : "7.6.0",
"minimum_wire_compatibility_version" : "5.6.0",
"minimum_index_compatibility_version" : "5.0.0"
},
"tagline" : "You Know, for Search"
}
#退出该bash
exit
#logstash安装
cd /etc/logstash-6.6.0/config/
cp logstash-sample.conf logstash.conf
cat logstash.conf
# Sample Logstash configuration for creating a simple
# Beats -> Logstash -> Elasticsearch pipeline.
input {
beats {
port => 5044
}
}
output {
elasticsearch {
hosts => ["http://192.168.0.205:9200"] #这里是写IP地址
index => "%{[@metadata][beat]}-%{[@metadata][version]}-%{+YYYY.MM.dd}"
user => "zhangsan" !!!!!! 这里注意
password => "123456" !!!!这里注意
}
}
#后台启动
/etc/logstash-6.6.0/bin/logstash -f /etc/logstash-6.6.0/config/logstash.conf &
#Kibana安装
注:默认设置配置Kibana运行localhost:5601
注:官方配置文件说明:https://www.elastic.co/guide/en/kibana/6.6/settings.html
cd /etc/kibana-6.6.0-linux-x86_64/
vim config/kibana.yml
server.port: 5601
server.host: "192.168.0.205"
elasticsearch.hosts: ["http://192.168.0.205:9200"] #Elasticsearch的地址
elasticsearch.username: "zhangsan"
elasticsearch.password: "123456"
#启动
bin/kibana &
踩过的坑:

解决方法:
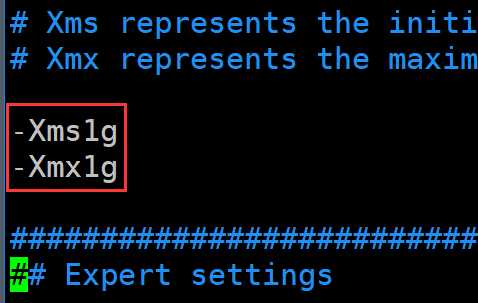
如果机器的内存充足的话,就给elasticsearch多一点内存,配置文件vim /etc/elasticsearch-6.6.0/config/jvm.options

如果机器的内存不是那么的充足的话,我们可以改改后端弹性搜索的阈值。修改配置文件vim /etc/kibana-6.6.0-linux-x86_64/config/kibana.yml,将#去掉,然后将30000毫秒(也就是30s)
更改成40000(40秒),这个根据实际情况进行修改。
vim /etc/kibana-6.6.0-linux-x86_64/config/kibana.yml

标签:x64 错误 wget count 环境 ada jpg pop 默认
原文地址:https://www.cnblogs.com/smlile-you-me/p/10354887.html