标签:editor syn UNC str 键值 process 设置 data temp
vue-quill-editor的guthub地址 ,现在市面上有很多的富文本编辑器,我个人还是非常推荐Vue自己家的vue-quill-deitor,虽然说只支持IE10+,但这种问题,帅给别人吧!
那么我们直击正题,在vue中使用quill呢,我们需要npm进行安装,安装命令如下:
|
1
|
npm install vue-quill-editor |
再安装依赖项
|
1
|
npm install quill |
使用:
在main.js中进行引入
|
1
2
3
4
5
6
7
|
import Vue from ‘vue‘import VueQuillEditor from ‘vue-quill-editor‘import ‘quill/dist/quill.core.css‘import ‘quill/dist/quill.snow.css‘import ‘quill/dist/quill.bubble.css‘ Vue.use(VueQuillEditor) |
下面的css一定还要引用,否则编辑器将会没有css。
在vue页面中代码如下:
|
1
2
3
4
5
6
7
8
9
10
11
12
13
14
15
16
17
18
19
20
21
22
23
24
25
26
27
28
29
30
31
32
33
34
35
36
37
38
39
40
41
42
43
44
45
46
47
48
|
<template> <div class="edit_container"> <quill-editor v-model="content" ref="myQuillEditor" :options="editorOption" @blur="onEditorBlur($event)" @focus="onEditorFocus($event)" @change="onEditorChange($event)"> </quill-editor> <button v-on:click="saveHtml">保存</button> </div> </template><script>export default { name: ‘App‘, data(){ return { content: `<p>hello world</p>`, editorOption: {} } },computed: { editor() { return this.$refs.myQuillEditor.quill; }, },methods: { onEditorReady(editor) { // 准备编辑器 }, onEditorBlur(){}, // 失去焦点事件 onEditorFocus(){}, // 获得焦点事件 onEditorChange(){}, // 内容改变事件 saveHtml:function(event){ alert(this.content); } }}</script><style>#app { font-family: ‘Avenir‘, Helvetica, Arial, sans-serif; -webkit-font-smoothing: antialiased; -moz-osx-font-smoothing: grayscale; text-align: center; color: #2c3e50; margin-top: 60px;}</style> |
其中的v-model就是我们自己的html代码,你可以将这个html直接放到数据库,这样也就没有什么问题了。如果想要禁用编辑器可以通过以下代码:
|
1
2
3
4
|
onEditorFocus(val,editor){ // 富文本获得焦点时的事件 console.log(val); // 富文本获得焦点时的内容 editor.enable(false); // 在获取焦点的时候禁用 } |
主题设置
在vue项目中,具体引入Quill的文件中,需要使用哪种主题就写哪个。默认是snow主题的。
|
1
2
3
4
5
6
7
8
|
data(){ return { content: `<p>hello world</p>`, editorOption: { theme:‘snow‘ } } } |
工具栏设置
|
1
2
3
4
5
6
7
8
9
10
11
12
13
14
15
16
17
18
19
20
21
22
23
24
25
26
27
28
29
30
|
modules:{ toolbar:[ [‘bold‘, ‘italic‘, ‘underline‘, ‘strike‘], //加粗,斜体,下划线,删除线 [‘blockquote‘, ‘code-block‘], //引用,代码块 [{ ‘header‘: 1 }, { ‘header‘: 2 }], // 标题,键值对的形式;1、2表示字体大小 [{ ‘list‘: ‘ordered‘}, { ‘list‘: ‘bullet‘ }], //列表 [{ ‘script‘: ‘sub‘}, { ‘script‘: ‘super‘ }], // 上下标 [{ ‘indent‘: ‘-1‘}, { ‘indent‘: ‘+1‘ }], // 缩进 [{ ‘direction‘: ‘rtl‘ }], // 文本方向 [{ ‘size‘: [‘small‘, false, ‘large‘, ‘huge‘] }], // 字体大小 [{ ‘header‘: [1, 2, 3, 4, 5, 6, false] }], //几级标题 [{ ‘color‘: [] }, { ‘background‘: [] }], // 字体颜色,字体背景颜色 [{ ‘font‘: [] }], //字体 [{ ‘align‘: [] }], //对齐方式 [‘clean‘], //清除字体样式 [‘image‘,‘video‘] //上传图片、上传视频 ] }, theme:‘snow‘ } } |
图片推拽上传
需要安装 quill-image-drop-module 模块,那么改一下imageDrop设置为true,你就可以把你电脑上的图片网上一坨就可以了。
|
1
2
3
4
5
6
7
8
9
10
11
12
13
14
15
16
|
import { quillEditor } from ‘vue-quill-editor‘import * as Quill from ‘quill‘ //引入编辑器import { ImageDrop } from ‘quill-image-drop-module‘;Quill.register(‘modules/imageDrop‘, ImageDrop);export default { name: ‘App‘, data(){ return{ editorOption:{ modules:{ imageDrop:true, }, theme:‘snow‘ } } } |
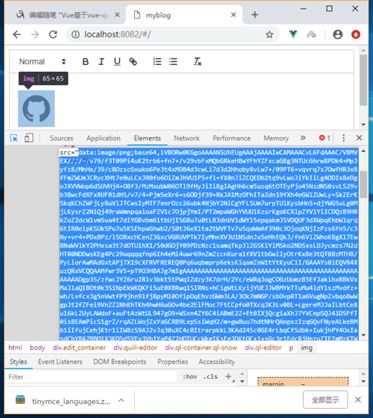
那上传文件那你就不用想了,你也许想先把图片放上去,其实这个文件托上去就已经是个base64了,等你在前台读数的时候直接decode就好~

图片调整大小ImageResize
|
1
2
3
4
5
6
7
8
|
return{ editorOption:{ modules:{ imageResize: {} }, theme:‘snow‘ } } |
详解Vue基于vue-quill-editor富文本编辑器使用心得
标签:editor syn UNC str 键值 process 设置 data temp
原文地址:https://www.cnblogs.com/raineliflor/p/10397132.html