标签:bre atl _for line lib 路径 dll grid enter
由于一开始定的开发平台在QT下,到后面要加入地图控件.qt里本身带有地图qmap(在qt的官方案例中可以找到,用qml做的),但只有固定的几个地图源,要做google或者bing地图,时间和人力不允许,而且对地图也不是很熟悉..就决定先用gmap.
思路:
gmap 是用c#开发的,像QT这种C++语言类无法直接使用,固将gmap 以com组件的形式封装成控件,供c++使用;
1.以管理员模式身份打开vs2017-文件-新建-项目-创建 Windows窗体控件库

框架可根据情况自行选择; 确定;
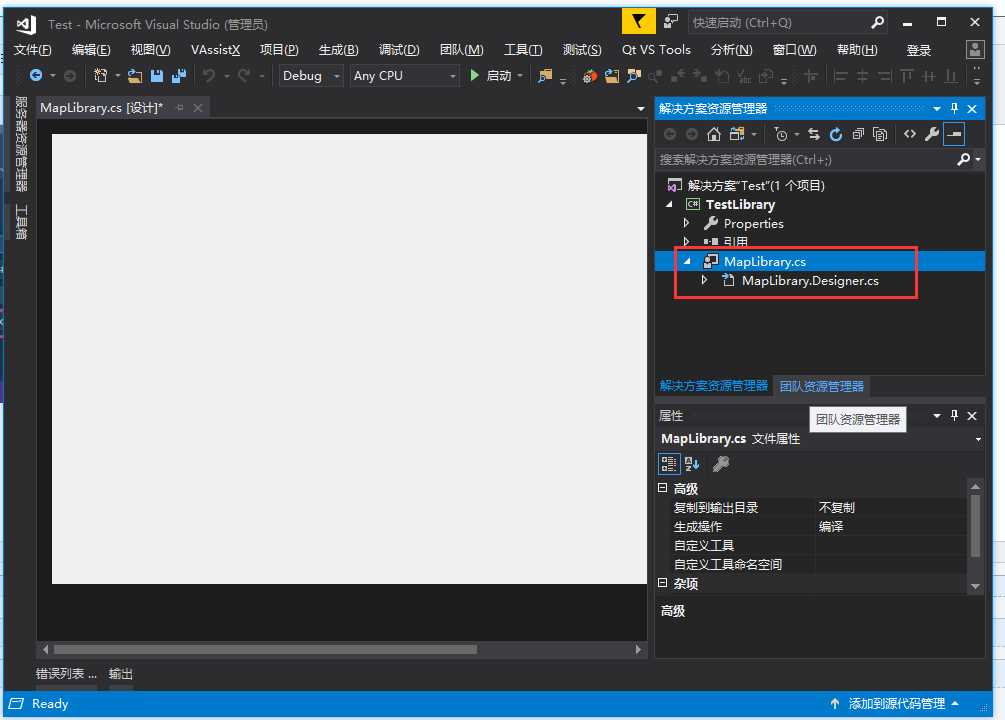
2.这时候就出现控件窗体了,可以更一下文件名
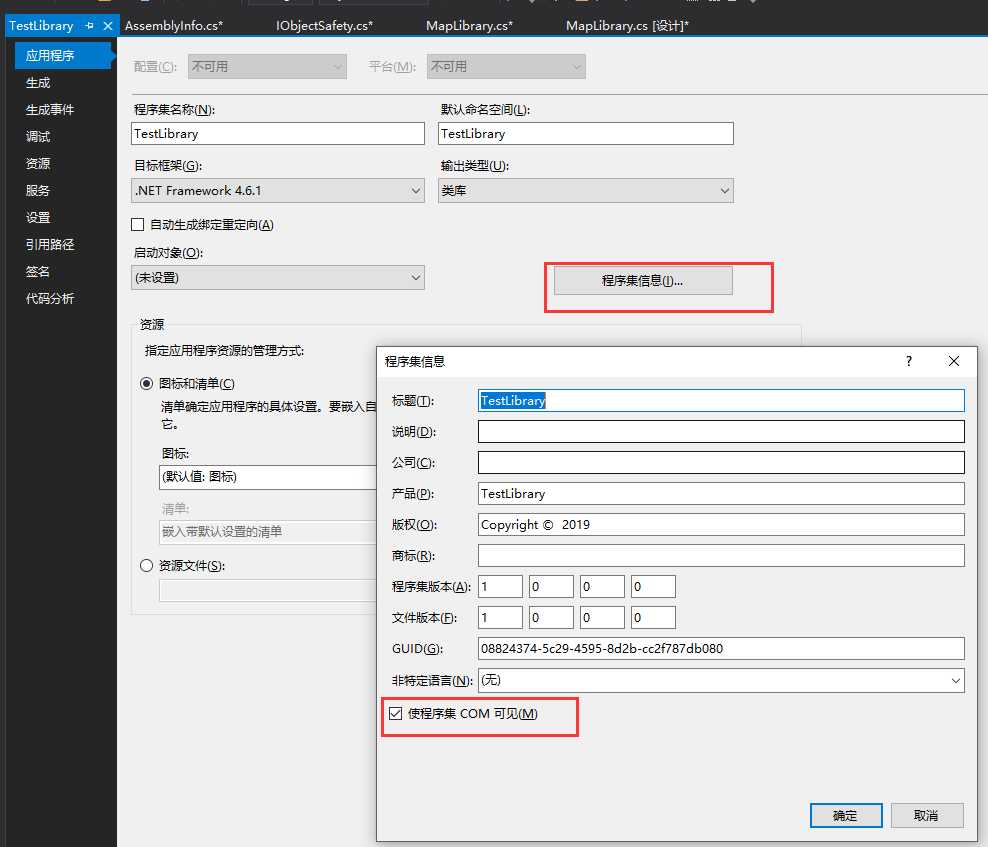
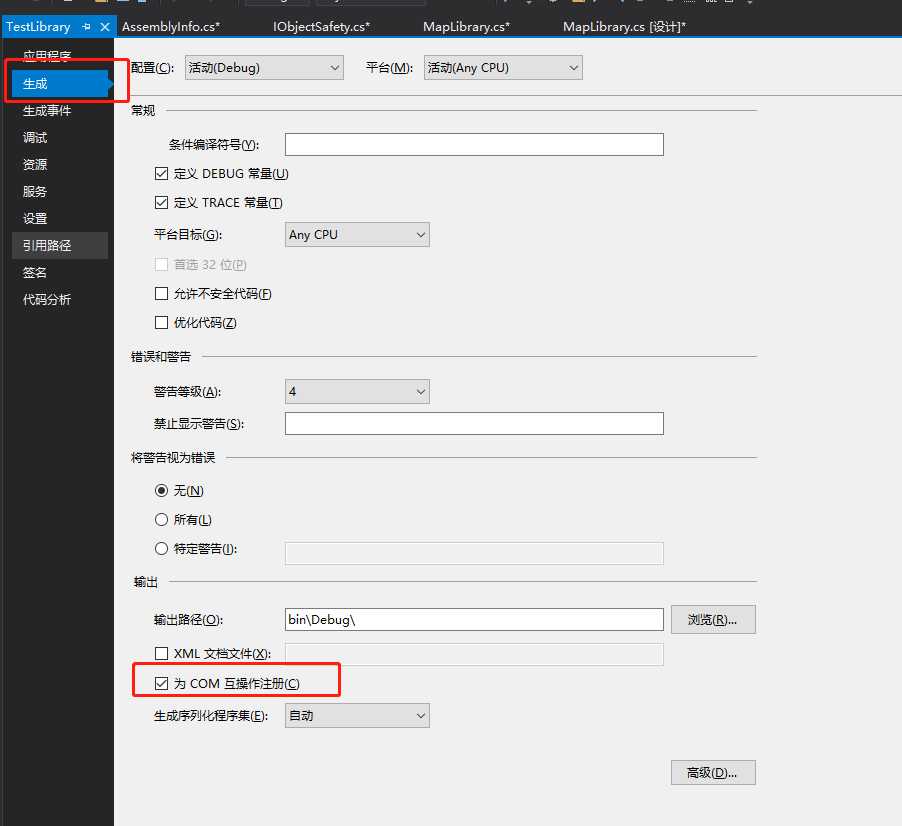
3. 工程属性设置 勾选 使程序集COM可见 ,勾选 为COM互操作可见 (其作用在于在程序编译后,不需要再安装com组件,如不是管理员身体启动vs,勾选它在编译时会报无权限错误)
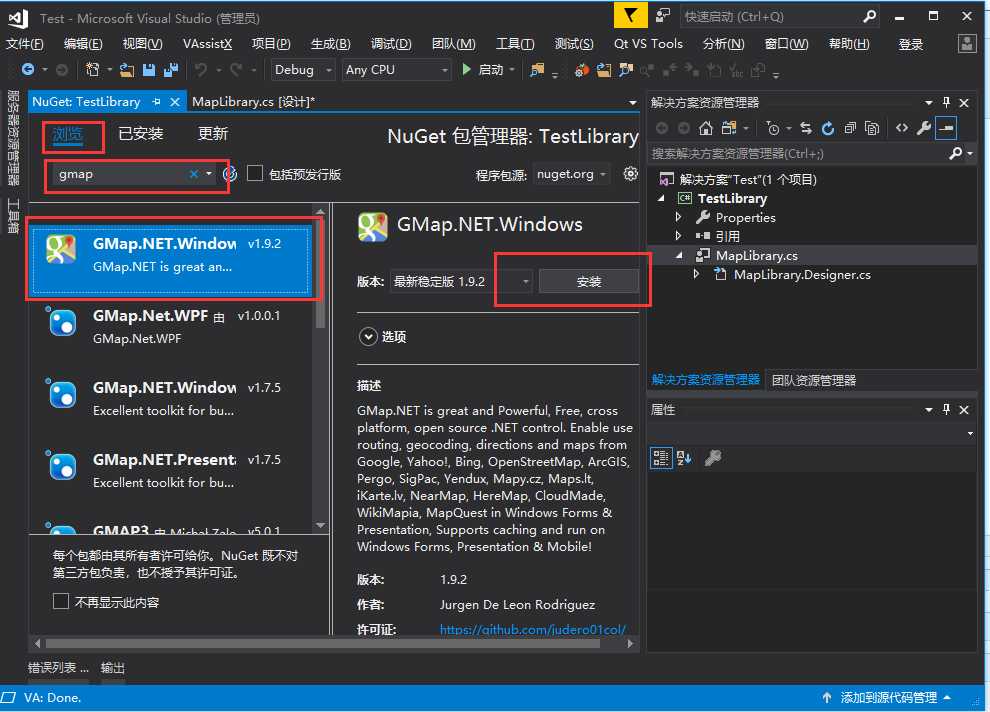
4.添加gmap引用,我这里使用 NuGet 来添加....项目---管理NuGet程序包 浏览 搜索 gmap 点击 安装
5.安装完后 添加gmap控件到 控件窗体
在工具箱 找到GmapControl 拖到控件窗体
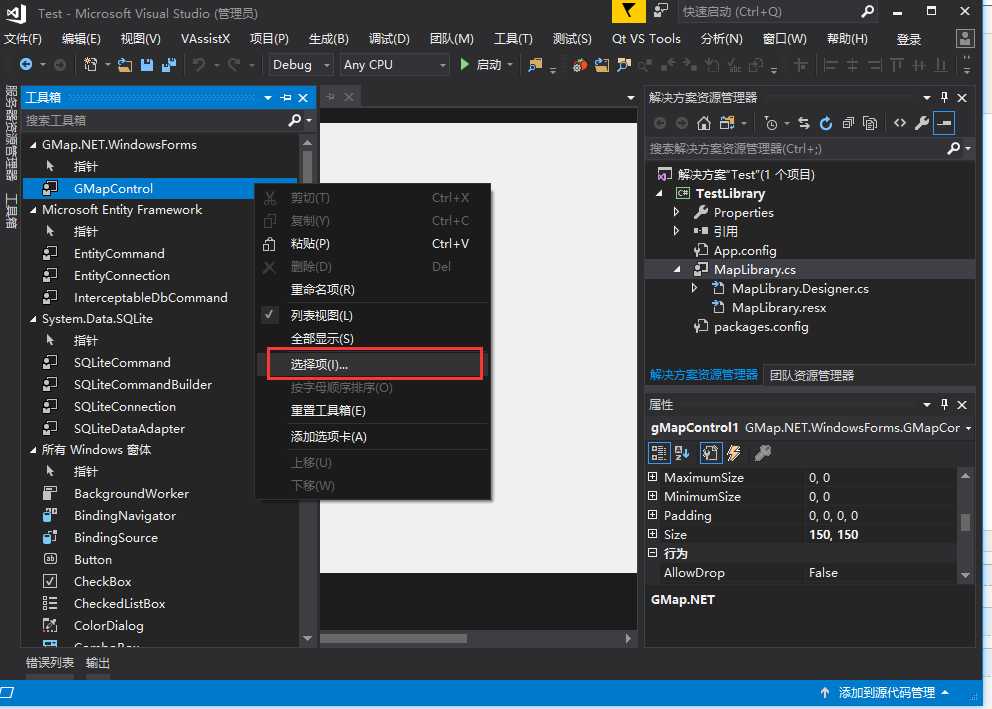
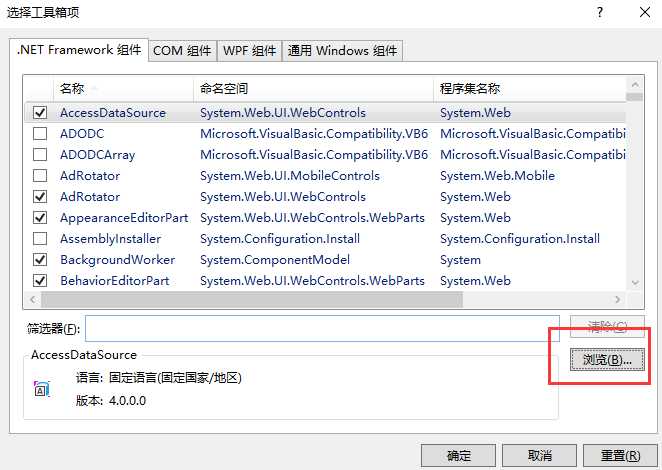
如果找不到 GmapControl 控件,, 需手动添加gmapcontrol控件
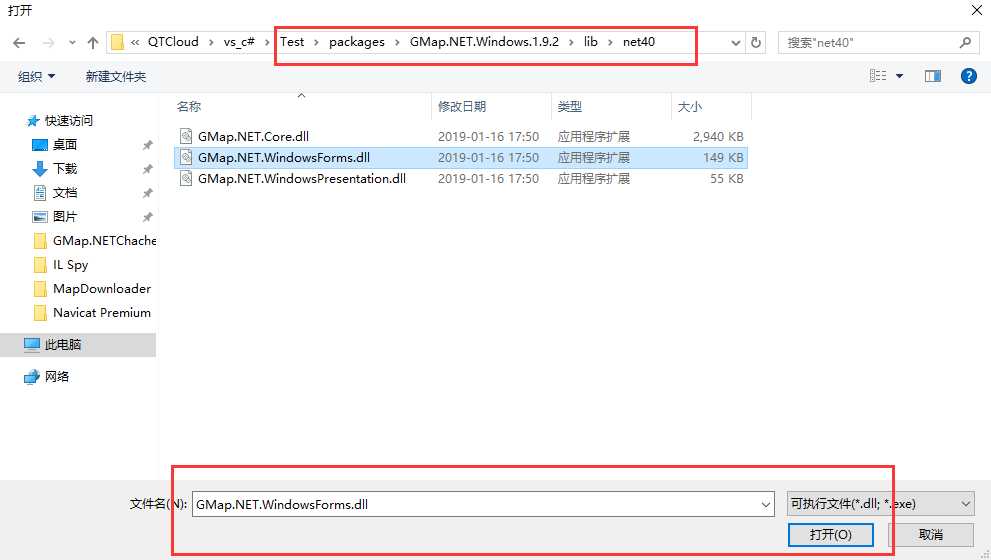
在工具箱空白处右键 打开 选择项 浏览到本项目解决方案下,有个packages 文件名,就是gmap的引用包,,浏览找到 GMap.NET.WindowsForms.dll 添加 即可.....这时工具箱内就会有GmapControl了
6.将 GmapControl 添加到窗体后,默认名为 gMapControl1 可自行更改 ..... 在 gMapControl1 控件上双击 添加以下代码
需添加引用
using GMap.NET.MapProviders;
using GMap.NET;
this.gMapControl1.CacheLocation = System.Windows.Forms.Application.StartupPath;//缓存文件路径
            this.gMapControl1.MapProvider = GMapProviders.BingHybridMap;
            this.gMapControl1.Manager.Mode = AccessMode.ServerAndCache;//地图模式为本地缓存,完全离线

            this.gMapControl1.ShowCenter = true;//隐藏或显示中心十字
            this.gMapControl1.MinZoom = 1;
            this.gMapControl1.MaxZoom = 23;
            this.gMapControl1.Zoom = 12;
            //this.gMapControl.ShowTileGridLines = false;//道路网格线
            this.gMapControl1.DragButton = System.Windows.Forms.MouseButtons.Left;//左健拖动地图
            this.gMapControl1.MouseWheelZoomType = MouseWheelZoomType.MousePositionWithoutCenter;//不以中心点缩放
            this.gMapControl1.Position = new PointLatLng(34.2313041, 108.8774211);
7,添加一个新的接口 IObjectSafety.cs
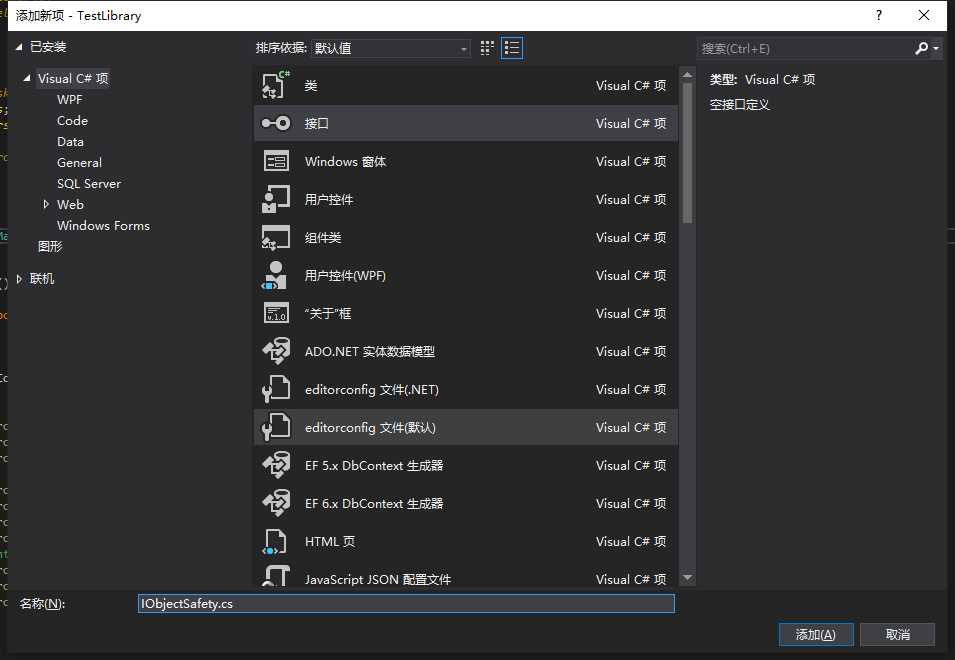
代码如下
using System;
using System.Collections.Generic;
using System.Linq;
using System.Text;
using System.Threading.Tasks;
using System.Runtime.InteropServices; //需手动添加的

namespace TestLibrary
{
    //以下代码可完全复制过去,不做任何改动,Guid 也不需要更改
    [ComImport, Guid("1D9AD540-F2C9-4368-8697-C4AAFCCE9C55")]
    [InterfaceType(ComInterfaceType.InterfaceIsIUnknown)]
    public interface IObjectSafety
    {
        [PreserveSig]
        int GetInterfaceSafetyOptions(ref Guid riid, [MarshalAs(UnmanagedType.U4)] ref int pdwSupportedOptions, [MarshalAs(UnmanagedType.U4)] ref int pdwEnabledOptions);

        [PreserveSig()]
        int SetInterfaceSafetyOptions(ref Guid riid, [MarshalAs(UnmanagedType.U4)] int dwOptionSetMask, [MarshalAs(UnmanagedType.U4)] int dwEnabledOptions);

    }
}
在AssemblyInfo.cs 文件中 添加 using System.Security; 和 [assembly: AllowPartiallyTrustedCallers()]
8,返回到 MapLibrary.cs , 给MapLibrary添加父类 IObjectSafety ,,,添加Guid (在工具--创建Guid 这个小工具里生成)
并添加代码
using System;
using System.Collections.Generic;
using System.ComponentModel;
using System.Drawing;
using System.Data;
using System.Linq;
using System.Text;
using System.Threading.Tasks;
using System.Windows.Forms;
using GMap.NET.MapProviders;
using GMap.NET;
using System.Runtime.InteropServices;

namespace TestLibrary
{
    [Guid("0E32CE01-4D40-45A6-8B59-B39ABFE8ADB0")]
    public partial class MapLibrary: UserControl, IObjectSafety //接口类的引用
    {
        public MapLibrary()
        {
            InitializeComponent();
        }

        private void gMapControl1_Load(object sender, EventArgs e)
        {

            this.gMapControl1.CacheLocation = System.Windows.Forms.Application.StartupPath;//缓存文件路径
            this.gMapControl1.MapProvider = GMapProviders.BingHybridMap;
            this.gMapControl1.Manager.Mode = AccessMode.ServerAndCache;//地图模式为本地缓存,完全离线

            this.gMapControl1.ShowCenter = true;//隐藏或显示中心十字
            this.gMapControl1.MinZoom = 1;
            this.gMapControl1.MaxZoom = 23;
            this.gMapControl1.Zoom = 12;
            //this.gMapControl.ShowTileGridLines = false;//道路网格线
            this.gMapControl1.DragButton = System.Windows.Forms.MouseButtons.Left;//左健拖动地图
            this.gMapControl1.MouseWheelZoomType = MouseWheelZoomType.MousePositionWithoutCenter;//不以中心点缩放
            this.gMapControl1.Position = new PointLatLng(34.2313041, 108.8774211);
        }

        #region IObjectSafety //以下 到 #endregion 为添加的代码,不需要做任何修改
        private const string _IID_IDispatch = "{00020400-0000-0000-C000-000000000046}";
        private const string _IID_IDispatchEx = "{a6ef9860-c720-11d0-9337-00a0c90dcaa9}";
        private const string _IID_IPersistStorage = "{0000010A-0000-0000-C000-000000000046}";
        private const string _IID_IPersistStream = "{00000109-0000-0000-C000-000000000046}";
        private const string _IID_IPersistPropertyBag = "{37D84F60-42CB-11CE-8135-00AA004BB851}";

        private const int INTERFACESAFE_FOR_UNTRUSTED_CALLER = 0x00000001;
        private const int INTERFACESAFE_FOR_UNTRUSTED_DATA = 0x00000002;
        private const int S_OK = 0;
        private const int E_FAIL = unchecked((int)0x80004005);
        private const int E_NOINTERFACE = unchecked((int)0x80004002);

        private bool _fSafeForScripting = true;
        private bool _fSafeForInitializing = true;

        public int GetInterfaceSafetyOptions(ref Guid riid, ref int pdwSupportedOptions, ref int pdwEnabledOptions)
        {
            int Rslt = E_FAIL;

            string strGUID = riid.ToString("B");
            pdwSupportedOptions = INTERFACESAFE_FOR_UNTRUSTED_CALLER | INTERFACESAFE_FOR_UNTRUSTED_DATA;
            switch (strGUID)
            {
                case _IID_IDispatch:
                case _IID_IDispatchEx:
                    Rslt = S_OK;
                    pdwEnabledOptions = 0;
                    if (_fSafeForScripting == true)
                        pdwEnabledOptions = INTERFACESAFE_FOR_UNTRUSTED_CALLER;
                    break;
                case _IID_IPersistStorage:
                case _IID_IPersistStream:
                case _IID_IPersistPropertyBag:
                    Rslt = S_OK;
                    pdwEnabledOptions = 0;
                    if (_fSafeForInitializing == true)
                        pdwEnabledOptions = INTERFACESAFE_FOR_UNTRUSTED_DATA;
                    break;
                default:
                    Rslt = E_NOINTERFACE;
                    break;
            }

            return Rslt;
        }

        public int SetInterfaceSafetyOptions(ref Guid riid, int dwOptionSetMask, int dwEnabledOptions)
        {
            int Rslt = E_FAIL;
            string strGUID = riid.ToString("B");
            switch (strGUID)
            {
                case _IID_IDispatch:
                case _IID_IDispatchEx:
                    if (((dwEnabledOptions & dwOptionSetMask) == INTERFACESAFE_FOR_UNTRUSTED_CALLER) && (_fSafeForScripting == true))
                        Rslt = S_OK;
                    break;
                case _IID_IPersistStorage:
                case _IID_IPersistStream:
                case _IID_IPersistPropertyBag:
                    if (((dwEnabledOptions & dwOptionSetMask) == INTERFACESAFE_FOR_UNTRUSTED_DATA) && (_fSafeForInitializing == true))
                        Rslt = S_OK;
                    break;
                default:
                    Rslt = E_NOINTERFACE;
                    break;
            }

            return Rslt;
        }
        #endregion

    }


}
9. 在Release 模式下编译生成 ,,成功后就生成 就可以封闭组件啦
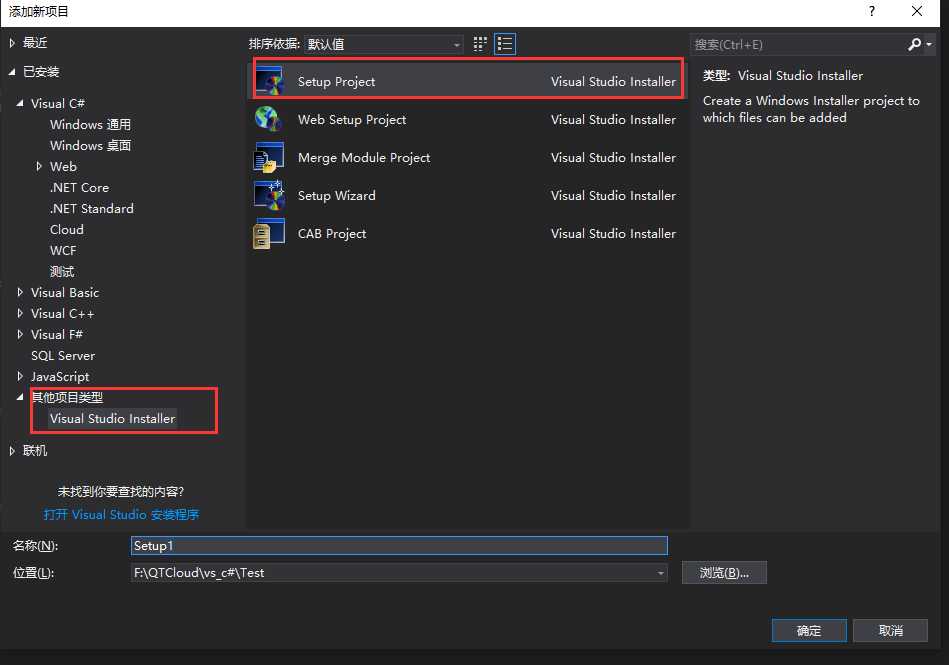
10,生成activex控件.....在当前解决方案里添加一新项目 Setup Project 没有的自行百度解决..网上资料很多
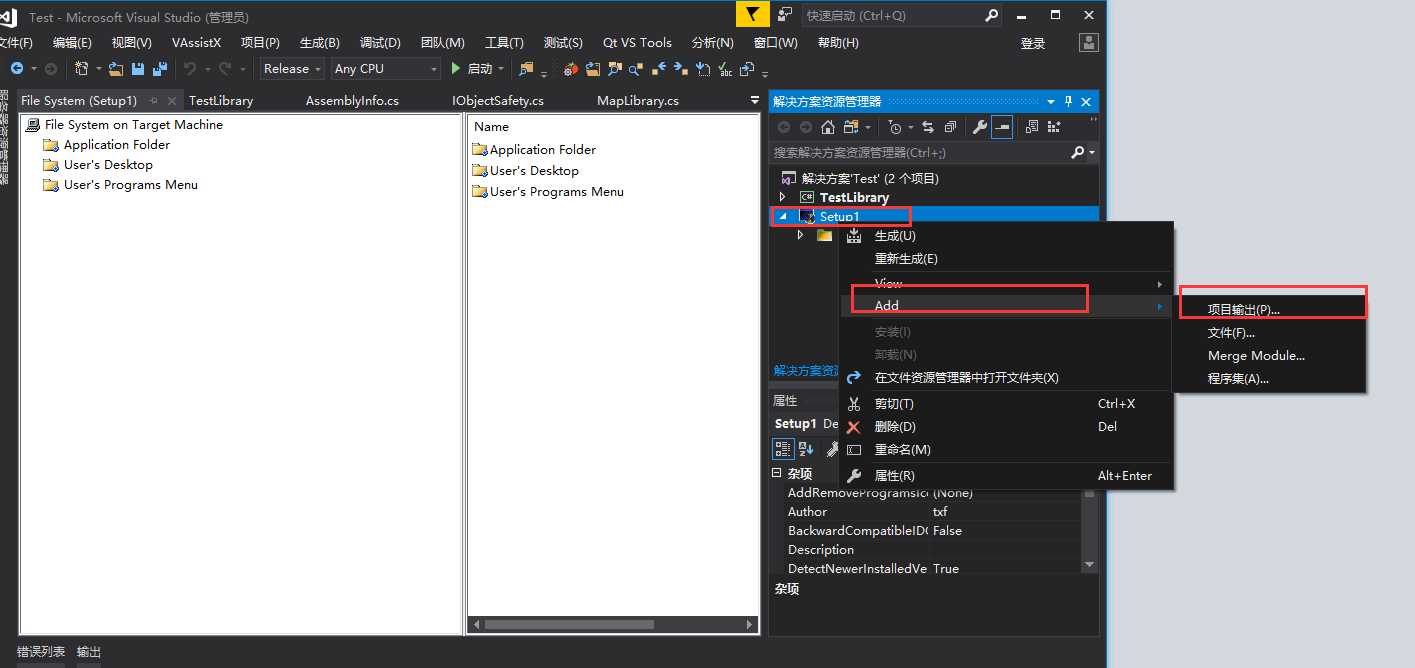
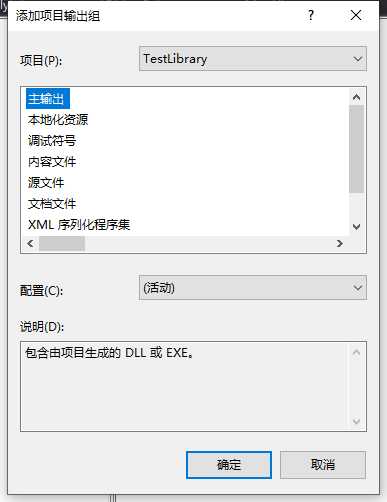
添加工程后如下图,,在项目上 Add -- 项目输出 主输出 确定;
先点 下图的1 ,再点 2 的属性 ,,设置 3 Register为vsdrpCOM
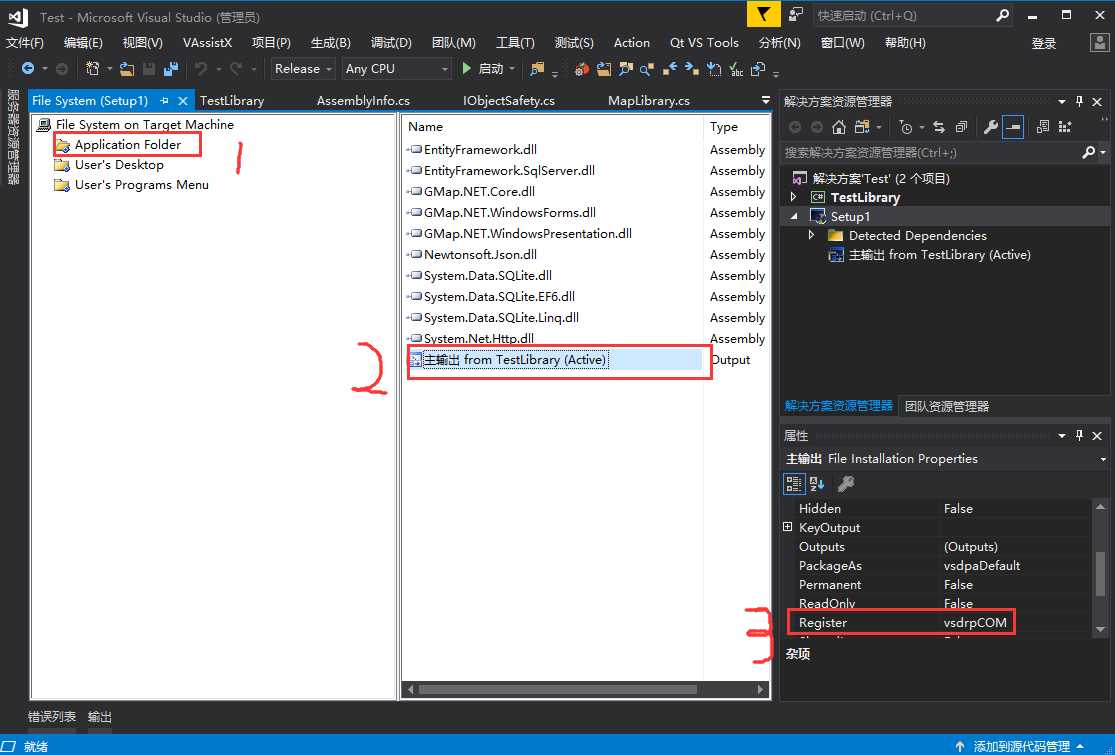
编译生成!!!! 这时在项目目录下就会 有setup 两个文件...这时控件就生成了,,安装就可以使用..可以直接双击setup1.msi安装..也可以在项目上右键 安装/卸载

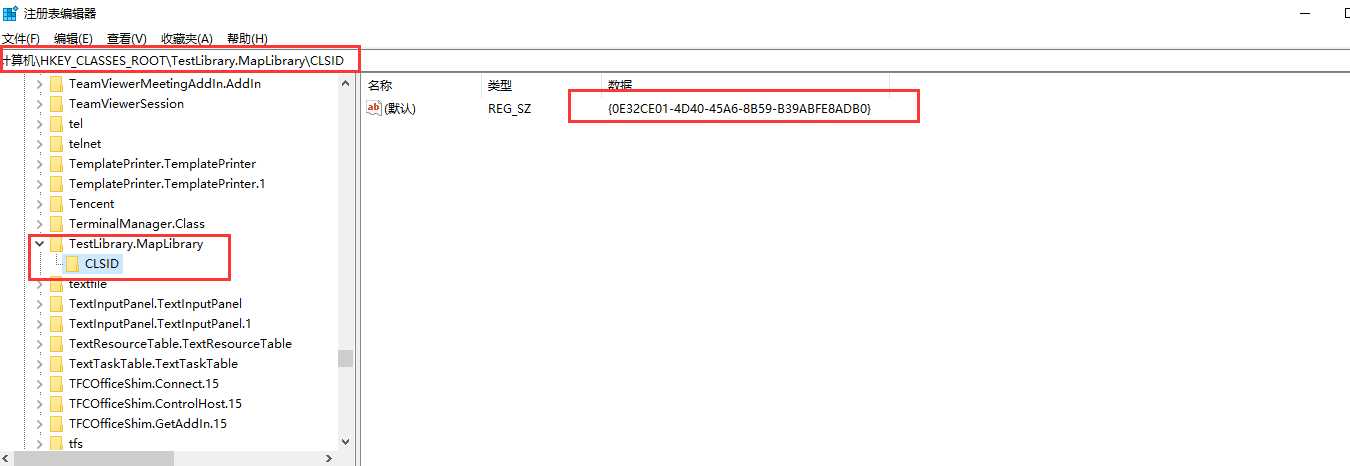
安装结束后 在注册表里可查看是否安装成功
以下是如何在QT中调用gMap
一.创建一个新的带窗口的QT工程
在pro 文件中添加配置 axcontainer , 如下:
QT += core gui axcontainer
重新qmake
添加头文件
#include <QAxWidget>
cpp中添加以下代码
#include "MainWindow.h"
#include "ui_MainWindow.h"
#include <QAxWidget>  //activex控件头文件

MainWindow::MainWindow(QWidget *parent) :
    QMainWindow(parent),
    ui(new Ui::MainWindow)
{
    ui->setupUi(this);

    QAxWidget * axWidget = new QAxWidget(this);
    axWidget->setControl(QString::fromUtf8("{0E32CE01-4D40-45A6-8B59-B39ABFE8ADB0}"));//这里的guid 就是在gmap中生成添加的guid..同时在注册表中也可以看到
   // axWidget->resize(620,720);
    axWidget->show();
}

MainWindow::~MainWindow()
{
    delete ui;
}
正常来说到这里就可以使用了,,但我这次为了写这个记录,顺便操作了一次,不知道是什么原因没有成功调用...
哪天我发现了再上来说明
封装过程参考:https://www.cnblogs.com/wyynts/p/6874387.html
将GMap封装为Activex供QT使用(工具:VS2017,QT5.12)
标签:bre atl _for line lib 路径 dll grid enter
原文地址:https://www.cnblogs.com/baqifanye/p/10414004.html