标签:一个 ace .com com content poi hello code 自己
原文:使用IdentityServer4实现一个简单的Oauth2客户端模式授权
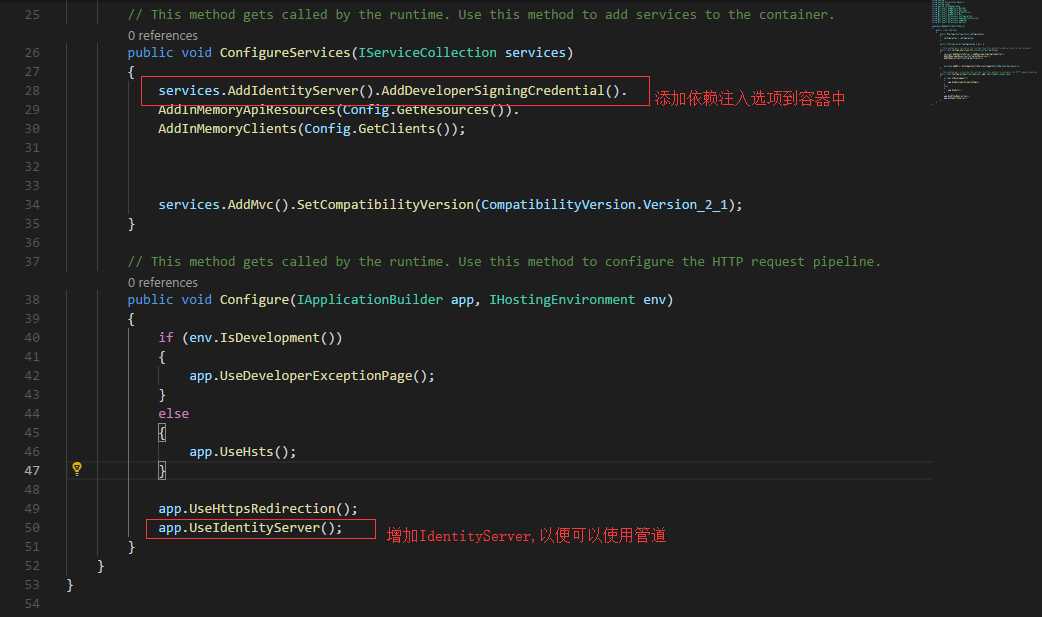
1、首先新建一个webAPI项目做为IdentityServer的服务端,提供生成Token的服务,首先修改Startup.cs文件,如下图:
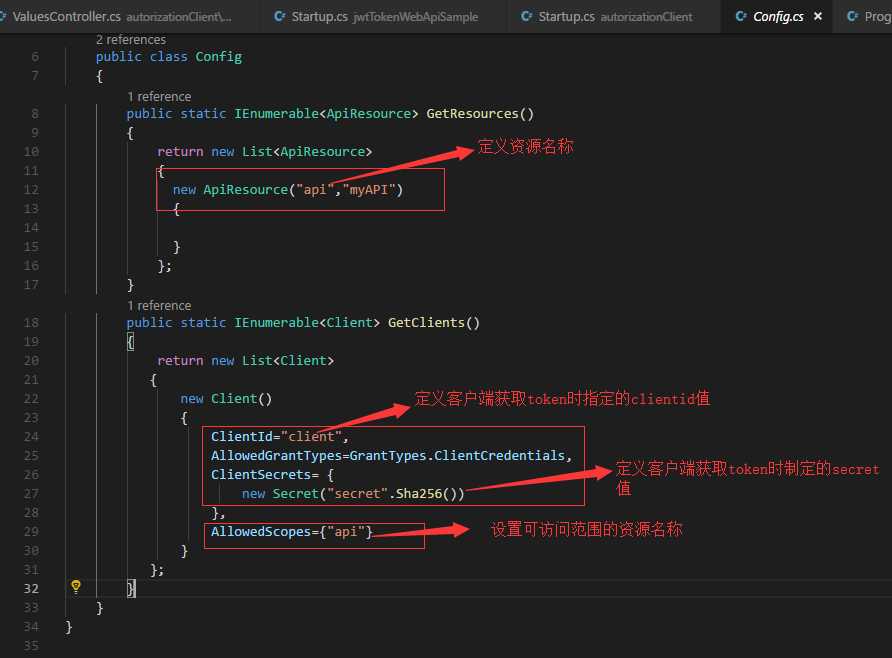
2、增加一个Config.cs文件,以便于提供资源和认证设置,如下图:
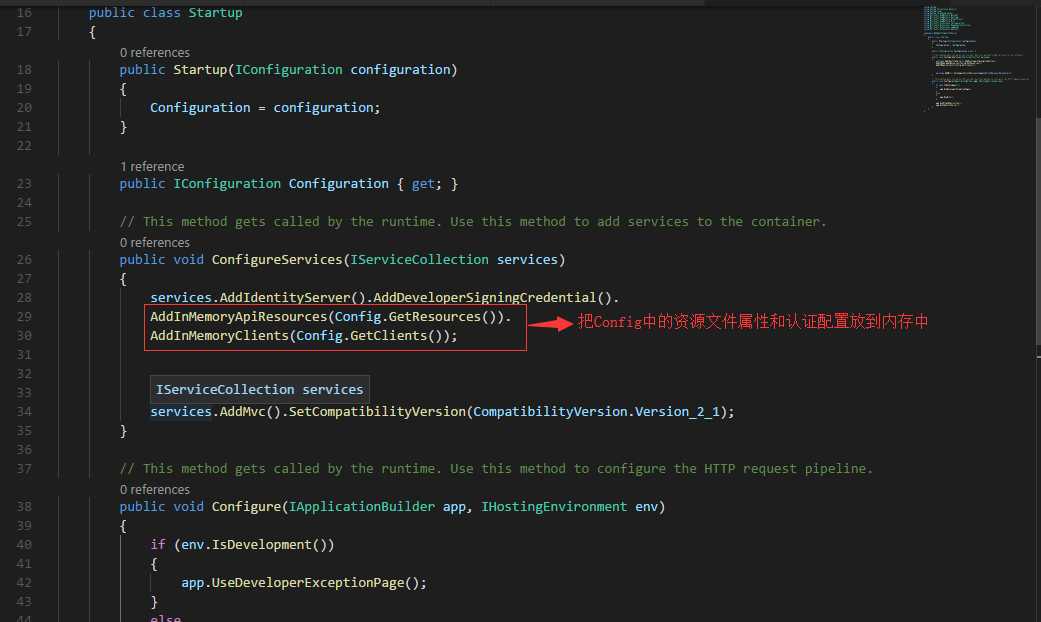
3、在Startup.cs文件中配置做初始化:
4、好了,我们把网站启动,然后我们访问http://localhost:5000/.well-known/openid-configuration(http://localhost:5000是我的程序启动地址,可以在Program.cs文件中自己配置。.well-known/openid-configuration是程序的默认配置地址)然后返回如下内容,表明我们服务端已经没有什么问题了。

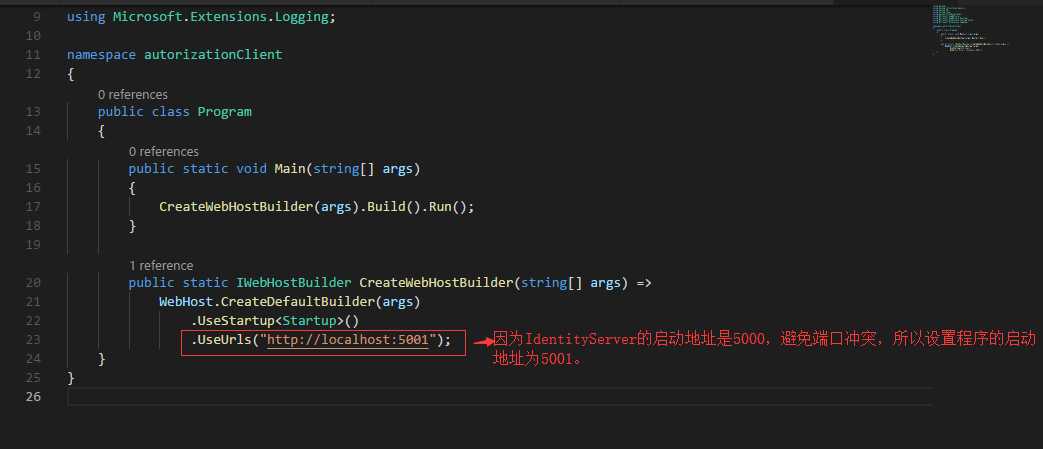
5、然后我们再单独创建一个Webapi项目来实现调用IdentityServer端获取token实现资源的正常访问.首先设置启动地址:
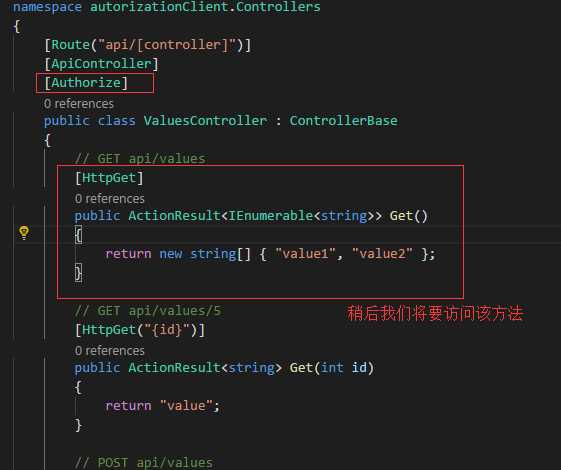
6、设置API控制器授权特性:
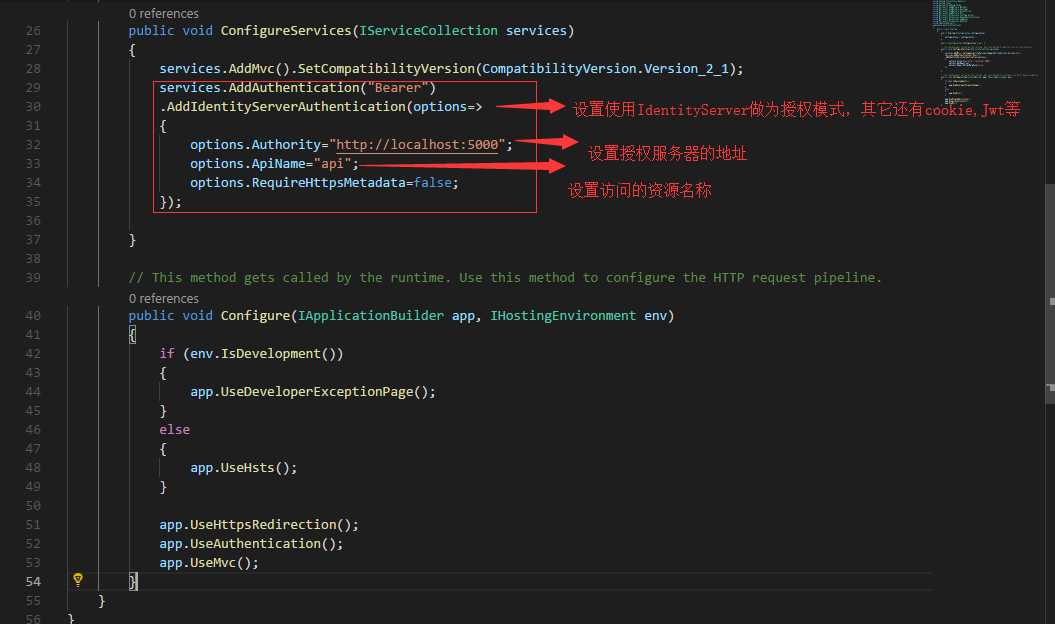
7、设置启动配置选项:
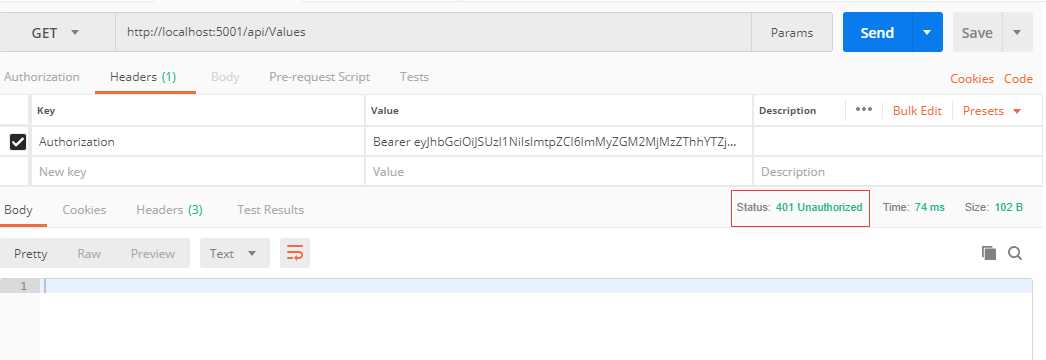
8.我们先在Postman中用一个错误的token去访问,结果提示未授权。
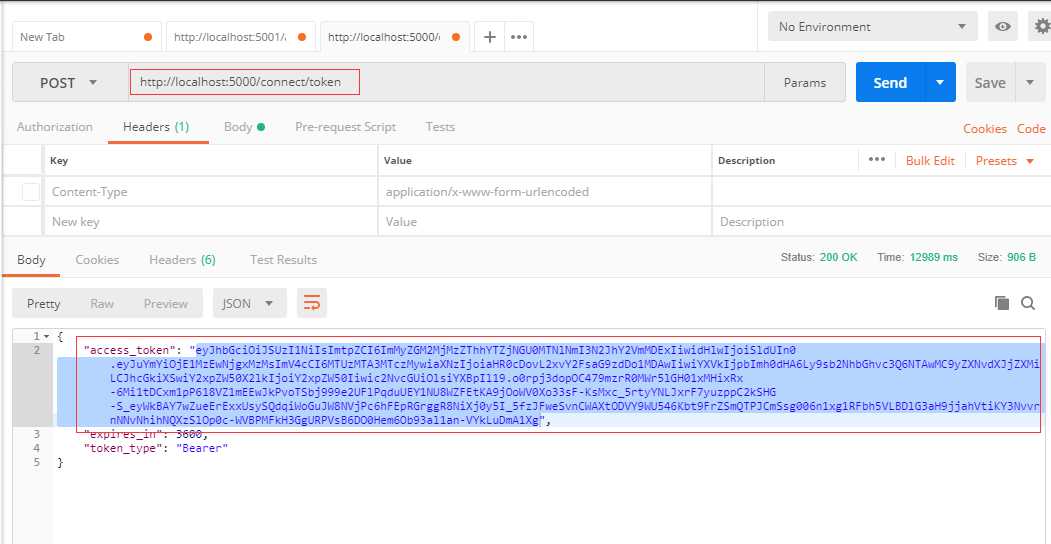
9、通过访问IdentityServer提供的endpoint(步骤4图中有标记)地址来获取token,如下图:
10.通过获取的token,去访问被限制的资源(即步骤6图中标识的位置),返回成功,即访问成功:
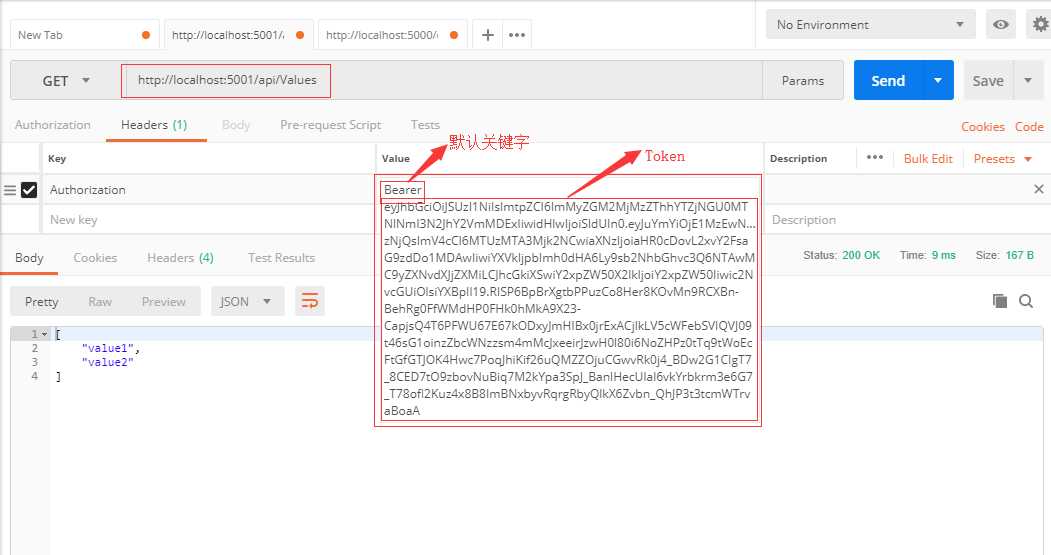
附上通过第三方程序来调用token,然后携带token访问API的demo:
using System;
using System.Net.Http;
using IdentityModel.Client;
namespace identityServerClient
{
    class Program
    {
        static void Main(string[] args)
        {
            var discoveryClient=DiscoveryClient.GetAsync("http://localhost:5000").Result;
            if(discoveryClient.IsError)
            {
                Console.WriteLine("there are some errors");
            }
            var tokenClient=new TokenClient(discoveryClient.TokenEndpoint,"client","secret");
            var tokenResponse=tokenClient.RequestClientCredentialsAsync("api").Result;
            if(tokenResponse.IsError)
            {
                Console.WriteLine(tokenResponse.Error);
            }
            else
            {
                Console.WriteLine(tokenResponse.Json);
            }
            var httpClient=new HttpClient();
            httpClient.SetBearerToken(tokenResponse.AccessToken);
            var response=httpClient.GetAsync("http://localhost:5001/api/values").Result;
            if(response.IsSuccessStatusCode)
            {
                Console.WriteLine(response.Content.ReadAsStringAsync().Result);
            }
            Console.ReadLine();


            Console.WriteLine("Hello World!");
        }
    }
}
使用IdentityServer4实现一个简单的Oauth2客户端模式授权
标签:一个 ace .com com content poi hello code 自己
原文地址:https://www.cnblogs.com/lonelyxmas/p/10618814.html