标签:改变 nbsp network 自定义 并保存 多表 href ota ace
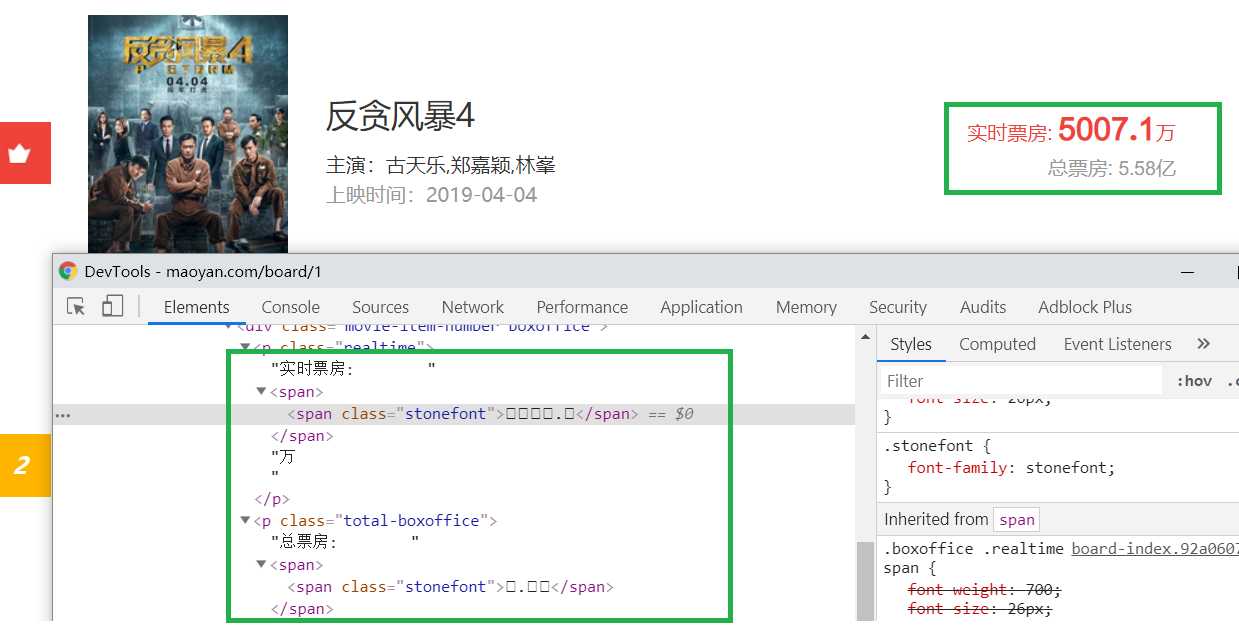
可以看出又是字体反爬,需要获得字体文件,定位字体文件的url,在页面或css里搜@font-face或font-famil

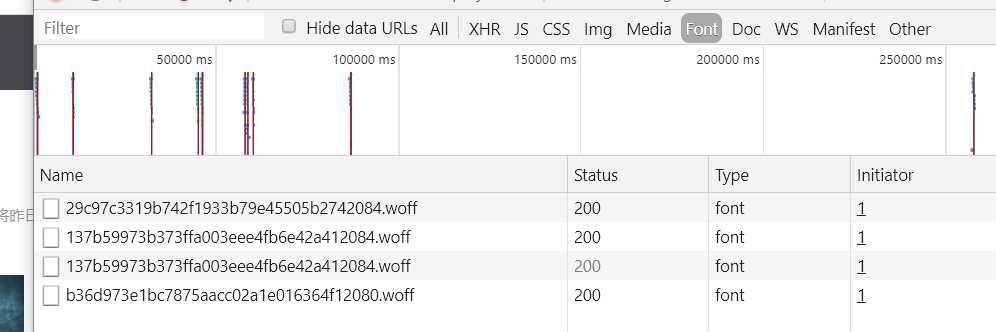
在network选font标签刷新页面几次发现每次用的字体都不一,加密用的字体库是动态的,手动建立关系表然后全局替换的方法不管用了。
建立字符和动态字体库unicode的联系
首先要了解字体文件内部有很多表,上篇用到记录unicode索引和字形关系的cmap表就在里面,
这此要用到glyf表,这个表里记录了具体的字形数据,表里只记录了字形数据,没有表头索引。
有专门的表loca按顺序记录glyf里每个字形的位置,在使用字体时通过loca表来找到具体字形。
所以反爬不是改变字形的话可以利用字形数据来找到自定义字体unicode与真实字符的联系。
这部分详细资料见 https://www.cnblogs.com/shenyiyangle/p/10700156.html 中的glyf表。
找关联的思路如图:
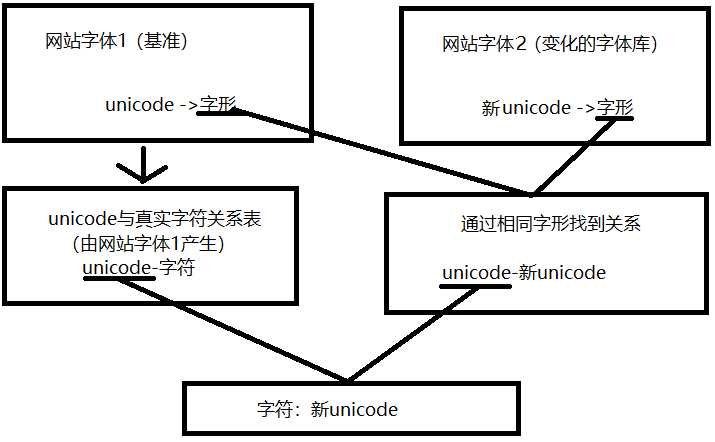
1.下载一个网站字体做为基准,建立基准字体unicode和真实字符关系。
2.在页面刷新网页字体库变化,重新下载字体,记为网站字体2,通过比较网站字体1和网站字体2的字形找到unicode和新unicode联系。
3.再通过相同的unicode来建立真实字符和变化字体库unicode的联系,最后全局将新unicode替换成真实字符。
headers={"User-Agent":"Mozilla/5.0 (Windows NT 10.0; Win64; x64) AppleWebKit/537.36 (KHTML, like Gecko) Chrome/73.0.3683.86 Safari/537.36"}
r=requests.get("https://maoyan.com/board/1",headers=headers)
font1_url="http:"+re.findall("url\(\‘(\/\/.*?woff)\‘\)",r.text,re.M)[0]
#创建font目录保存基准字体
if not os.path.exists("font"):
    font1=requests.get(font1_url,headers=headers)
    os.mkdir("font")
    with open("./font/base.woff","wb")as f:
        f.write(font1.content)
base_font = TTFont(‘./font/base.woff‘)
base_dict=[]
for i in range(len(baseFont.getGlyphOrder()[2:])):
    print(f"对应的数字{i+1}:")
    w=input()
    base_dict.append({"code":baseFont.getGlyphOrder()[2:][i],"num":w})

new_font_url="http:"+re.findall("url\(\‘(\/\/.*?woff)\‘\)",r.text,re.M)[0]
font=requests.get(new_font_url,headers=headers)
with open("new_font.woff","wb")as f:
    f.write(font.content)
new_font = TTFont(‘new_font.woff‘)
new_font_code_list=new_font.getGlyphOrder()[2:]
replace_dic=[]
for i in range(10):
    news = new_font[‘glyf‘][new_font_code_list[i]]
    for j in range(10):
        bases = base_font[‘glyf‘][base_dict[j]["code"]]
        if news == bases:
            unicode=new_font_code_list[i].lower().replace("uni","&#x")+";"
            num= base_dict[j]["num"]
            replace_dic.append({"code":unicode,"num":num})
org_data=r.text
for i in range(len(replace_dic)):
    new_data=new_data.replace(replace_dic[i]["code"],replace_dic[i]["num"])
tree=etree.HTML(org_data)
dds=tree.xpath(‘//dl[@class="board-wrapper"]/dd‘)
info=[]
for dd in dds:
    title=dd.xpath(‘.//p[@class="name"]/a/@title‘)[0]
    star=dd.xpath(‘.//p[@class="star"]/text()‘)[0].replace("主演:","")
    time=dd.xpath(‘.//p[@class="releasetime"]/text()‘)[0].replace("上映时间:","")
    realticket=dd.xpath(‘.//p[@class="realtime"]//text()‘)[1]+dd.xpath(‘.//p[@class="realtime"]//text()‘)[2].strip()
    totalticket=dd.xpath(‘.//p[@class="total-boxoffice"]//text()‘)[1]+dd.xpath(‘.//p[@class="total-boxoffice"]//text()‘)[2].strip()
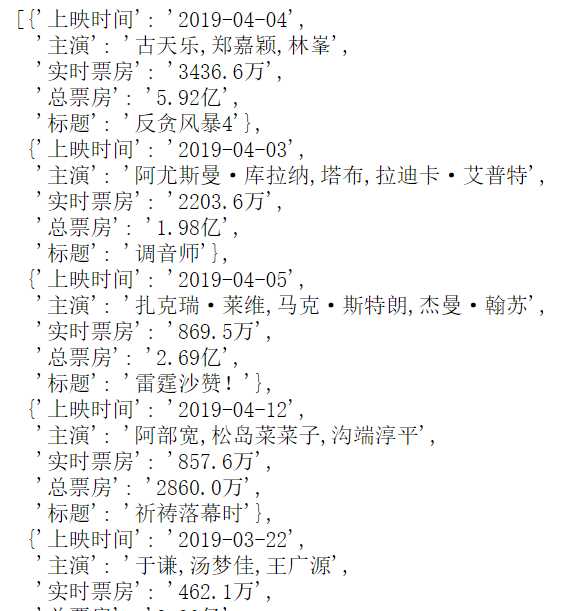
    info.append({"标题":title,"主演":star,"上映时间":time,"实时票房":realticket,"总票房":totalticket})
import csv
csv_file = open("1325.csv", ‘w‘, newline=‘‘)
keys = []
writer = csv.writer(csv_file)
keys = info[1].keys()
writer.writerow(keys)
for dic in info:
    for key in keys:
        if key not in dic:
            dic[key ] = ‘‘
    writer.writerow(dic.values())
csv_file.close()
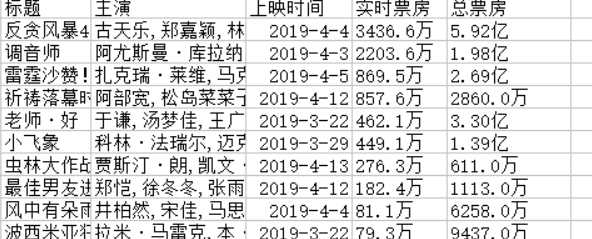

以上是全部代码
标签:改变 nbsp network 自定义 并保存 多表 href ota ace
原文地址:https://www.cnblogs.com/shenyiyangle/p/10711065.html