标签:pen 读取 height using mamicode 实例 alt window not
1.图像是由像素组成的,所以修改了像素就可以实现图像的改变。
2先看灰度图像(单通道):
*****2.获取灰度图像的像素值使用: int gray = gray_src.at<uchar>(row, col);
*****3.修改灰度图像的像素值使用:gray_src.at<uchar>(row, col) = 255 - gray;//对每一个像素取反
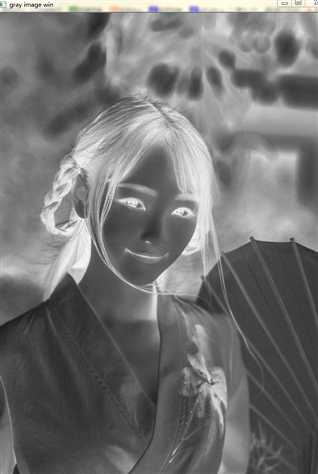
*****源代码,对灰度图像像素值全部取反
#include<opencv2\opencv.hpp>
#include<iostream>

using namespace std;
using namespace cv;
/*图像操作*/
int main(int argc, char **argv)
{
	Mat src = imread("E:\\vsprom\\learn02\\nv1.jpg");
	if (src.empty())
	{
		cout << "can not load imagefile...." << endl;
		return -1;
	}
	namedWindow("in image win", CV_WINDOW_AUTOSIZE);
	imshow("in image win", src);


	/*将一个RGB图像转为GRAY图像*/
	Mat gray_src;
	cvtColor(src,gray_src,CV_BGR2GRAY);


	int height = gray_src.rows;
	int width = gray_src.cols;
	for (int row = 0; row < height; row++)
	{
		for (int col = 0; col < width; col++)
		{
			int gray = gray_src.at<uchar>(row, col);/*读取一个GRAY像素点的像素值(CV_8UC1)*/
			gray_src.at<uchar>(row, col) = 255 - gray;//对每一个像素取反
		}
	}
	namedWindow("gray image win", CV_WINDOW_AUTOSIZE);
	imshow("gray image win", gray_src);


	waitKey(0);
	return 0;
}
效果图:

3.RGB图像的像素操作
读像素值
int b = src.at<Vec3b>(row, col)[0];//第一个通道
int g = src.at<Vec3b>(row, col)[1];//第二个通道
int r = src.at<Vec3b>(row, col)[2];//第三个通道
修改像素值
dst.at<Vec3b>(row, col)[0] = 255 - b;
dst.at<Vec3b>(row, col)[1] = 255 - g;
dst.at<Vec3b>(row, col)[2] = 255 - r;
源代码实例:
    /*获取RGB的像素值*/
    Mat dst;
    dst.create(src.size(), src.type());
    int height = dst.rows;
    int width = dst.cols;
    int cn = src.channels();//通道数

    for (int row = 0; row < height; row++)
    {
        for (int col = 0; col < width; col++)
        {
            if (cn == 1)
            {
                int gray = dst.at<uchar>(row, col);/*读取一个GRAY像素点的像素值(CV_8UC1)*/
                dst.at<uchar>(row, col) = 255 - gray;//对每一个像素取反

            }
            else if(cn==3)
            {
                int b = src.at<Vec3b>(row, col)[0];//第一个通道
                int g = src.at<Vec3b>(row, col)[1];//第二个通道
                int r = src.at<Vec3b>(row, col)[2];//第三个通道
                dst.at<Vec3b>(row, col)[0] = 255 - b;
                dst.at<Vec3b>(row, col)[1] = 255 - g;
                dst.at<Vec3b>(row, col)[2] = 255 - r;
            }

        }
    }
    namedWindow("rgb image win", CV_WINDOW_AUTOSIZE);
    imshow("rgb image win", dst);
产看输出效果图

标签:pen 读取 height using mamicode 实例 alt window not
原文地址:https://www.cnblogs.com/huipengbo/p/10777446.html