标签:int status 失败 ring oss ESS sha 根据 blog
以前看了上文的帖子,感觉对自己有用,分享一下。
在这里我就细说一下步骤,给大家提供较完整的教程:本文对源代码进行了删减,源代码功能更多,感兴趣可以回去研读一下
功能:
定时爬取课程,若有课程给自己发送邮件,用微信或者QQ邮箱给自己提醒
第一步:首先你要安装python IDE
本文采用python3.7.0下载地址如下
链接:https://pan.baidu.com/s/1liQ4Z32kXo6secQpMYQw_w
提取码:2qn3
步骤:
1.解压
2.以管理员身份运行python3.7.0- amd64
3.注意勾选Add python 3.7 to path,点击Customize installation
4.点击next
5.自己选择安装目录
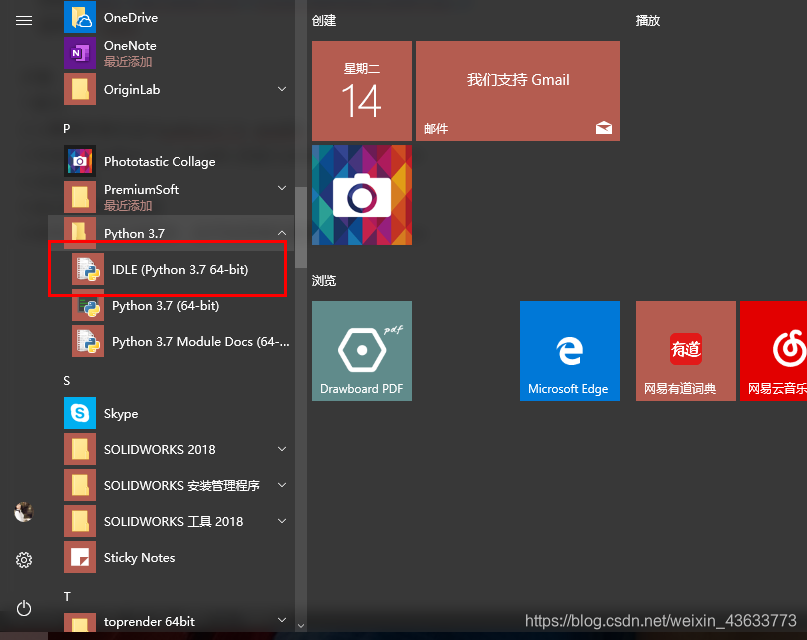
6.结束后关闭安装程序,在开始菜单栏里找到IDLE python
第二步:拷贝相应代码并更改相应数据
1.打开IDLE
2.点击新建窗口File-New File,将以下代码复制进去
import requests, smtplib, email, time
from bs4 import BeautifulSoup as bs  # 使用 BeautifulSoup库对页面进行解析
from email.mime.multipart import MIMEMultipart
from email.mime.text import MIMEText
from email.mime.image import MIMEImage
from email.header import Header

MAX = 18  # 作为周数的约束条件,最大值为21
INI = 125  # 作为访问失败的无效值,随意定的
session = requests.Session()


# 登录EPC
url_login = ‘http://epc.ustc.edu.cn/n_left.asp‘
data = {
    ‘submit_type‘: ‘user_login‘,
    ‘name‘: ‘**********‘,
    ‘pass‘: ‘**********‘,
    ‘user_type‘: ‘2‘,
    ‘Submit‘: ‘LOG IN‘
}
resp = session.post(url=url_login, data=data)


# 解析页面,返回列表:[week,星期,教师,学时,上课时间,教室]
def getInfo(url):
    resp = session.get(url)
    resp.encoding = resp.apparent_encoding
    # print(resp.text)
    soup = bs(resp.text, ‘html.parser‘)
    tds = soup.select(‘td[align="center"]‘)
    return [int(tds[14].string[1:3]), tds[15].string, ] + [string for string in tds[18].strings]
    # tds[0] #只显示可预约
    # tds[1] #预约单元
    # tds[2] #周数
    # tds[3] #星期几
    # tds[4] #教师
    # tds[5] #学时
    # tds[6] #上课时间
    # tds[7] #教室……
    # tds[14] #第多少周
    # tds[15].string #星期
    # tds[16].string #教师
    # [x for x in tds[18].strings] #时间


def getEPC():
    # 返回数据:字典
    # key:name or INI
    # value:[week,星期,教师,学时,上课时间,教室] or [INI]
    try:
       url1 = ‘http://epc.ustc.edu.cn/m_practice.asp?second_id=2001‘  # Situational dialogue
       url2 = ‘http://epc.ustc.edu.cn/m_practice.asp?second_id=2002‘  # Topical discussion
       url3 = ‘http://epc.ustc.edu.cn/m_practice.asp?second_id=2003‘  # Debate
       url4 = ‘http://epc.ustc.edu.cn/m_practice.asp?second_id=2004‘  # Drama
       url7 = ‘http://epc.ustc.edu.cn/m_practice.asp?second_id=2007‘  # Pronunciation Practice

       info = {}
       info[‘Situational Dialogue‘] = getInfo(url1)
       info[‘Topical Discussion‘] = getInfo(url2)
       info[‘Topical Discussion‘] = getInfo(url2)
       info[‘Debate‘] = getInfo(url3)
       info[‘Pronunciation Practice‘] = getInfo(url7)
       return info
    except:
       return {INI: [INI]}


# 邮箱发送
def Send_mail(text):
    msg_from = ‘542127509@qq.com‘  # 发送方邮箱
    passwd = ‘************‘  # 填入发送方邮箱的授权码
    msg_to = ‘648810974@qq.com‘  # 收件人邮箱

    subject = "课程爬取"  # 主题
    msg = MIMEText(text)
    msg[‘Subject‘] = subject
    msg[‘From‘] = msg_from
    msg[‘To‘] = msg_to
    try:
        s = smtplib.SMTP_SSL("smtp.qq.com", 465)
        s.login(msg_from, passwd)
        s.sendmail(msg_from, msg_to, msg.as_string())
        print(‘succeed‘)
    except:
        print("发送失败")
    finally:
        s.quit()


# 主程序
while 1:
    status = True
    info = getEPC()
    print(time.ctime(), ‘:‘)
    for key, value in info.items():
        print(‘{}:{}‘.format(key, value))
    print(‘\n‘)
    for value in info.values():
        if value[0] < MAX:
            text = ‘There is a course of {} in week{},{},{},{}‘.format(key, value[0], value[1], value[2], value[3],end=‘\n\n‘)
            print(text)
            Send_mail(text)
    time.sleep(60)  # 这里修改刷新频率
**
**
1.MAX = 18改成你想要的周数
2.data中红色部分为自己账号密码:
3.图片处加#号为不想要的课程,例如:只想选debate,把别的url都加上#,记得要对称的加
4.以下四个与邮箱相关的地方地方更改
这里授权码可以百度一下(非qq密码),qq邮箱授权码获取如下:
https://service.mail.qq.com/cgi-bin/help?subtype=1&&no=1001256&&id=28
5.最后一行刷新频率根据自己需要改:
time.sleep(60) # 这里修改刷新频率
**
**

**
**
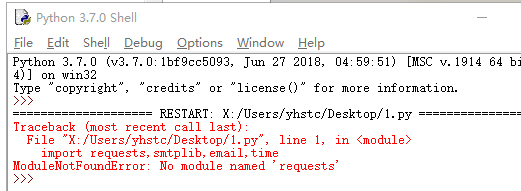
有的同学运行是发现如下提示,因为没有安装相应的requests库函数,
解决步骤:
1.在win10下输入框内输入cmd并运行
2.安装requests库,输入如下代码,回车:
pip install requests
注释:(若bs4库没安装,与之类似,输入 pip install bs4)
部分同学遇到如下情况,只需将匡内部分复制到命令框运行即可,重复上一步(无此现象忽略)
第四部:将QQ邮箱与微信绑定,关注公众号或者下载QQ邮箱即可
标签:int status 失败 ring oss ESS sha 根据 blog
原文地址:https://www.cnblogs.com/yhstcxx/p/10865387.html