标签:mic mit offic image img 配置 pie inf contain

# 拉取 18.04 版本的 Ubuntu 镜像
docker pull ubuntu:latest

# 以交互方式运行并进入 ubuntu 容器环境
docker run -it --name my-ubuntu -p 80:80 ubuntu:latest /bin/bash

# 退出 ubuntu 容器环境 的交互模式
exit

# 创建待提交的副本
docker commit -m "init" -a "hippieZhou" container_id hippiezhou/ubuntu:latest

# 查看本地创建的镜像,会出现一个镜像名称为 hippiezhou/ubuntu,Tag 为 dev 的镜像
docker images

# 运行我们创建的本地本地镜像
docker run -it --name helloworld -p 80:80 hippiezhou/ubuntu:latest bin/bash

# 创建 Tag
# docker tag ubuntu:18.04 hippiezhou/ubuntu:latest

# 将我们修改的进行推送到 DockerHub
docker login
docker push hippiezhou/ubuntu:latest

# 拉取我们自定义的镜像
docker pull hippiezhou/ubuntu:latest
docker run -it --name hello-world -p 80:80 hippiezhou/ubuntu:latest bin/bash
# 拉取镜像
docker pull nginx:latest

# 运行镜像实例
# nginx默认使用的是 80 端口,所以对内使用 80 端口,对外暴露的端口可任意配置;
# 这里以 8090 为例,执行成功后访问:127.0.0.1:8090 即可;
docker run -d --name my-nginx -p 8090:80 nginx:latest

# 删除镜像实例
docker rm container_di

# 删除镜像
docker rmi image_id
# 拉取 mysql 镜像
docker pull mysql:latest

# 以后台方式运行一个 mysql 的镜像实例
# 设置实例名称为:my-sql
# 设置端口映射为 3306 -> 3306
# 设置数据库的用户密码:mysql
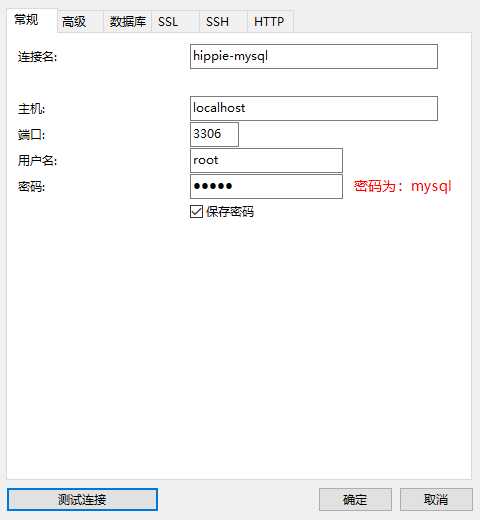
docker run -d --name my-mysql -p 3306:3306 -e MYSQL_ROOT_PASSWORD=mysql mysql:latest
注:因为 mysql 默认使用的是 3306 端口,所以我们这里最好显式设置一下端口映射(经测试,如果不设置的话,我的电脑是连接不上的,目前原因未知)
执行上述命令后,我们就可以使用数据库连接工具进行连接了,连接信息如下图所示:

标签:mic mit offic image img 配置 pie inf contain
原文地址:https://www.cnblogs.com/hippieZhou/p/10744684.html