标签:pat 数据类型 latest 作者 col The 后缀 root 日志
- scrapy:爬虫框架。
      异步爬取,高性能的数据解析+持久化存储操作,
      集成了各种功能(高性能异步下载,队列,分布式,解析,持久化等)的具有很强通用性的项目模板。

- 框架:集成了很多功能且具有很强通用性的一个项目模板

- 如何学习框架:
    - 学习框架的功能模块的具体使用。
 windows系统:

     a. pip3 install wheel

      b. 下载twisted http://www.lfd.uci.edu/~gohlke/pythonlibs/#twisted

      c. 进入下载目录,执行 pip3 install Twisted?17.1.0?cp35?cp35m?win_amd64.whl

      d. pip3 install pywin32

      e. pip3 install scrapy
Linux系统:
pip3 install scrapy
- ① 创建一个工程:scrapy startproject firstBlood
- ② cd firstBlood
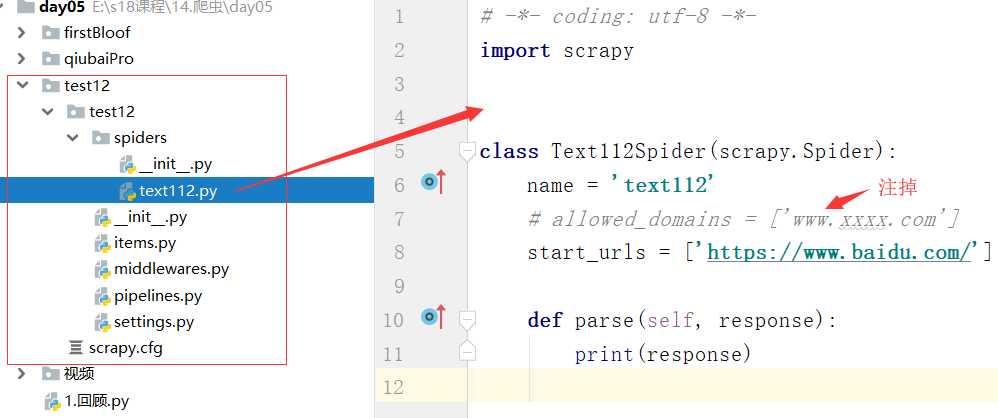
- ③ 创建爬虫文件:scrapy genspider first www.xxx.com
- ④ 执行:scrapy crawl first
    scrapy crawl 爬虫名称 :该种执行形式会显示执行的日志信息
    scrapy crawl 爬虫名称 --nolog:该种执行形式不会显示执行的日志信息
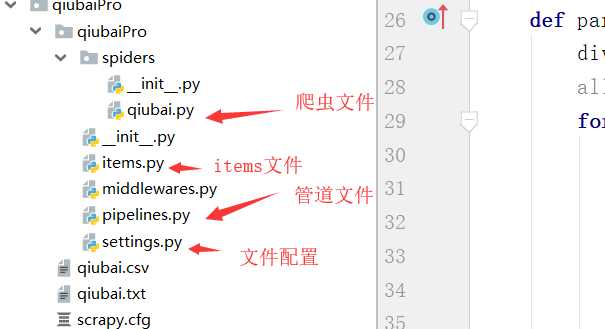
项目结构:

project_name/
   scrapy.cfg:
   project_name/
       __init__.py
       items.py
       pipelines.py
       settings.py
       spiders/
           __init__.py

scrapy.cfg   项目的主配置信息。(真正爬虫相关的配置信息在settings.py文件中)
items.py     设置数据存储模板,用于结构化数据,如:Django的Model
pipelines    数据持久化处理
settings.py  配置文件,如:递归的层数、并发数,延迟下载等
spiders      爬虫目录,如:创建文件,编写爬虫解析规则
# -*- coding: utf-8 -*-
import scrapy

class QiubaiSpider(scrapy.Spider):
    name = ‘qiubai‘ #应用名称
    #允许爬取的域名(如果遇到非该域名的url则爬取不到数据)
    allowed_domains = [‘https://www.qiushibaike.com/‘]
    #起始爬取的url
    start_urls = [‘https://www.qiushibaike.com/‘]

     #访问起始URL并获取结果后的回调函数,该函数的response参数就是向起始的url发送请求后,获取的响应对象.该函数返回值必须为可迭代对象或者NUll
     def parse(self, response):
        print(response.text) #获取字符串类型的响应内容
        print(response.body)#获取字节类型的相应内容
爬虫文件

示例:
#嗅事百科 作者和内容

# -*- coding: utf-8 -*-
import scrapy


class FirstSpider(scrapy.Spider):
    name = ‘first‘
    # allowed_domains = [‘www.xxx.com‘]
    start_urls = [‘https://www.qiushibaike.com/text/‘]

    def parse(self, response):

        div_list = response.xpath(‘//div[@id="content-left"]/div‘)
        for div in div_list:
            autor = div.xpath(‘./div[1]/a[2]/h2/text()‘).extract_first()
            content = div.xpath(‘./a/div/span//text()‘).extract()
            print(autor,content)
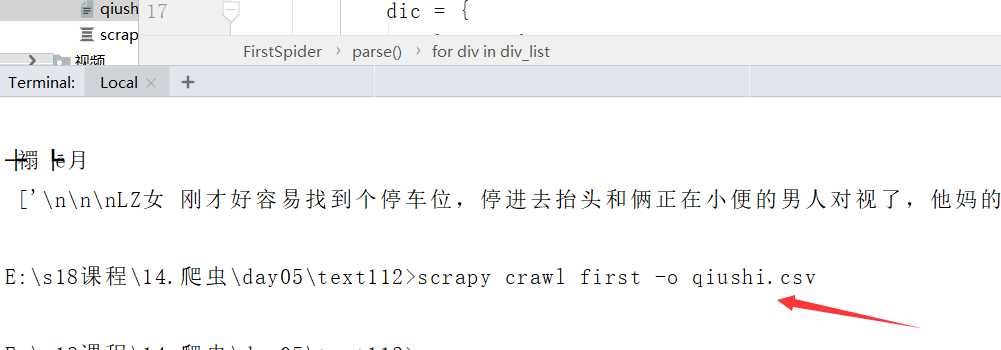
- 持久化存储:
    - 基于终端指令:scrapy crawl qiubai -o filePath.csv
        - 好处:便捷
        - 弊端:局限性强(只可以将数据写入本地文件,文件后缀是由具体要求)
    - 基于管道:
        - 基于持久化存储的所有操作都必须写入到管道文件的管道类中
必须以结构  [{},{}]  的形式

执行输出指定格式进行存储:将爬取到的数据写入不同格式的文件中进行存储
    scrapy crawl 爬虫名称 -o xxx.json
    scrapy crawl 爬虫名称 -o xxx.xml
    scrapy crawl 爬虫名称 -o xxx.csv
#示例:

# -*- coding: utf-8 -*-
import scrapy


class FirstSpider(scrapy.Spider):
    name = ‘first‘
    # allowed_domains = [‘www.xxx.com‘]
    start_urls = [‘https://www.qiushibaike.com/text/‘]

    def parse(self, response):
        all_data = []
        div_list = response.xpath(‘//div[@id="content-left"]/div‘)
        for div in div_list:
            autor = div.xpath(‘./div[1]/a[2]/h2/text()‘).extract_first()
            content = div.xpath(‘./a/div/span//text()‘).extract()
            # print(autor,content)
            dic = {
                ‘author‘:autor,
                ‘content‘:content,
                ‘---‘:"\n"+"----------------------------------------"
            }
            all_data.append(dic)

        return all_data
#在爬虫文件中

# -*- coding: utf-8 -*-
import scrapy
from qiubaiPro.items import QiubaiproItem

class QiubaiSpider(scrapy.Spider):
    name = ‘qiubai‘
    # allowed_domains = [‘www.xxx.com‘]
    start_urls = [‘https://www.qiushibaike.com/text/‘]


    def parse(self, response):
        div_list = response.xpath(‘//div[@id="content-left"]/div‘)
        all_data = []
        for div in div_list:
            # author = div.xpath(‘./div[1]/a[2]/h2/text()‘)[0].extract()
            author = div.xpath(‘./div[1]/a[2]/h2/text()‘).extract_first()

            content = div.xpath(‘./a/div/span//text()‘).extract()
            content = ‘‘.join(content)
            # print(content)
            #实例化一个item类型的对象
            item = QiubaiproItem()
            #使用中括号的形式访问item对象中的属性
            item[‘author‘] = author
            item[‘content‘] = content

            #将item提交给管道
            yield item
#items.py文件中

import scrapy


class QiubaiproItem(scrapy.Item):
    # define the fields for your item here like:
    # name = scrapy.Field()
    #scrapy.Field()万能的数据类型
    author = scrapy.Field()
    content = scrapy.Field()
#pipelines.py(管道文件)中
# -*- coding: utf-8 -*-

# Define your item pipelines here
#
# Don‘t forget to add your pipeline to the ITEM_PIPELINES setting
# See: https://doc.scrapy.org/en/latest/topics/item-pipeline.html

#一个类表示的是将解析/爬取到的数据存储到一个平台
import pymysql
from redis import Redis

#存在本地文件
class QiubaiproPipeline(object):
    fp = None
    def open_spider(self,spider):
        print(‘开始爬虫......‘)
        self.fp = open(‘./qiubai.txt‘,‘w‘,encoding=‘utf-8‘)
    #可以将item类型的对象中存储的数据进行持久化存储
    def process_item(self, item, spider):
        author = item[‘author‘]
        print(author, type(author))
        content = item[‘content‘]
        self.fp.write(author+ ":"+content)

        return item #返回给了下一个即将被执行的管道类
    def close_spider(self,spider):
        print(‘结束爬虫!!!‘)
        self.fp.close()

# 存在mysql数据库中
class MysqlPipeLine(object):
    conn = None
    cursor = None
    def open_spider(self,spider):
        self.conn = pymysql.Connect(host=‘127.0.0.1‘,port=3306,user=‘root‘,password=‘‘,db=‘qiubai‘,charset=‘utf8‘)
        print(self.conn)

    def process_item(self, item, spider):
        self.cursor = self.conn.cursor()
        try:
            self.cursor.execute(‘insert into qiubai values("%s","%s")‘%(item[‘author‘],item[‘content‘]))
            self.conn.commit()
        except Exception as e:
            print(e)
            self.conn.rollback()
        return item
    def close_spider(self,spider):
        self.cursor.close()
        self.conn.close()

#存在redis数据库
class RedisPipeLine(object):
    conn = None
    def open_spider(self,spider):
        self.conn = Redis(host=‘127.0.0.1‘,port=6379)
        print(self.conn)
    def process_item(self,item,spider):
        dic = {
            ‘author‘:item[‘author‘],
            ‘content‘:item[‘content‘]
        }
        self.conn.lpush(‘qiubai‘,dic)
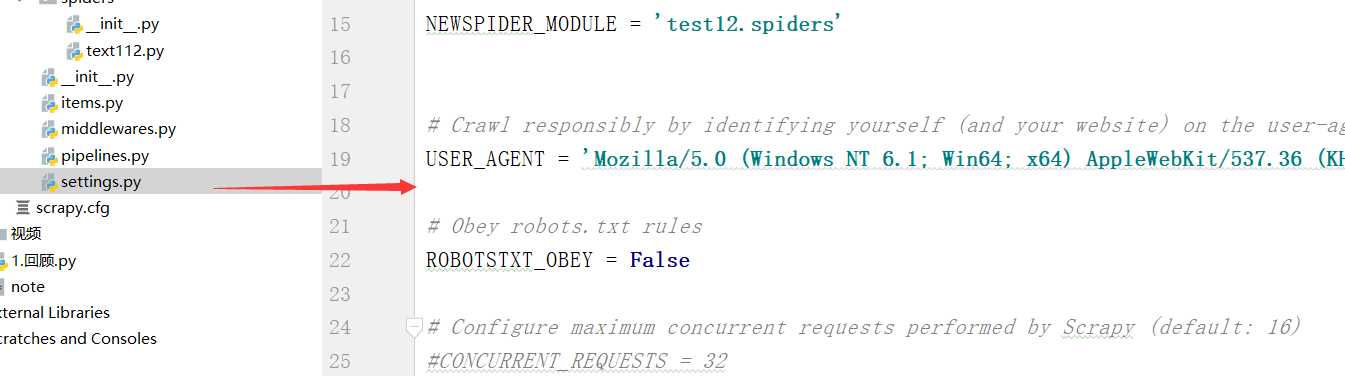
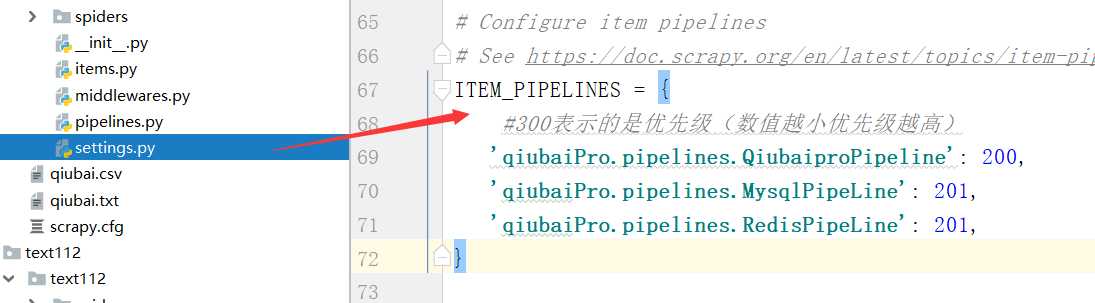
setting配置文件中
标签:pat 数据类型 latest 作者 col The 后缀 root 日志
原文地址:https://www.cnblogs.com/sc-1067178406/p/10956908.html