标签:idt 数字 pil 技术 data 绘制 index lower info
# 随机生成RGB的色彩值
def rgbcolor():
    red = random.randint(0,255)
    green = random.randint(0,255)
    blue = random.randint(0,255)
return red,green,blue# 生成随机的子母(大写小写)和数字
def getRandomChar():
random_num = str(random.randint(0, 9))
random_lower = chr(random.randint(97, 122)) # 小写字母a~z
random_upper = chr(random.randint(65, 90)) # 大写字母A~Z
random_char = random.choice([random_num, random_lower, random_upper])
return random_char
rgb_color = rgbcolor()
# 创建一张随机的背景图片
img = Image.new(mode="RGB",size=(width,height),color=rgb_color)
print(img)
img.show()随机的背景图

def createCodeImage():
background_color = rgbcolor()
# 创建一张随机的背景图片
img = Image.new(mode="RGB",size=(width,height),color=background_color)
# 设置文字的字体
font = ImageFont.truetype(font="ahellya.ttf",size=36)
# 图片画笔进行绘制图片
draw = ImageDraw.Draw(img)
# 随机生成4位验证码
for index in range(5):
str_or_num = getRandomChar()
text_color = rgbcolor()
# 防止背景的颜色和字体的颜色一致
while text_color == background_color:
text_color = rgbcolor()
draw.text((10+30*index,3),text=str_or_num,fill=text_color,font=font)
img.show()
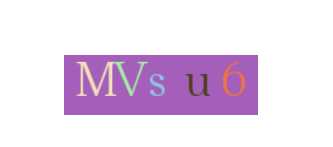
createCodeImage()随机生成的验证码

# 绘制线条
def create_line(draw):
for i in range(10):
x1 = random.randint(0,width)
x2 = random.randint(0,width)
y1 = random.randint(0,height)
y2 = random.randint(0,height)
draw.line((x1,y1,x2,y2),fill=rgbcolor(),width=2)
# 绘制随机点
def create_point(draw):
for i in range(50):
x_point = random.randint(0,width)
y_point = random.randint(0,height)
draw.point((x_point,y_point),fill=rgbcolor())# 图片验证码
import random
from PIL import Image, ImageDraw, ImageFont
# 生成随机的子母(大写小写)和数字
def getRandomChar():
    random_num = str(random.randint(0, 9))
    random_lower = chr(random.randint(97, 122))  # 小写字母a~z
    random_upper = chr(random.randint(65, 90))  # 大写字母A~Z
    random_char = random.choice([random_num, random_lower, random_upper])
    return random_char
# 随机生成RGB的色彩值
def rgbcolor():
red = random.randint(0, 255)
green = random.randint(0, 255)
blue = random.randint(0, 255)
return red, green, blue
# 创建图片的高度和宽度
width = 160
height = 50
# 绘制线条
def create_line(draw):
for i in range(10):
x1 = random.randint(0, width)
x2 = random.randint(0, width)
y1 = random.randint(0, height)
y2 = random.randint(0, height)
draw.line((x1, y1, x2, y2), fill=rgbcolor(), width=2)
# 绘制随机点
def create_point(draw):
for i in range(50):
x_point = random.randint(0, width)
y_point = random.randint(0, height)
draw.point((x_point, y_point), fill=rgbcolor())
def createCodeImage():
background_color = rgbcolor()
# 创建一张随机的背景图片
img = Image.new(mode="RGB", size=(width, height), color=background_color)
# 设置文字的字体
font = ImageFont.truetype(font="ahellya.ttf", size=36)
# 图片画笔进行绘制图片
draw = ImageDraw.Draw(img)
# 随机生成5位验证码
str_data = ""
for index in range(5):
str_or_num = getRandomChar()
text_color = rgbcolor()
# 防止背景的颜色和字体的颜色一致
while text_color == background_color:
text_color = rgbcolor()
draw.text((10 + 30 * index, 3), text=str_or_num, fill=text_color, font=font)
str_data += str_or_num
print(str_data) # 生成的验证码
create_line(draw)
create_point(draw)
img.show()
createCodeImage()
效果如下所示:

标签:idt 数字 pil 技术 data 绘制 index lower info
原文地址:https://www.cnblogs.com/yangchangjie150330/p/11179995.html