标签:分布式 zip 文件配置 文件信息 dev 中心 分布 pid 运行
Apollo源码及简介、Apollo配置中心、Apollo设计原理
1、下载配置中心
2、执行两个sql文件:apolloconfigdb(存放配置文件信息)、apolloportaldb(网站信息)
3、下载好的apollo-build-scripts-master上传到服务器。服务器需要JDK环境
4、解压:unzip apollo-build-scripts-master.zip
5、进入/apollo-build-scripts-master修改demo.sh。修改数据库信息,配置服务地址。
6、./demo.sh start 启动服务


7、默认账号:apollo,密码:admin
8、创建项目

9、日志可以在servicewe文件夹下面的.log里面查看
    <dependency>
        <groupId>com.ctrip.framework.apollo</groupId>
        <artifactId>apollo-client</artifactId>
        <version>1.0.0</version>
    </dependency>
    <dependency>
        <groupId>com.ctrip.framework.apollo</groupId>
        <artifactId>apollo-core</artifactId>
        <version>1.0.0</version>
    </dependency>
这里引入的jar下载下来好像不可以使用。需要我们手动下载Apollo然后编译导入Maven仓库
1、先删除Maven仓库已有的apollo jar
2、apollo-master\scripts

3.点击build.bat,等命令行执行完成之后就可以看到Maven仓库中的jar包了
@SpringBootApplication
@EnableApolloConfig
public class ApolloApplication {
    public static void main(String[] args) {
        SpringApplication.run(ApolloApplication.class,args);
    }
}server:
port: 8001
spring:
application:
name: springboot-abllocal.meta=http://192.168.100.128:8080
dev.meta=http://192.168.100.128:8080
fat.meta=${fat_meta}
uat.meta=${uat_meta}
lpt.meta=${lpt_meta}
pro.meta=${pro_meta}除了可以在配置文件配置之外,还有如下配置方法
1.通过Java System Property 在java的启动脚本中,在VM options中指定 -Dapollo.meta= http://config-service-url
2.通过Spring Boot的配置文件在application.properties或bootstrap.properties文件中指定apollo.meta=http://config-service-url
3.通过在操作系统中的server.properties配置文件Windows中,文件位置为C:\opt\settings\server.properties,在其中配置apollo.meta=http://config-service-url
4.通过在app.properties配置文件中指定apollo.meta=http://config-service-url
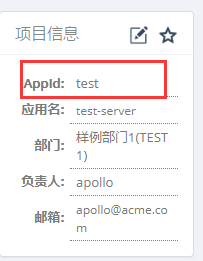
#应用ID
app.id=test
@RestController
public class IndexController {
    //:后面相当于是默认值
    @Value("${test:test}")
    private String test;

    @GetMapping("/apolloDemo")
    public String getYushengjun() {
        return test;
    }

}


标签:分布式 zip 文件配置 文件信息 dev 中心 分布 pid 运行
原文地址:https://www.cnblogs.com/yangk1996/p/11218151.html