标签:集合 res main 修改 gre app ddl material 链接
Flutter动画库的核心类是Animation对象,它生成指导动画的值,Animation对象指导动画的当前状态(例如,是开始、停止还是向前或者向后移动),但它不知道屏幕上显示的内容。动画类型分为两类:
在Flutter中的动画系统基于Animation对象的。widget可以在build函数中读取Animation对象的当前值,并且可以监听动画的状态改变。
Animation 是 Flutter 动画库中的核心类,它会插入指导动画生成的值。 Animation 对象知道一个动画当前的状态(例如开始、 停止、 播放、 回放), 但它不知道屏幕上绘制的是什么, 因为 Animation 对象只是提供一个值表示当前需要展示的动画, UI 如何绘制出图形完全取决于 UI 自身如何在渲染和 build() 方法里处理这个值, 当然也可以不做处理。 Animation<double>是一个比较常用的Animation类, 泛型也可以支持其它的类型,比如: Animation<Color>或 Animation<Size>。 Animation 对象就是会在一段时间内依次生成一个区间之间值的类, 它的输出可以是线性的、曲线的、一个步进函数或者任何其他可以设计的映射 比如:CurvedAnimation。
AnimationController 是一个动画控制器, 它控制动画的播放状态, 如例子里面的: controller.forward()就是控制动画"向前"播放。 所以构建 AnimationController 对象之后动画并没有立刻开始执行。 在默认情况下, AnimationController 会在给定的时间内线性地生成从 0.0 到 1.0 之间的数字。 AnimationController 是一种特殊的 Animation 对象了, 它父类其实是一个 Animation<double>, 当硬件准备好需要一个新的帧的时候它就会产生一个新的值。 由于 AnimationController 派生自 Animation <double>,因此可以在需要 Animation 对象的任何地方使用它。 但是 AnimationController 还有其他的方法来控制动画的播放, 例如前面提到的 .forward()方法启动动画。
AnimationController 生成的数字(默认是从 0.0 到 1.0) 是和屏幕刷新有关, 前面也提到它会在硬件需要一个新帧的时候产生新值。 因为屏幕一般都是 60 帧/秒, 所以它也通常一秒内生成 60 个数字。 每个数字生成之后, 每个 Animation 对象都会调用绑定的监听器对象。
Tween 本身表示的就是一个 Animation 对象的取值范围, 只需要设置开始和结束的边界值(值也支持泛型)。 它唯一的工作就是定义输入范围到输出范围的映射, 输入一般是 AnimationController 给出的值 0.0~1.0。 看下面的例子, 我们就能知道 animation 的 value 是怎么样通过 AnimationController 生成的值映射到 Tween 定义的取值范围里面的。
Tween.animation通过传入 aniamtionController 获得一个_AnimatedEvaluation 类型的 animation 对象(基类为 Animation), 并且将 aniamtionController 和 Tween 对象传入了 _AnimatedEvaluation 对象。animation = new Tween(begin: 0.0, end: 300.0).animate(controller) ... Animation<T> animate(Animation<double> parent) { return _AnimatedEvaluation<T>(parent, this); }
animation.value方法即是调用 _evaluatable.evaluate(parent)方法, 而 _evaluatable 和 parent 分别为 Tween 对象和 AnimationController 对象。T get value => _evaluatable.evaluate(parent); .... class _AnimatedEvaluation<T> extends Animation<T> with AnimationWithParentMixin<double> { _AnimatedEvaluation(this.parent, this._evaluatable); ....
animation.value则就是 AnimationController 线性生成的 0.0~1.0 直接的值。 在 lerp 方法里面我们可以看到这个 0.0~1.0 的值被映射到了 begin 和 end 范围内了。T evaluate(Animation<double> animation) => transform(animation.value); T transform(double t) { if (t == 0.0) return begin; if (t == 1.0) return end; return lerp(t); } T lerp(double t) { assert(begin != null); assert(end != null); return begin + (end - begin) * t; }
那么 Flutter 是怎么样让这个动画在规定时间不断地绘制的呢?
vsync: this, 我们看到了这个类的使用。 从 "vsync" 参数名意为"垂直帧同步"可以看出, 这个是绘制动画帧的"节奏器"。AnimationController({ double value, this.duration, this.debugLabel, this.lowerBound = 0.0, this.upperBound = 1.0, this.animationBehavior = AnimationBehavior.normal, @required TickerProvider vsync, }) : assert(lowerBound != null), assert(upperBound != null), assert(upperBound >= lowerBound), assert(vsync != null), _direction = _AnimationDirection.forward { _ticker = vsync.createTicker(_tick); _internalSetValue(value ?? lowerBound); }
@protected
void scheduleTick({ bool rescheduling = false }) {
    assert(!scheduled);
    assert(shouldScheduleTick);
    _animationId = SchedulerBinding.instance.scheduleFrameCallback(_tick, rescheduling: rescheduling);
}
而 Ticker 会在 start 函数内将_tick 被绑定到 SchedulerBinding 的帧回调方法内。 返回的_animationId 是 SchedulerBinding 给定的下一个动作回调的 ID, 可以根据_animationId 来取消 SchedulerBinding 上绑定的回调。
SchedulerBinding 则是在构造方法中将自己的 _handleBeginFrame 函数和 window 的 onBeginFrame 绑定了回调。 这个回调会在屏幕需要准备显示帧之前回调。
再回到 AnimationController 看它是如何控制 Animation 的值的。
 void _tick(Duration elapsed) {
    _lastElapsedDuration = elapsed;
    final double elapsedInSeconds = elapsed.inMicroseconds.toDouble() / Duration.microsecondsPerSecond;
    assert(elapsedInSeconds >= 0.0);
    _value = _simulation.x(elapsedInSeconds).clamp(lowerBound, upperBound);
    if (_simulation.isDone(elapsedInSeconds)) {
      _status = (_direction == _AnimationDirection.forward) ?
        AnimationStatus.completed :
        AnimationStatus.dismissed;
      stop(canceled: false);
    }
    notifyListeners();
    _checkStatusChanged();
  }
在 AnimationController 的回调当中, 会有一个 Simulation 根据动画运行了的时间(elapsed) 来计算当前的的_value 值, 而且这个值还需要处于 Animation 设置的区间之内。 除了计算_value 值之外, 该方法还会更新 Animation Status 的状态, 判断是否动画已经结束。 最后通过 notifyListeners 和_checkStatusChanged 方法通知给监听器 value 和 AnimationStatus 的变化。 监听 AnimationStatus 值的变化有一个专门的注册方法 addStatusListener。
通过监听 AnimationStatus, 在动画开始或者结束的时候反转动画, 就达到了动画循环播放的效果。
  ...
   animation.addStatusListener((status) {
      if (status == AnimationStatus.completed) {
        controller.reverse();
      } else if (status == AnimationStatus.dismissed) {
        controller.forward();
      }
    });
    controller.forward();

    ...
回顾一下这个动画绘制调用的顺序就是, window 调用 SchedulerBinding 的_handleBeginFrame 方法, SchedulerBinding 调用 Ticker 的_tick 方法, Ticker 调用 AnimationController 的_tick 的方法, AnimationContoller 通知监听器, 而监听器调用 widget 的 setStatus 方法来调用 build 更新, 最后 build 使用了 Animation 对象当前的值来绘制动画帧。
看到这里会有一个疑惑, 为什么监听器是注册在 Animation 上的, 监听通知反而由 AnimationController 发送?
还是看源码吧。
 Animation<T> animate(Animation<double> parent) {
    return _AnimatedEvaluation<T>(parent, this);
  }

class _AnimatedEvaluation<T> extends Animation<T> with AnimationWithParentMixin<double> {
  _AnimatedEvaluation(this.parent, this._evaluatable);
}

mixin AnimationWithParentMixin<T> {
  Animation<T> get parent;
  /// Listeners can be removed with [removeListener].
  void addListener(VoidCallback listener) => parent.addListener(listener);
}
_AnimatedEvaluation<T>泛型对象 使用 mixin "继承" 了 AnimationWithParentMixin<double>, 最后我们看到 Animation 作为 AnimationWithParentMixin 的"子类"实现的 addListener 方法其实是将监听器注册到 parent 对象上了, 也就是 AnimationController。import ‘package:flutter/material.dart‘; import ‘package:flutter/animation.dart‘; void main() { //运行程序 runApp(LogoApp()); } class LogoApp extends StatefulWidget{ @override State<StatefulWidget> createState(){ return new _LogoAppState(); } } //logo Widget ImageLogo = new Image( image: new AssetImage(‘images/logo.jpg‘), ); //with 是dart的关键字,混入的意思,将一个或者多个类的功能添加到自己的类无需继承这些类 //避免多重继承问题 //SingleTickerProviderStateMixin 初始化 animation 和 Controller的时候需要一个TickerProvider类型的参数Vsync //所依混入TickerProvider的子类 class _LogoAppState extends State<LogoApp> with SingleTickerProviderStateMixin{ //动画的状态,如动画开启,停止,前进,后退等 Animation<double> animation; //管理者animation对象 AnimationController controller; @override void initState() { // TODO: implement initState super.initState(); //创建AnimationController //需要传递一个vsync参数,存在vsync时会防止屏幕外动画( //译者语:动画的UI不在当前屏幕时)消耗不必要的资源。 通过将SingleTickerProviderStateMixin添加到类定义中,可以将stateful对象作为vsync的值。 controller = new AnimationController( //时间是3000毫秒 duration: const Duration( milliseconds: 3000 ), //vsync 在此处忽略不必要的情况 vsync: this, ); //补间动画 animation = new Tween( //开始的值是0 begin: 0.0, //结束的值是200 end : 200.0, ).animate(controller)//添加监听器 ..addListener((){ //动画值在发生变化时就会调用 setState(() { }); }); //只显示动画一次 controller.forward(); } @override Widget build(BuildContext context){ return new MaterialApp( theme: ThemeData( primarySwatch: Colors.red ), home: new Scaffold( appBar: new AppBar( title: Text("动画demo"), ), body:new Center( child: new Container( //宽和高都是根据animation的值来变化 height: animation.value, width: animation.value, child: ImageLogo, ), ), ), ); } @override void dispose() { // TODO: implement dispose super.dispose(); //资源释放 controller.dispose(); } }
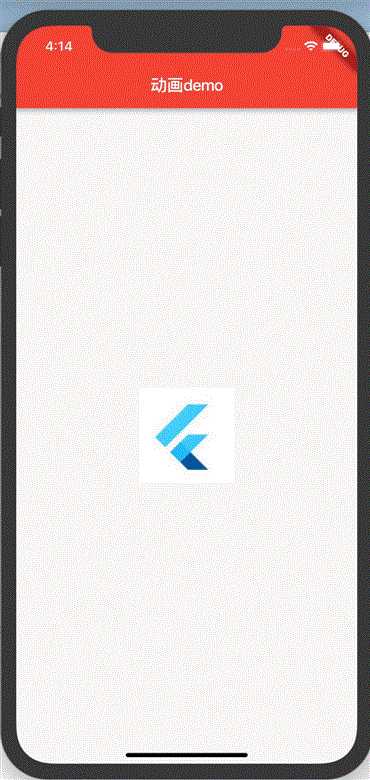
上面实现了图像在3000毫秒间从宽高是0变化到宽高是200,主要分为六部
SingleTickerProviderStateMixin,为了传入vsync对象AnimationController对象Animation对象,并关联AnimationController对象AnimationController的forward开启动画widget根据Animation的value值来设置宽高widget的dispose()方法中调用释放资源 注意:上面创建
Tween用了Dart语法的级联符号
animation = tween.animate(controller)
          ..addListener(() {
            setState(() {
              // the animation object’s value is the changed state
            });
          });
等价于下面代码:
animation = tween.animate(controller);
animation.addListener(() {
            setState(() {
              // the animation object’s value is the changed state
            });
          });
使用AnimatedWidget对动画进行简化,使用AnimatedWidget创建一个可重用动画的widget,而不是用addListener()和setState()来给widget添加动画。AnimatedWidget类允许从setState()调用中的动画代码中分离出widget代码。AnimatedWidget不需要维护一个State对象了来保存动画。
import ‘package:flutter/material.dart‘;
import ‘package:flutter/animation.dart‘;

void main() {
  //运行程序
  runApp(LogoApp());
}

class LogoApp extends StatefulWidget{
  @override
  State<StatefulWidget> createState(){
    return new _LogoAppState();
  }
}

//logo
Widget ImageLogo = new Image(
    image: new AssetImage(‘images/logo.jpg‘),
);

//抽象出来
class AnimatedLogo extends AnimatedWidget{
  AnimatedLogo({
  Key key,Animation<double> animation
 }):super(key:key,listenable:animation);

  @override
  Widget build(BuildContext context){
    final Animation<double> animation = listenable;
    return new MaterialApp(
      theme: ThemeData(
          primarySwatch: Colors.red
      ),
      home: new Scaffold(
        appBar: new AppBar(
          title: Text("动画demo"),
        ),
        body:new Center(
          child: new Container(
            //宽和高都是根据animation的值来变化
            height: animation.value,
            width: animation.value,
            child: ImageLogo,
          ),
        ),
      ),
    );
  }
}

//with 是dart的关键字,混入的意思,将一个或者多个类的功能添加到自己的类无需继承这些类
//避免多重继承问题
//SingleTickerProviderStateMixin 初始化 animation 和 Controller的时候需要一个TickerProvider类型的参数Vsync
//所依混入TickerProvider的子类
class _LogoAppState extends State<LogoApp> with SingleTickerProviderStateMixin{
  //动画的状态,如动画开启,停止,前进,后退等
  Animation<double> animation;
  //管理者animation对象
  AnimationController controller;
  @override
  void initState() {
    // TODO: implement initState
    super.initState();
    //创建AnimationController
    //需要传递一个vsync参数,存在vsync时会防止屏幕外动画(
    //译者语:动画的UI不在当前屏幕时)消耗不必要的资源。 通过将SingleTickerProviderStateMixin添加到类定义中,可以将stateful对象作为vsync的值。
    controller = new AnimationController(
        //时间是3000毫秒
        duration: const Duration(
            milliseconds: 3000
        ),
        //vsync 在此处忽略不必要的情况
        vsync: this,
    );
    //补间动画
    animation = new Tween(
      //开始的值是0
      begin: 0.0,
      //结束的值是200
      end : 200.0,
    ).animate(controller);//添加监听器
    //只显示动画一次
    controller.forward();
  }

  @override
  Widget build(BuildContext context){
      return AnimatedLogo(animation: animation);
  }

  @override
  void dispose() {
    // TODO: implement dispose
    super.dispose();
    //资源释放
    controller.dispose();
  }
}
可以发现AnimatedWidget中会自动调用addListener和setState(),_LogoAppState将Animation对象传递给基类并用animation.value设置Image宽高。
在平时开发,我们知道,很多时候都需要监听动画的状态,好像完成、前进、倒退等。在Flutter中可以通过addStatusListener()来得到这个通知,以下代码添加了动画状态
 //补间动画
    animation = new Tween(
      //开始的值是0
      begin: 0.0,
      //结束的值是200
      end : 200.0,
    ).animate(controller)
    //添加动画状态
    ..addStatusListener((state){
      return print(‘$state‘);
   });//添加监听器
运行代码会输出下面结果:
I/flutter (16745): AnimationStatus.forward //动画开始
Syncing files to device KNT AL10...
I/zygote64(16745): Do partial code cache collection, code=30KB, data=25KB
I/zygote64(16745): After code cache collection, code=30KB, data=25KB
I/zygote64(16745): Increasing code cache capacity to 128KB
I/flutter (16745): AnimationStatus.completed//动画完成
下面那就运用addStatusListener()在开始或结束反转动画。那就产生循环效果:
//补间动画
    animation = new Tween(
      //开始的值是0
      begin: 0.0,
      //结束的值是200
      end : 200.0,
    ).animate(controller)
    //添加动画状态
    ..addStatusListener((state){
      //如果动画完成了
      if(state == AnimationStatus.completed){
        //开始反向这动画
        controller.reverse();
      } else if(state == AnimationStatus.dismissed){
        //开始向前运行着动画
        controller.forward();
      }
    });//添加监听器
效果如下:

上面的代码存在一个问题:更改动画需要更改显示Image的widget,更好的解决方案是将职责分离:
Animation对象AnimatedBuilder类完成此分离。AnimatedBuilder是渲染树中的一个独立的类,与AnimatedWidget类似,AnimatedBuilder自动监听来自Animation对象的通知,并根据需要将该控件树标记为脏(dirty),因此不需要手动调用addListener()//AnimatedBuilder class GrowTransition extends StatelessWidget{ final Widget child; final Animation<double> animation; GrowTransition({this.child,this.animation}); @override Widget build(BuildContext context){ return new MaterialApp( theme: ThemeData( primarySwatch: Colors.red ), home: new Scaffold( appBar: new AppBar( title: Text("动画demo"), ), body:new Center( child: new AnimatedBuilder( animation: animation, builder: (BuildContext context,Widget child){ return new Container( //宽和高都是根据animation的值来变化 height: animation.value, width: animation.value, child: child, ); }, child: child, ), ), ), ); } class _LogoAppState extends State<LogoApp> with SingleTickerProviderStateMixin{ //动画的状态,如动画开启,停止,前进,后退等 Animation animation; //管理者animation对象 AnimationController controller; @override void initState() { // TODO: implement initState super.initState(); //创建AnimationController //需要传递一个vsync参数,存在vsync时会防止屏幕外动画( //译者语:动画的UI不在当前屏幕时)消耗不必要的资源。 通过将SingleTickerProviderStateMixin添加到类定义中,可以将stateful对象作为vsync的值。 controller = new AnimationController( //时间是3000毫秒 duration: const Duration( milliseconds: 3000 ), //vsync 在此处忽略不必要的情况 vsync: this, ); final CurvedAnimation curve = new CurvedAnimation(parent: controller, curve: Curves.easeIn); //补间动画 animation = new Tween( //开始的值是0 begin: 0.0, //结束的值是200 end : 200.0, ).animate(curve) // //添加动画状态 ..addStatusListener((state){ //如果动画完成了 if(state == AnimationStatus.completed){ //开始反向这动画 controller.reverse(); } else if(state == AnimationStatus.dismissed){ //开始向前运行着动画 controller.forward(); } });//添加监听器 //只显示动画一次 controller.forward(); } @override Widget build(BuildContext context){ //return AnimatedLogo(animation: animation); return new GrowTransition(child:ImageLogo,animation: animation); } @override void dispose() { // TODO: implement dispose super.dispose(); //资源释放 controller.dispose(); } }
上面代码有一个迷惑的问题是,child看起来好像是指定了两次,但实际发生的事情是,将外部引用的child传递给AnimatedBuilder,AnimatedBuilder将其传递给匿名构造器,然后将该对象用作其子对象。最终的结果是AnimatedBuilder插入到渲染树中的两个Widget之间。最后,在initState()方法创建一个AnimationController和一个Tween,然后通过animate()绑定,在build方法中,返回带有一个Image为子对象的GrowTransition对象和一个用于驱动过渡的动画对象。如果只是想把可复用的动画定义成一个widget,那就用AnimatedWidget。
很多时候,一个动画需要两种或者两种以上的动画,在Flutter也是可以实现的,每一个Tween管理动画的一种效果,如:
 final AnimationController controller =
    new AnimationController(duration: const Duration(milliseconds: 2000), vsync: this);
    final Animation<double> sizeAnimation =
    new Tween(begin: 0.0, end: 300.0).animate(controller);
    final Animation<double> opacityAnimation =
    new Tween(begin: 0.1, end: 1.0).animate(controller);
可以通过sizeAnimation.Value来获取大小,通过opacityAnimation.value来获取不透明度,但AnimatedWidget的构造函数只能接受一个动画对象,解决这个问题,需要动画的widget创建了自己的Tween对象,上代码:
//AnimatedBuilder
class GrowTransition extends StatelessWidget {
  final Widget child;
  final Animation<double> animation;

  GrowTransition({this.child, this.animation});
  static final _opacityTween = new Tween<double>(begin: 0.1, end: 1.0);
  static final _sizeTween = new Tween<double>(begin: 0.0, end: 200.0);

  @override
  Widget build(BuildContext context) {
    return new MaterialApp(
      theme: ThemeData(primarySwatch: Colors.red),
      home: new Scaffold(
        appBar: new AppBar(
          title: Text("动画demo"),
        ),
        body: new Center(
          child: new AnimatedBuilder(
            animation: animation,
            builder: (BuildContext context, Widget child) {
              return new Opacity(
                  opacity: _opacityTween.evaluate(animation),
                child: new Container(
                //宽和高都是根据animation的值来变化
                height: _sizeTween.evaluate(animation),
                width: _sizeTween.evaluate(animation),
                child: child,
              ),
              );
            },
            child: child,
          ),
        ),
      ),
    );
  }
}

class _LogoAppState extends State<LogoApp> with SingleTickerProviderStateMixin {
  //动画的状态,如动画开启,停止,前进,后退等
  Animation<double> animation;

  //管理者animation对象
  AnimationController controller;

  @override
  void initState() {
    // TODO: implement initState
    super.initState();
    //创建AnimationController
    //需要传递一个vsync参数,存在vsync时会防止屏幕外动画(
    //译者语:动画的UI不在当前屏幕时)消耗不必要的资源。 通过将SingleTickerProviderStateMixin添加到类定义中,可以将stateful对象作为vsync的值。
    controller = new AnimationController(
      //时间是3000毫秒
      duration: const Duration(milliseconds: 3000),
      //vsync 在此处忽略不必要的情况
      vsync: this,
    );
    //新增
    animation = new CurvedAnimation(parent: controller, curve: Curves.easeIn)
      ..addStatusListener((state) {
        //如果动画完成了
        if (state == AnimationStatus.completed) {
          //开始反向这动画
          controller.reverse();
        } else if (state == AnimationStatus.dismissed) {
          //开始向前运行着动画
          controller.forward();
        }
      }); //添加监听器
    //只显示动画一次
    controller.forward();
  }

  @override
  Widget build(BuildContext context) {
     return new GrowTransition(child:ImageLogo,animation: animation);
  }

  @override
  void dispose() {
    // TODO: implement dispose
    super.dispose();
    //资源释放
    controller.dispose();
  }
}
可以看到在GrowTransition定义两个Tween动画,并且加了不透明Opacitywidget,最后在initState方法中修改增加一句animation = new CurvedAnimation(parent: controller, curve: Curves.easeIn),最后的动画效果:

注意:可以通过改变Curves.easeIn值来实现非线性运动效果。
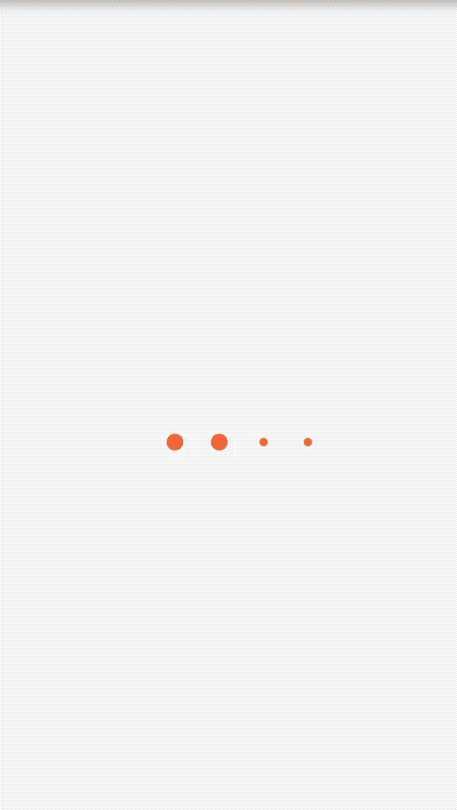
2.自定义动画
示例2:

class _bollView extends CustomPainter{
  //颜色
  Color color;
  //数量
  int count;
  //集合放动画
  List<Animation<double>> ListAnimators;
  _bollView({this.color,this.count,this.ListAnimators});
  @override
  void paint(Canvas canvas,Size size){
     //绘制流程
     double boll_radius = (size.width - 15) / 8;
     Paint paint = new Paint();
     paint.color = color;
     paint.style = PaintingStyle.fill;
     //因为这个wiaget是80 球和球之间相隔5
     for(int i = 0; i < count;i++){
       double value = ListAnimators[i].value;
       //确定圆心 半径 画笔
       //第一个球 r
       //第二个球 5 + 3r
       //第三个球 15 + 5r
       //第四个球 30 + 7r
       //半径也是随着动画值改变
       canvas.drawCircle(new Offset((i+1) * boll_radius + i * boll_radius  + i * 5,size.height / 2), boll_radius * (value > 1 ? (2 - value) : value), paint);
     }
  }

  //刷新是否重绘
  @override
  bool shouldRepaint(CustomPainter oldDelegate){
    return oldDelegate != this;
  }
}
class MyBalls extends StatefulWidget{
  Size size;
  Color color;
  int count;
  int seconds;

  //默认四个小球 红色
  MyBalls({this.size,this.seconds : 400,this.color :Colors.redAccent,this.count : 4});
  @override
  State<StatefulWidget> createState(){
    return MyBallsState();
  }
}
//继承TickerProviderStateMixin,提供Ticker对象
class MyBallsState extends State<MyBalls> with TickerProviderStateMixin {
  //动画集合
  List<Animation<double>>animatios = [];
  //控制器集合
  List<AnimationController> animationControllers = [];
  //颜色
  Animation<Color> colors;

  @override
  void initState(){
    super.initState();
    for(int i = 0;i < widget.count;i++){
         //创建动画控制器
         AnimationController animationController = new AnimationController(
             vsync: this,
             duration: Duration(
               milliseconds: widget.count * widget.seconds
             ));
         //添加到控制器集合
         animationControllers.add(animationController);
         //颜色随机
         colors = ColorTween(begin: Colors.red,end:Colors.green).animate(animationController);
         //创建动画 每个动画都要绑定控制器
         Animation<double> animation = new Tween(begin: 0.1,end:1.9).animate(animationController);
         animatios.add(animation);
    }
    animatios[0].addListener((){
      //刷新
      setState(() {
      });
    });

    //延迟执行
    var delay = (widget.seconds ~/ (2 * animatios.length - 2));
    for(int i = 0;i < animatios.length;i++){
     Future.delayed(Duration(milliseconds: delay * i),(){
        animationControllers[i]
            ..repeat().orCancel;
      });
    }
  }
  @override
  Widget build(BuildContext context){
    return new CustomPaint(
      //自定义画笔
      painter: _bollView(color: colors.value,count: widget.count,ListAnimators : animatios),
      size: widget.size,
    );
  }
  //释放资源
  @override
  void dispose(){
    super.dispose();
    animatios[0].removeListener((){
      setState(() {
      });
    });
    animationControllers[0].dispose();
  }
}
class Ball extends StatelessWidget{
  @override
  Widget build(BuildContext context){
    return MaterialApp(
      home: Scaffold(
        appBar: AppBar(
          title: Text(‘Animation demo‘),
        ),
        body: Center(
            child: MyBalls(size: new Size(80.0,20.0)),
        ),
      ),
    );
  }
}
本篇文章从简单的例子出发, 并且结合了源码, 分析了 Flutter 动画实现的原理。Flutter 以硬件设备刷新为驱动, 驱使 widget 依据给定的值生成新动画帧, 从而实现了动画效果。
链接:
1. https://juejin.im/post/5cdbbc01f265da037b6134d9
2.https://juejin.im/post/5c617e34f265da2d90581613
标签:集合 res main 修改 gre app ddl material 链接
原文地址:https://www.cnblogs.com/lxlx1798/p/11221196.html