标签:常用 固定 mod 路径名 sys 长度 out path 传递
一、loggin模
1.日志级别
CRITICAL = 50 #FATAL = CRITICAL
ERROR = 40
WARNING = 30 #WARN = WARNING
INFO = 20
DEBUG = 10
NOTSET = 0 #不设置
2. 默认级别为warning,默认打印到终端
import logging

logging.debug(‘调试debug‘)
logging.info(‘消息info‘)
logging.warning(‘警告warn‘)
logging.error(‘错误error‘)
logging.critical(‘严重critical‘)

‘‘‘
WARNING:root:警告warn
ERROR:root:错误error
CRITICAL:root:严重critical
‘‘‘
3. 为logging模块指定全局配置,针对所有logger有效,控制打印到文件中

可在logging.basicConfig()函数中通过具体参数来更改logging模块默认行为,可用参数有
filename:用指定的文件名创建FiledHandler(后边会具体讲解handler的概念),这样日志会被存储在指定的文件中。
filemode:文件打开方式,在指定了filename时使用这个参数,默认值为“a”还可指定为“w”。
format:指定handler使用的日志显示格式。
datefmt:指定日期时间格式。
level:设置rootlogger(后边会讲解具体概念)的日志级别
stream:用指定的stream创建StreamHandler。可以指定输出到sys.stderr,sys.stdout或者文件,默认为sys.stderr。若同时列出了filename和stream两个参数,则stream参数会被忽略。


#格式
%(name)s:Logger的名字,并非用户名,详细查看

%(levelno)s:数字形式的日志级别

%(levelname)s:文本形式的日志级别

%(pathname)s:调用日志输出函数的模块的完整路径名,可能没有

%(filename)s:调用日志输出函数的模块的文件名

%(module)s:调用日志输出函数的模块名

%(funcName)s:调用日志输出函数的函数名

%(lineno)d:调用日志输出函数的语句所在的代码行

%(created)f:当前时间,用UNIX标准的表示时间的浮 点数表示

%(relativeCreated)d:输出日志信息时的,自Logger创建以 来的毫秒数

%(asctime)s:字符串形式的当前时间。默认格式是 “2003-07-08 16:49:45,896”。逗号后面的是毫秒

%(thread)d:线程ID。可能没有

%(threadName)s:线程名。可能没有

%(process)d:进程ID。可能没有

%(message)s:用户输出的消息


logging.basicConfig()
#======介绍
可在logging.basicConfig()函数中可通过具体参数来更改logging模块默认行为,可用参数有
filename:用指定的文件名创建FiledHandler(后边会具体讲解handler的概念),这样日志会被存储在指定的文件中。
filemode:文件打开方式,在指定了filename时使用这个参数,默认值为“a”还可指定为“w”。
format:指定handler使用的日志显示格式。
datefmt:指定日期时间格式。
level:设置rootlogger(后边会讲解具体概念)的日志级别
stream:用指定的stream创建StreamHandler。可以指定输出到sys.stderr,sys.stdout或者文件,默认为sys.stderr。若同时列出了filename和stream两个参数,则stream参数会被忽略。


format参数中可能用到的格式化串:
%(name)s Logger的名字
%(levelno)s 数字形式的日志级别
%(levelname)s 文本形式的日志级别
%(pathname)s 调用日志输出函数的模块的完整路径名,可能没有
%(filename)s 调用日志输出函数的模块的文件名
%(module)s 调用日志输出函数的模块名
%(funcName)s 调用日志输出函数的函数名
%(lineno)d 调用日志输出函数的语句所在的代码行
%(created)f 当前时间,用UNIX标准的表示时间的浮 点数表示
%(relativeCreated)d 输出日志信息时的,自Logger创建以 来的毫秒数
%(asctime)s 字符串形式的当前时间。默认格式是 “2003-07-08 16:49:45,896”。逗号后面的是毫秒
%(thread)d 线程ID。可能没有
%(threadName)s 线程名。可能没有
%(process)d 进程ID。可能没有
%(message)s用户输出的消息


#========使用
import logging
logging.basicConfig(filename=‘access.log‘,
                    format=‘%(asctime)s - %(name)s - %(levelname)s -%(module)s:  %(message)s‘,
                    datefmt=‘%Y-%m-%d %H:%M:%S %p‘,
                    level=10)

logging.debug(‘调试debug‘)
logging.info(‘消息info‘)
logging.warning(‘警告warn‘)
logging.error(‘错误error‘)
logging.critical(‘严重critical‘)


#========结果
access.log内容:
2017-07-28 20:32:17 PM - root - DEBUG -test:  调试debug
2017-07-28 20:32:17 PM - root - INFO -test:  消息info
2017-07-28 20:32:17 PM - root - WARNING -test:  警告warn
2017-07-28 20:32:17 PM - root - ERROR -test:  错误error
2017-07-28 20:32:17 PM - root - CRITICAL -test:  严重critical

part2: 可以为logging模块指定模块级的配置,即所有logger的配置
4 logging模块的Formatter,Handler,Logger,Filter对象
原理图:https://pan.baidu.com/s/1skWyTT7
#logger:产生日志的对象

#Filter:过滤日志的对象

#Handler:接收日志然后控制打印到不同的地方,FileHandler用来打印到文件中,StreamHandler用来打印到终端

#Formatter对象:可以定制不同的日志格式对象,然后绑定给不同的Handler对象使用,以此来控制不同的Handler的日志格式
‘‘‘
critical=50
error =40
warning =30
info = 20
debug =10
‘‘‘


import logging

#1、logger对象:负责产生日志,然后交给Filter过滤,然后交给不同的Handler输出
logger=logging.getLogger(__file__)

#2、Filter对象:不常用,略

#3、Handler对象:接收logger传来的日志,然后控制输出
h1=logging.FileHandler(‘t1.log‘) #打印到文件
h2=logging.FileHandler(‘t2.log‘) #打印到文件
h3=logging.StreamHandler() #打印到终端

#4、Formatter对象:日志格式
formmater1=logging.Formatter(‘%(asctime)s - %(name)s - %(levelname)s -%(module)s:  %(message)s‘,
                    datefmt=‘%Y-%m-%d %H:%M:%S %p‘,)

formmater2=logging.Formatter(‘%(asctime)s :  %(message)s‘,
                    datefmt=‘%Y-%m-%d %H:%M:%S %p‘,)

formmater3=logging.Formatter(‘%(name)s %(message)s‘,)


#5、为Handler对象绑定格式
h1.setFormatter(formmater1)
h2.setFormatter(formmater2)
h3.setFormatter(formmater3)

#6、将Handler添加给logger并设置日志级别
logger.addHandler(h1)
logger.addHandler(h2)
logger.addHandler(h3)
logger.setLevel(10)

#7、测试
logger.debug(‘debug‘)
logger.info(‘info‘)
logger.warning(‘warning‘)
logger.error(‘error‘)
logger.critical(‘critical‘)
5 Logger与Handler的级别
logger是第一级过滤,然后才能到handler,我们可以给logger和handler同时设置level,但是需要注意的是
Logger is also the first to filter the message based on a level — if you set the logger to INFO, and all handlers to DEBUG, you still won‘t receive DEBUG messages on handlers — they‘ll be rejected by the logger itself. If you set logger to DEBUG, but all handlers to INFO, you won‘t receive any DEBUG messages either — because while the logger says "ok, process this", the handlers reject it (DEBUG < INFO).


#验证
import logging


form=logging.Formatter(‘%(asctime)s - %(name)s - %(levelname)s -%(module)s:  %(message)s‘,
                    datefmt=‘%Y-%m-%d %H:%M:%S %p‘,)

ch=logging.StreamHandler()

ch.setFormatter(form)
# ch.setLevel(10)
ch.setLevel(20)

l1=logging.getLogger(‘root‘)
# l1.setLevel(20)
l1.setLevel(10)
l1.addHandler(ch)

l1.debug(‘l1 debug‘)
6 Logger的继承(了解)
import logging

formatter=logging.Formatter(‘%(asctime)s - %(name)s - %(levelname)s -%(module)s:  %(message)s‘,
                    datefmt=‘%Y-%m-%d %H:%M:%S %p‘,)

ch=logging.StreamHandler()
ch.setFormatter(formatter)


logger1=logging.getLogger(‘root‘)
logger2=logging.getLogger(‘root.child1‘)
logger3=logging.getLogger(‘root.child1.child2‘)


logger1.addHandler(ch)
logger2.addHandler(ch)
logger3.addHandler(ch)
logger1.setLevel(10)
logger2.setLevel(10)
logger3.setLevel(10)

logger1.debug(‘log1 debug‘)
logger2.debug(‘log2 debug‘)
logger3.debug(‘log3 debug‘)
‘‘‘
2017-07-28 22:22:05 PM - root - DEBUG -test:  log1 debug
2017-07-28 22:22:05 PM - root.child1 - DEBUG -test:  log2 debug
2017-07-28 22:22:05 PM - root.child1 - DEBUG -test:  log2 debug
2017-07-28 22:22:05 PM - root.child1.child2 - DEBUG -test:  log3 debug
2017-07-28 22:22:05 PM - root.child1.child2 - DEBUG -test:  log3 debug
2017-07-28 22:22:05 PM - root.child1.child2 - DEBUG -test:  log3 debug
‘‘‘
7 应用
"""
logging配置
"""

import os
import logging.config

# 定义三种日志输出格式 开始

standard_format = ‘[%(asctime)s][%(threadName)s:%(thread)d][task_id:%(name)s][%(filename)s:%(lineno)d]‘                   ‘[%(levelname)s][%(message)s]‘ #其中name为getlogger指定的名字

simple_format = ‘[%(levelname)s][%(asctime)s][%(filename)s:%(lineno)d]%(message)s‘

id_simple_format = ‘[%(levelname)s][%(asctime)s] %(message)s‘

# 定义日志输出格式 结束

logfile_dir = os.path.dirname(os.path.abspath(__file__))  # log文件的目录

logfile_name = ‘all2.log‘  # log文件名

# 如果不存在定义的日志目录就创建一个
if not os.path.isdir(logfile_dir):
    os.mkdir(logfile_dir)

# log文件的全路径
logfile_path = os.path.join(logfile_dir, logfile_name)

# log配置字典
LOGGING_DIC = {
    ‘version‘: 1,
    ‘disable_existing_loggers‘: False,
    ‘formatters‘: {
        ‘standard‘: {
            ‘format‘: standard_format
        },
        ‘simple‘: {
            ‘format‘: simple_format
        },
    },
    ‘filters‘: {},
    ‘handlers‘: {
        #打印到终端的日志
        ‘console‘: {
            ‘level‘: ‘DEBUG‘,
            ‘class‘: ‘logging.StreamHandler‘,  # 打印到屏幕
            ‘formatter‘: ‘simple‘
        },
        #打印到文件的日志,收集info及以上的日志
        ‘default‘: {
            ‘level‘: ‘DEBUG‘,
            ‘class‘: ‘logging.handlers.RotatingFileHandler‘,  # 保存到文件
            ‘formatter‘: ‘standard‘,
            ‘filename‘: logfile_path,  # 日志文件
            ‘maxBytes‘: 1024*1024*5,  # 日志大小 5M
            ‘backupCount‘: 5,
            ‘encoding‘: ‘utf-8‘,  # 日志文件的编码,再也不用担心中文log乱码了
        },
    },
    ‘loggers‘: {
        #logging.getLogger(__name__)拿到的logger配置
        ‘‘: {
            ‘handlers‘: [‘default‘, ‘console‘],  # 这里把上面定义的两个handler都加上,即log数据既写入文件又打印到屏幕
            ‘level‘: ‘DEBUG‘,
            ‘propagate‘: True,  # 向上(更高level的logger)传递
        },
    },
}


def load_my_logging_cfg():
    logging.config.dictConfig(LOGGING_DIC)  # 导入上面定义的logging配置
    logger = logging.getLogger(__name__)  # 生成一个log实例
    logger.info(‘It works!‘)  # 记录该文件的运行状态

if __name__ == ‘__main__‘:
    load_my_logging_cfg()
"""
MyLogging Test
"""

import time
import logging
import my_logging  # 导入自定义的logging配置

logger = logging.getLogger(__name__)  # 生成logger实例


def demo():
    logger.debug("start range... time:{}".format(time.time()))
    logger.info("中文测试开始。。。")
    for i in range(10):
        logger.debug("i:{}".format(i))
        time.sleep(0.2)
    else:
        logger.debug("over range... time:{}".format(time.time()))
    logger.info("中文测试结束。。。")

if __name__ == "__main__":
    my_logging.load_my_logging_cfg()  # 在你程序文件的入口加载自定义logging配置
    demo()
注意注意注意:


#1、有了上述方式我们的好处是:所有与logging模块有关的配置都写到字典中就可以了,更加清晰,方便管理


#2、我们需要解决的问题是:
    1、从字典加载配置:logging.config.dictConfig(settings.LOGGING_DIC)

    2、拿到logger对象来产生日志
    logger对象都是配置到字典的loggers 键对应的子字典中的
    按照我们对logging模块的理解,要想获取某个东西都是通过名字,也就是key来获取的
    于是我们要获取不同的logger对象就是
    logger=logging.getLogger(‘loggers子字典的key名‘)


    但问题是:如果我们想要不同logger名的logger对象都共用一段配置,那么肯定不能在loggers子字典中定义n个key
 ‘loggers‘: {
        ‘l1‘: {
            ‘handlers‘: [‘default‘, ‘console‘],  #
            ‘level‘: ‘DEBUG‘,
            ‘propagate‘: True,  # 向上(更高level的logger)传递
        },
        ‘l2: {
            ‘handlers‘: [‘default‘, ‘console‘ ],
            ‘level‘: ‘DEBUG‘,
            ‘propagate‘: False,  # 向上(更高level的logger)传递
        },
        ‘l3‘: {
            ‘handlers‘: [‘default‘, ‘console‘],  #
            ‘level‘: ‘DEBUG‘,
            ‘propagate‘: True,  # 向上(更高level的logger)传递
        },

}


#我们的解决方式是,定义一个空的key
    ‘loggers‘: {
        ‘‘: {
            ‘handlers‘: [‘default‘, ‘console‘],
            ‘level‘: ‘DEBUG‘,
            ‘propagate‘: True,
        },

}

这样我们再取logger对象时
logging.getLogger(__name__),不同的文件__name__不同,这保证了打印日志时标识信息不同,但是拿着该名字去loggers里找key名时却发现找不到,于是默认使用key=‘‘的配置
另外一个django的配置,瞄一眼就可以,跟上面的一样
#logging_config.py
LOGGING = {
    ‘version‘: 1,
    ‘disable_existing_loggers‘: False,
    ‘formatters‘: {
        ‘standard‘: {
            ‘format‘: ‘[%(asctime)s][%(threadName)s:%(thread)d][task_id:%(name)s][%(filename)s:%(lineno)d]‘
                      ‘[%(levelname)s][%(message)s]‘
        },
        ‘simple‘: {
            ‘format‘: ‘[%(levelname)s][%(asctime)s][%(filename)s:%(lineno)d]%(message)s‘
        },
        ‘collect‘: {
            ‘format‘: ‘%(message)s‘
        }
    },
    ‘filters‘: {
        ‘require_debug_true‘: {
            ‘()‘: ‘django.utils.log.RequireDebugTrue‘,
        },
    },
    ‘handlers‘: {
        #打印到终端的日志
        ‘console‘: {
            ‘level‘: ‘DEBUG‘,
            ‘filters‘: [‘require_debug_true‘],
            ‘class‘: ‘logging.StreamHandler‘,
            ‘formatter‘: ‘simple‘
        },
        #打印到文件的日志,收集info及以上的日志
        ‘default‘: {
            ‘level‘: ‘INFO‘,
            ‘class‘: ‘logging.handlers.RotatingFileHandler‘,  # 保存到文件,自动切
            ‘filename‘: os.path.join(BASE_LOG_DIR, "xxx_info.log"),  # 日志文件
            ‘maxBytes‘: 1024 * 1024 * 5,  # 日志大小 5M
            ‘backupCount‘: 3,
            ‘formatter‘: ‘standard‘,
            ‘encoding‘: ‘utf-8‘,
        },
        #打印到文件的日志:收集错误及以上的日志
        ‘error‘: {
            ‘level‘: ‘ERROR‘,
            ‘class‘: ‘logging.handlers.RotatingFileHandler‘,  # 保存到文件,自动切
            ‘filename‘: os.path.join(BASE_LOG_DIR, "xxx_err.log"),  # 日志文件
            ‘maxBytes‘: 1024 * 1024 * 5,  # 日志大小 5M
            ‘backupCount‘: 5,
            ‘formatter‘: ‘standard‘,
            ‘encoding‘: ‘utf-8‘,
        },
        #打印到文件的日志
        ‘collect‘: {
            ‘level‘: ‘INFO‘,
            ‘class‘: ‘logging.handlers.RotatingFileHandler‘,  # 保存到文件,自动切
            ‘filename‘: os.path.join(BASE_LOG_DIR, "xxx_collect.log"),
            ‘maxBytes‘: 1024 * 1024 * 5,  # 日志大小 5M
            ‘backupCount‘: 5,
            ‘formatter‘: ‘collect‘,
            ‘encoding‘: "utf-8"
        }
    },
    ‘loggers‘: {
        #logging.getLogger(__name__)拿到的logger配置
        ‘‘: {
            ‘handlers‘: [‘default‘, ‘console‘, ‘error‘],
            ‘level‘: ‘DEBUG‘,
            ‘propagate‘: True,
        },
        #logging.getLogger(‘collect‘)拿到的logger配置
        ‘collect‘: {
            ‘handlers‘: [‘console‘, ‘collect‘],
            ‘level‘: ‘INFO‘,
        }
    },
}


# -----------
# 用法:拿到俩个logger

logger = logging.getLogger(__name__) #线上正常的日志
collect_logger = logging.getLogger("collect") #领导说,需要为领导们单独定制领导们看的日志
二、hashlib模块
# 1、什么叫hash:hash是一种算法(3.x里代替了md5模块和sha模块,主要提供 SHA1, SHA224, SHA256, SHA384, SHA512 ,MD5 算法),该算法接受传入的内容,经过运算得到一串hash值
# 2、hash值的特点是:
#2.1 只要传入的内容一样,得到的hash值必然一样=====>要用明文传输密码文件完整性校验
#2.2 不能由hash值返解成内容=======》把密码做成hash值,不应该在网络传输明文密码
#2.3 只要使用的hash算法不变,无论校验的内容有多大,得到的hash值长度是固定的
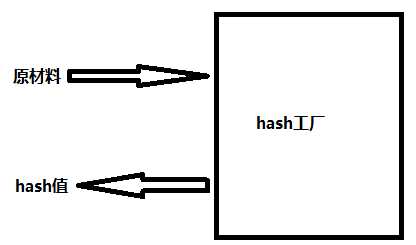
hash算法就像一座工厂,工厂接收你送来的原材料(可以用m.update()为工厂运送原材料),经过加工返回的产品就是hash值
1 import hashlib
 2
 3 m=hashlib.md5()# m=hashlib.sha256()
 4
 5 m.update(‘hello‘.encode(‘utf8‘))
 6 print(m.hexdigest())  #5d41402abc4b2a76b9719d911017c592
 7
 8 m.update(‘alvin‘.encode(‘utf8‘))
 9
10 print(m.hexdigest())  #92a7e713c30abbb0319fa07da2a5c4af
11
12 m2=hashlib.md5()
13 m2.update(‘helloalvin‘.encode(‘utf8‘))
14 print(m2.hexdigest()) #92a7e713c30abbb0319fa07da2a5c4af
15
16 ‘‘‘
17 注意:把一段很长的数据update多次,与一次update这段长数据,得到的结果一样
18 但是update多次为校验大文件提供了可能。
以上加密算法虽然依然非常厉害,但时候存在缺陷,即:通过撞库可以反解。所以,有必要对加密算法中添加自定义key再来做加密。
1 import hashlib
2
3 # ######## 256 ########
4
5 hash = hashlib.sha256(‘898oaFs09f‘.encode(‘utf8‘))
6 hash.update(‘alvin‘.encode(‘utf8‘))
7 print (hash.hexdigest())#e79e68f070cdedcfe63eaf1a2e92c83b4cfb1b5c6bc452d214c1b7e77cdfd1c7
import hashlib
passwds=[
    ‘alex3714‘,
    ‘alex1313‘,
    ‘alex94139413‘,
    ‘alex123456‘,
    ‘123456alex‘,
    ‘a123lex‘,
    ]
def make_passwd_dic(passwds):
    dic={}
    for passwd in passwds:
        m=hashlib.md5()
        m.update(passwd.encode(‘utf-8‘))
        dic[passwd]=m.hexdigest()
    return dic

def break_code(cryptograph,passwd_dic):
    for k,v in passwd_dic.items():
        if v == cryptograph:
            print(‘密码是===>\033[46m%s\033[0m‘ %k)

cryptograph=‘aee949757a2e698417463d47acac93df‘
break_code(cryptograph,make_passwd_dic(passwds))
python 还有一个 hmac 模块,它内部对我们创建 key 和 内容 进行进一步的处理然后再加密:
1 import hmac
2 h = hmac.new(‘alvin‘.encode(‘utf8‘))
3 h.update(‘hello‘.encode(‘utf8‘))
4 print (h.hexdigest())#320df9832eab4c038b6c1d7ed73a5940
#要想保证hmac最终结果一致,必须保证:
#1:hmac.new括号内指定的初始key一样
#2:无论update多少次,校验的内容累加到一起是一样的内容

import hmac

h1=hmac.new(b‘egon‘)
h1.update(b‘hello‘)
h1.update(b‘world‘)
print(h1.hexdigest())

h2=hmac.new(b‘egon‘)
h2.update(b‘helloworld‘)
print(h2.hexdigest())

h3=hmac.new(b‘egonhelloworld‘)
print(h3.hexdigest())

‘‘‘
f1bf38d054691688f89dcd34ac3c27f2
f1bf38d054691688f89dcd34ac3c27f2
bcca84edd9eeb86f30539922b28f3981
‘‘‘
标签:常用 固定 mod 路径名 sys 长度 out path 传递
原文地址:https://www.cnblogs.com/wukai66/p/11222401.html
