标签:network 80端口 snmp set 机房 乱码 系统选择 无法 schema
1.环境准备从CentOS7模板机全新克隆一台新主机
IP规划为10.0.0.61/172.16.1.61,主机名为m01
注册账号:http://c.onealert.com/console//ucid/regist.jsp[root@m01 ~]# rpm -ivh http://repo.zabbix.com/zabbix/3.0/rhel/7/x86_64/zabbix-release-3.0-1.el7.noarch.rpm
[root@m01 ~]# yum repolist
Loaded plugins: fastestmirror
base | 3.6 kB 00:00:00
epel | 4.7 kB 00:00:00
extras | 3.4 kB 00:00:00
updates | 3.4 kB 00:00:00
zabbix | 2.9 kB 00:00:00
zabbix-non-supported | 951 B 00:00:00
(1/5): extras/7/x86_64/primary_db | 187 kB 00:00:00
(2/5): epel/x86_64/updateinfo | 1.0 MB 00:00:02
(3/5): updates/7/x86_64/primary_db | 3.3 MB 00:00:04
(4/5): epel/x86_64/primary_db | 6.6 MB 00:00:09
(5/5): zabbix/x86_64/primary_db | 167 kB 00:00:09
zabbix-non-supported/x86_64/primary | 1.6 kB 00:00:01
Loading mirror speeds from cached hostfile
base: mirrors.aliyun.com
extras: mirrors.aliyun.com
updates: mirrors.aliyun.com
zabbix-non-supported 4/4
repo id repo name status
base/7/x86_64 CentOS-7 - Base - mirrors.aliyun.com 10,019
epel/x86_64 Extra Packages for Enterprise Linux 7 - x86_64 12,985
extras/7/x86_64 CentOS-7 - Extras - mirrors.aliyun.com 382
updates/7/x86_64 CentOS-7 - Updates - mirrors.aliyun.com 1,457
zabbix/x86_64 Zabbix Official Repository - x86_64 365
zabbix-non-supported/x86_64 Zabbix Official Repository non-supported - x86_64 4
repolist: 25,212
[root@m01 ~]# yum makecache fast
Loaded plugins: fastestmirror
base | 3.6 kB 00:00:00
epel | 4.7 kB 00:00:00
extras | 3.4 kB 00:00:00
updates | 3.4 kB 00:00:00
zabbix | 2.9 kB 00:00:00
zabbix-non-supported | 951 B 00:00:00
Loading mirror speeds from cached hostfile
base: mirrors.aliyun.com
extras: mirrors.aliyun.com
updates: mirrors.aliyun.com
Metadata Cache Created[root@m01 ~]# yum install zabbix-server-mysql zabbix-web-mysql httpd php -y[root@m01 ~]# yum -y install mariadb-server
[root@m01 ~]# systemctl start mariadb.service
#创建数据库,权限
[root@m01 ~]# mysql
>create database zabbix character set utf8 collate utf8_bin;
>grant all privileges on zabbix.* to zabbix@localhost identified by ‘zabbix‘;
>exit
#导入数据库sql文件
[root@m01 ~]# zcat /usr/share/doc/zabbix-server-mysql-3.0.25/create.sql.gz |mysql -uzabbix -pzabbix zabbix#配置zabbix Server连接mysql
sed -i.ori ‘115a DBPassword=zabbix‘ /etc/zabbix/zabbix_server.conf
#修改apache-php配置
sed -i.ori ‘18a php_value date.timezone Asia/Shanghai‘ /etc/httpd/conf.d/zabbix.confsystemctl start zabbix-server
systemctl start httpd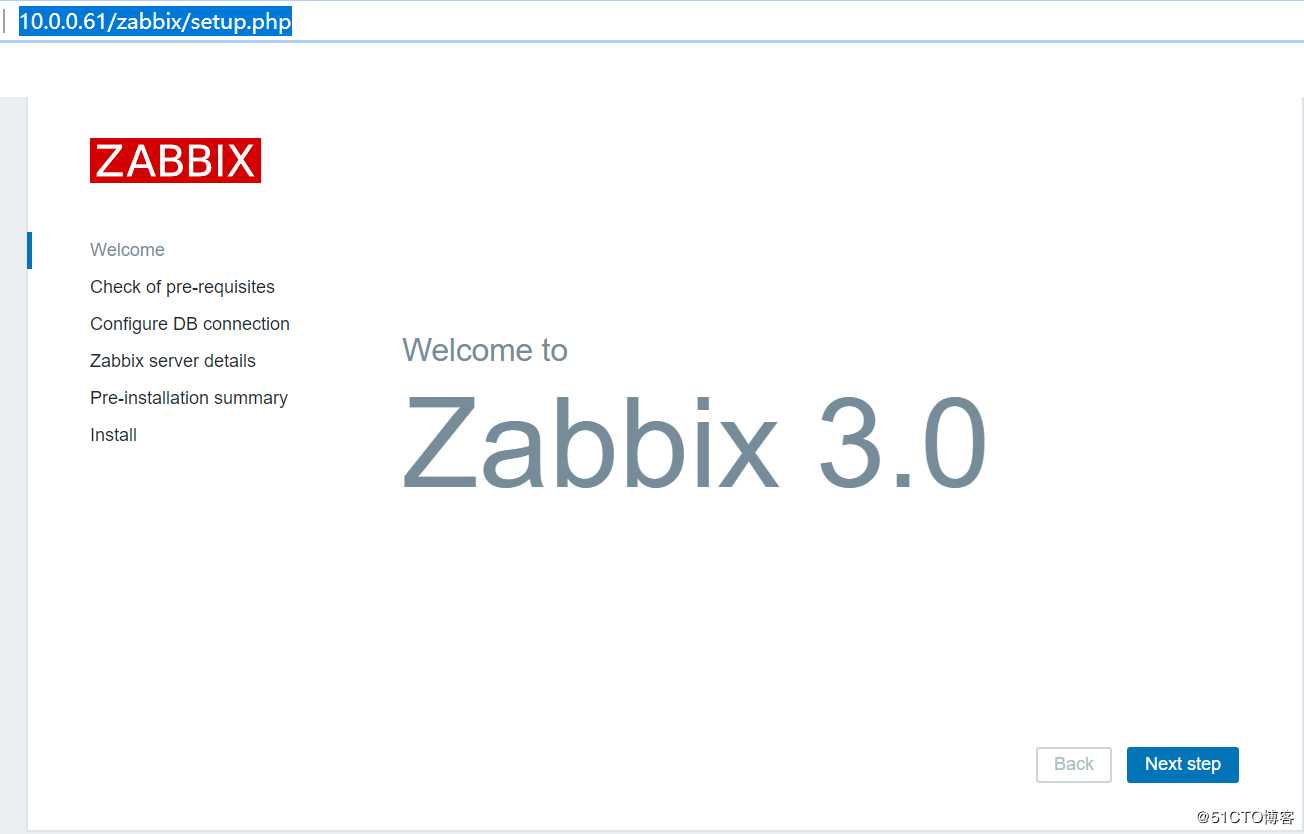
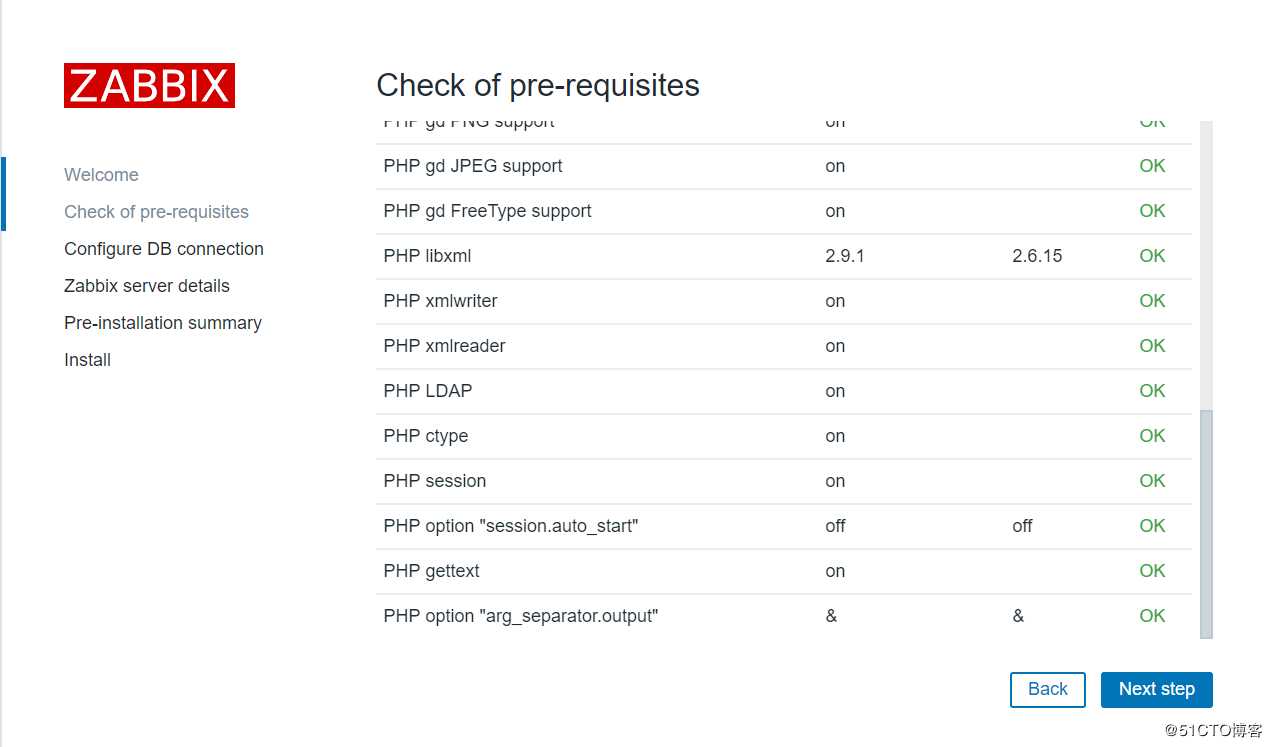
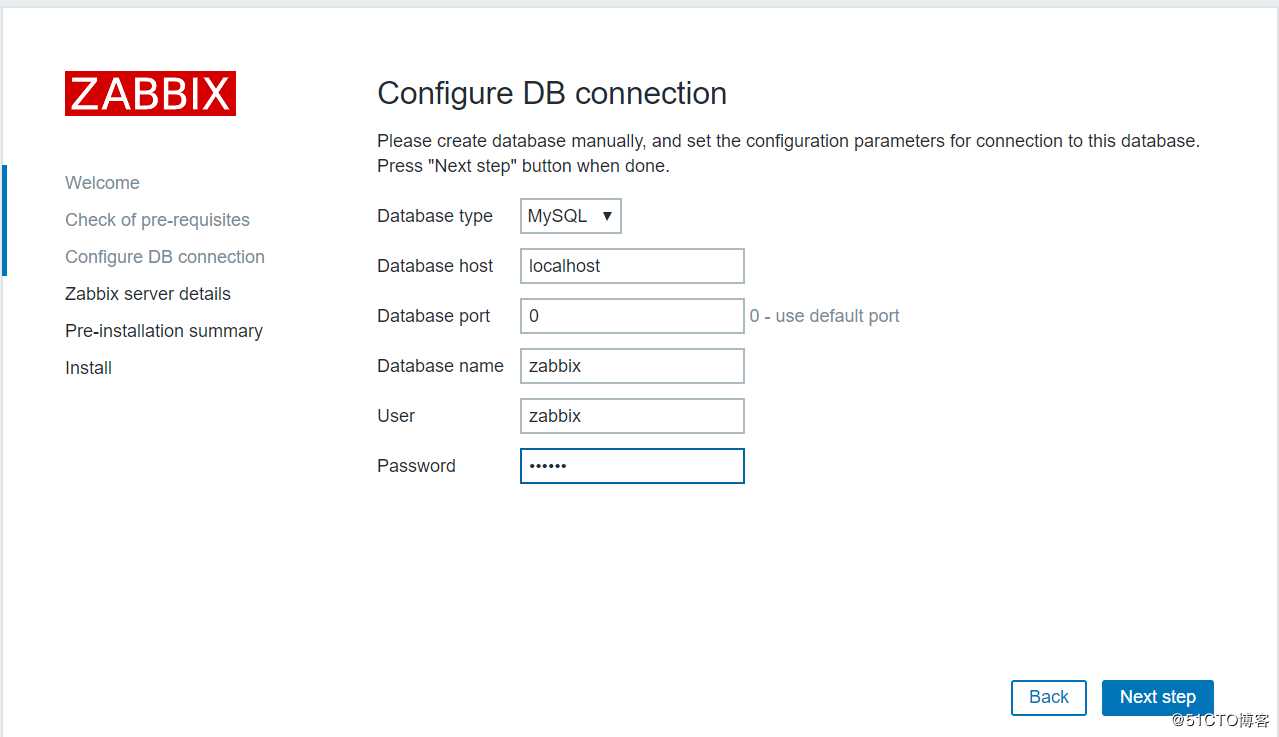
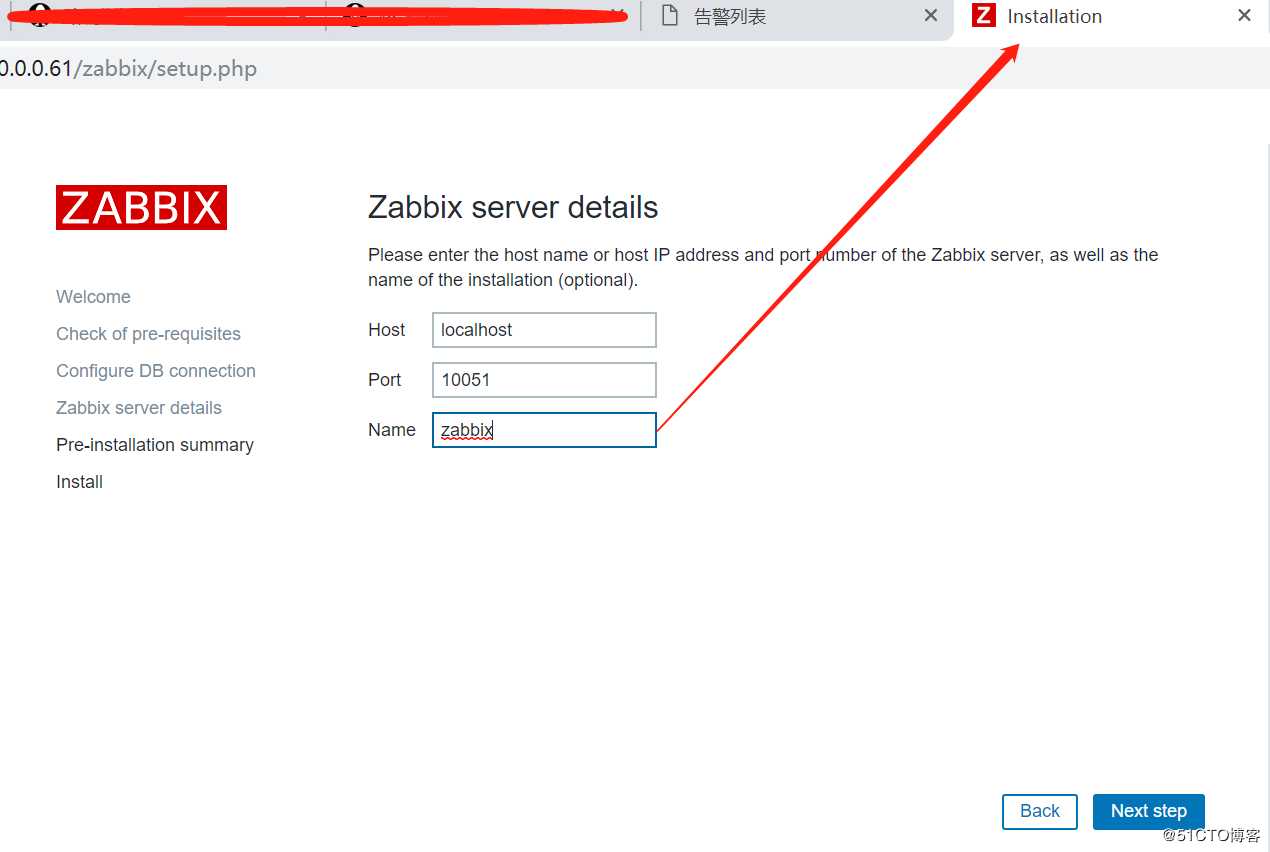
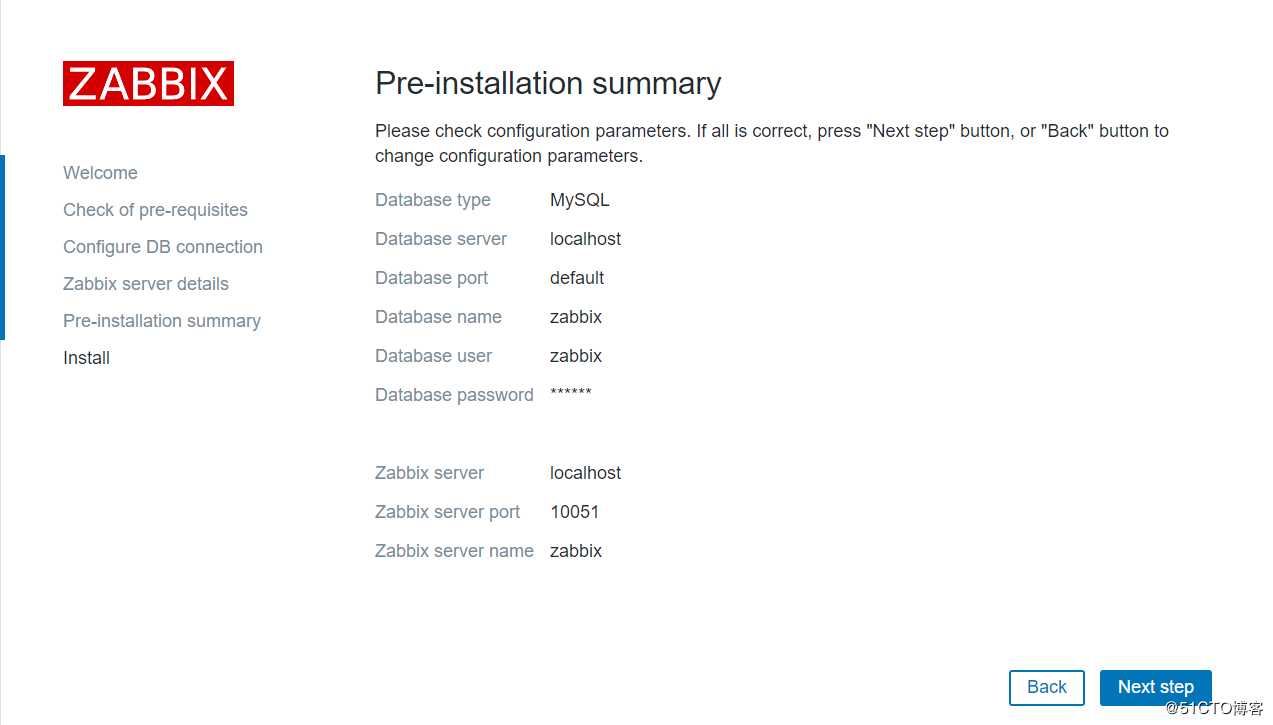
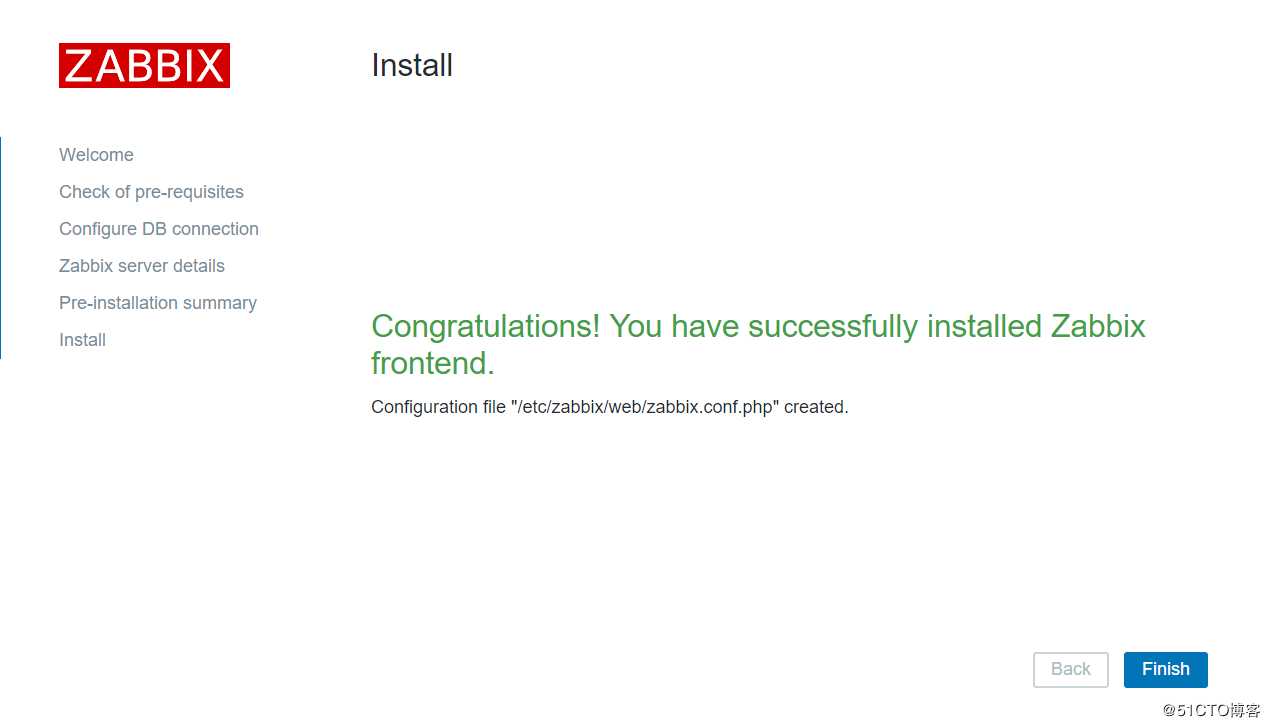
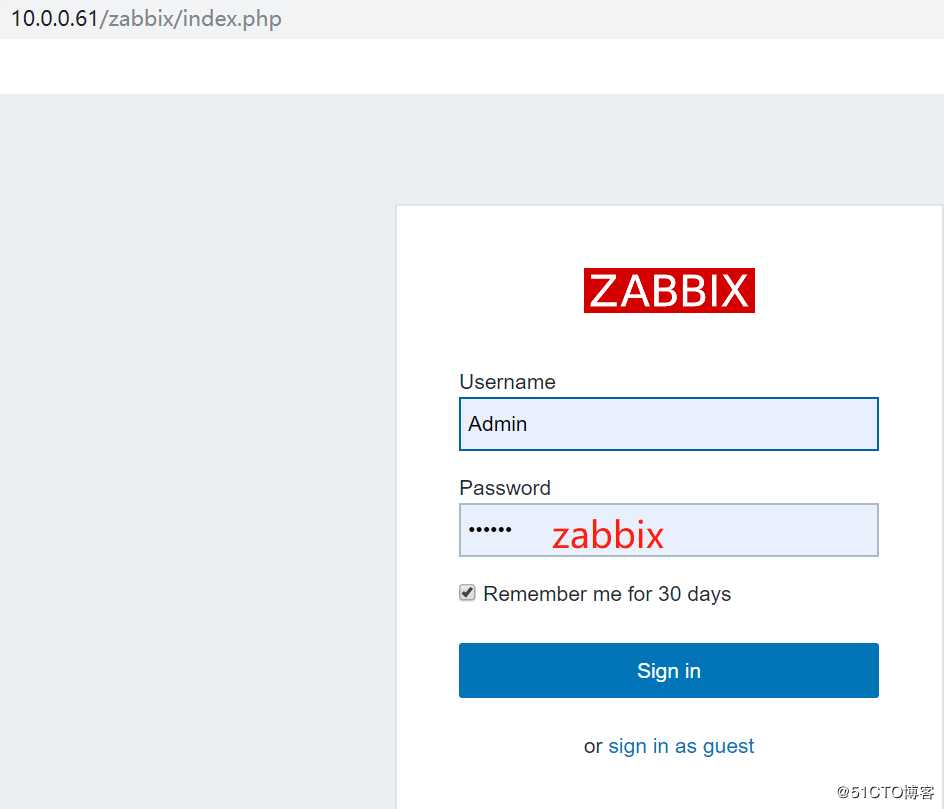
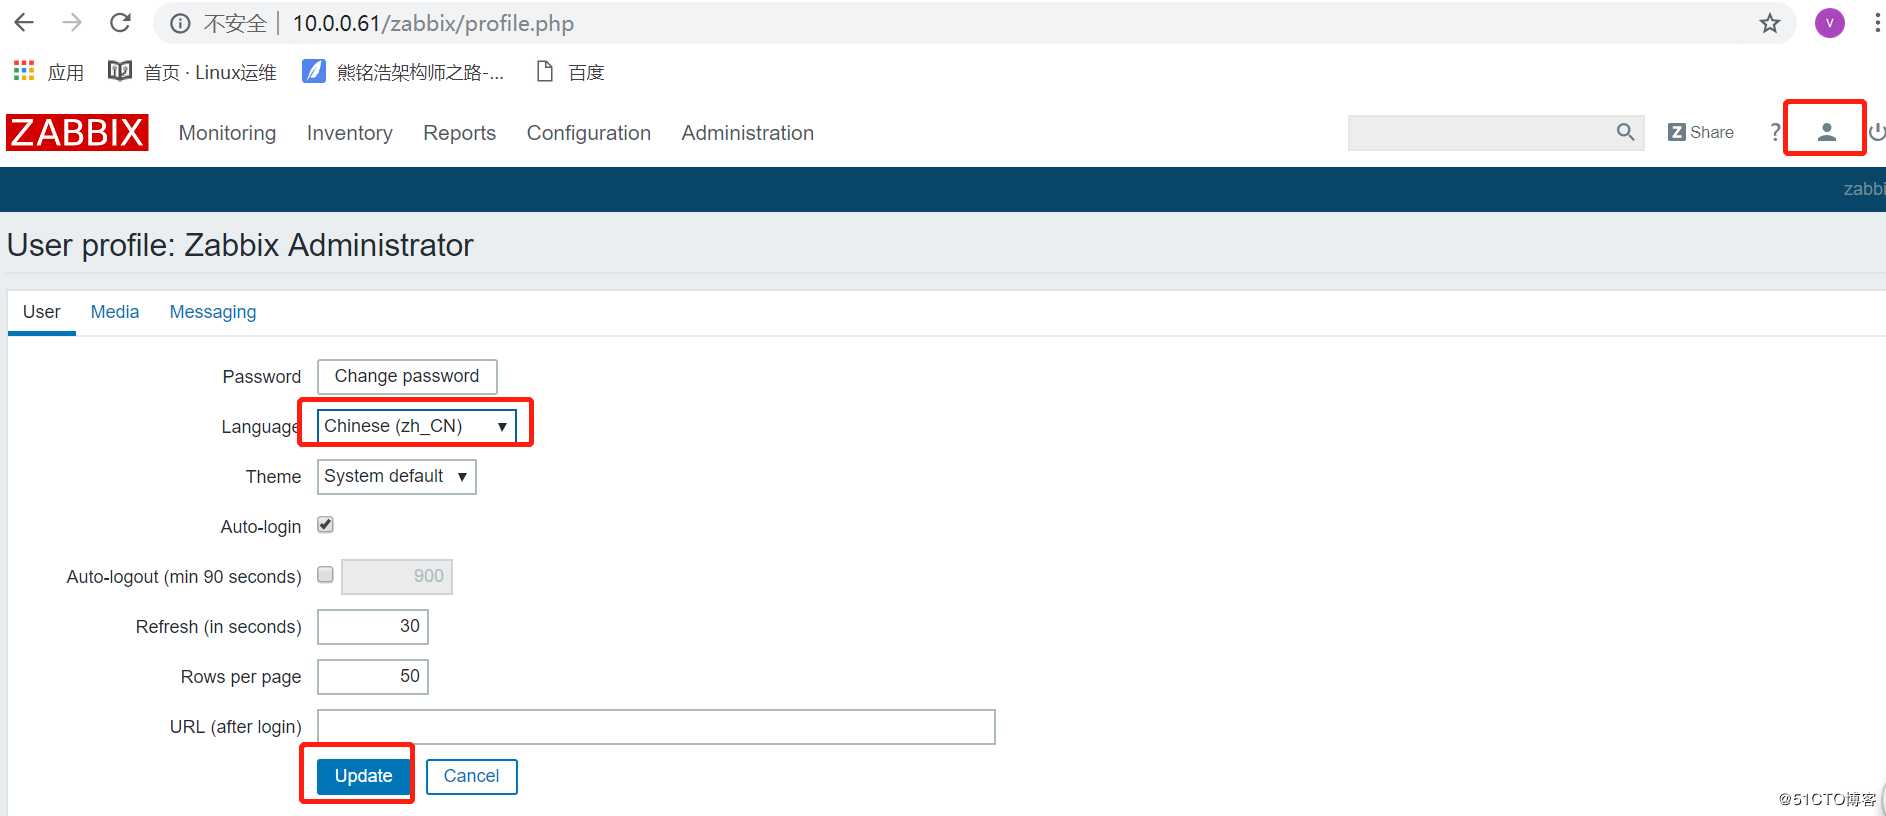
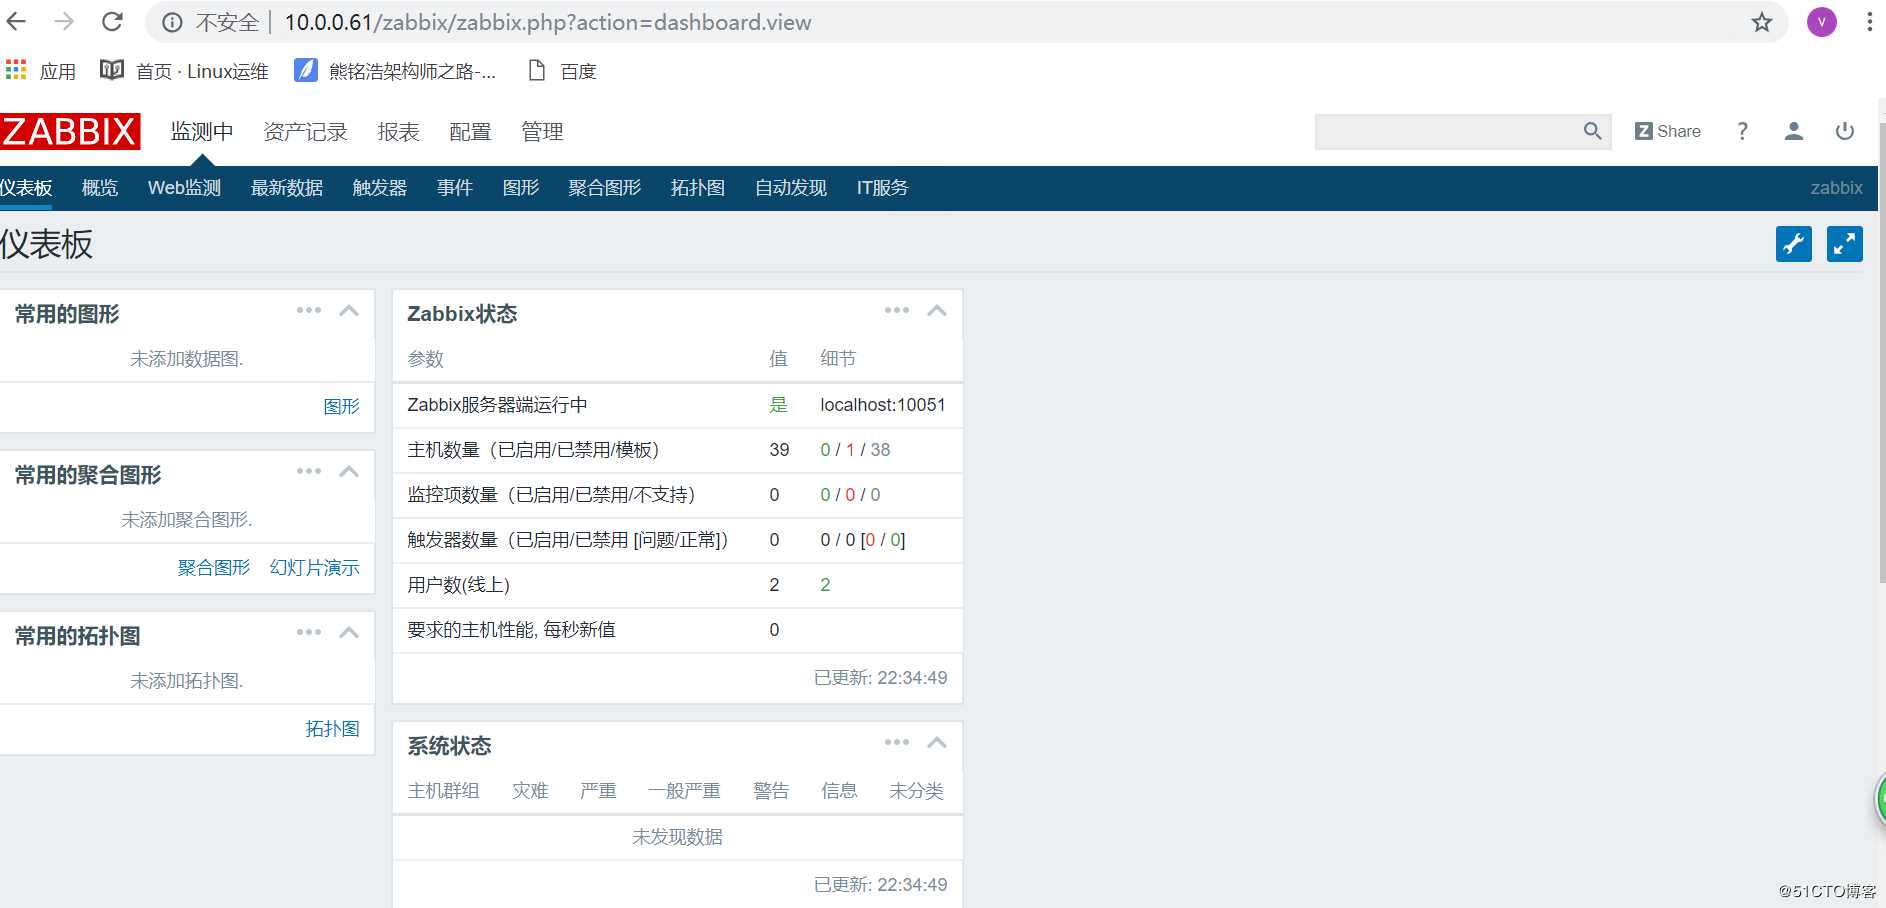
[root@m01 ~]# systemctl enable httpd.service mariadb.service zabbix-server.service zabbix-agent.service

[root@m01 ~]# systemctl is-enabled httpd.service mariadb.service zabbix-server.service zabbix-agent.service
enabled
enabled
enabled
enabled

[root@m01 ~]# systemctl is-active httpd.service mariadb.service zabbix-server.service zabbix-agent.service
active
active
active
active所有需要被监控的服务器都要执行下面步骤,下面以在m01安装客户端为例(注意centos6和7,不同系统选择不一样):
[root@m01 ~]# rpm -ivh http://repo.zabbix.com/zabbix/3.0/rhel/7/x86_64/zabbix-release-3.0-1.el7.noarch.rpm
[root@m01 ~]# yum install zabbix-agent -y
[root@m01 ~]# sed -i.ori ‘s#Server=127.0.0.1#Server=172.16.1.61#‘ /etc/zabbix/zabbix_agentd.conf
[root@m01 ~]# systemctl start zabbix-agent.service#只能在服务端m01操作,需要使用-s执行相应客户端IP
yum install zabbix-get
zabbix_get -s 172.16.1.61 -p 10050 -k "system.cpu.load[all,avg1]"
zabbix_get -s 172.16.1.21 -p 10050 -k "system.cpu.load[all,avg1]"
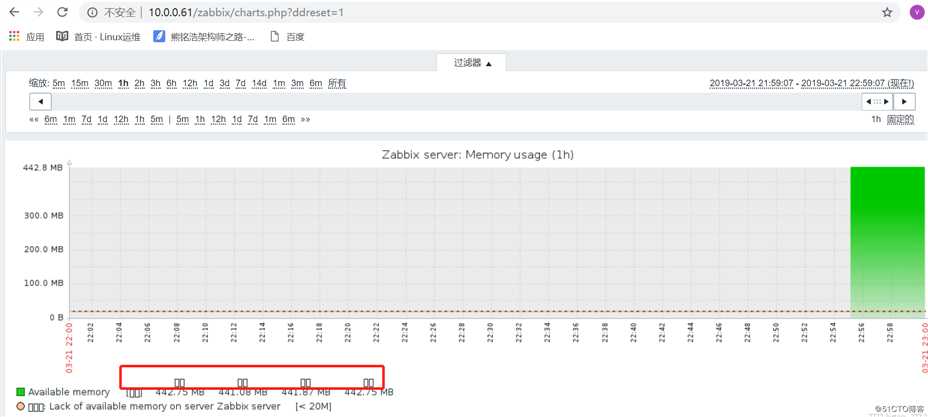
[root@m01 ~]# yum -y install wqy-microhei-fonts

[root@m01 ~]# cp /usr/share/fonts/wqy-microhei/wqy-microhei.ttc /usr/share/fonts/dejavu/DejaVuSans.ttf
cp: overwrite ‘/usr/share/fonts/dejavu/DejaVuSans.ttf’? y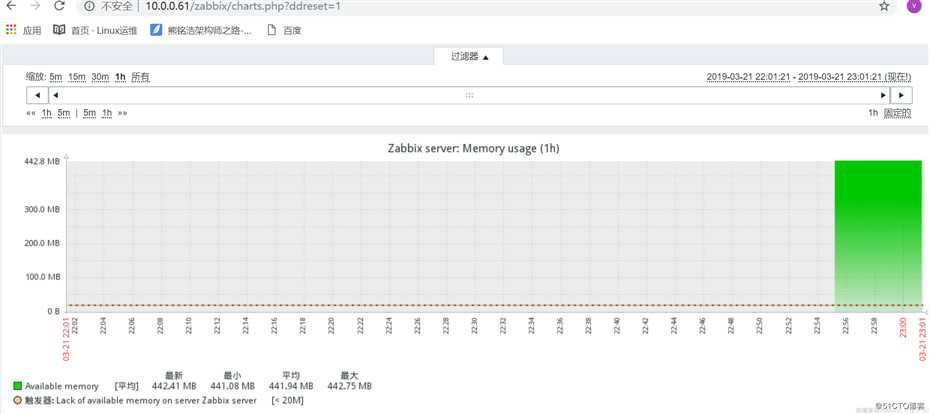
[root@web01 ~]# rpm -ivh https://mirrors.aliyun.com/zabbix/zabbix/3.0/rhel/6/x86_64/zabbix-release-3.0-1.el6.noarch.rpm

[root@m01 ~]# yum install zabbix-agent -y

[root@m01 ~]# sed -i.ori ‘s#Server=127.0.0.1#Server=172.16.1.61#‘ /etc/zabbix/zabbix_agentd.conf

[root@web01 ~]# service zabbix-agent restart
Shutting down Zabbix agent: [FAILED]
Starting Zabbix agent: [ OK ]

[root@web01 ~]# chkconfig zabbix-agent on里面加上主机名IP对应关系,否则有时候会很慢
172.16.1.61 m01
172.16.1.7 web01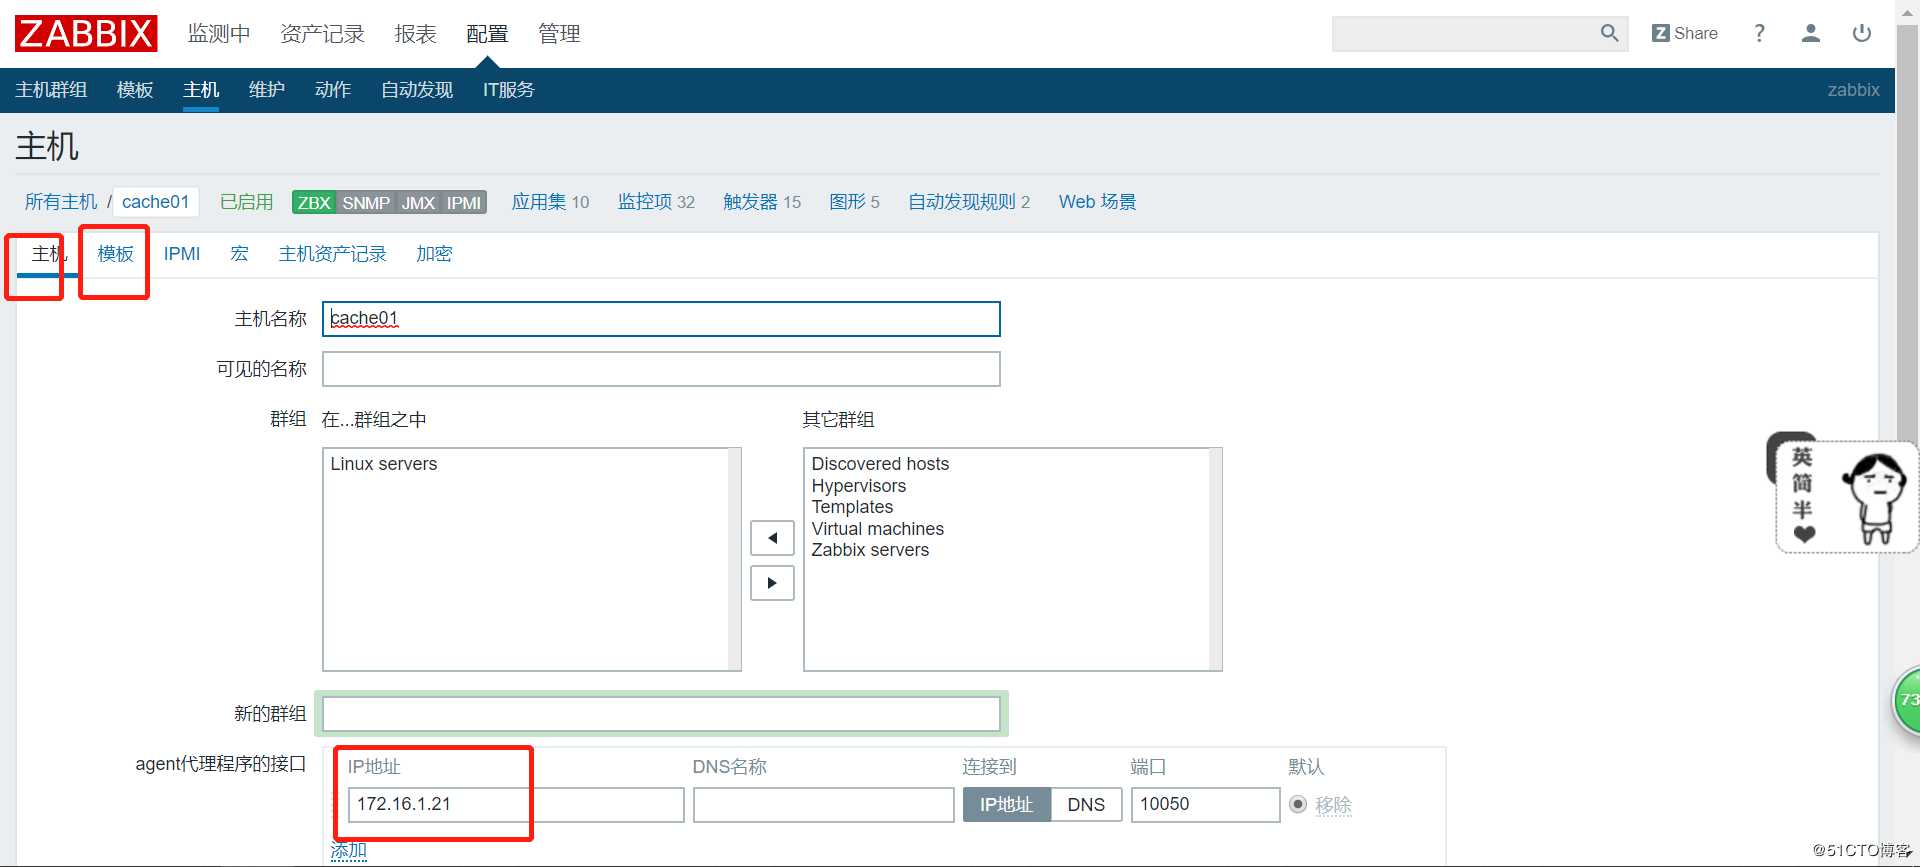
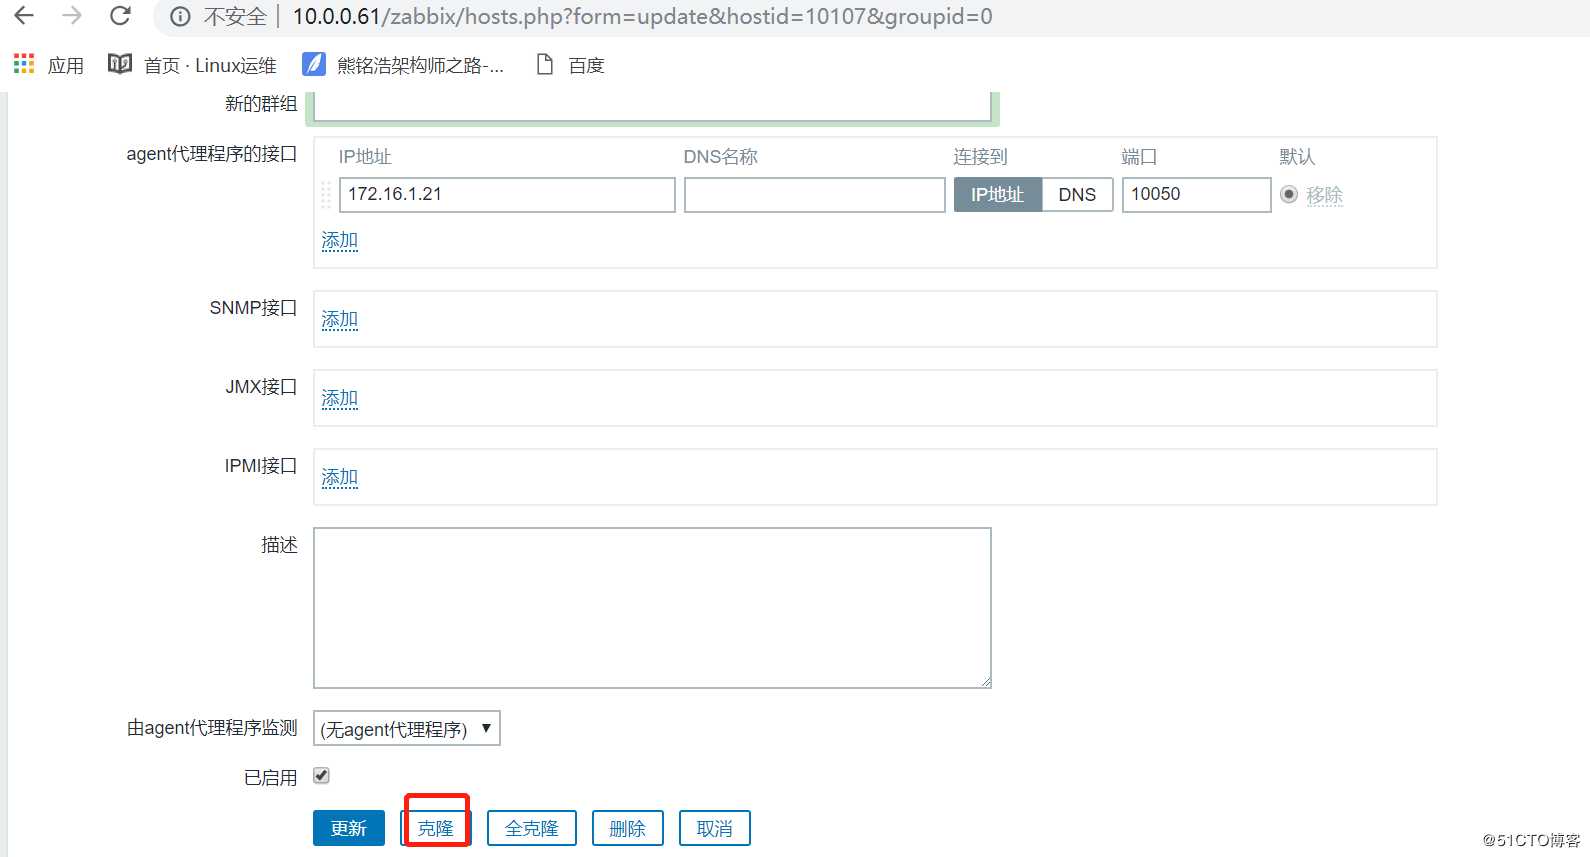
语法:key名字要唯一,多个key以行为分割
UserParameter=<key>,<shell command>
UserParameter=login-user,who|wc -l
UserParameter=login-user,/bin/sh /server/scripts/login.sh
修改配置文件
root@cache01 ~]# sed -i ‘$a UserParameter=login-user,who|wc -l‘ /etc/zabbix/zabbix_agentd.d/userparameter_mysql.conf
重启客户端

[root@cache01 ~]# systemctl restart zabbix-agent.service
服务端测试

[root@m01 ~]# zabbix_get -s 172.16.1.21 -k ‘login-user‘
2
在server注册
1.创建模板
2.创建应用集:给监控项分类
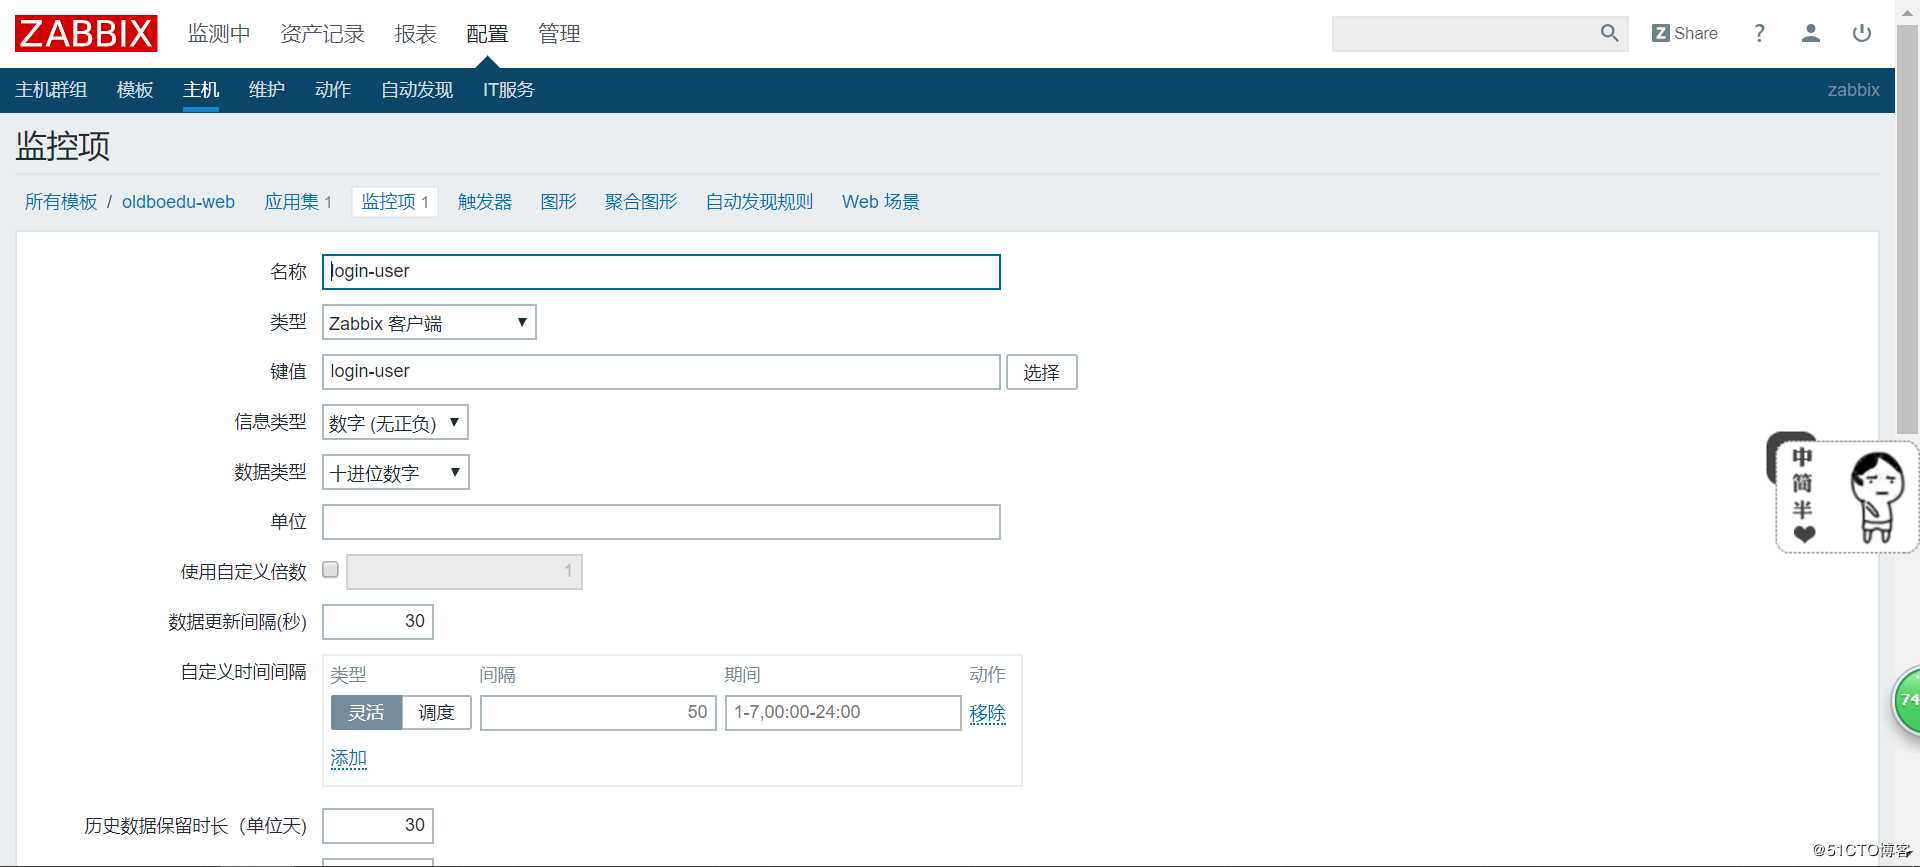
3.创建监控项:监控的内容
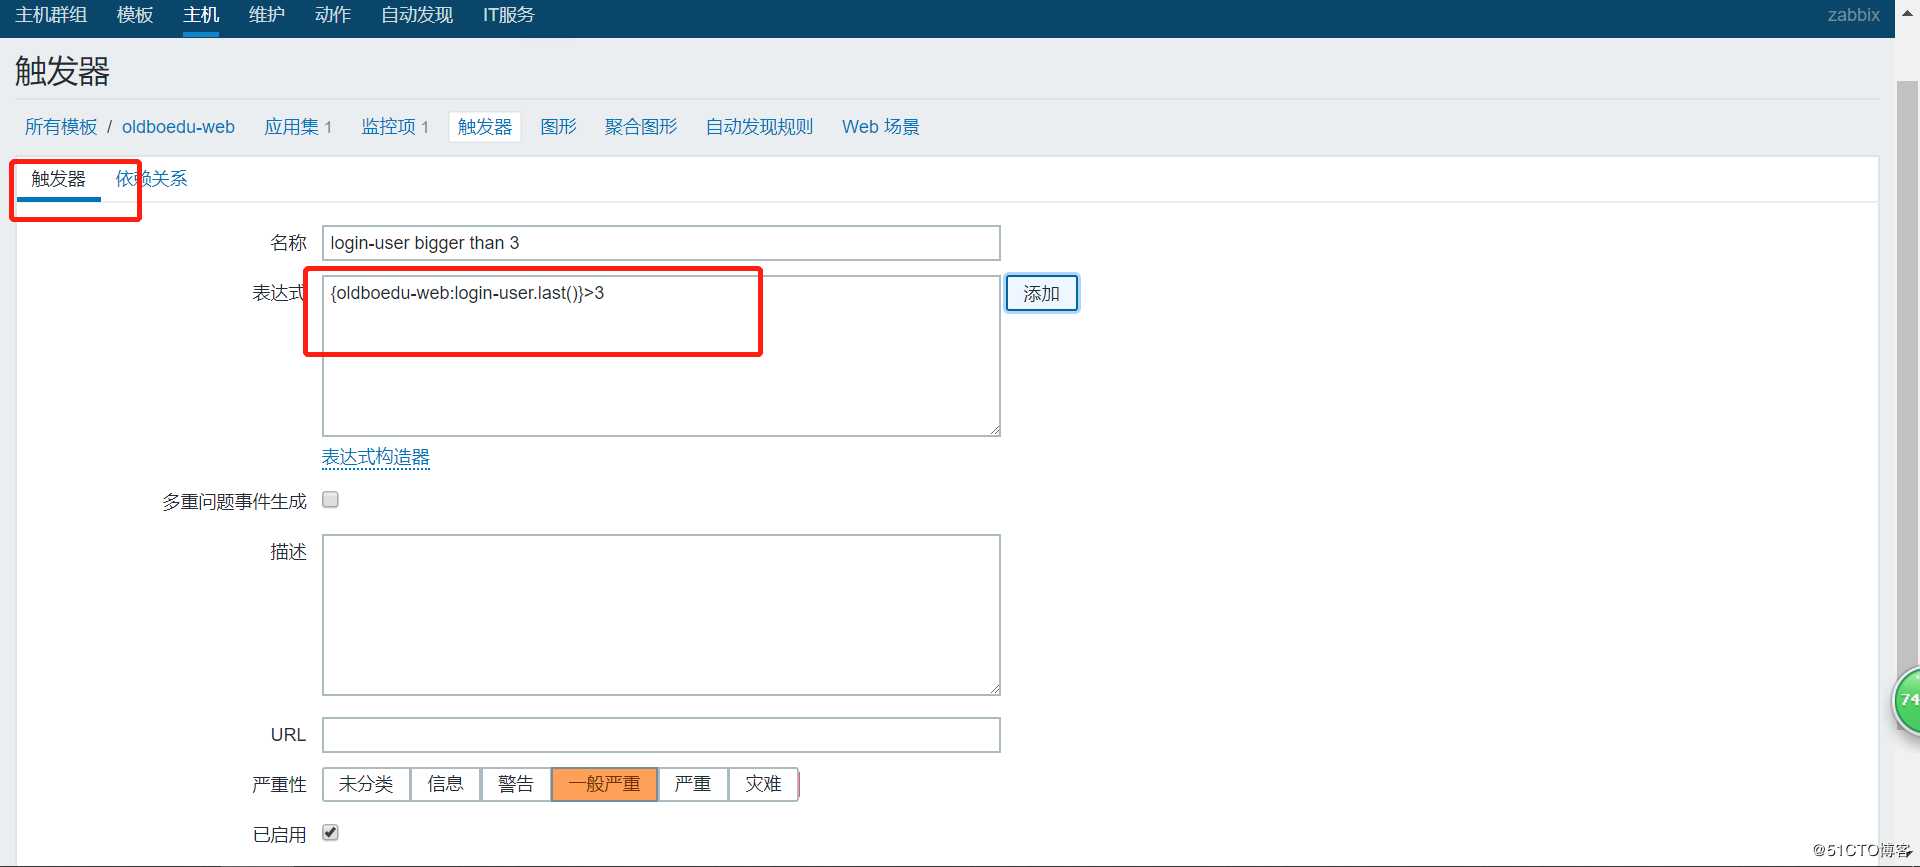
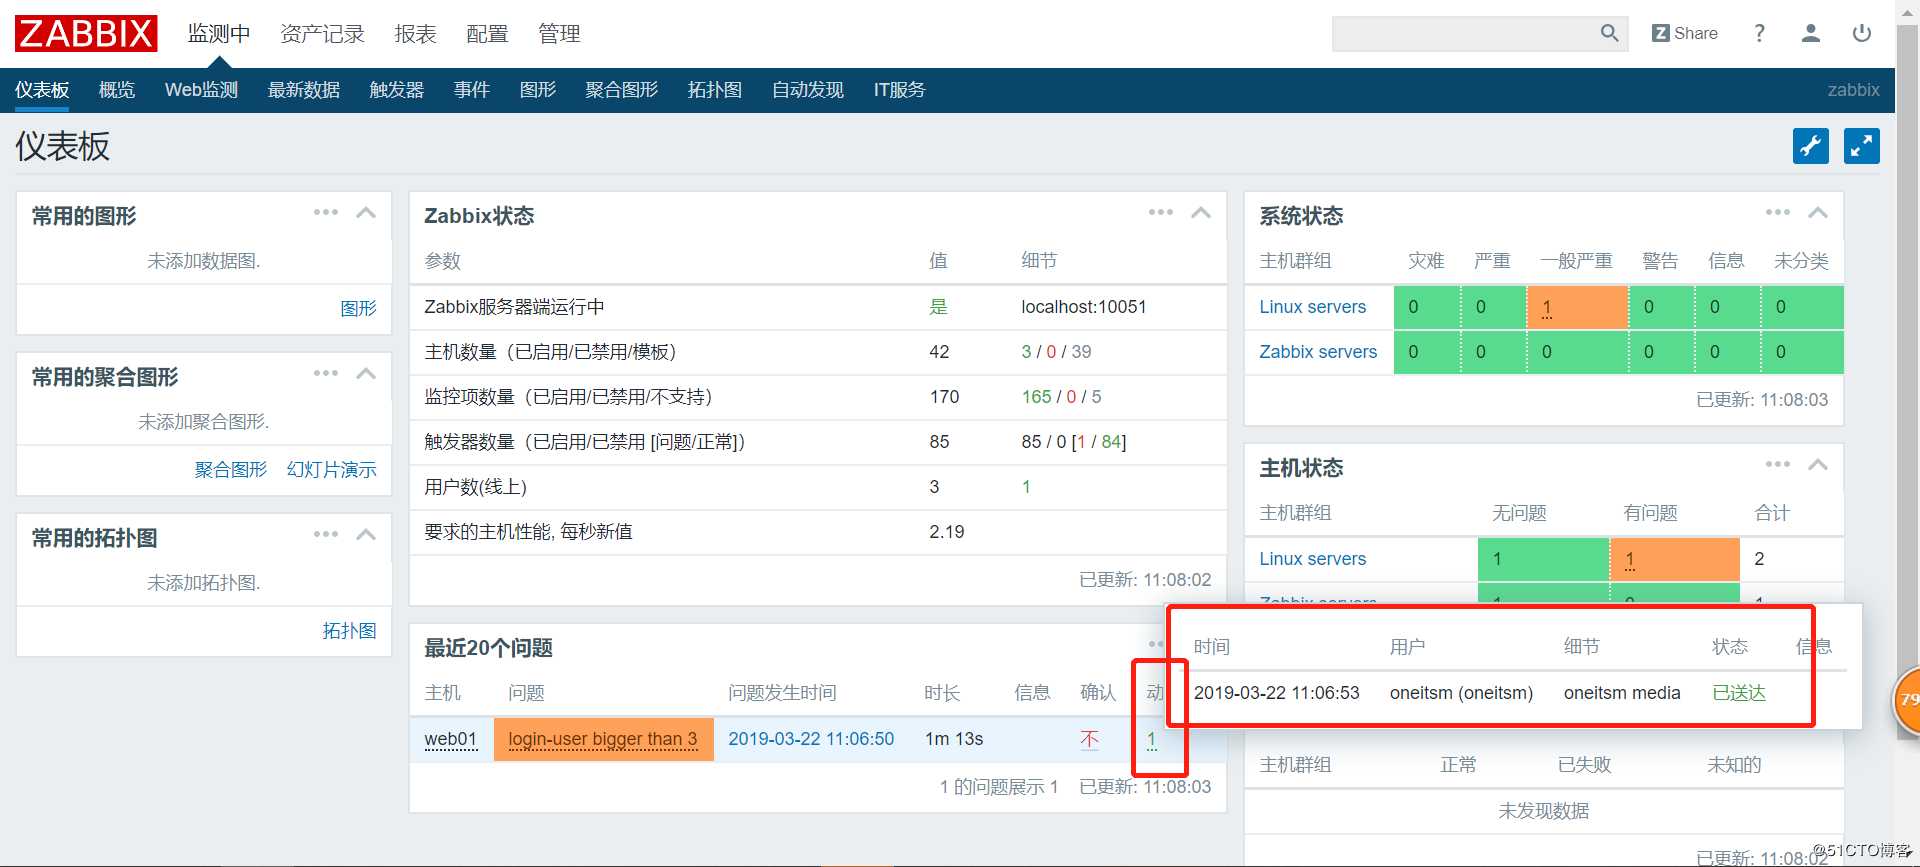
4.创建触发器:当监控项获取到的值 达到一定条件时 就触发报警
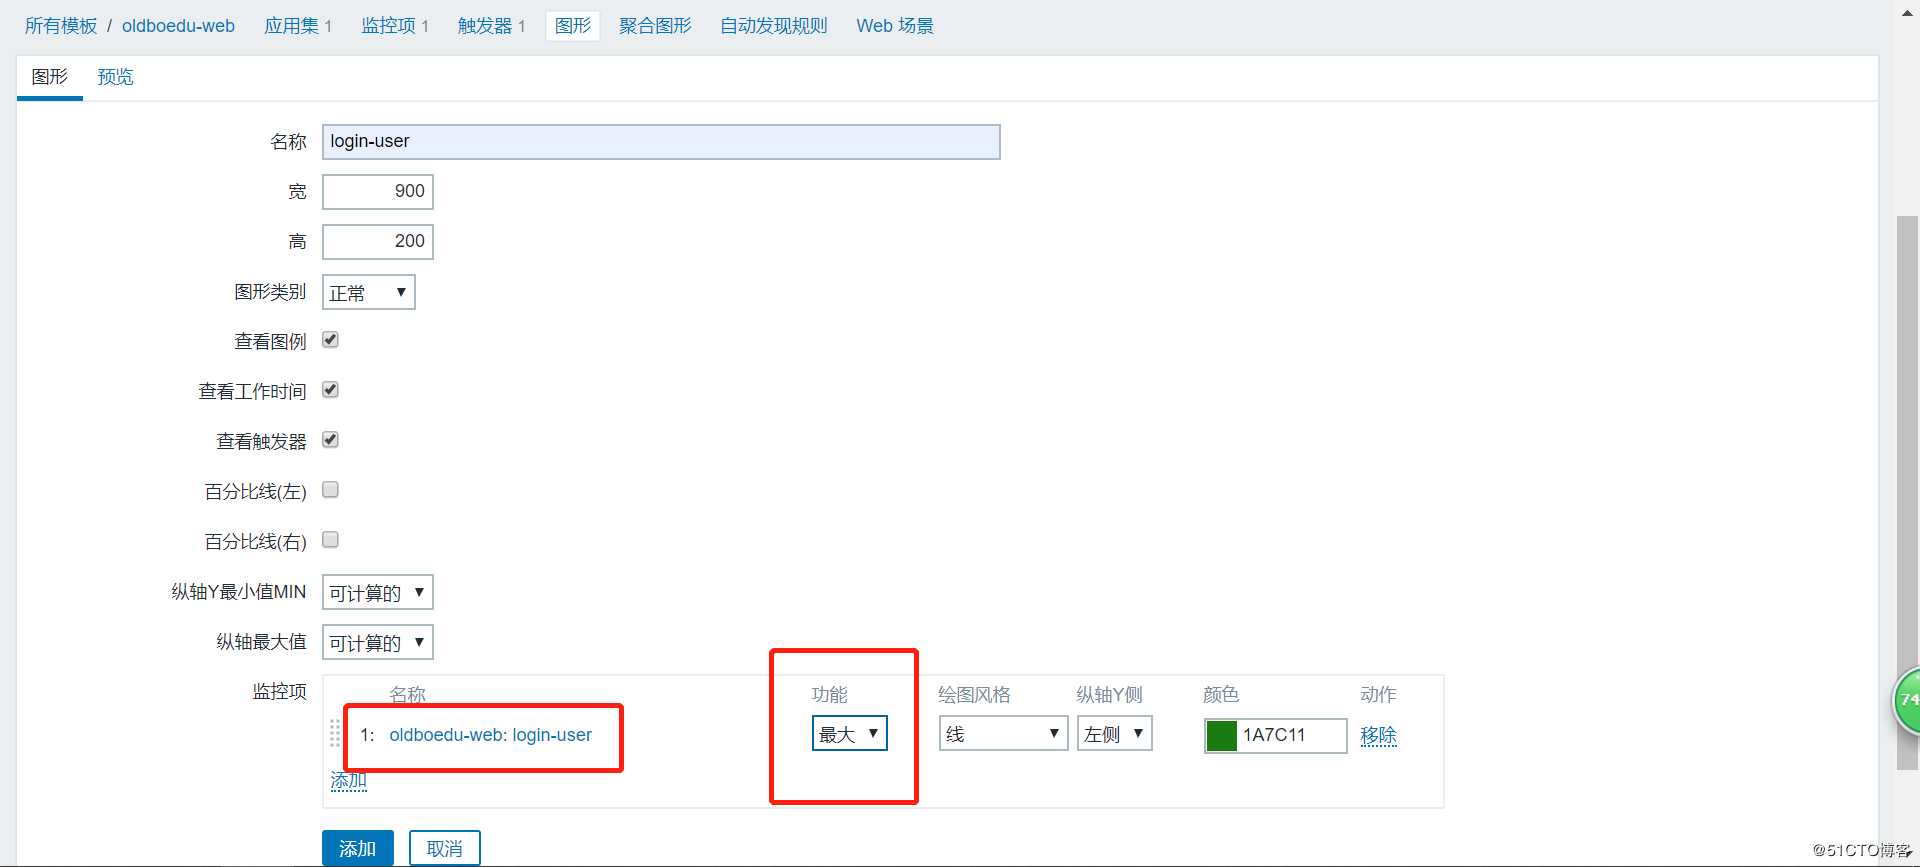
5.创建图形
6.主机关联模板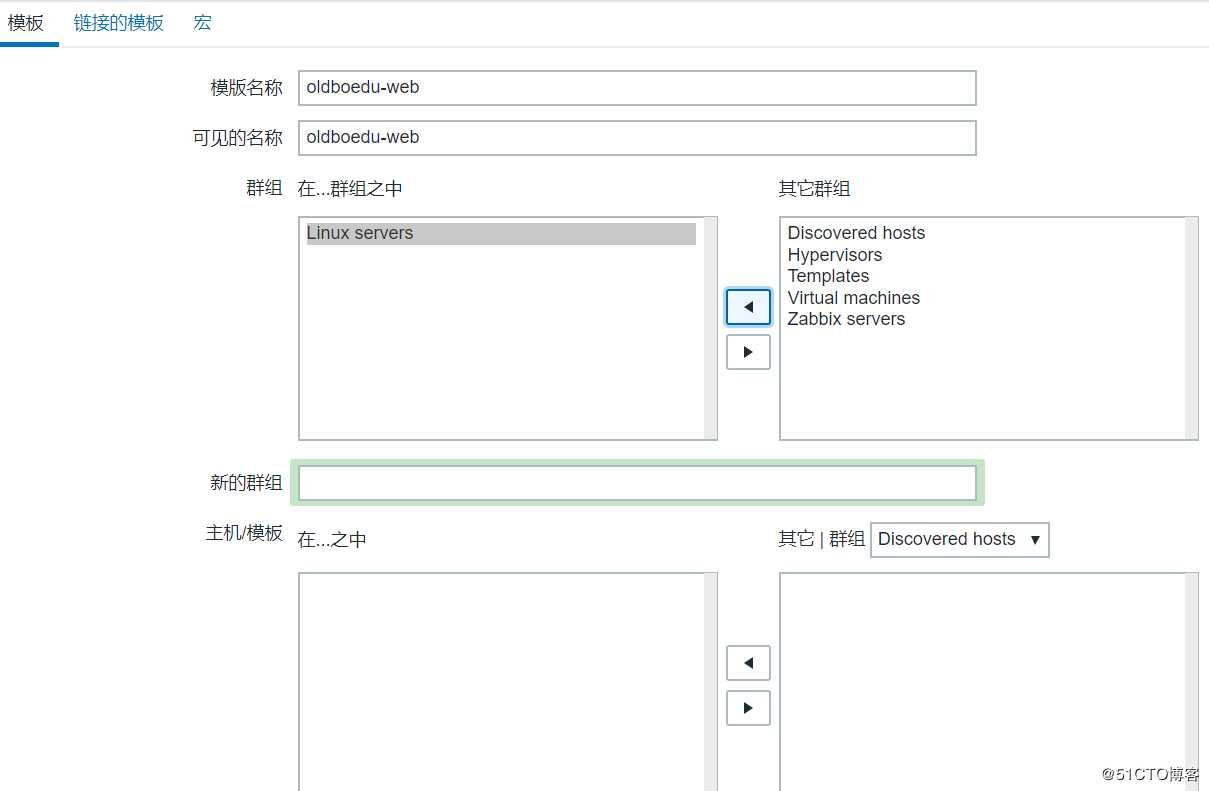

http://www.onealert.com/index.html
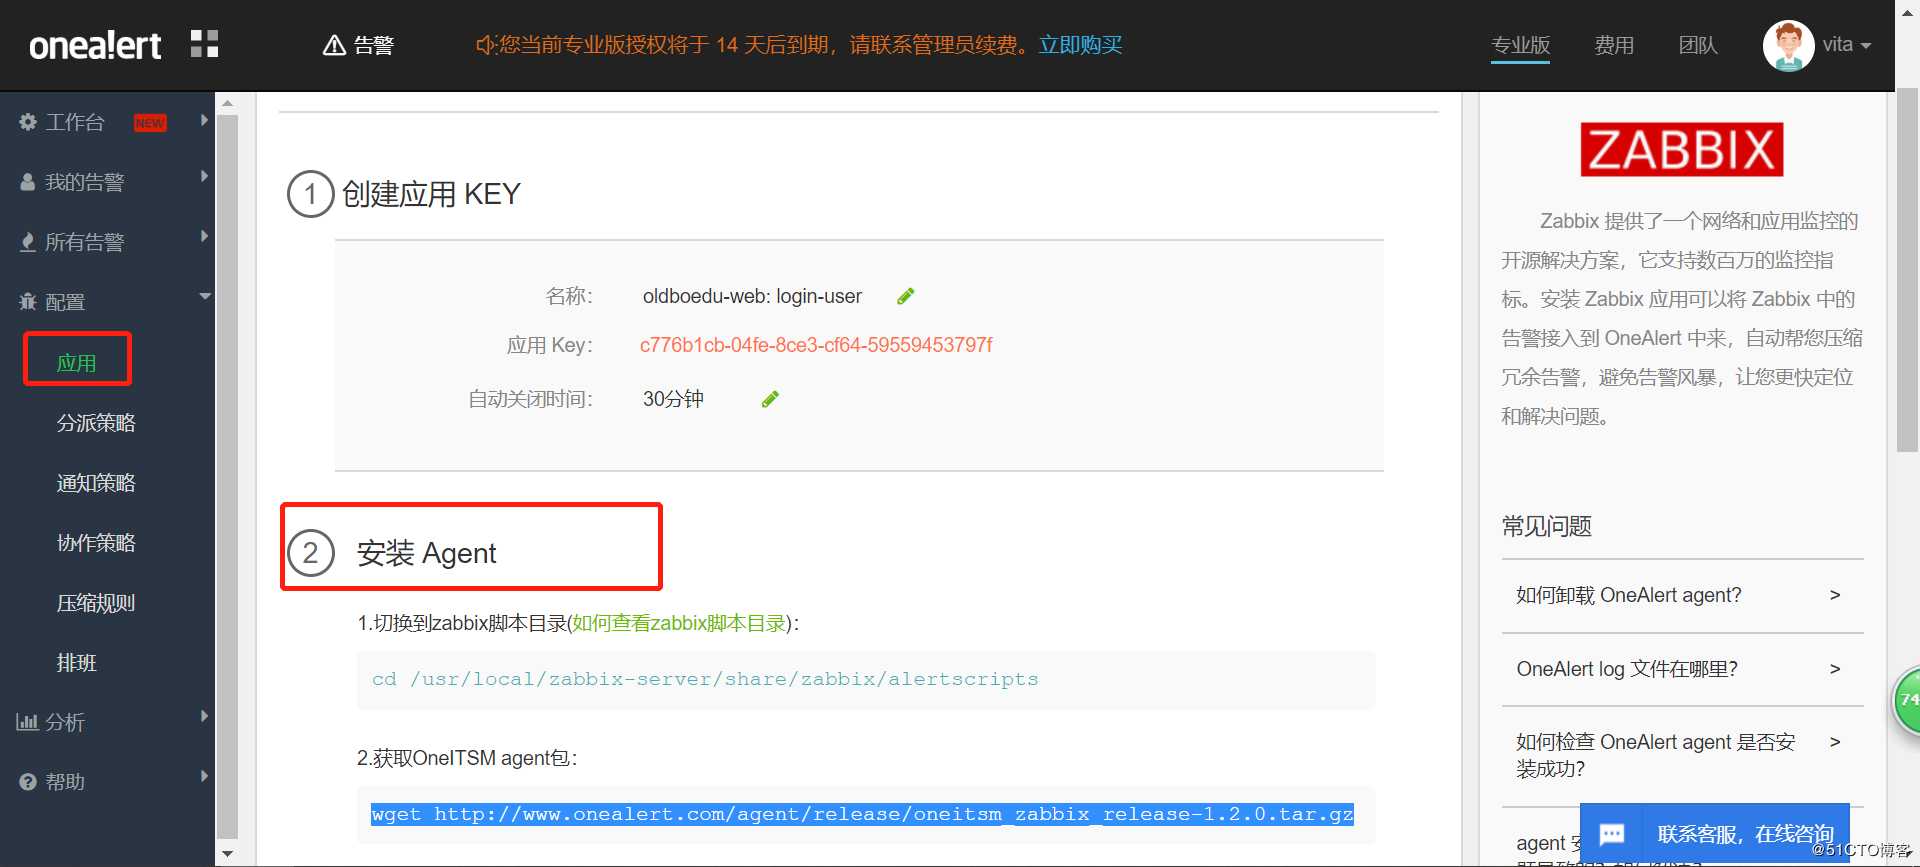
在zabbix服务端执行

[root@m01 bin]# grep ‘alertscripts‘ /etc/zabbix/zabbix_server.conf
#AlertScriptsPath=${datadir}/zabbix/alertscripts
AlertScriptsPath=/usr/lib/zabbix/alertscripts

[root@m01 bin]# cd /usr/lib/zabbix/alertscripts/

[root@m01 alertscripts]# wget http://www.onealert.com/agent/release/oneitsm_zabbix_release-1.2.0.tar.gz

[root@m01 alertscripts]# tar -zxf oneitsm_zabbix_release-1.2.0.tar.gz

[root@m01 alertscripts]# cd oneitsm/bin

[root@m01 alertscripts]# bash install.sh c776b1cb-04fe-8ce3-cf64-59559453797f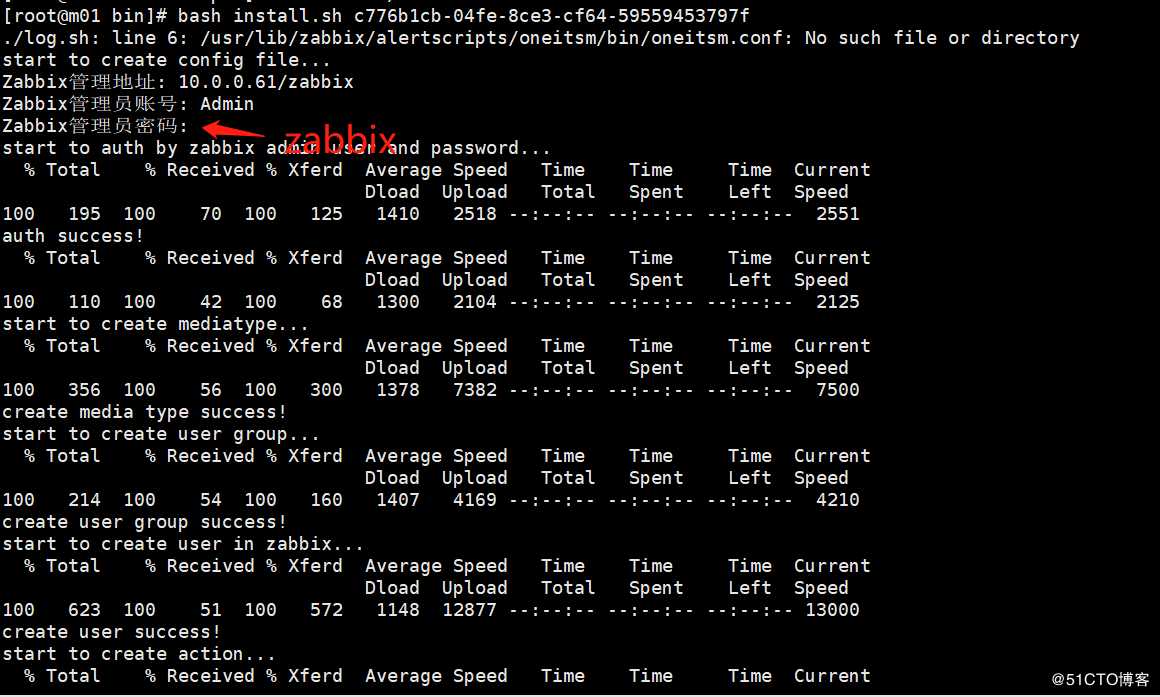




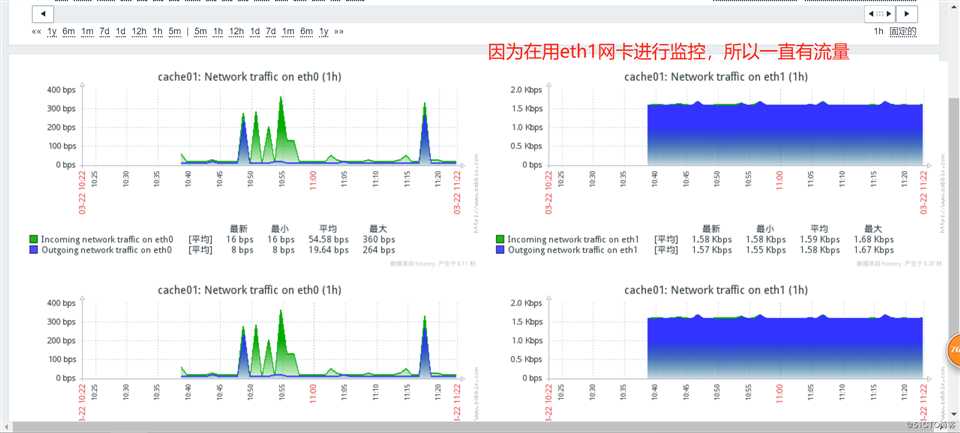
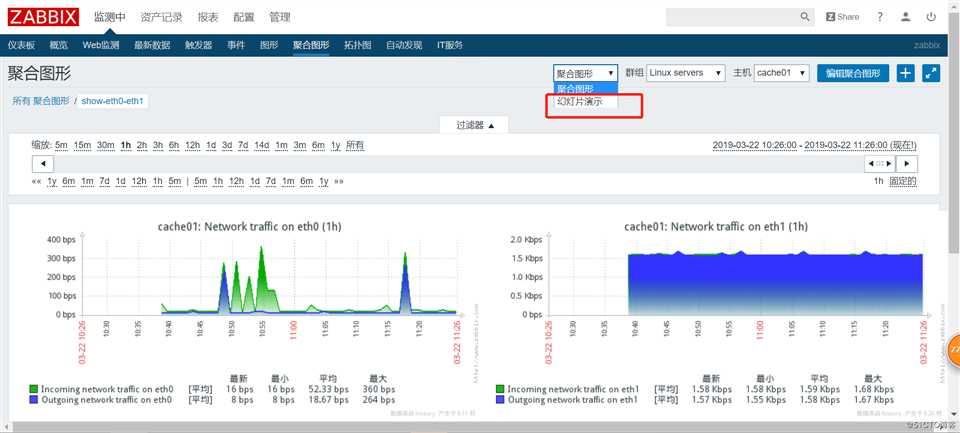

https://share.zabbix.com
https://github.com/zhangyao8/zabbix-community-repos目标:使用zabbix将架构所有集群监控
具体内容:
一、硬件、系统、网络监控
所有集群节点(所有虚拟机)都监控上
二、应用服务监控
监控备份服务器,简单方法是监控rsync端口,如果有其他更佳方案可以说明;
监控NFS服务器,使用监控NFS进程来判断NFS服务器正常,如果有其他更佳方案可以说明;
监控MySQL服务器,简单方法监控mysql的3306端口,或者使用zabbix提供的Mysql模板,如果有其他更佳方案可以说明;
监控2台web服务器,简单方法监控80端口,如果有其他更佳方案可以说明;
监控URL地址来更精确的监控我们的网站运行正常;
监控反向代理服务器,PPTP服务器等你在期中架构部署的服务(即监控端口和进程)。
监控Nginx的7种连接状态(自定义key)。
端口和进程

[root@m01 bin]# zabbix_get -s 172.16.1.7 -k net.tcp.port[,80]
0
#启动NGINX

[root@m01 bin]# zabbix_get -s 172.16.1.7 -k net.tcp.port[,80]
1

[root@m01 bin]# zabbix_get -s 172.16.1.7 -k proc.num[]
79

URL
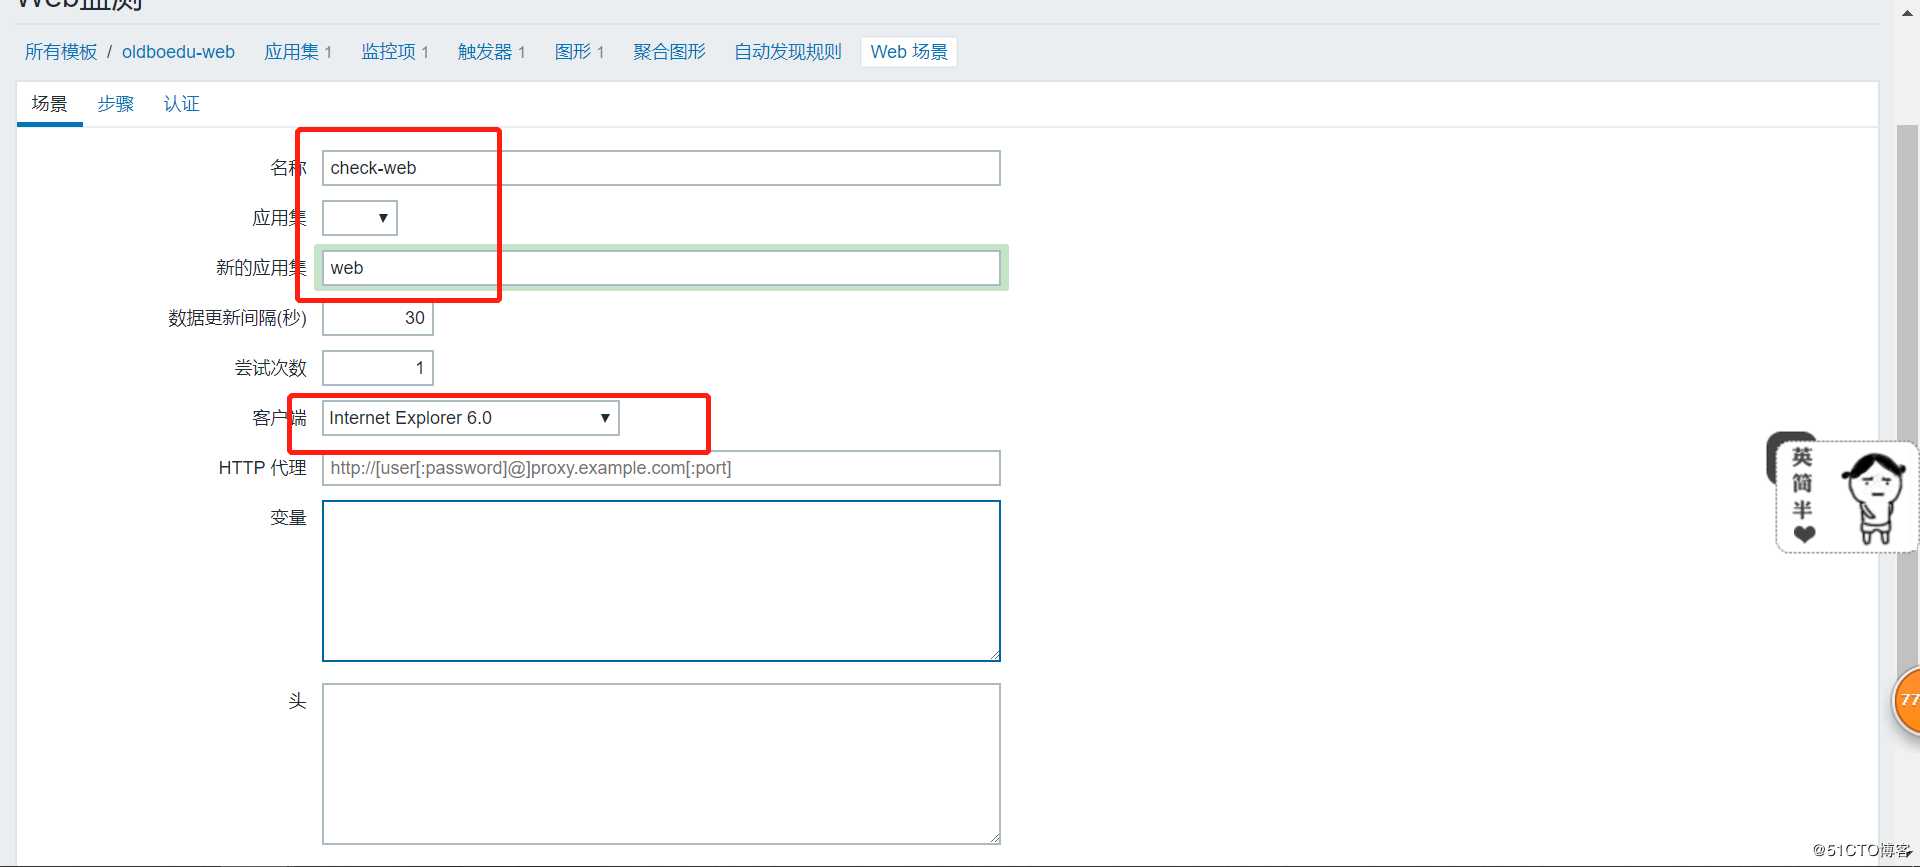
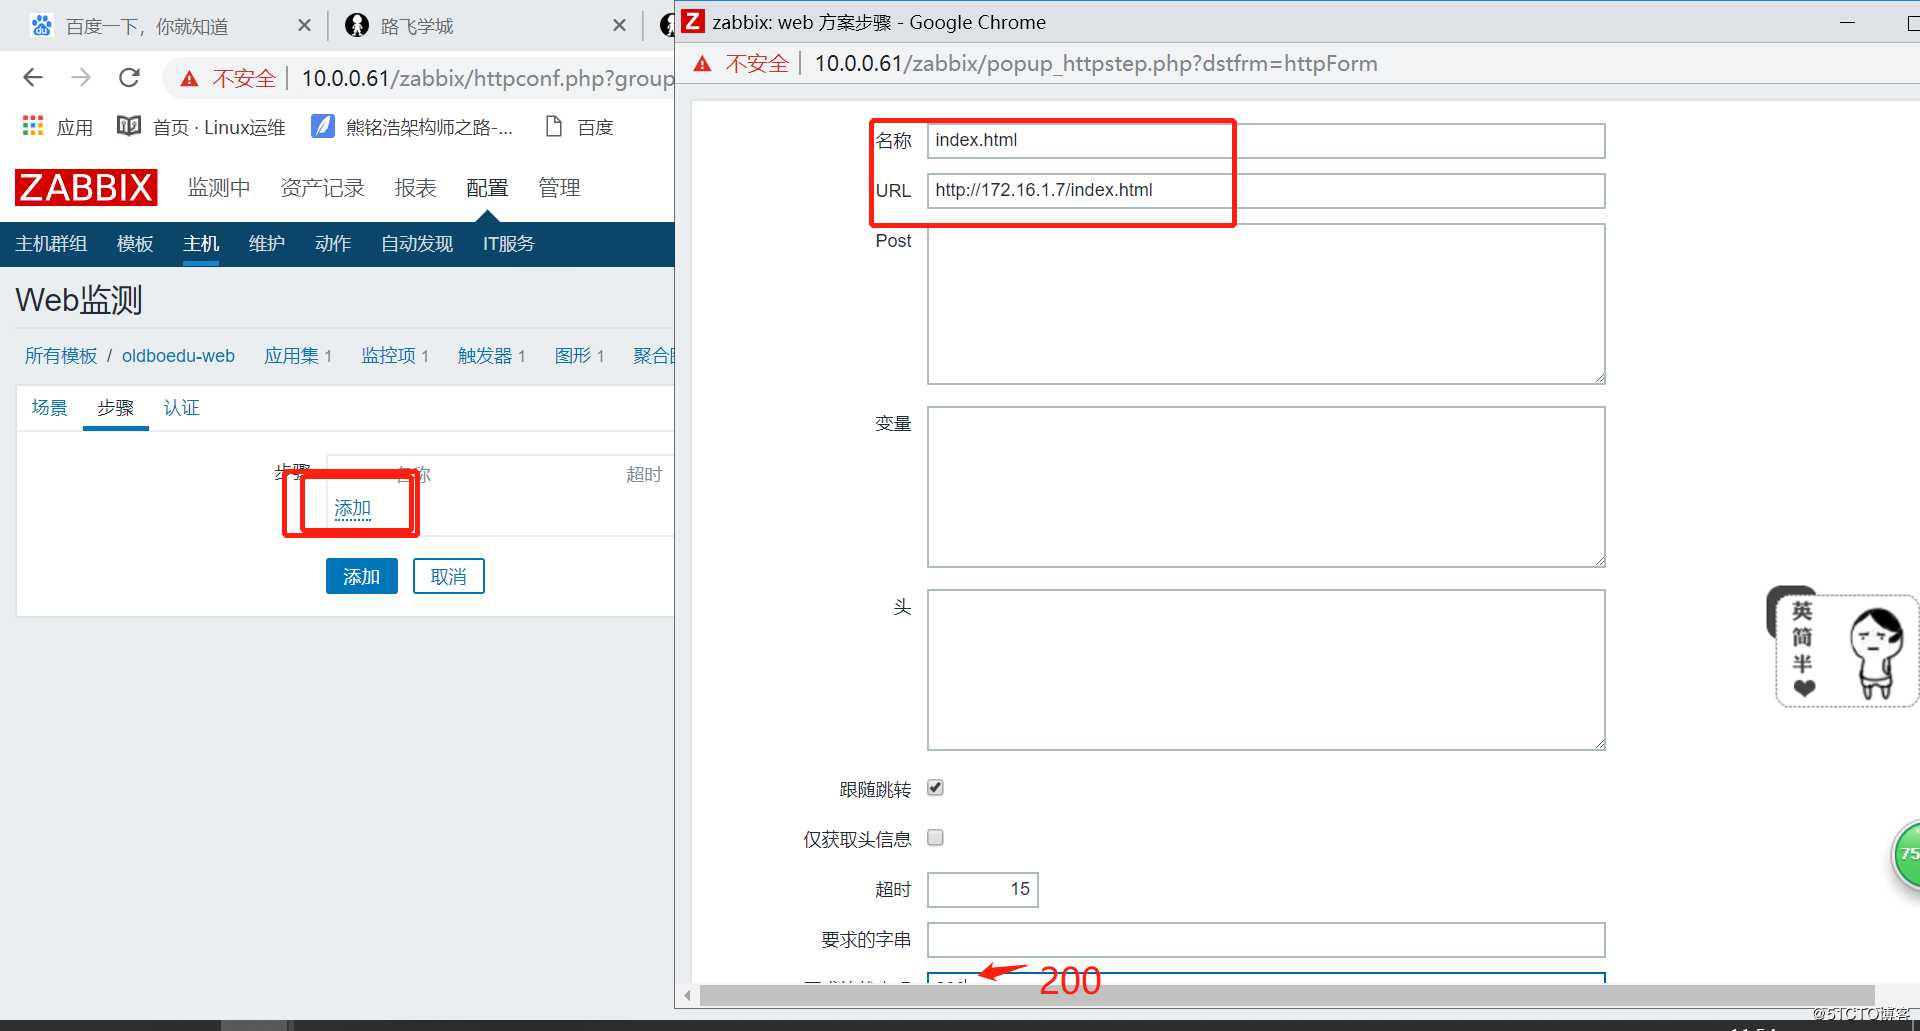
自动发现:zabbix Server主动发现所有客户端,然后将客户端登记自己的小本本上,缺点zabbix server压力山大(网段大,客户端多),时间消耗多。

自动注册:zabbix agent主动到zabbix Server上报到,登记;缺点agent有可能找不到Server(配置出错)

被动模式:默认,都是站在agent的立场上说话,agent被server抓取数据
主动模式:都是站在agent的立场上说话,agent主动的将数据发送给Server

两种模式都是在agent上的配置文件配置的
自动发现配置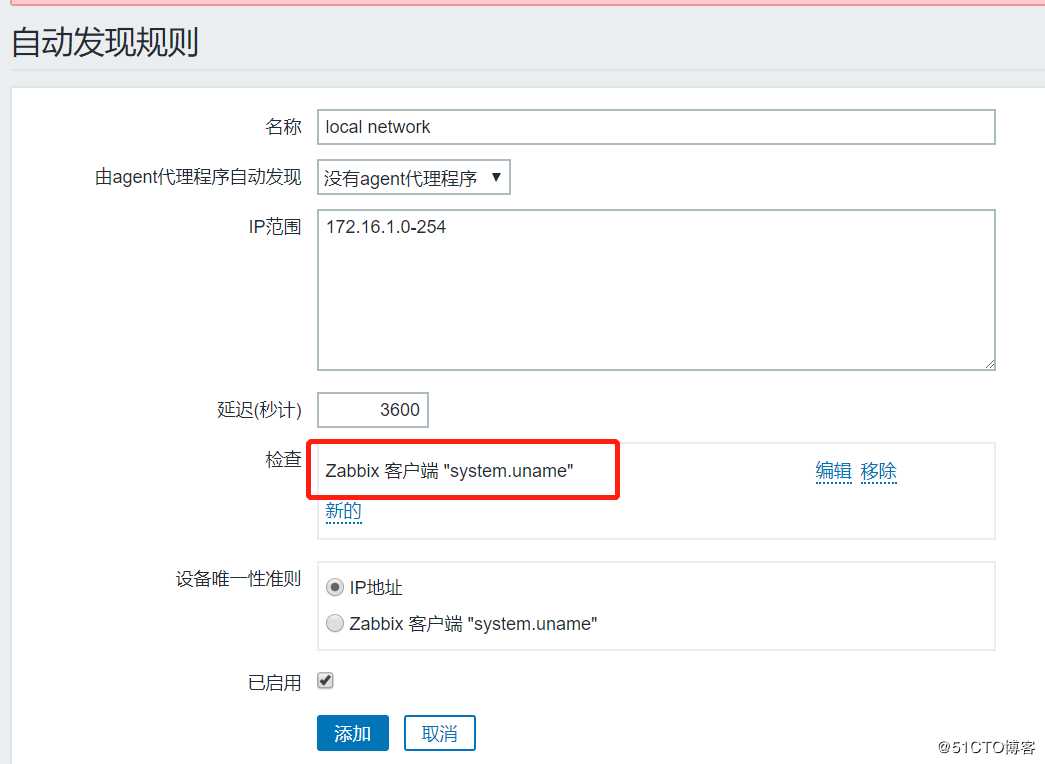


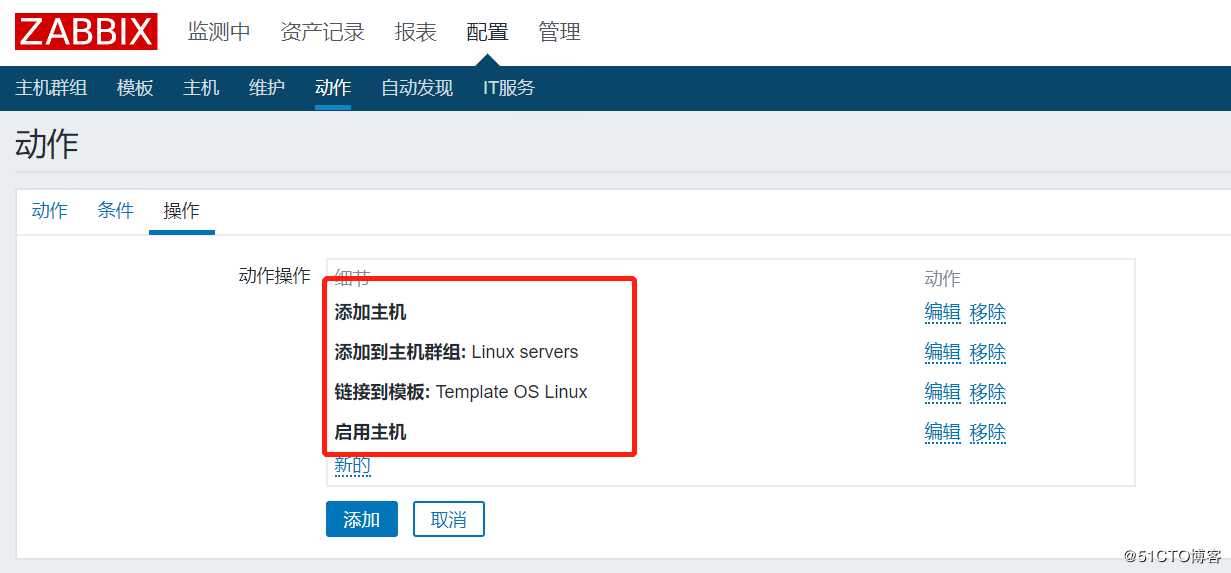

自动注册配置
关掉自动发现--和相应动作
第一步:zabbix Server安装完毕 (完成)
第二步:zabbix agent安装完毕,需要额外增加的配置
vim /etc/zabbix/zabbix_agentd.conf
ServerActive=172.16.1.61
#Hostname=web01使用HostnameItem就不需要这个了
HostnameItem=system.hostname
HostMetadataItem=system.uname
service zabbix-agent restart
netstat -tunlp|grep zabbix

第三步:Server上做hosts解析
echo "172.16.1.7 cache01" >> /etc/hosts

第四步:网页上配置自动注册
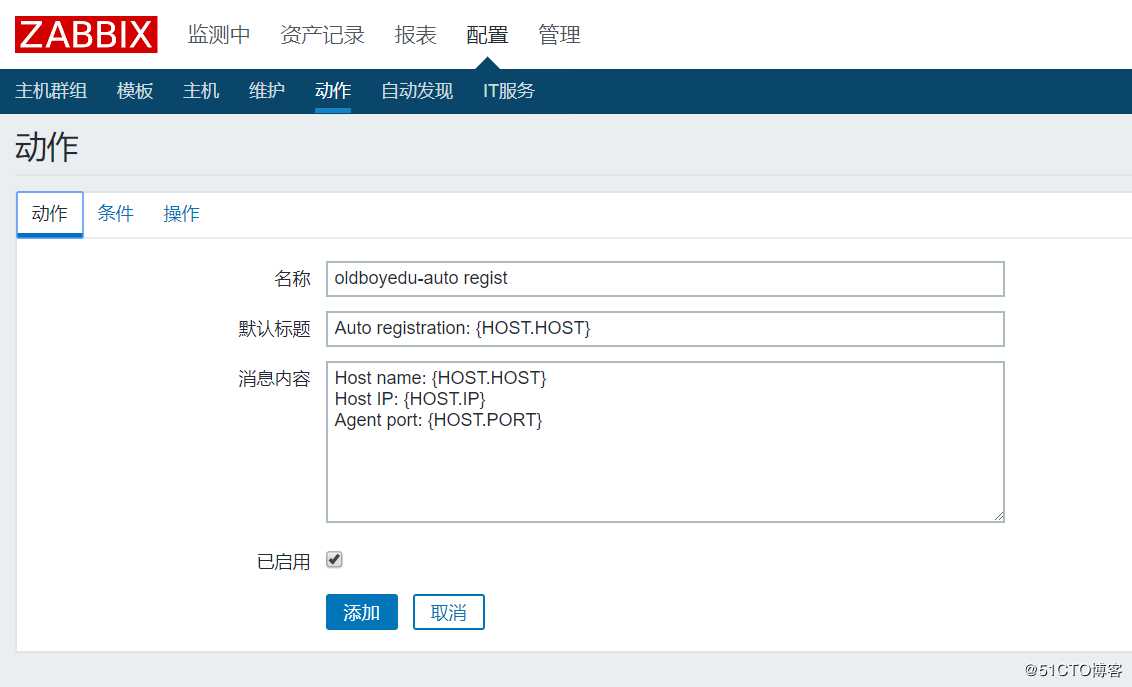
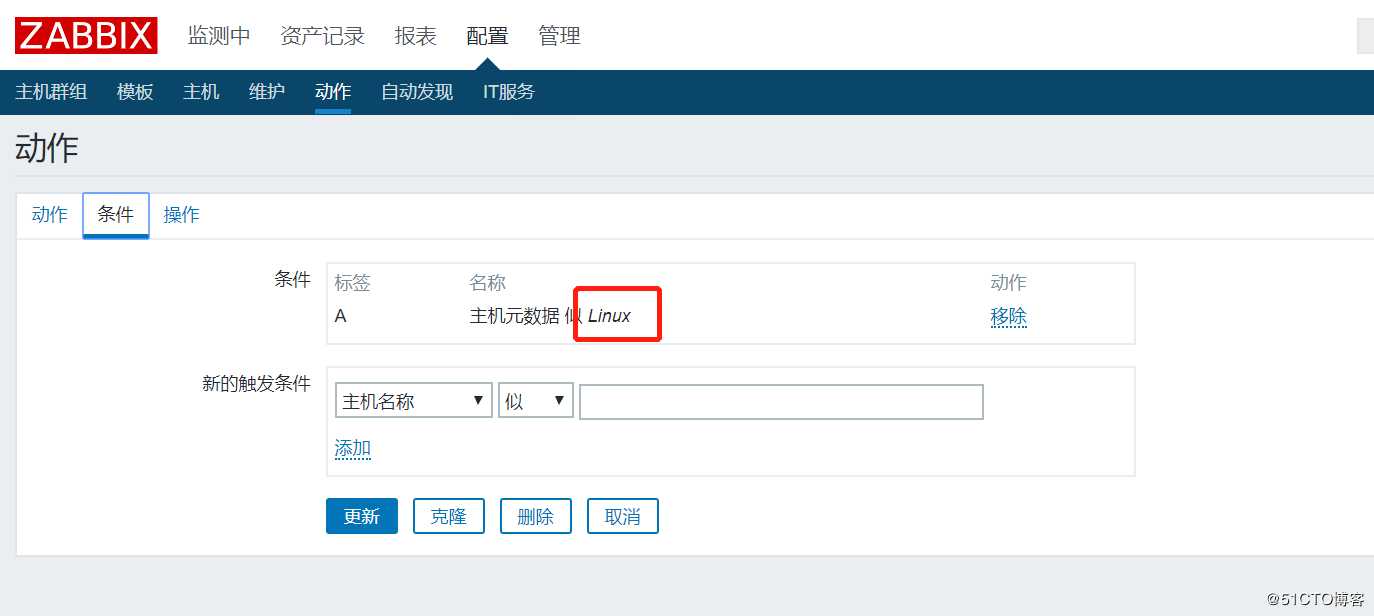
[root@m01 bin]# zabbix_get -s 172.16.1.7 -k ‘system.uname‘
Linux web01 2.6.32-696.el6.x86_64 #1 SMP Tue Mar 21 19:29:05 UTC 2017 x86_64
Linux中L大写
注意:要在/etc/hosts中加上主机名与ip的解析,在web页面端添加完配置,不生效可以重启相应服务试验下
分布式监控:
a. 分担压力,降低负载
b. 多机房监控
机器准备:
Zabbix Server m01
Zabbix Proxy cache01
Zabbix Agent cache02

第一步:在代理机cache01安装zabbix proxy
rpm -ivh http://repo.zabbix.com/zabbix/3.0/rhel/7/x86_64/zabbix-release-3.0-1.el7.noarch.rpm

yum -y install zabbix-proxy-mysql

第二步:安装数据库
zabbix proxy也需要数据库,这个数据库不是用于存储监控数据的 只是用于存储配置信息
#安装数据库
yum -y install mariadb-server
systemctl start mariadb.service

#建库 创建用户授权
mysql

create database zabbix_proxy character set utf8 collate utf8_bin;
grant all privileges on zabbix_proxy.* to zabbix@‘localhost‘ identified by ‘zabbix‘;
exit

#导入数据库文件
zcat /usr/share/doc/zabbix-proxy-mysql-3.0.13/schema.sql.gz |mysql -uzabbix -pzabbix zabbix_proxy

第三步: 配置zabbix proxy,并在zabbix网页登记
#配置zabbix proxy连接数据库
sed -i.ori ‘162a DBPassword=zabbix‘ /etc/zabbix/zabbix_proxy.conf
systemctl start zabbix-proxy.service
DBSocket=/tmp/mysql.sock ---取消注释
sed -i ‘s#Server=127.0.0.1#Server=172.16.1.61#‘ /etc/zabbix/zabbix_proxy.conf
sed -i ‘s#Hostname=Zabbix proxy#Hostname=cache01#‘ /etc/zabbix/zabbix_proxy.conf

systemctl start zabbix-proxy.service

第四步:agent 指向 proxy
[root@cache01 ~]# grep ^Server /etc/zabbix/zabbix_agentd.conf
Server=172.16.1.61
ServerActive=172.16.1.61

[root@cache01 ~]# sed -i ‘s#172.16.1.61#172.16.1.21#g‘ /etc/zabbix/zabbix_agentd.conf

[root@cache01 ~]# grep ^Server /etc/zabbix/zabbix_agentd.conf
Server=172.16.1.21
ServerActive=172.16.1.21

[root@cache01 ~]# systemctl restart zabbix-agent.service

配置好了,在proxy端看日志
tail -50f /var/log/zabbix/zabbix_proxy.log

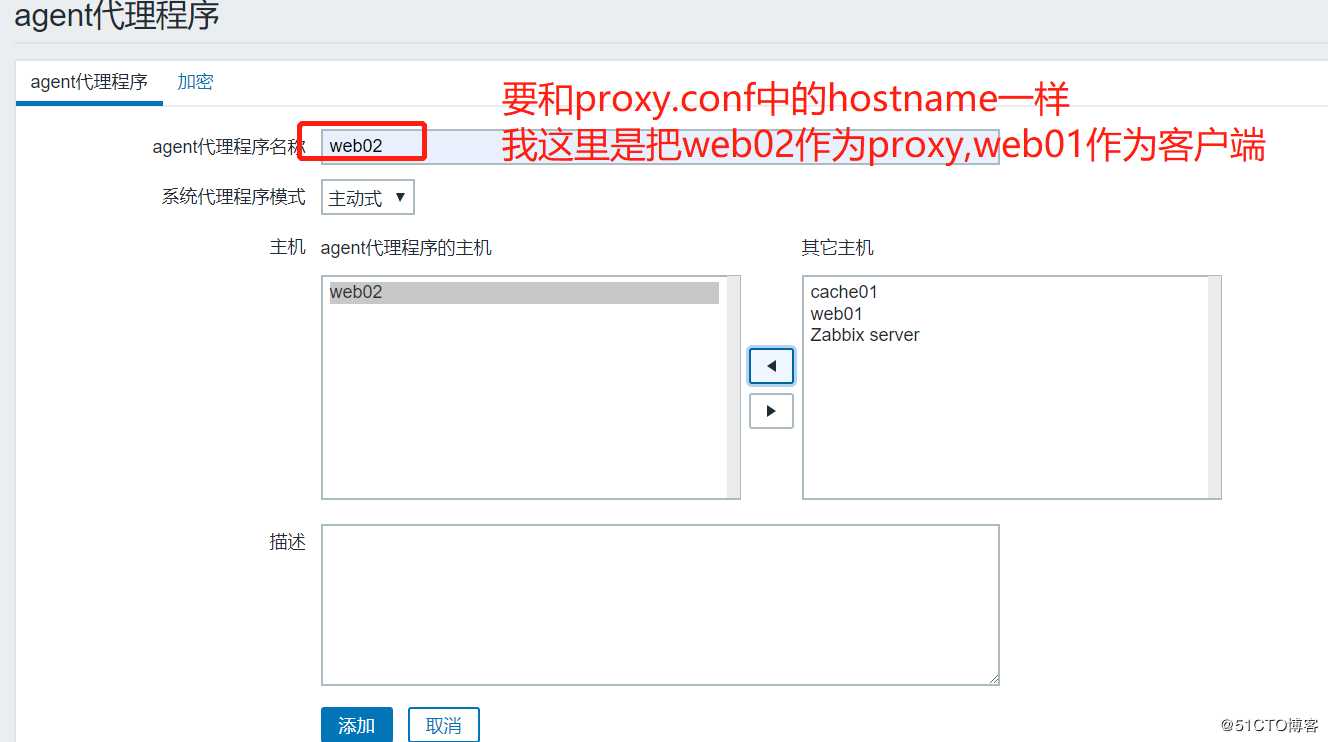
2089:20190322:145234.334 cannot send history data to server at "172.16.1.61": proxy "web02" not found
2089:20190322:145235.338 cannot send history data to server at "172.16.1.61": proxy "web02" not found
2089:20190322:145236.343 cannot send history data to server at "172.16.1.61": proxy "web02" not found
是因为还要再zabbix服务端页面上进行配置
小结:前面所讲内容全部属于zabbix agent方式监控
当前场景:无法安装agent,通过snmp监控
snmp :simple network manager protocol 简单网络管理协议

安装
yum -y install net-snmp net-snmp-utils

配置snmp
sed -i.ori ‘57a view systemview included .1‘ /etc/snmp/snmpd.conf
systemctl start snmpd.service

使用SNMP

[root@db01 ~]# snmpwalk -v 2c -c public 127.0.0.1 sysname

#snmpwalk 类似 zabbix_get
#-v 2c 指定使用snmp协议的版本 snmp分为v1 v2 v3
#-c public 指定暗号
#sysname 类似zabbix的key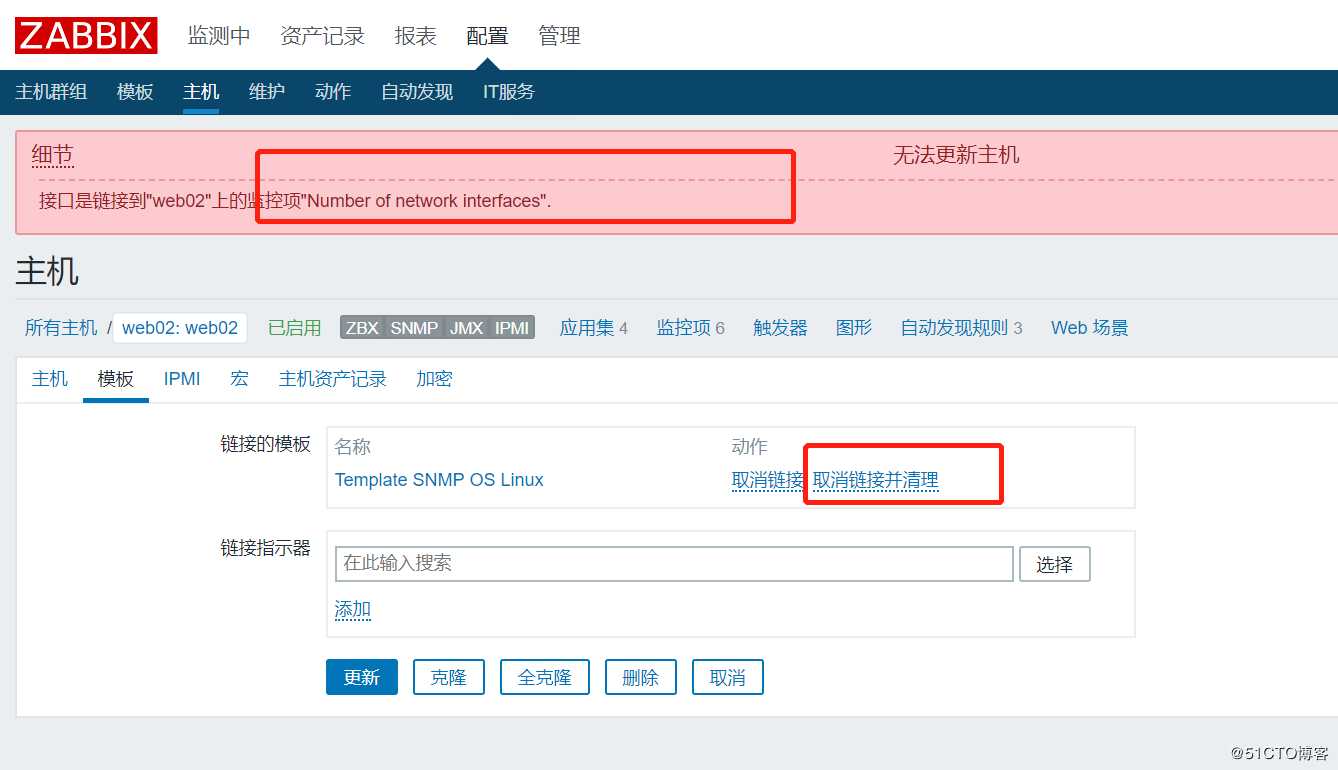
标签:network 80端口 snmp set 机房 乱码 系统选择 无法 schema
原文地址:https://blog.51cto.com/10983441/2426109