标签:实体类 insert gen modify 连接 静态 filter 简化 submit
一、SSH架构
1.Struts 2 + Spring + Hibernate
2.以Spring作为核心框架,数据持久化使用Hibernate完成,表现层使用Struts 2
3.Spring提供对象管理、面向切面编程等实用功能
4.通过Spring提供的服务简化编码、降低开发难度、提高开发效率
二、需要导入依赖jar
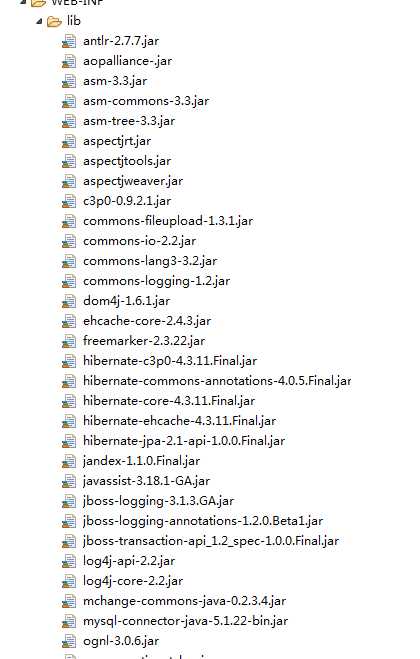
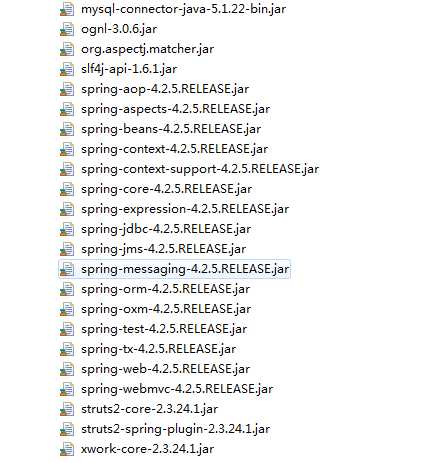
SSH整合体验最不好的就是添加jar包,由于三个框架所依赖的jar包非常多,其中有一些jar包可能冲突,我们应该将冲突的jar包,保留高级版本的,删掉低级版本的。
其中struts2-spring-plugin-xxx.jar 架包 是struts2和spring 整合的jar一定要记得加。
三.配置web.xml和src目录下创建一个config文件夹,在config文件夹添加springDao.xml,spring.xml,hibernate.cfg.xml,struts.xml,ehcache.xml等。
web.xml配置
?xml version="1.0" encoding="UTF-8"?>
<web-app xmlns:xsi="http://www.w3.org/2001/XMLSchema-instance" xmlns="http://xmlns.jcp.org/xml/ns/javaee" xsi:schemaLocation="http://xmlns.jcp.org/xml/ns/javaee http://xmlns.jcp.org/xml/ns/javaee/web-app_4_0.xsd" id="WebApp_ID" version="4.0">
  <display-name>SSH</display-name>
  <welcome-file-list>
    <welcome-file>index.html</welcome-file>
    <welcome-file>index.htm</welcome-file>
    <welcome-file>index.jsp</welcome-file>
    <welcome-file>default.html</welcome-file>
    <welcome-file>default.htm</welcome-file>
    <welcome-file>default.jsp</welcome-file>
  </welcome-file-list>
    <!-- Spring开启Hibernate的OpenSessionView模式 -->
    <filter>
        <filter-name>OpenSessionInViewFilter</filter-name>
        <filter-class>
          org.springframework.orm.hibernate4.support.OpenSessionInViewFilter
        </filter-class>
    </filter>
    <filter-mapping>
        <filter-name>OpenSessionInViewFilter</filter-name>
        <url-pattern>*</url-pattern>
    </filter-mapping>
    <!-- 开启编码过滤器 -->
    <filter>
        <description>字符集过滤器</description>
        <filter-name>encodingFilter</filter-name>
        <filter-class>
            org.springframework.web.filter.CharacterEncodingFilter
        </filter-class>
        <init-param>
        <description>字符集编码</description>
            <param-name>encoding</param-name>
            <param-value>UTF-8</param-value>
        </init-param>
    </filter>
    <filter-mapping>
        <filter-name>encodingFilter</filter-name>
    <url-pattern>/*</url-pattern>
    </filter-mapping>
    <!-- 防止spring内存溢出监听器 -->
    <listener>
        <listener-class>
            org.springframework.web.util.IntrospectorCleanupListener
        </listener-class>
    </listener>
    <!-- Struts2的配置 -->
    <filter>
        <filter-name>struts2</filter-name>
        <filter-class>
        org.apache.struts2.dispatcher.ng.filter.StrutsPrepareAndExecuteFilter
        </filter-class>
        <init-param>
            <param-name>config</param-name>
            <param-value>struts-default.xml,struts-plugin.xml,config/struts.xml</param-value>
        </init-param>
    </filter>
    <filter-mapping>
        <filter-name>struts2</filter-name>
        <url-pattern>*.action</url-pattern>
    </filter-mapping>
    <!-- Spring的配置 -->
    <context-param>
        <param-name>contextConfigLocation</param-name>
        <param-value>classpath:config/spring.xml,classpath:config/springDao.xml</param-value>
    </context-param>
    <listener>
        <listener-class>
            org.springframework.web.context.ContextLoaderListener
        </listener-class>
    </listener>
    <!-- 配置session超时时间,单位分钟 -->
    <session-config>
        <session-timeout>15</session-timeout>
    </session-config>
</web-app>
springDao.xml配置
<?xml version="1.0" encoding="UTF-8"?>
<beans xmlns="http://www.springframework.org/schema/beans"
    xmlns:xsi="http://www.w3.org/2001/XMLSchema-instance"
    xmlns:aop="http://www.springframework.org/schema/aop"
    xmlns:context="http://www.springframework.org/schema/context"
    xmlns:tx="http://www.springframework.org/schema/tx"
    xsi:schemaLocation="http://www.springframework.org/schema/beans http://www.springframework.org/schema/beans/spring-beans.xsd
        http://www.springframework.org/schema/aop http://www.springframework.org/schema/aop/spring-aop-4.2.xsd
        http://www.springframework.org/schema/context http://www.springframework.org/schema/context/spring-context-4.2.xsd
        http://www.springframework.org/schema/tx http://www.springframework.org/schema/tx/spring-tx-4.2.xsd">

        <bean id="dataSource" class="com.mchange.v2.c3p0.ComboPooledDataSource" destroy-method="close">
            <property name="driverClass" value="com.mysql.jdbc.Driver" />
            <property name="jdbcUrl" value="jdbc:mysql://localhost:3306/ssh" />
            <property name="user" value="root" />
            <property name="password" value="100" />
            <!-- 队列中的最小连接数 -->
            <property name="minPoolSize" value="15"></property>
            <!-- 队列中的最大连接数 -->
            <property name="maxPoolSize" value="25"></property>
            <!-- 当连接耗尽时创建的连接数 -->
            <property name="acquireIncrement" value="15"></property>
            <!-- 等待时间 -->
            <property name="checkoutTimeout" value="10000"></property>
            <!-- 初始化连接数 -->
            <property name="initialPoolSize" value="20"></property>
            <!-- 最大空闲时间,超出时间连接将被丢弃 -->
            <property name="maxIdleTime" value="20"></property>
            <!-- 每隔60秒检测空闲连接 -->
            <property name="idleConnectionTestPeriod" value="60000"></property>
        </bean>

        <!-- session工厂由spring来管理 -->
        <bean id="sessionFactory" class="org.springframework.orm.hibernate4.LocalSessionFactoryBean" >
            <!-- 加载数据源对象,spring的配置方式 -->
            <property name="dataSource"  ref="dataSource"/>
            <!-- 读取hibernate配置信息,hibernate配置方式 -->
            <property name="configLocation" value="classpath:config/hibernate.cfg.xml" />
            <!-- 自动加载映射文件 *表示匹配该文件下的所有映射文件 -->
            <property name="mappingLocations"
                     value="classpath:com/znsd/ssh/entities/mapper/*.hbm.xml" >
            </property>
        </bean>

        <!-- 配置事务 -->
        <bean id="txManager" class="org.springframework.orm.hibernate4.HibernateTransactionManager">
            <property name="sessionFactory" ref="sessionFactory" />
        </bean>

        <!-- 事务的通知方式 -->
        <tx:advice id="txAdvice" transaction-manager="txManager">
            <tx:attributes>
                <tx:method name="find*" propagation="REQUIRED" read-only="true" />
                <tx:method name="search*" propagation="REQUIRED" read-only="true" />
                <tx:method name="query*" propagation="REQUIRED" read-only="true" />

                <tx:method name="add*" propagation="REQUIRED" />
                <tx:method name="submit*" propagation="REQUIRED" />
                <tx:method name="save*" propagation="REQUIRED" />
                <tx:method name="insert*" propagation="REQUIRED" />

                <tx:method name="del*" propagation="REQUIRED" />
                <tx:method name="remove*" propagation="REQUIRED" />

                <tx:method name="update*" propagation="REQUIRED" />
                <tx:method name="modify*" propagation="REQUIRED" />

                <tx:method name="*" propagation="REQUIRED" read-only="true" />
            </tx:attributes>
        </tx:advice>

        <!-- AOP切面拦截事务,事务一定是加在业务层 -->
        <aop:config>
            <aop:pointcut id="serviceMethod"
                expression="execution(* com.znsd.ssh.service.impl.*.*(..))" />
            <aop:advisor advice-ref="txAdvice"
                pointcut-ref="serviceMethod" />
        </aop:config>

</beans>
一般项目中使用连接池进行数据库连接,这里我们选用c3p0连接池。首先添加c3p0的连接池信息。 首先需要导入c3p0连接池对应的驱动包。 当然也可以选用其他连接池信息,只需要修改对应的驱动类和参数即可。 连接池信息有两种配置方案: 在springDao文件中配置。 在hibernate.cfg.xml文件配置 ---- 我是用的springDao.xml配置的。
spring.xml配置
<?xml version="1.0" encoding="UTF-8"?>
<beans xmlns="http://www.springframework.org/schema/beans"
    xmlns:xsi="http://www.w3.org/2001/XMLSchema-instance"
    default-autowire="byType"
    xmlns:context="http://www.springframework.org/schema/context"
    xmlns:tx="http://www.springframework.org/schema/tx"
    xmlns:aop="http://www.springframework.org/schema/aop"
    xsi:schemaLocation="http://www.springframework.org/schema/beans http://www.springframework.org/schema/beans/spring-beans.xsd
        http://www.springframework.org/schema/context http://www.springframework.org/schema/context/spring-context-4.2.xsd
        http://www.springframework.org/schema/aop http://www.springframework.org/schema/aop/spring-aop-4.2.xsd
        http://www.springframework.org/schema/tx http://www.springframework.org/schema/tx/spring-tx-4.2.xsd">

    <!-- 使用spring注解方式 -->

    <!-- 指定要扫描的某个文件夹中的Bean -->
    <context:component-scan base-package="com.znsd.ssh">
        <!-- 只检索指定的规则 只不过要在context:component-scan下加上 use-default-filters="false"-->
        <!-- <context:include-filter type="annotation" expression="org.springframework.stereotype.Repository"/> -->
        <!-- 排除指定的规则 -->
        <!-- <context:exclude-filter type="annotation" expression="org.springframework.stereotype.Repository"/> -->
    </context:component-scan>
</beans>
hibernate.cfg.xml配置
<?xml version="1.0" encoding="UTF-8"?>
<!DOCTYPE hibernate-configuration PUBLIC
    "-//Hibernate/Hibernate Configuration DTD 3.0//EN"
    "http://www.hibernate.org/dtd/hibernate-configuration-3.0.dtd">
    <hibernate-configuration>
        <session-factory>
            <!-- 数据库方言 -->
            <property name="dialect">org.hibernate.dialect.MySQL5InnoDBDialect</property>
            <!-- 在控制台输出sql语句 -->
            <property name="show_sql">true</property>
            <!-- 格式化sql语句 -->
            <property name="format_sql">true</property>
            <!-- 数据库生成策略 -->
            <property name="hibernate.hbm2ddl.auto">update</property>
        </session-factory>
    </hibernate-configuration>
struts.xml配置
<?xml version="1.0" encoding="UTF-8"?>
<!DOCTYPE struts PUBLIC
    "-//Apache Software Foundation//DTD Struts Configuration 2.3//EN"
    "http://struts.apache.org/dtds/struts-2.3.dtd">
<struts>
    <!-- 设置全局的编码格式 -->
    <constant name="struts.i18n.encoding" value="UTF-8"/>
    <!-- 开启OGNL的静态访问 -->
    <constant name="struts.ognl.allowStaticMethodAccess" value="true" />
    <!-- 当struts的配置文件修改后,系统是否自动重新加载该文件,默认值为false(生产环境下使用),开发阶段最好打开-->
    <constant name="struts.configuration.xml.reload" value="true" />
    <!-- 开发模式下使用,这样可以打印出更详细的错误信息 -->
    <constant name="struts.devMode" value="true" />

    <!-- 登录 -->
    <package name="default" namespace="/" extends="struts-default">
        <action name="*">
            <result name="success">/WEB-INF/veiws/{1}.jsp</result>
        </action>

        <action name="loginPost" class="loginAction" method="loginpost">
            <result name="success">/WEB-INF/veiws/welcome.jsp</result>
            <result name="input">/WEB-INF/veiws/login.jsp</result>
        </action>

        <action name="registerPost" class="registerPost" method="registerpost">
            <result name="success">/WEB-INF/veiws/welcome.jsp</result>
            <result name="input" type="dispatcher">register.action</result>
        </action>

        <action name="welcome" class="indexAction" method="index"></action>
    </package>
</struts>
ehcache.xml配置
<ehcache>
    <cache name="sampleCache1"
        maxElementsInMemory="10000"
        eternal="false"
        timeToIdleSeconds="300"
        timeToLiveSeconds="600"
        overflowToDisk="true"
        />
    <cache name="sampleCache2"
        maxElementsInMemory="1000"
        eternal="true"
        timeToIdleSeconds="0"
        timeToLiveSeconds="0"
        overflowToDisk="false"
        />
</ehcache>
四,下面是代码实现的功能。
创建一个实体类和一个属性映射xml
<!DOCTYPE hibernate-mapping PUBLIC
    "-//Hibernate/Hibernate Mapping DTD 3.0//EN"
    "http://www.hibernate.org/dtd/hibernate-mapping-3.0.dtd">
    <hibernate-mapping>
        <class name="com.znsd.ssh.entities.UserInfo" table="user">
             <id name="userId" column="userId">
                 <generator class="native"></generator>
             </id>
             <property name="userName" column="userName"></property>
             <property name="password" column="password"></property>
        </class>
    </hibernate-mapping>
实体类
package com.znsd.ssh.entities;

import java.io.Serializable;

import org.springframework.stereotype.Component;

@Component
public class UserInfo implements Serializable{
    /**
     *
     */
    private static final long serialVersionUID = 1L;
    private Integer userId;
    private String userName;
    private String password;
    public Integer getUserId() {
        return userId;
    }
    public void setUserId(Integer userId) {
        this.userId = userId;
    }
    public String getUserName() {
        return userName;
    }
    public void setUserName(String userName) {
        this.userName = userName;
    }
    public String getPassword() {
        return password;
    }
    public void setPassword(String password) {
        this.password = password;
    }
    @Override
    public String toString() {
        return "UserInfo [userId=" + userId + ", userName=" + userName + ", password=" + password + "]";
    }
}
Action
package com.znsd.ssh.action;


import java.util.List;
import java.util.Map;

import org.apache.logging.log4j.core.config.plugins.validation.constraints.Required;
import org.springframework.beans.factory.annotation.Autowired;
import org.springframework.beans.factory.annotation.Qualifier;
import org.springframework.context.annotation.Scope;
import org.springframework.stereotype.Controller;

import com.opensymphony.xwork2.ActionSupport;
import com.znsd.ssh.entities.UserInfo;
import com.znsd.ssh.service.UserService;

@Controller
public class LoginAction extends ActionSupport{
/**
*
*/
private static final long serialVersionUID = 1L;
@Autowired
@Qualifier("userService")
private UserService userService;

//登录
public String loginpost(){
for (UserInfo userInfo : list) {
  System.out.println(userInfo.getClass().getName());
}
System.out.println(user);
if(userService.login(user)) {
  return SUCCESS;
}else {
  return INPUT;
}

}
}
javaBean
BaseDao接口和实现类BaseDaoImpl如下:
package com.znsd.ssh.dao;

import java.io.Serializable;
import java.util.List;

public interface BaseDao <T>{
    //实现添加的方法
    Serializable save(T entity);

    //实现删除的方法
    void delete(T entity);

    //根据id来删除的方法
    void delete(Class<T> clazz,Serializable id);

    //实现更新的方法
    void update(T entity);

    //根据id来获取对象
    T get(Class<T> clazz, Serializable id);

    //实现查询所有数据的方法
    List<T> findAll(Class<T> clazz);

    //实现根据条件查询的方法
    List<T> findAll(Class<T> clazz,String where,Object[] paras);
}
UserDao接口和实现类UserDaoImpl如下:
package com.znsd.ssh.dao;

import java.util.List;


import com.znsd.ssh.entities.UserInfo;

public interface UserDao extends BaseDao<UserInfo>{
    public boolean login(UserInfo user);
}
package com.znsd.ssh.dao;

import java.util.List;


import com.znsd.ssh.entities.UserInfo;

public interface UserDao extends BaseDao<UserInfo>{
    public boolean login(UserInfo user);
}
UserService接口和实现类UserServiceImpl
package com.znsd.ssh.service;

import java.util.List;

import com.znsd.ssh.entities.UserInfo;

public interface UserService {
    public boolean login(UserInfo user);
}
package com.znsd.ssh.service.impl;

import java.util.List;

import org.springframework.beans.factory.annotation.Autowired;
import org.springframework.beans.factory.annotation.Qualifier;
import org.springframework.stereotype.Service;

import com.znsd.ssh.dao.UserDao;
import com.znsd.ssh.entities.UserInfo;
import com.znsd.ssh.service.UserService;

@Service("userService")
public class UserServiceImpl implements UserService{
    @Autowired
    @Qualifier("userDao")
    private UserDao userDao;

    @Override
    public boolean login(UserInfo user) {
        return userDao.login(user);
    }
}
jsp页面
测试:
<%@ page language="java" contentType="text/html; charset=ISO-8859-1"
    pageEncoding="ISO-8859-1"%>
<!DOCTYPE html>
<html>
<head>
<meta charset="ISO-8859-1">
<title>Insert title here</title>
</head>
<body>
    <% response.sendRedirect("login.action"); %>
</body>
</html>
下面WebContent\WEB-INF\veiws所有的jsp
login.jsp
<%@ page language="java" contentType="text/html; charset=UTF-8"
    pageEncoding="UTF-8"%>
<!DOCTYPE html>
<html>
<head>
<meta charset="UTF-8">
<title>登录</title>
</head>
<body>
    <form action="loginPost.action" method="post">
        <table>
            <tr>
                <td>用户名:</td>
                <td><input type="text" name="user.userName"></td>
            </tr>
            <tr>
                <td>密码:</td>
                <td><input type="password" name="user.password"></td>
            </tr>
            <tr>
                <td><input type="submit" value="提交"></td>
                <td><input type="reset" value="重置"></td>
            </tr>
        </table>
    </form>
    <a href="register.action">没有账号?立即注册</a>
</body>
</html>
welcome.jsp
<%@ page language="java" contentType="text/html; charset=UTF-8"
    pageEncoding="UTF-8"%>
<!DOCTYPE html>
<html>
<head>
<meta charset="UTF-8">
<title>主页</title>
</head>
<body>
    <h1>欢迎来到SSH!</h1>
</body>
</html>
这样一个简单的ssh框架就搭建好了,只做了一个简单的登录功能能!
标签:实体类 insert gen modify 连接 静态 filter 简化 submit
原文地址:https://www.cnblogs.com/panxiaohai/p/11231712.html