标签:允许 files 目录 volume har 服务端 sha bsp md5
yum install libacl libacl-devel
tar zxf bacula-9.2.2.tar.gz
cd bacula-9.2.2
CFLAGS="-g -Wall" ./configure \
--sbindir=/usr/local/bacula/bin \
--sysconfdir=/usr/local/bacula/etc \
--with-pid-dir=/usr/local/bacula/working \
--with-subsys-dir=/usr/local/bacula/working \
--with-working-dir=/usr/local/bacula/working \
--enable-client-only
make&&make install&&make install-autostart-fd
vi /usr/local/bacula/etc/bacula-fd.conf
Director {
Name = server-dir
# 此Name为Director的名称,即server端名称而非client的名称。
Password = "3ydivk+gipxRjqbNCdwUeNi8ZWhGh3NXyvHXPZLAgMZ1"
# 定义client的密码,director需要通过此密码连接客户端
}
Director {
Name = server-mon
# 此Name为tray-monitor的名称,即monitor的名称而非client的名称。
Password = "w1yPbENlbfCMNrsD2gMarzBfLb+I1+kRN/UhUM3s5+VB"
# 配置 tray-monitor监控密码,详见《Tray Monitor服务》。。
Monitor = yes
cd /usr/local/bacula/bin
./bacula start
选择自定义安装
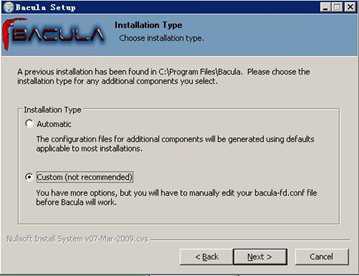
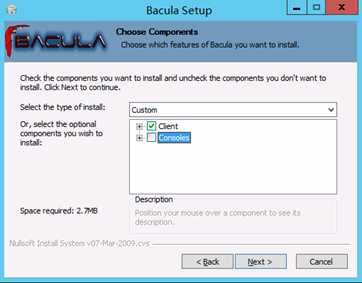
选择Client即可(console可以查看服务端备份任务的状态等,可以不用安装)
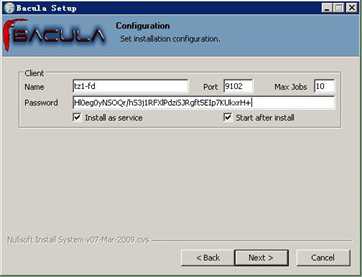
输入Client端信息(Name:client名称、port:默认9102、Max Jobs:默认10、Password:在服务端的dir配置文件中查看Client的password)
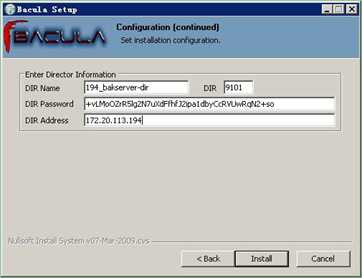
DIR配置(用于查看备份job信息,可以不配置)
(DIR Name:服务端DIR、DIR:9101默认端口、DIR Password:在服务端的dir或bconsole配置文件中查看password、DIR Address:DIR地址)
安装完成后,默认配置默认位于C:\Program Files\Bacula ,配置文件为bacula-fd.conf
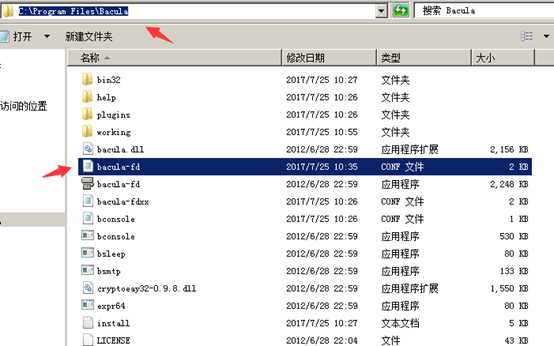
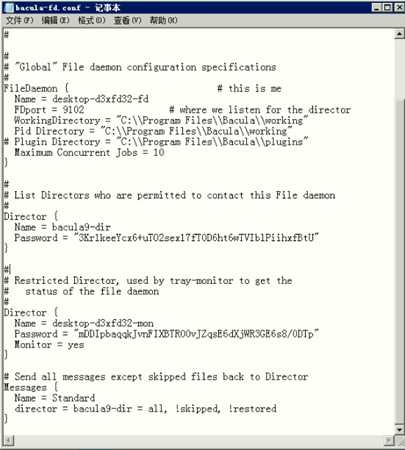
配置文件中:
Director {
Name = bacula9-dir
Password = "3Kr1keeYcx6+uTO2sex17fT0D6ht6wTVIblPiihxfBtU"
}
# 此处配置为允许哪个Director连接此客户端。
# Name为Server Director的name,Password为Director定义的该Client密码。
# Send all messages except skipped files back to Director
Messages {
Name = Standard
director = bacula9-dir = all, !skipped, !restored
}
# Restricted Director, used by tray-monitor to get the
# status of the file daemon
Director {
Name = desktop-d3xfd32-mon
# 此Name为tray-monitor的名称,即monitor的名称而非client的名称。
Password = "mDDIpbaqqkJvnFIXBTR00vJZqsE6dXjWR3GE6s8/0DTp"
# 配置 tray-monitor监控密码,详见《Tray Monitor服务》。。
Monitor = yes
}
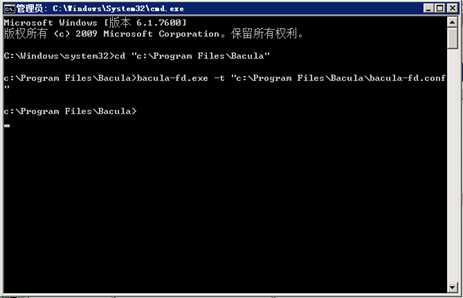
配置完成后可检测配置文件是否有误
C:\Users\sky>cd C:\Program Files\Bacula
C:\Program Files\Bacula>bacula-fd.exe -c "C:\Program Files\Bacula\bacula-fd.conf"
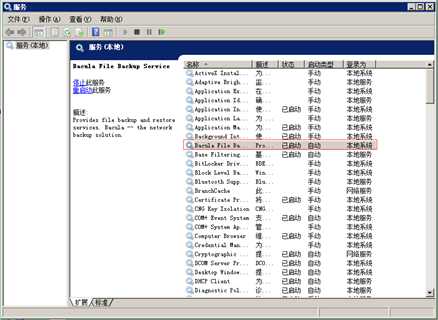
查看客户端服务状态
vi bacula-dir.conf
… …
Schedule {
Name = "schedule1"
Run = Level=Full sun at 0:00
Run = Level=Incremental hourly at 0:00
}
Pool {
Name = Pool1
Pool Type = Backup
Recycle = yes # Bacula can automatically recycle Volumes
AutoPrune = yes # Prune expired volumes
Volume Retention = 365 days # one year
Maximum Volume Bytes = 50G # Limit Volume size to something reasonable
Maximum Volumes = 100 # Limit number of Volumes in Pool
Label Format = "backup-"
}
# linux client
Client{
Name = "linux-fd"
Address = linuxip
FDPort = 9102
Catalog = MyCatalog
Password = "yn2FnKAoucIbFMLtESgdARYmFUvqjuPYITyeLKwDwd9k"
}
# windows client
Client{
Name = "windows-fd"
Address = windowsip
FDPort = 9102
Catalog = MyCatalog
Password = "Hl0eg0yNSOQr/hS3j1RFXlPdziSJRgft5EIp7KUkxrH+"
}
# For linux
FileSet {
Name = "FileSet1"
Include {
Options {
signature = MD5
Compression = GZIP
}
File = /var/log/
}
}
# For windows
FileSet {
Name = "FileSet2"
Include {
Options {
signature = MD5
Compression = GZIP
}
File = "C:/myfiles"
}
}
# linux job
Job {
Name = "linux-backup1"
JobDefs = "DefaultJob"
Type = Backup
Client = "linux-fd"
FileSet = "FileSet1"
Storage = File1
Pool = Pool1
Schedule = "Schedule1"
}
Job {
Name = "linux-restores1"
Type = Restore
Client = "linux-fd"
FileSet = "FileSet1"
Storage = File1
Pool = Pool1
Messages = Standard
Where = /tmp
}
# windows job
Job {
Name = "windows-backup1"
JobDefs = "DefaultJob"
Type = Backup
Client = "windows-fd"
FileSet = "FileSet2"
Storage = File1
Pool = Pool1
Schedule = "Schedule1"
}
Job {
Name = "windows-restores1"
Type = Restore
Client = "windows-fd"
FileSet = "FileSet2"
Storage = File1
Pool = Pool1
Messages = Standard
Where = "c:/tmp"
}
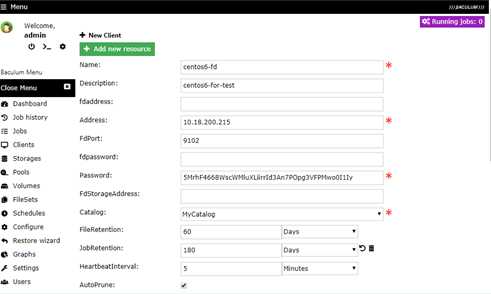
密码为client端定义的密码,登录client,查看该fd密码。
vi /usr/local/bacula/etc/bacula-fd.conf
#
Director {
Name = server-dir
Password = "7oV+FkA+JLKw1DtYOevB+CKAjHvfuGPctgtvLyHf9dji"
# client密码为该密码
}
Fileset定义需要备份的内容
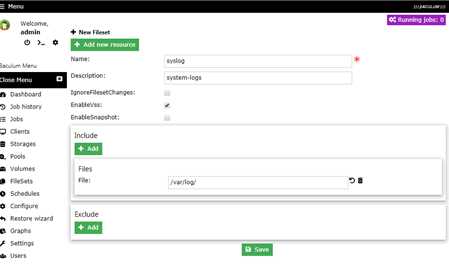
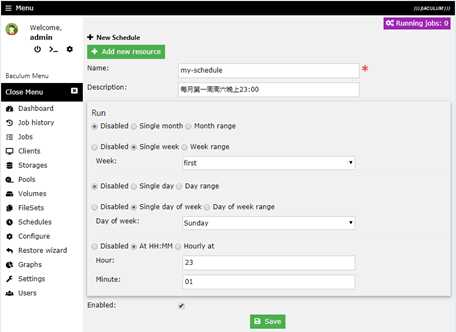
Name:不能使用中文(通过界面创建schedule功能不全,建议通过bacula-dir.conf配置)
每月第一周周六晚上23:00
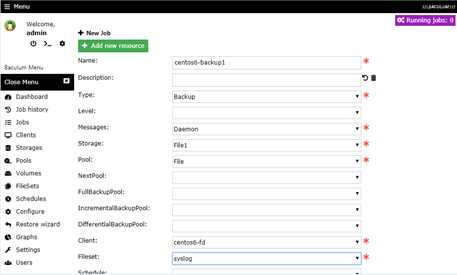
Name:最好能从名字确定系统和备份类型(如:centos01-backup、windows01-restore)
Type:选择备份类型
Storage:选择File1
Pool:选择默认的File
Client:选择刚创建的client
Fileset:选择刚创建需要备份的目录
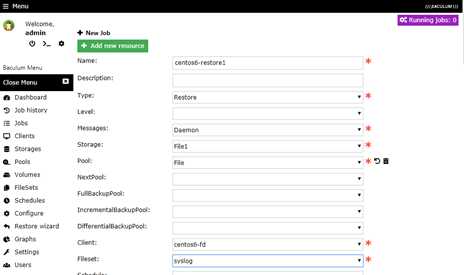
Name:最好能从名字确定系统和备份类型(如:centos01-backup、windows01-restore)
Type:选择备份类型(此处是restore)
Storage:选择File1
Pool:选择默认的File
Client:选择刚创建的client
Fileset:选择备份的那个目的fileset
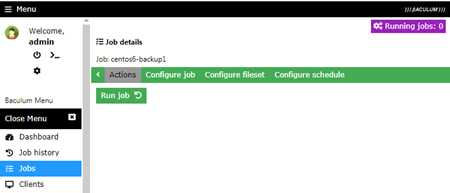
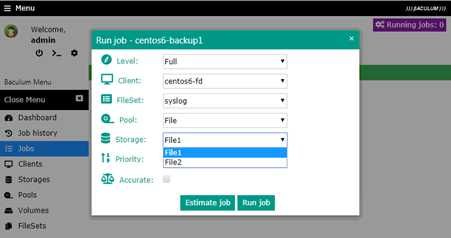
在Jobs中选中需要运行的job,单击Run job
Job配置Storage为File1,在运行的时候如果选择File2是无效的,备份还是保存在File1中。
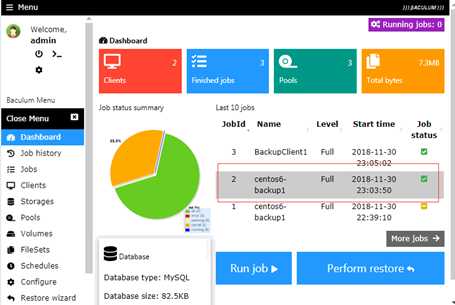
在Dashboard中查看完成的任务
选择备份任务
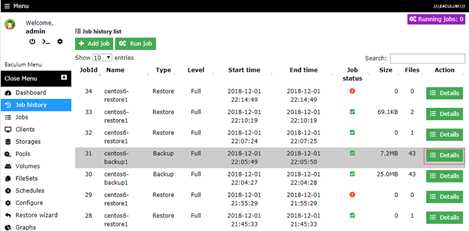
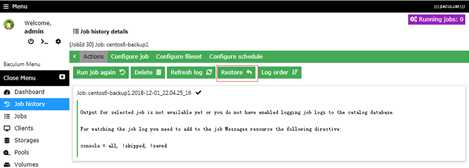
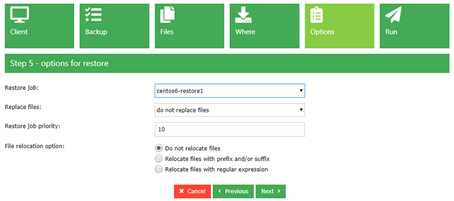
选择restore
选择需要还原的文件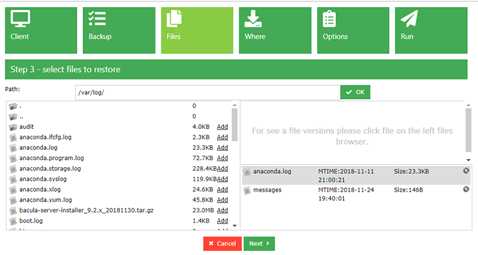

选择还原位置(默认为restore任务中配置的还原位置)
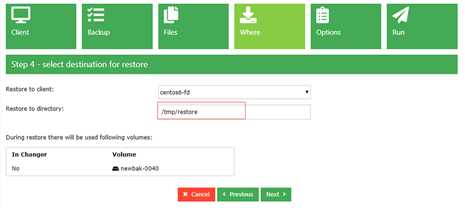
选择restore job
标签:允许 files 目录 volume har 服务端 sha bsp md5
原文地址:https://www.cnblogs.com/skyshao/p/11389374.html