标签:cto app 单选 oar mes lang example eof rom
初始化:iptables|firewalld,selinux,ntp|chrony在A上实现。
一、http服务上需要实现的功能。
1.实现http服务,下载http服务,并且开启服务,设置成开机自动启动。(centos7)
yum install httpd
systemctl start httpd
systemctl enable httpd
2.配置启动文件yum源文件的挂载,yum源文件提前拷贝到机器上
[root@centos7 ]#cd /var/www/html
[root@centos7 html]#mkdir -pv centos/{6,7}/os/x86_64/
把拷贝好的光盘文件挂载上去,放的位置不同,挂载的位置也不同。在/etc/fstab添加下面2行
[root@centos7 html]#vim /etc/fstab
/data/CentOS-7-x86_64-Everything-1810.iso /var/www/html/centos/7/os/x86_64/ iso9660 defaults 0 0
/data/CentOS-6.10-x86_64-bin-DVD1.iso /var/www/html/centos/6/os/x86_64/ iso9660 defaults 0 0
自动挂载
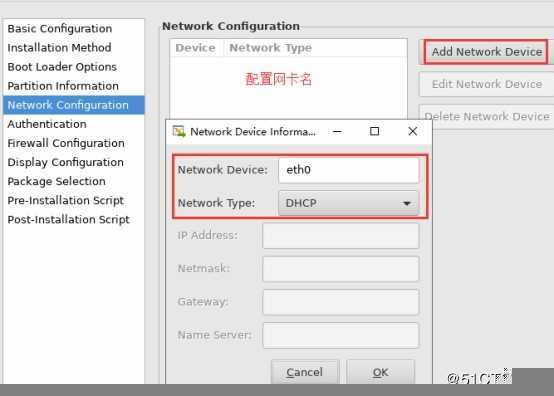
[root@centos7 html]#mount -a3.应答文件的配置,在图形化界面配置生成,必须可以打开图形功能(centos7) 6和7的文件要在不同的机器上分别生成,6和7还是有一点点细微的差别的。
[root@centos7 ~]#yum install system-config-kickstart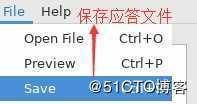
[root@centos7 ~]#system-config-kickstart 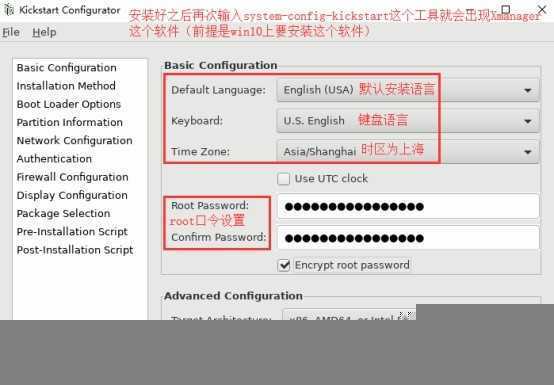
分区要自己设置的,由于图片原因,就不细写了
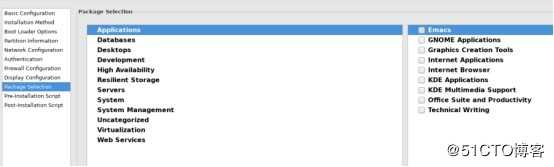
下面这个地方要注意了。必须要在本机的yum仓库中把一个yum名字改成development,不然不会出现下图的包的选择。需要什么包自己选择,也可以不选择,但是centos6必须选择一个包,生成文件后也可以删除,不选择的话会把所有的包都安装上。

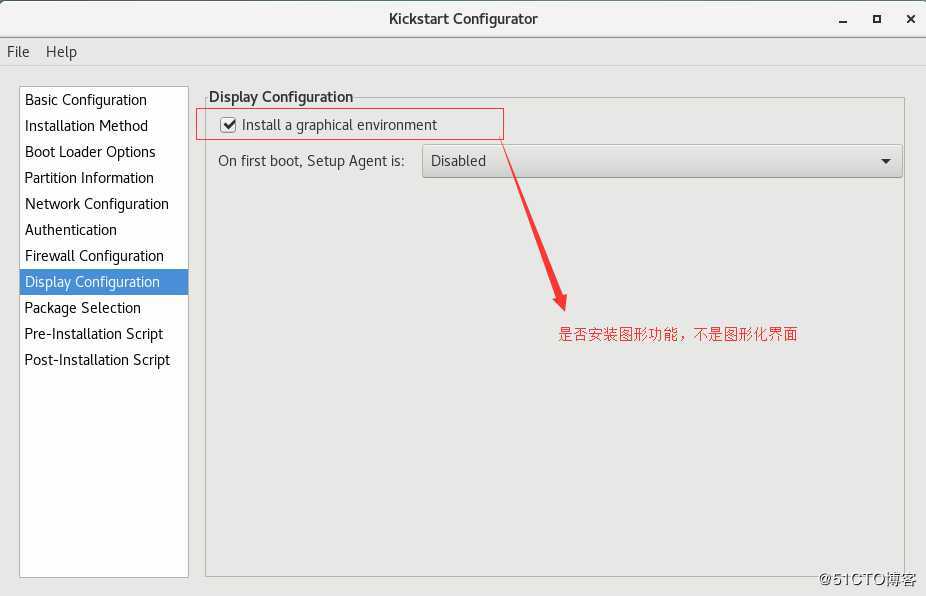
安装后脚本,可以自己写个初始化脚本,图片被吃了
下面是应答文件的保存
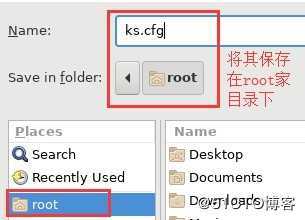
生成文件后还可以修改。具体情况自己选择。
[root@centos7 ]#cd /var/www/html
[root@centos7 html]#mkdir ksdir
把生成ks文件拷贝到里面
[root@centos7 html]#cd ksdir/
[root@centos7 ksdir]#tree
.
├── ks6_desktop.cfg
└── ks7_mini.cfg

0 directories, 2 files
这里贴一个ks文件,可以照的修改修改。6和7是有区别的。需要自己生成。
#platform=x86, AMD64, or Intel EM64T
#version=DEVEL
# Install OS instead of upgrade
install
# Keyboard layouts
keyboard ‘us‘
# Root password
rootpw --plaintext magedu
# Use network installation
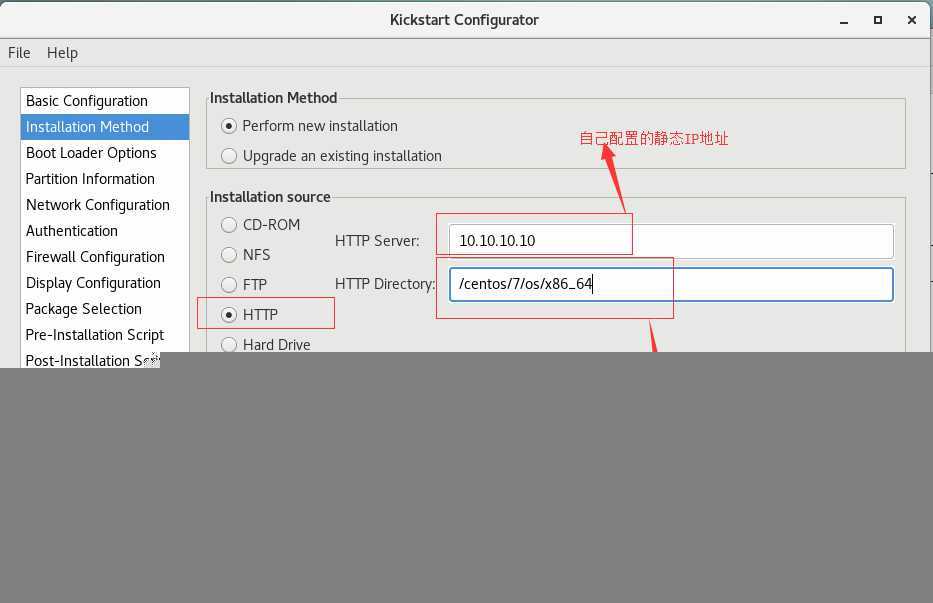
url --url="http://10.10.10.10/centos/7/os/x86_64"
# System language
lang en_US
# System authorization information
auth --useshadow --passalgo=sha512
# Use text mode install
text
firstboot --disable
# SELinux configuration
selinux --disabled
# Firewall configuration
firewall --disabled
# Network information
network --bootproto=dhcp --device=eth0
# Reboot after installation
reboot
# System timezone
timezone Africa/Abidjan
# System bootloader configuration
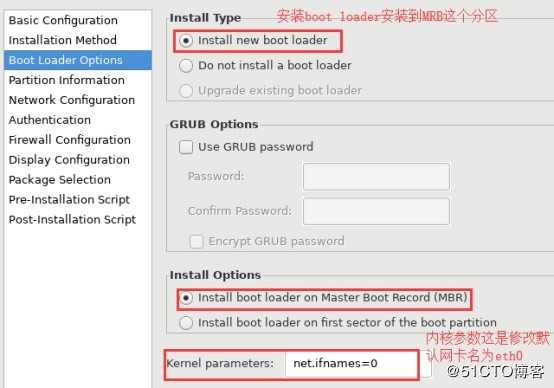
bootloader --append="net.ifnames=0" --location=mbr
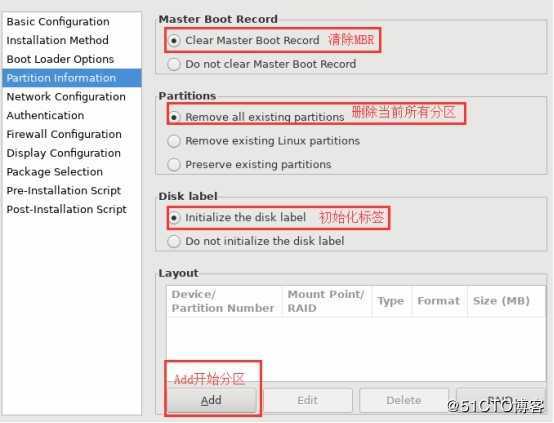
# Clear the Master Boot Record
zerombr
# Partition clearing information
clearpart --all --initlabel
# Disk partitioning information
part / --fstype="xfs" --size=10000
part /boot --fstype="xfs" --size=1000
part swap --fstype="swap" --size=1024
%post
useradd wang
echo 123456 | passwd --stdin wang &> /dev/null
mkdir /etc/yum.repos.d/backup
cd /etc/yum.repos.d/
mv *.repo backup/
cat >base.repo <<EOF
[base]
baseurl=file:///misc/cd
gpgcheck=0
EOF
systemctl enable autofs
%end
%packages
autofs
tree
vim-enhanced
%end 最后的httpd的结构目录,这是没有挂载光盘文件之前的。index.html这个是没有什么用的文件。
[root@centos7 html]#tree
.
├── centos
│ ├── 6
│ │ └── os
│ │ └── x86_64
│ └── 7
│ └── os
│ └── x86_64
├── index.html
└── ksdir
    ├── ks6_desktop.cfg
    └── ks7_mini.cfg

8 directories, 3 files
二、dhcp服务需要实现的功能
[root@centos7 network-scripts]#yum install dhcp
把配置示例弄过来,然后在修改修改
[root@centos7 network-scripts]#cp /usr/share/doc/dhcp*/dhcpd.conf.example /etc/dhcp/dhcpd.conf
[root@centos7 ksdir]#vim /etc/dhcp/dhcpd.conf
主要修改如下,就不一一解释了,截图写的详细太累了,一一解释实在是太多了。
default-lease-time 86400;
max-lease-time 864000;
subnet 10.10.10.0 netmask 255.255.255.0 {
 range 10.10.10.11 10.10.10.100;
 range 10.10.10.130 10.10.10.254;
 option routers 10.10.10.10;
 option domain-name-servers 114.114.114.114,8.8.8.8;
 option domain-name "yuming.org";
 next-server 10.10.10.10;
 filename "pxelinux.0";
}

host mysql {
  hardware ethernet 00:0c:29:ec:ab:e6;
  fixed-address 10.10.10.5;
}
配置好就可以启动服务等,在另一台机器上查看效果了,看看是否可以得到地址,注意一定要在同一个网段,看能否得到地址、网关等。
[root@centos7 dhcpd]#systemctl start dhcpd
[root@centos7 dhcpd]#systemctl enable dhcpd
三、tftp服务
[root@centos7 dhcpd]#yum install tftp-server
[root@centos7 dhcpd]#systemctl start tftp.service
[root@centos7 dhcpd]#systemctl enable tftp.service
客户端包。测试的时候可以使用
[root@centos6 isolinux]#yum install tftp
四、相关PXE相关文件
[root@centos7 tftpboot]#yum install syslinux
[root@centos7 tftpboot]#cp /usr/share/syslinux/pxelinux.0 /var/lib/tftpboot/
[root@centos7 tftpboot]# cd /var/lib/tftpboot
安装菜单的准备工作
[root@centos7 tftpboot]#mkdir /var/lib/tftpboot/pxelinux.cfg/
[root@centos7 tftpboot]#cp /misc/cd//isolinux/isolinux.cfg /var/lib/tftpboot/pxelinux.cfg/default
把光盘上的启动文件拷贝过来
mkdir /var/lib/tftpboot/centos{6,7}
cp /var/www/html/centos/7/os/x86_64/isolinux/{vmlinux,initrd.img} /var/lib/tftpboot/centos7
cp /var/www/html/centos/6/os/x86_64/isolinux/{vmlinux,initrd.img} /var/lib/tftpboot/centos6
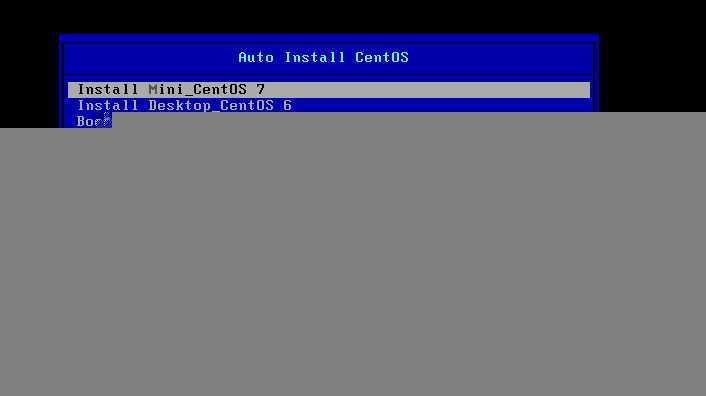
下面只是为了改一下开机的图片显示,改成简易的风格,还有一些菜单选项需要修改。
kernel和append的路径一定要写对了。
[root@centos7 tftpboot]#cp /usr/share/syslinux/menu.c32 /var/lib/tftpboot
[root@centos7 tftpboot]#vim pxelinux.cfg/default
default menu.c32
timeout 600
menu title Auto Install CentOS
label linux7
menu label Install ^Mini_CentOS 7
menu default
kernel centos7/vmlinuz
append initrd=centos7/initrd.img ks=http://10.10.10.10/ksdir/ks7_mini.cfg
label linux6
menu label Install Desktop_CentOS 6
kernel centos6/vmlinuz
append initrd=centos6/initrd.img ks=http://10.10.10.10/ksdir/ks6_desktop.cfg
label local
menu label Boot from ^local drive
localboot 0xffff最后的目录结构是这样的
[root@centos7 tftpboot]#tree
.
├── centos6
│ ├── initrd.img
│ └── vmlinuz
├── centos7
│ ├── initrd.img
│ └── vmlinuz
├── menu.c32
├── pxelinux.0
└── pxelinux.cfg
    └── default

3 directories, 7 files
五、A机器搭建完成。B机器配置同样网段就可以测试使用了,效果图如下。
标签:cto app 单选 oar mes lang example eof rom
原文地址:https://blog.51cto.com/14451122/2436534