标签:ase nec handle spec frame before mamicode jdb mysql
什么是ssm框架:ssm框架即为springmvc,spring,mybatis的整合
如何使用ssm框架
第一步:导入所需要的jar包
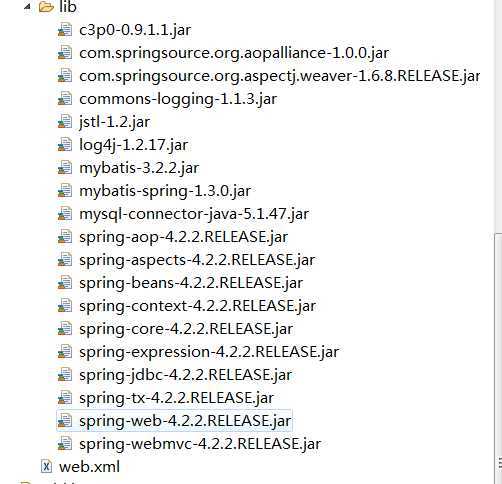
   1. mysql数据库驱动jar
     mysql-connector-java-5.1.46.jar
     2. mybatis 的jar包
     mybatis-3.2.2.jar
     3. spring的核心jar。
     commons-logging-1.1.3.jar
     spring-beans-4.2.2.RELEASE.jar
     spring-context-4.2.2.RELEASE.jar
     spring-core-4.2.2.RELEASE.jar
     spring-expression-4.2.2.RELEASE.jar

     4. spring的注解。
     spring-aop-4.2.2.RELEASE.jar
     5. 事物处理。
        spring-aspects-4.2.2.RELEASE.jar
        spring-jdbc-4.2.2.RELEASE.jar
        spring-tx-4.2.2.RELEASE.jar
        com.springsource.org.aopalliance-1.0.0.jar
        com.springsource.org.aspectj.weaver-1.6.8.RELEASE.jar

     6.    数据源的jar包
        c3p0-0.9.1.1.jar

     7. springmvc的jar包。
      spring-web-4.2.2.RELEASE.jar
      spring-webmvc-4.2.2.RELEASE.jar

     8. spring与mybatis整合的jar包
       mybatis-spring-1.3.0.jar
第二步:进行spring文件和mabatis的文件配置
1.包扫描:
<context:component-scan base-package="com.zhiyou.zt"></context:component-scan>
2.定义数据源c3p0 :
<bean id="dataSource" class="com.mchange.v2.c3p0.ComboPooledDataSource">
        <property name="user" value="root"></property>
        <property name="password" value="root"></property>
        <property name="jdbcUrl" value="jdbc:mysql://localhost:3306/mybatis"></property>
        <property name="driverClass" value="com.mysql.jdbc.Driver"></property>
    </bean>
3.定义一个SessionFactory工程类的bean:
<bean id="factoryBean" class="org.mybatis.spring.SqlSessionFactoryBean">
        <property name="dataSource" ref="dataSource"></property>
        <property name="mapperLocations" value="classpath:com/zhiyou/zt/mapper/*.xml"></property>

    </bean>
4.设置mybatis接口的实现类:
<bean class="org.mybatis.spring.mapper.MapperScannerConfigurer">
        <property name="basePackage" value="com.zhiyou.zt.dao"></property>
        <property name="sqlSessionFactory" ref="factoryBean"></property>
    </bean>
5.事务管理
<bean id="transactionManager" class="org.springframework.jdbc.datasource.DataSourceTransactionManager">
        <property name="dataSource" ref="dataSource"></property>
    </bean>
6.方法的属性
    <tx:advice transaction-manager="transactionManager" id="advice">
        <tx:attributes>
            <tx:method name="query*" read-only="true"/>
            <tx:method name="select*" read-only="true"/>
            <tx:method name="*"/>
        </tx:attributes>
    </tx:advice>
7.切面的配置
<aop:config>
        <aop:pointcut expression="execution(* com.zhiyou.zt.service.*.*(..))" id="pointcut"/>
        <aop:advisor advice-ref="advice" pointcut-ref="pointcut"/>
    </aop:config>
第三步:进行springmvc文件的配置
1.包扫描
<context:component-scan base-package="com.zhiyou.zt.controller"></context:component-scan>
2.开启注解
<mvc:annotation-driven></mvc:annotation-driven>
3.静态资源
<mvc:default-servlet-handler/>
4.试图解析器
    <bean class="org.springframework.web.servlet.view.InternalResourceViewResolver">
        <property name="prefix" value="/"></property>
        <property name="suffix" value=".jsp"></property>
    </bean>
第四步:web.xml文件的配置
<servlet>
        <servlet-name>springDispatcherServlet</servlet-name>
        <servlet-class>org.springframework.web.servlet.DispatcherServlet</servlet-class>
        <init-param>
            <param-name>contextConfigLocation</param-name>
            <param-value>classpath:spring-*.xml</param-value>
        </init-param>
        <load-on-startup>1</load-on-startup>
    </servlet>

    <!-- Map all requests to the DispatcherServlet for handling -->
    <servlet-mapping>
        <servlet-name>springDispatcherServlet</servlet-name>
        <url-pattern>/</url-pattern>
    </servlet-mapping>

    <!-- needed for ContextLoaderListener -->
    <context-param>
        <param-name>contextConfigLocation</param-name>
        <param-value>classpath:applicationContext.xml</param-value>
    </context-param>

    <!-- Bootstraps the root web application context before servlet initialization -->
    <listener>
        <listener-class>org.springframework.web.context.ContextLoaderListener</listener-class>
    </listener>
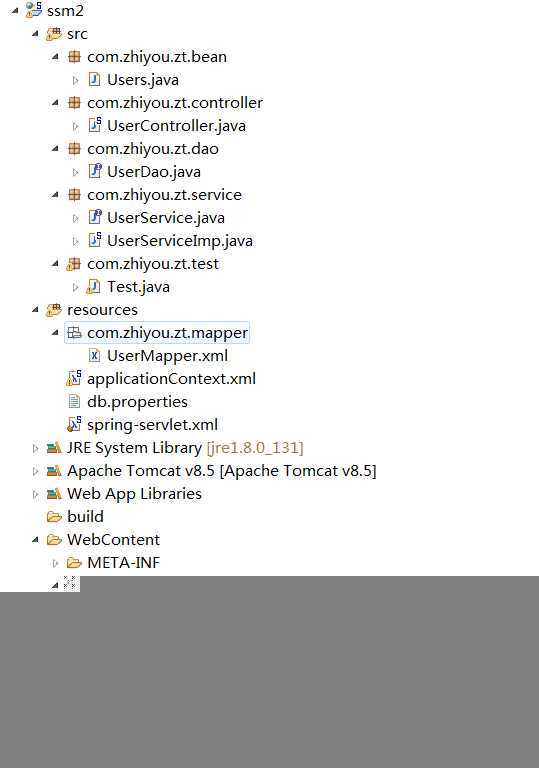
第五步:整体构造
标签:ase nec handle spec frame before mamicode jdb mysql
原文地址:https://www.cnblogs.com/1556553526qq-com/p/11494381.html