标签:概述 文件夹 title 文件 set last man nec htm
搜索可以使用最原始的模糊匹配的like方式进行搜索。当然这种搜索方式对于一些小量的数据是非常合适的。但是随着数据量越来越大。这时候我们就需要使用搜索引擎了。搜索引擎会将所有需要搜索的数据使用算法做一个索引,以后搜索的时候就只需要根据这个索引即可找到相应的数据。搜索引擎做索引的过程会比较慢,甚至占用空间,但是一旦索引建立完成,那么以后再搜索的时候就会很快了。
这个插件是专门给Django提供搜索功能的。django-haystack提供了一个搜索的接口,底层可以根据自己的需求更换搜索引擎。他其实有点类似于Django中的ORM插件,提供了一个操作数据库的接口,但是底层具体使用哪个数据库是可以自己设置的。
django-haystack支持的搜索引擎有Solr、Elasticsearch、Whoosh、Xapian等。Whoosh是基于纯Python的搜索引擎,检索速度快,集成方便。
1 pip3 install django-haystack
2 pip3 install whoosh
1.在项目中安装django-haystack,在settings.py
 1 INSTALLED_APPS = [
 2     ‘django.contrib.admin‘,
 3     ‘django.contrib.auth‘,
 4     ‘django.contrib.contenttypes‘,
 5     ‘django.contrib.sessions‘,
 6     ‘django.contrib.sites‘,
 7
 8     # 添加
 9     ‘haystack‘,
10 ]
2.设置搜索引擎,在settings中
1 HAYSTACK_CONNECTIONS = {
2     ‘default‘: {
3         # 设置haystack的搜索引擎
4         ‘ENGINE‘: ‘haystack.backends.whoosh_backend.WhooshEngine‘,
5         # 设置索引文件的位置
6         ‘PATH‘: os.path.join(BASE_DIR, ‘whoosh_index‘),
7     }
8 }
3.创建索引类
在模型所属的app下创建一个search_indexes.py文件,然后创建索引类。假如要给News app创建索引,代码如下:
1 class NewsIndex(indexes.SearchIndex,indexes.Indexable):
2     text = indexes.CharField(document=True,use_template=True)
3
4     def get_model(self):
5         return News
6
7     def index_queryset(self, using=None):
8         return self.get_model().objects.all()
4.添加url映射
1 urlpatterns = [
2     path(‘‘,views.index,name=‘index‘),
3     # 添加search的url映射
4     path(‘search/‘,include(‘haystack.urls‘)),
5     path(‘news/‘, include("apps.news.urls")),
6 ]
5.添加模板
在templates文件夹下创建以下结构的目录:
1 templates
2     search
3         indexes
4             news(app的名字)
5                 news(模型的名字)_text.txt
然后在news_text.txt中添加需要被索引的字段
1 # 根据标题和内容文本
2 {{ object.title }}
3 {{ object.content }}
紧接着templates文件下创建search.html模板文件,haystack会自动在templates文件下寻找这个模板文件渲染,并且会给这个模板传入page/paginator/query等参数,django内置的分页与查询的关键字。我们可以通过page.object_list获取到查询出来的数据。
<ul class="recommend-list">
    {% for result in page.object_list %}
        {% with result.object as news %}
            <li>
                <div class="thumbnail-group">
                    <a href="#">
                        <img src="{{ news.thumbnail }}" >
                    </a>
                </div>
                <div class="news-group">
                    <p class="title">
                        <a href="#">{{ news.title }}</a>
                    </p>
                    <p class="desc">
                        {{ news.desc }}
                    </p>
                    <p class="more">
                       <span class="category">{{ news.caetgory.name }}</span>
                        <span class="pub-time">{{ news.pub_time }}</span>
                        <span class="author">{{ news.author.username }}</span>
                    </p>
                </div>
            </li>
        {% endwith %}
    {% endfor %}
</ul>
6.建立索引
1 python manage.py rebuild_index
如果不想每次数据操作后都要手动的创建索引,可以在settings中配置:
1 # 增删改查后自动创建索引
2 HAYSTACK_SIGNAL_PROCESSOR = ‘haystack.signals.RealtimeSignalProcessor‘
7.使用jieba分词替换Whoosh默认的分词
Whoosh默认是采用正则表达式进行分词的,这对于英文词汇适用,但是中文支持的不好,这里替换为jieba分词,jieba分词库对中文却支持的好。
安装
1 pip3 install jieba
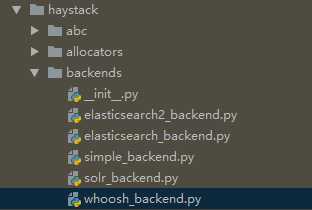
安装完成后,拷贝D:\python\Lib\site-packages\haystack\backends\whoosh_backend.py其中的代码,将他放在项目的其他包中,然后创建一个名叫whoosh_cn_backend.py文件,把刚刚复制的代码粘贴进去,然后再添加以下代码:
 1 import jieba
 2 from whoosh.analysis import Tokenizer, Token
 3
 4 class ChineseTokenizer(Tokenizer):
 5     def __call__(self, value, positions=False, chars=False,
 6                  keeporiginal=False, removestops=True,
 7                  start_pos=0, start_char=0, mode=‘‘, **kwargs):
 8         t = Token(positions, chars, removestops=removestops, mode=mode,
 9                   **kwargs)
10         seglist = jieba.cut(value, cut_all=True)
11         for w in seglist:
12             t.original = t.text = w
13             t.boost = 1.0
14             if positions:
15                 t.pos = start_pos + value.find(w)
16             if chars:
17                 t.startchar = start_char + value.find(w)
18                 t.endchar = start_char + value.find(w) + len(w)
19             yield t
20
21 def ChineseAnalyzer():
22     return ChineseTokenizer()
然后再将之前的代码中的分析器analyzer=StemmingAnalyzer()替换为analyzer=ChineseAnalyzer()就行了。
了解更多:http://django-haystack.readthedocs.io/en/master/tutorial.html
标签:概述 文件夹 title 文件 set last man nec htm
原文地址:https://www.cnblogs.com/Alexephor/p/11529991.html