标签:wait can mogodb creat 高并发 不可用 不同 ica pen
为何要搭建Redis集群。Redis是在内存中保存数据的,而我们的电脑一般内存都不大,这也就意味着Redis不适合存储大数据,适合存储大数据的是Hadoop生态系统的Hbase或者是MogoDB。Redis更适合处理高并发,一台设备的存储能力是很有限的,但是多台设备协同合作,就可以让内存增大很多倍,这就需要用到集群。
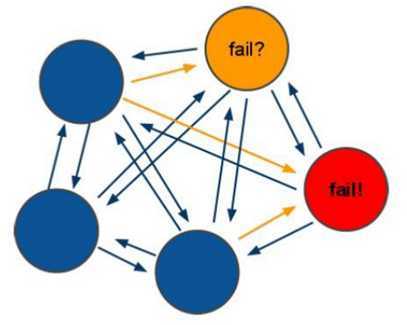
Redis集群搭建的方式有多种,例如使用客户端分片、Twemproxy、Codis等,但从redis 3.0之后版本支持redis-cluster集群,它是Redis官方提出的解决方案,Redis-Cluster采用无中心结构,每个节点保存数据和整个集群状态,每个节点都和其他所有节点连接。其redis-cluster架构图如下:

客户端与 redis 节点直连,不需要中间 proxy 层.客户端不需要连接集群所有节点连接集群中任何一个可用节点即可。
所有的 redis 节点彼此互联(PING-PONG 机制),内部使用二进制协议优化传输速度和带宽.
(1)redis-cluster 把所有的物理节点映射到[0-16383]slot 上,cluster 负责维护
node<->slot<->value
(2)Redis 集群中内置了 16384 个哈希槽,当需要在 Redis 集群中放置一个 key-value 时,redis 先对 key 使用 crc16 算法算出一个结果,然后把结果对 16384 求余数,这样每个key 都会对应一个编号在 0-16383 之间的哈希槽,redis 会根据节点数量大致均等的将哈希槽映射到不同的节点。
例如三个节点:槽分布的值如下:
SERVER1: 0-5460
SERVER2: 5461-10922
SERVER3: 10923-16383
(1)选举过程是集群中所有master参与,如果半数以上master节点与故障节点通信超过(cluster-node-timeout),认为该节点故障,自动触发故障转移操作. 故障节点对应的从节点自动升级为主节点
(2)什么时候整个集群不可用(cluster_state:fail)?
如果集群任意master挂掉,且当前master没有slave.集群进入fail状态,也可以理解成集群的slot映射[0-16383]不完成时进入fail状态.

需要 6 台 redis 服务器。搭建伪集群。
需要 6 个 redis 实例。
需要运行在不同的端口 7001-7006
(1)安装gcc
Redis 是 c 语言开发的。安装 redis 需要 c 语言的编译环境。如果没有 gcc 需要在线安装。
yum install gcc-c++
(2)使用yum命令安装 ruby (我们需要使用ruby脚本来实现集群搭建)【此步省略】
yum install ruby
yum install rubygems
(3)将redis源码包上传到 linux 系统 ,解压redis源码包
(4)编译redis源码 ,进入redis源码文件夹
make
看到以下输出结果,表示编译成功

(5)创建目录/usr/local/redis-cluster目录, 安装6个redis实例,分别安装在以下目录
/usr/local/redis-cluster/redis-1
/usr/local/redis-cluster/redis-2
/usr/local/redis-cluster/redis-3
/usr/local/redis-cluster/redis-4
/usr/local/redis-cluster/redis-5
/usr/local/redis-cluster/redis-6
以第一个redis实例为例,命令如下(注意在源码目录下执行下面的命令)
make install PREFIX=/usr/local/redis-cluster/redis-1

其他一致。。。
(6)复制配置文件 将 /redis-3.0.0/redis.conf 复制到redis下的bin目录下
[root@localhost redis-3.0.0]# cp redis.conf /usr/local/redis-cluster/redis-1/bin
[root@localhost redis-3.0.0]# cp redis.conf /usr/local/redis-cluster/redis-2/bin
[root@localhost redis-3.0.0]# cp redis.conf /usr/local/redis-cluster/redis-3/bin
[root@localhost redis-3.0.0]# cp redis.conf /usr/local/redis-cluster/redis-4/bin
[root@localhost redis-3.0.0]# cp redis.conf /usr/local/redis-cluster/redis-5/bin
[root@localhost redis-3.0.0]# cp redis.conf /usr/local/redis-cluster/redis-6/bin
(1)修改每个redis节点的配置文件redis.conf
修改运行端口为7001 (7002 7003 .....)

将cluster-enabled yes 前的注释去掉(632行)

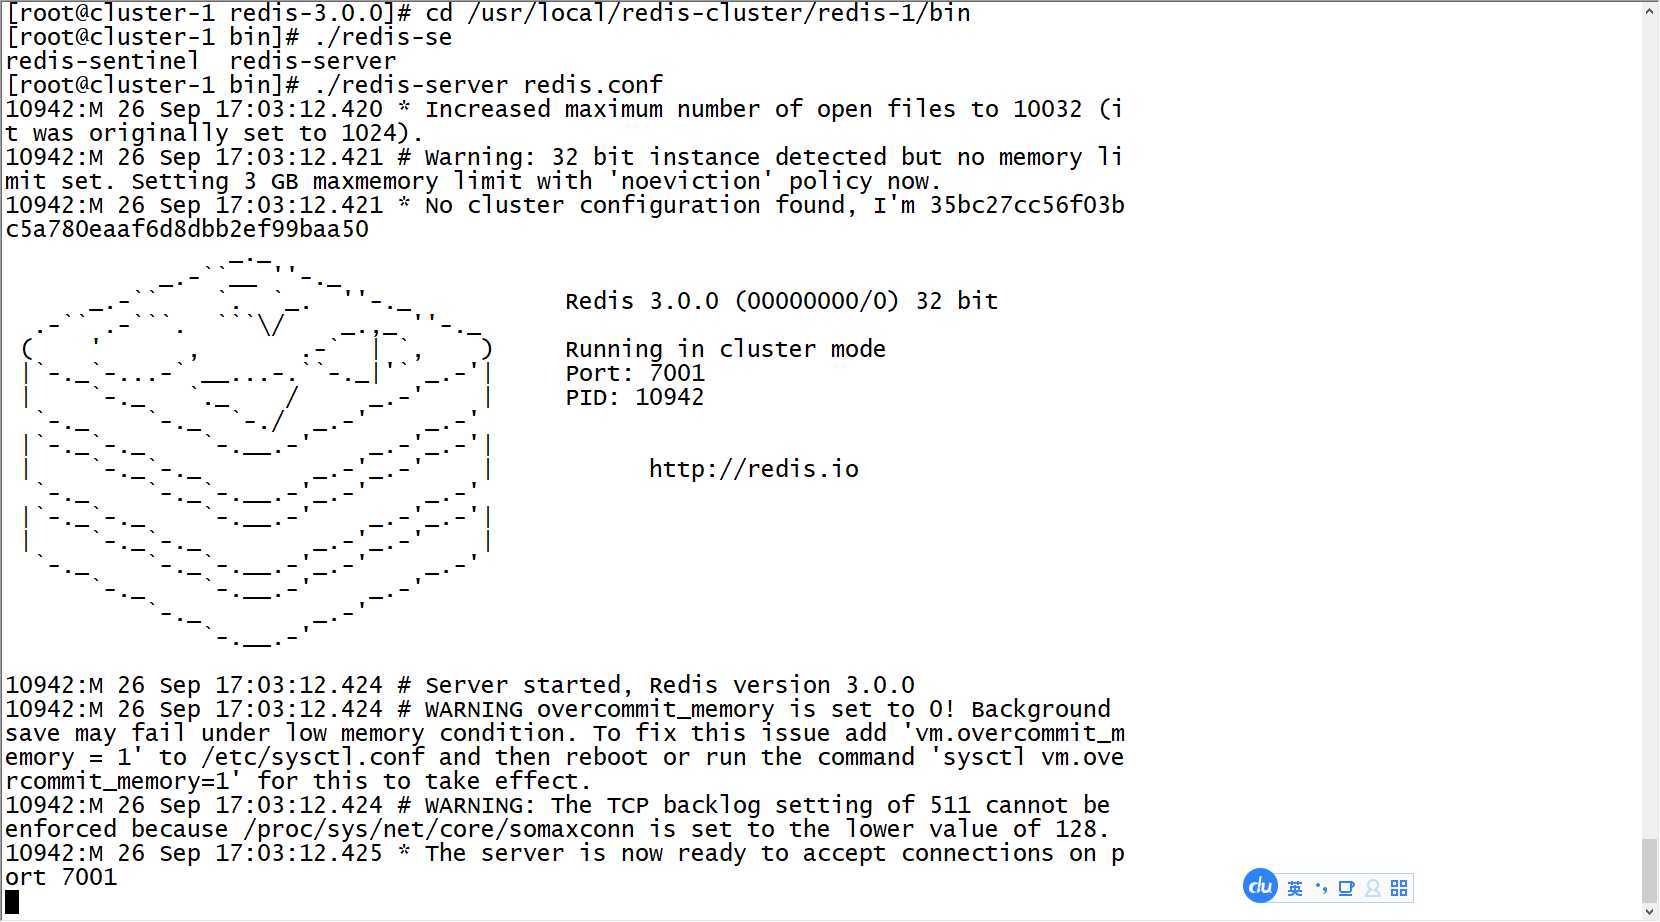
(2)启动每个redis实例
以第一个实例为例,命令如下
cd /usr/local/redis-cluster/redis-1/bin/
./redis-server redis.conf

把其余的5个也启动起来,然后查看一下是不是都启动起来了

(3)上传redis-3.0.0.gem ,安装 ruby用于搭建redis集群的脚本。(alt+p)
put h:/linux_upload/redis-3.0.0.gem
执行下面命令
gem install redis-3.0.0.gem
(4)使用 ruby 脚本搭建集群。
进入redis源码目录中的src目录 执行下面的命令
./redis-trib.rb create --replicas 1 192.168.40.128:7001 192.168.40.128:7002 192.168.40.128:7003 192.168.40.128:7004 192.168.40.128:7005 192.168.40.128:7006
结果如下:
>>> Creating cluster
Connecting to node 192.168.40.128:7001: OK           //检测连接
Connecting to node 192.168.40.128:7002: OK
Connecting to node 192.168.40.128:7003: OK
Connecting to node 192.168.40.128:7004: OK
Connecting to node 192.168.40.128:7005: OK
Connecting to node 192.168.40.128:7006: OK
>>> Performing hash slots allocation on 6 nodes...
Using 3 masters:
192.168.40.128:7001
192.168.40.128:7002
192.168.40.128:7003
Adding replica 192.168.40.128:7004 to 192.168.40.128:7001    //将4作为1的从节点
Adding replica 192.168.40.128:7005 to 192.168.40.128:7002
Adding replica 192.168.40.128:7006 to 192.168.40.128:7003
M: 35bc27cc56f03bc5a780eaaf6d8dbb2ef99baa50 192.168.40.128:7001
   slots:0-5460 (5461 slots) master                //槽
M: ef7dcb063e3c941b666a78c8cd44721d526a5916 192.168.40.128:7002
   slots:5461-10922 (5462 slots) master
M: ea883ab716e0b194ca6a2dbf0d64137f3af0cb18 192.168.40.128:7003
   slots:10923-16383 (5461 slots) master
S: bf166b59899f586207a056d5c7e06131a34957b4 192.168.40.128:7004
   replicates 35bc27cc56f03bc5a780eaaf6d8dbb2ef99baa50
S: b301e5cf266d03d4582a316a5572eb49e5af6f93 192.168.40.128:7005
   replicates ef7dcb063e3c941b666a78c8cd44721d526a5916
S: a5243ab9438029660e0d9890d501457310681395 192.168.40.128:7006
   replicates ea883ab716e0b194ca6a2dbf0d64137f3af0cb18
Can I set the above configuration? (type ‘yes‘ to accept): yes     //注意选yes,按照上面的样子分配
>>> Nodes configuration updated
>>> Assign a different config epoch to each node
>>> Sending CLUSTER MEET messages to join the cluster
Waiting for the cluster to join...
>>> Performing Cluster Check (using node 192.168.40.128:7001)
M: 35bc27cc56f03bc5a780eaaf6d8dbb2ef99baa50 192.168.40.128:7001
   slots:0-5460 (5461 slots) master
M: ef7dcb063e3c941b666a78c8cd44721d526a5916 192.168.40.128:7002
   slots:5461-10922 (5462 slots) master
M: ea883ab716e0b194ca6a2dbf0d64137f3af0cb18 192.168.40.128:7003
   slots:10923-16383 (5461 slots) master
M: bf166b59899f586207a056d5c7e06131a34957b4 192.168.40.128:7004
   slots: (0 slots) master
   replicates 35bc27cc56f03bc5a780eaaf6d8dbb2ef99baa50
M: b301e5cf266d03d4582a316a5572eb49e5af6f93 192.168.40.128:7005
   slots: (0 slots) master
   replicates ef7dcb063e3c941b666a78c8cd44721d526a5916
M: a5243ab9438029660e0d9890d501457310681395 192.168.40.128:7006
   slots: (0 slots) master
   replicates ea883ab716e0b194ca6a2dbf0d64137f3af0cb18
[OK] All nodes agree about slots configuration.
>>> Check for open slots...
>>> Check slots coverage...
[OK] All 16384 slots covered.
搭建成功....
Redis-cli 连接集群:
redis-cli -p 主机ip -p 端口(集群中任意端口) -c
redis-cli -p 192.168.40.128 -p 7001 -c
<?xml version="1.0" encoding="UTF-8"?>
<beans xmlns="http://www.springframework.org/schema/beans"
  xmlns:xsi="http://www.w3.org/2001/XMLSchema-instance" xmlns:p="http://www.springframework.org/schema/p"
  xmlns:context="http://www.springframework.org/schema/context"
  xsi:schemaLocation="http://www.springframework.org/schema/beans
            http://www.springframework.org/schema/beans/spring-beans.xsd
            http://www.springframework.org/schema/context
            http://www.springframework.org/schema/context/spring-context.xsd">

    <!-- 加载配置属性文件 按需加载 -->
    <context:property-placeholder ignore-unresolvable="true" location="classpath:properties/redis-cluster-config.properties" />
    <bean id="redisClusterConfiguration" class="org.springframework.data.redis.connection.RedisClusterConfiguration">
        <property name="maxRedirects" value="${redis.maxRedirects}"></property>
        <property name="clusterNodes">
            <set>
                <bean class="org.springframework.data.redis.connection.RedisClusterNode">
                    <constructor-arg name="host" value="${redis.host1}"></constructor-arg>
                    <constructor-arg name="port" value="${redis.port1}"></constructor-arg>
                </bean>
                <bean class="org.springframework.data.redis.connection.RedisClusterNode">
                    <constructor-arg name="host" value="${redis.host2}"></constructor-arg>
                    <constructor-arg name="port" value="${redis.port2}"></constructor-arg>
                </bean>
                    <bean class="org.springframework.data.redis.connection.RedisClusterNode">
                    <constructor-arg name="host" value="${redis.host3}"></constructor-arg>
                    <constructor-arg name="port" value="${redis.port3}"></constructor-arg>
                </bean>
                <bean class="org.springframework.data.redis.connection.RedisClusterNode">
                    <constructor-arg name="host" value="${redis.host4}"></constructor-arg>
                    <constructor-arg name="port" value="${redis.port4}"></constructor-arg>
                </bean>
                <bean class="org.springframework.data.redis.connection.RedisClusterNode">
                    <constructor-arg name="host" value="${redis.host5}"></constructor-arg>
                    <constructor-arg name="port" value="${redis.port5}"></constructor-arg>
                </bean>
                <bean class="org.springframework.data.redis.connection.RedisClusterNode">
                    <constructor-arg name="host" value="${redis.host6}"></constructor-arg>
                    <constructor-arg name="port" value="${redis.port6}"></constructor-arg>
                </bean>
            </set>
        </property>
    </bean>
    <bean id="jedisPoolConfig"   class="redis.clients.jedis.JedisPoolConfig">
            <property name="maxIdle" value="${redis.maxIdle}" />
            <property name="maxTotal" value="${redis.maxTotal}" />
    </bean>
    <bean id="jeidsConnectionFactory" class="org.springframework.data.redis.connection.jedis.JedisConnectionFactory"  >
        <constructor-arg ref="redisClusterConfiguration" />
        <constructor-arg ref="jedisPoolConfig" />
    </bean>
    <bean id="redisTemplate" class="org.springframework.data.redis.core.RedisTemplate">
        <property name="connectionFactory" ref="jeidsConnectionFactory" />
    </bean>
</beans>
#cluster configuration
redis.host1=192.168.40.128
redis.port1=7001

redis.host2=192.168.40.128
redis.port2=7002

redis.host3=192.168.40.128
redis.port3=7003

redis.host4=192.168.40.128
redis.port4=7004

redis.host5=192.168.40.128
redis.port5=7005

redis.host6=192.168.40.128
redis.port6=7006

redis.maxRedirects=3
redis.maxIdle=100
redis.maxTotal=600
标签:wait can mogodb creat 高并发 不可用 不同 ica pen
原文地址:https://www.cnblogs.com/lxl-six/p/11602822.html