标签:增加 文件加载 des 数据 inf fresh 覆盖 准备 color

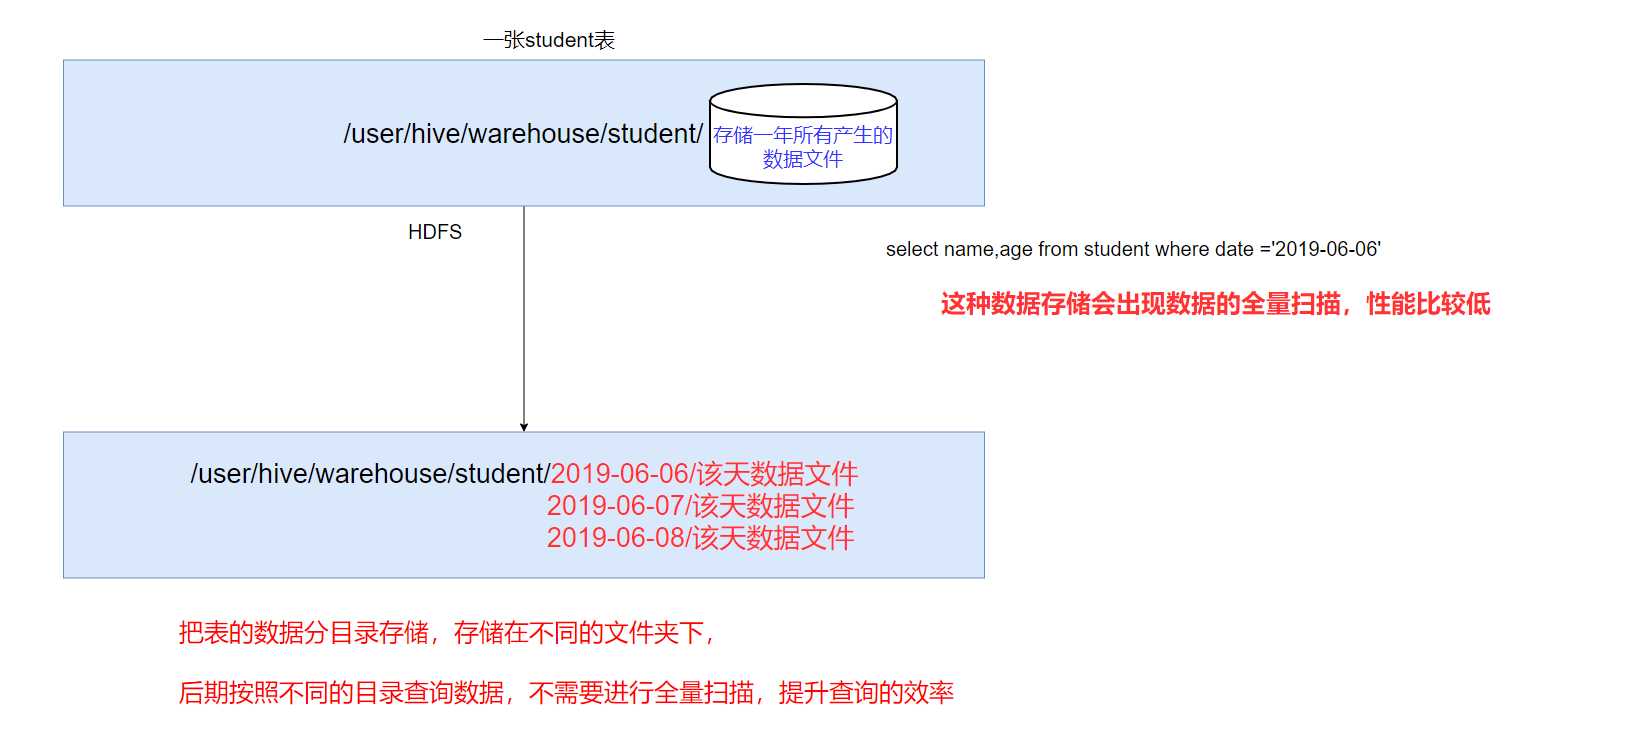
在文件系统上建立文件夹,把表的数据放在不同文件夹下面,加快查询速度。

创建一个分区字段的分区表
hive> create table student_partition1(
    id int,
    name string,
    age int)
    partitioned by (dt string)
    row format delimited fields terminated by ‘\t‘;
创建二级分区表
hive> create table student_partition2(
    id int,
    name string,
    age int)
    partitioned by (month string, day string)
    row format delimited fields terminated by ‘\t‘;
hive> alter table student_partition1 rename to student_partition3;
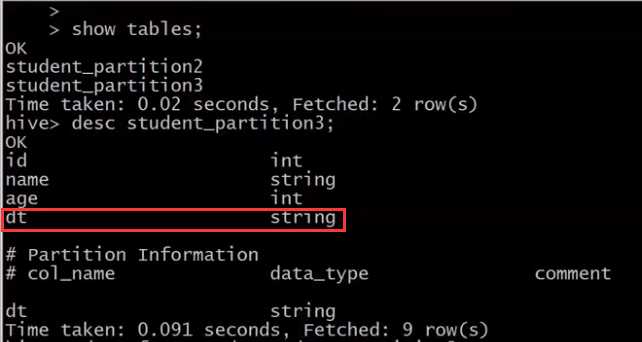
hive> desc student_partition3;
hive> desc formatted  student_partition3;

增加列
hive> alter table student_partition3 add columns(address string);
修改列
hive> alter table student_partition3 change column address address_id int;
替换列
hive> alter table student_partition3 replace columns(deptno string, dname string, loc string);
 #表示替换表中所有的字段
添加分区
//添加单个分区
hive> alter table student_partition1 add partition(dt=‘20170601‘) ;
//添加多个分区
hive> alter table student_partition1 add partition(dt=‘20190818‘) partition(dt=‘20190819‘);


删除分区
hive> alter table student_partition1 drop partition (dt=‘20170601‘);
hive> alter table student_partition1 drop partition (dt=‘20170602‘),partition (dt=‘20170603‘);
查看分区
hive> show partitions student_partition1;

语法
hive> load data [local] inpath ‘dataPath‘ overwrite | into table student [partition (partcol1=val1,…)];
? load data: 表示加载数据
? ==local==: 表示从本地加载数据到hive表;否则从HDFS加载数据到hive表
? inpath: 表示加载数据的路径
? overwrite: 表示覆盖表中已有数据,否则表示追加
? into table: 表示加载到哪张表
? student: 表示具体的表
? partition: 表示上传到指定分区
说明:load data ...本质,就是将dataPath文件上传到hdfs的 ‘/user/hive/warehouse/tablename’ 下。
实质:hdfs dfs -put /opt/student1.txt /user/hive/warehouse/student1
例如:
--普通表:
load data local inpath ‘/opt/bigdata/data/person.txt‘ into table person
--分区表:
load data local inpath ‘/opt/bigdata/data/person.txt‘ into table student_partition1 partition(dt="20190505")
--查询表:
select * from student_partition1 where dt=‘20190818‘;
--实操案例:
实现创建一张表,然后把本地的数据文件上传到hdfs上,最后把数据文件加载到hive表中
从指定的表中查询数据结果数据然后插入到目标表中
语法
insert into/overwrite table  tableName  select xxxx from tableName
insert into table student_partition1 partition(dt="2019-07-08") select * from student1;
在查询语句时先创建表,然后进行数据加载
语法
create table if not exists tableName as select id, name from tableName;
创建表,并指定在hdfs上的位置
create table if not exists student1(
id int,
name string)
row format delimited fields terminated by ‘\t‘
location ‘/user/hive/warehouse/student1‘;
上传数据文件到hdfs上对应的目录中
hdfs dfs -put /opt/student1.txt /user/hive/warehouse/student1
注意:先用export导出后,再将数据导入。
create table student2 like student1;
export table student1  to   ‘/export/student1‘;
import table student2  from ‘/export/student1‘;
1、将查询的结果导出到本地
insert overwrite local directory ‘/opt/bigdata/export/student‘ select * from student;
默认分隔符‘\001‘
2、将查询的结果格式化导出到本地
insert overwrite local directory ‘/opt/bigdata/export/student‘
           row format delimited fields terminated by  ‘,‘
           select * from student;
3、将查询的结果导出到HDFS上(没有local)
insert overwrite  directory ‘/export/student‘
           row format delimited fields terminated by  ‘,‘
           select * from student;
hdfs dfs -get /user/hive/warehouse/student/student.txt /opt/bigdata/data
基本语法:
hive -e "sql语句" > file
hive -f sql文件 > file
bin/hive -e ‘select * from default.student;‘ > /opt/bigdata/data/student1.txt
export table default.student to ‘/user/hive/warehouse/export/student1‘;
表的分区字段的值需要开发人员手动给定
1、创建分区表
create table order_partition(
order_number string,
order_price  double,
order_time string
)
partitioned BY(month string)
row format delimited fields terminated by ‘\t‘;
2、准备数据 order_created.txt内容如下
  10001 100 2019-03-02
  10002 200 2019-03-02
  10003 300 2019-03-02
  10004 400 2019-03-03
  10005 500 2019-03-03
  10006 600 2019-03-03
  10007 700 2019-03-04
  10008 800 2019-03-04
  10009 900 2019-03-04
3、加载数据到分区表
load data local inpath ‘/opt/bigdata/data/order_created.txt‘ overwrite into table order_partition partition(month=‘2019-03‘);
4、查询结果数据
  select * from order_partition where month=‘2019-03‘;
  结果为:
  10001   100.0   2019-03-02      2019-03
  10002   200.0   2019-03-02      2019-03
  10003   300.0   2019-03-02      2019-03
  10004   400.0   2019-03-03      2019-03
  10005   500.0   2019-03-03      2019-03
  10006   600.0   2019-03-03      2019-03
  10007   700.0   2019-03-04      2019-03
  10008   800.0   2019-03-04      2019-03
  10009   900.0   2019-03-04      2019-03
按照需求实现把数据自动导入到表的不同分区中,不需要手动指定
需求:按照不同部门作为分区导数据到目标表
1、创建表
--创建普通表
create table t_order(
    order_number string,
    order_price  double,
    order_time   string
)row format delimited fields terminated by ‘\t‘;
?
--创建目标分区表
create table order_dynamic_partition(
    order_number string,
    order_price  double
)partitioned BY(order_time string)
row format delimited fields terminated by ‘\t‘;
2、准备数据 order_created.txt内容如下
10001   100 2019-03-02
10002   200 2019-03-02
10003   300 2019-03-02
10004   400 2019-03-03
10005   500 2019-03-03
10006   600 2019-03-03
10007   700 2019-03-04
10008   800 2019-03-04
10009   900 2019-03-04
3、向普通表t_order加载数据
load data local inpath ‘/opt/bigdata/data/order_created.txt‘ overwrite into table t_order;
4、动态加载数据到分区表中
---要想进行动态分区,需要设置参数
hive> set hive.exec.dynamic.partition=true; //使用动态分区
hive> set hive.exec.dynamic.partition.mode=nonstrict; //非严格模式

    insert into table order_dynamic_partition partition(order_time) select order_number,order_price,order_time from t_order;

--注意字段查询的顺序,分区字段放在最后面。否则数据会有问题。
5、查看分区
show partitions order_dynamic_partition;


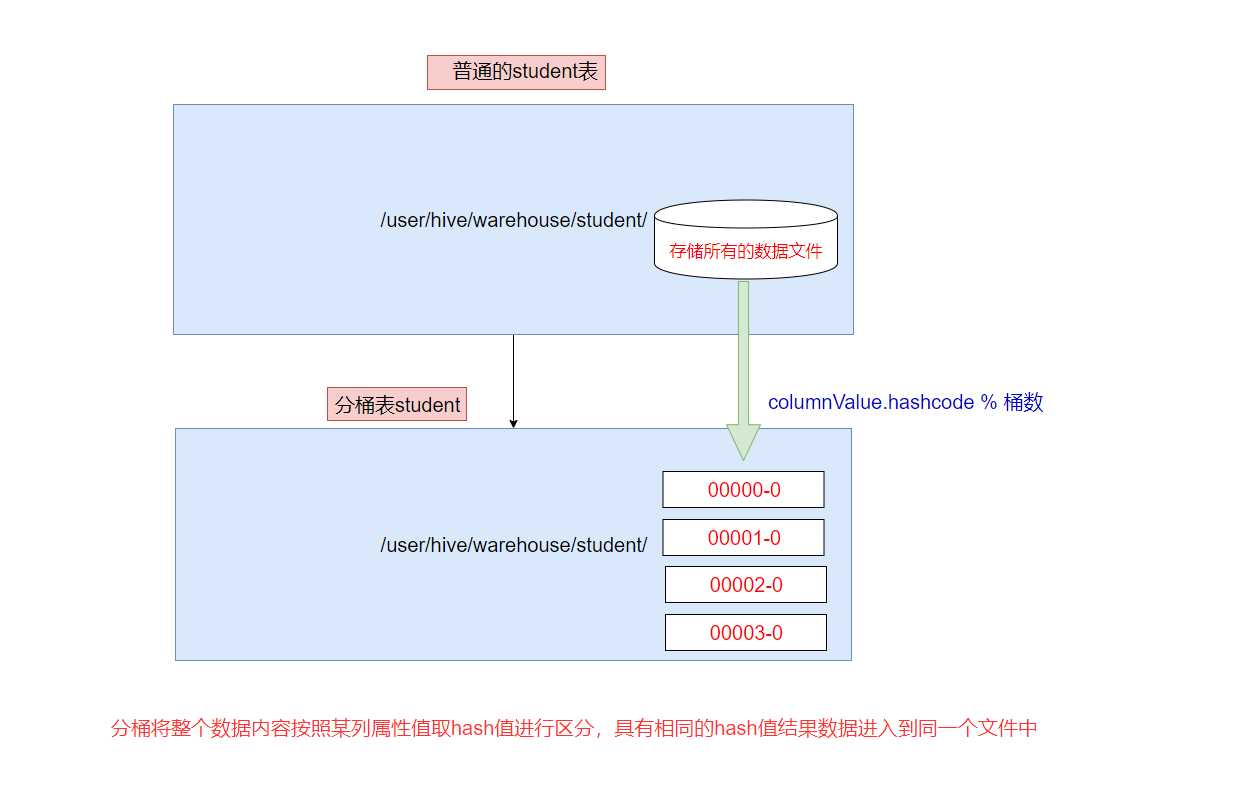
分桶是相对分区进行更细粒度的划分。
分桶将整个数据内容安装某列属性值取hash值进行区分,具有相同hash值的数据进入到同一个文件中
比如按照name属性分为3个桶,就是对name属性值的hash值对3取摸,按照取模结果对数据分桶。
取模结果为0的数据记录存放到一个文件
取模结果为1的数据记录存放到一个文件
取模结果为2的数据记录存放到一个文件
取模结果为3的数据记录存放到一个文件
作用
1、取样sampling更高效。没有分区的话需要扫描整个数据集。
2、提升某些查询操作效率,例如map side join
案例演示
1、创建分桶表
在创建分桶表之前要执行命名
set hive.enforce.bucketing=true;开启对分桶表的支持
set mapreduce.job.reduces=4; 设置与桶相同的reduce个数(默认只有一个reduce)
--分桶表
create table user_buckets_demo(id int, name string)
clustered by(id)
into 4 buckets
row format delimited fields terminated by ‘\t‘;
?
--普通表
create table user_demo(id int, name string)
row format delimited fields terminated by ‘\t‘;
2、准备数据文件 buckets.txt
1    laowang1
2    laowang2
3    laowang3
4    laowang4
5    laowang5
6    laowang6
7    laowang7
8    laowang8
9    laowang9
10    laowang10
3、加载数据到普通表 user_demo 中
load data local inpath ‘/opt/bigdata/data/buckets.txt‘ into table user_demo;
4、加载数据到桶表user_buckets_demo中
insert into table user_buckets_demo select * from user_demo;
5、hdfs上查看表的数据目录


6、抽样查询桶表的数据
tablesample抽样语句,语法:tablesample(bucket x out of y)
x表示从第几个桶开始取数据
y表示桶数的倍数,一共需要从 桶数/y 个桶中取数据
select * from user_buckets_demo tablesample(bucket 1 out of 2)
?
-- 需要的总桶数=4/2=2个
-- 先从第1个桶中取出数据
-- 再从第1+2=3个桶中取出数据
标签:增加 文件加载 des 数据 inf fresh 覆盖 准备 color
原文地址:https://www.cnblogs.com/lojun/p/11376476.html