标签:use axis 函数 and ima 三次 范围 技术 柱状图
在学习Python的各种工具包的时候,看网上的各种教程总是感觉各种方法很多很杂,参数的种类和个数也十分的多,理解起来需要花费不少的时间。
所以我在这里通过几个例子,对方法和每个参数都进行详细的解释,这样对于0基础的人也可以快速的掌握Matplotlib基本图形操作。
import numpy as np
import matplotlib.pyplot as plt
%matplotlib inline # 使图形可以直接在notebook上显示
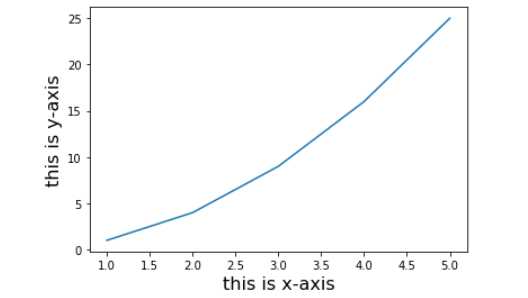
plt.plot([1,2,3,4,5],[1,4,9,16,25]) # plot方法是绘制图形,第一个参数是x轴的值,第二个参数是对应的y轴的值
plt.xlabel(‘this is x-axis‘,fontsize = 16) #xlabel是指定x轴的名字 fontsize是指定字体的大小
plt.ylabel(‘this is y-axis‘,fontsize = 16)
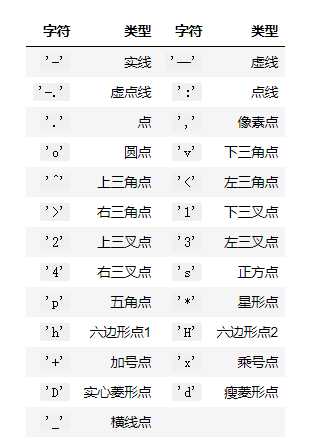
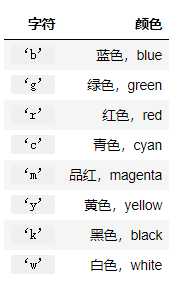
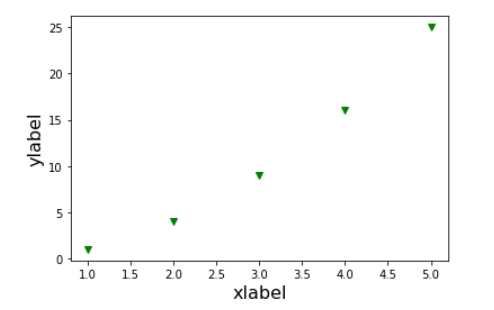
plt.plot([1,2,3,4,5],[1,4,9,16,25],‘gv‘) #其中‘gv’中的g代表green绿色,v代表下三角形
plt.xlabel(‘xlabel‘,fontsize = 16)
plt.ylabel(‘ylabel‘,fontsize = 16)
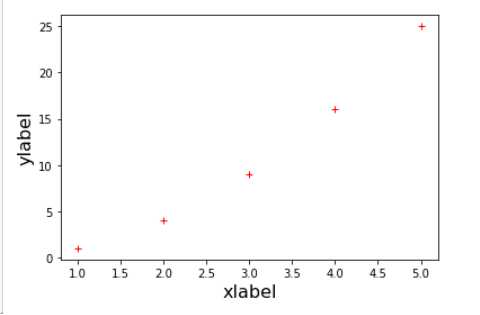
plt.plot([1,2,3,4,5],[1,4,9,16,25],‘+‘,color=‘r‘) # 其中的‘+’代表加号点,r代表red红色
plt.xlabel(‘xlabel‘,fontsize = 16)
plt.ylabel(‘ylabel‘,fontsize = 16)
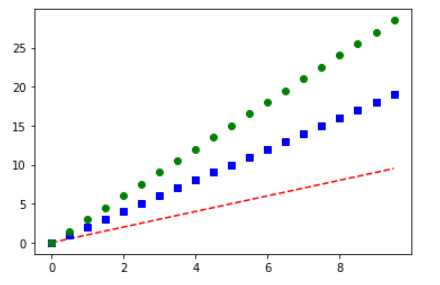
tang_numpy = np.arange(0,10,0.5) # 生产从0到10间隔为0.5的等差序列
# 然后连续绘制三条线,调用三次plot方法
plt.plot(tang_numpy,tang_numpy,‘r--‘)
plt.plot(tang_numpy,tang_numpy*2,‘bs‘)
plt.plot(tang_numpy,tang_numpy*3,‘go‘)
plt.plot(tang_numpy,tang_numpy,‘r--‘,
        tang_numpy,tang_numpy*2,‘bs‘,
        tang_numpy,tang_numpy*3,‘go‘)
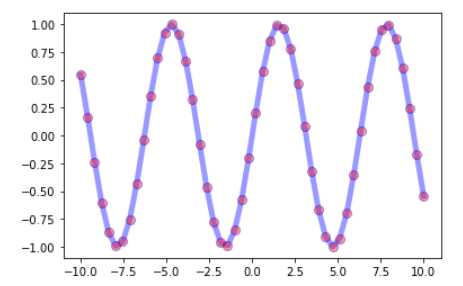
x = np.linspace(-10,10) #线条的范围
y = np.sin(x)
# linewidth参数是线条的宽度,color是颜色,linestype是线条的类型,marker是标记的类型,makercolor是标记的颜色,markersize是标记大小,alpha是透明度
plt.plot(x,y,linewidth=5, color=‘b‘,linestyle=‘-‘,marker = ‘o‘,markerfacecolor=‘r‘,markersize = 8,alpha = 0.4)
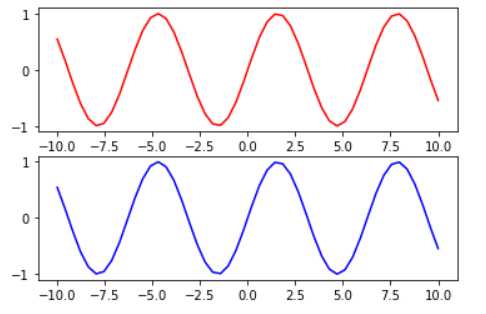
# 211 表示一会要画的图是2行一列的 最后一个1表示的是子图当中的第1个图
plt.subplot(211)
plt.plot(x,y,color=‘r‘)

# 212 表示一会要画的图是2行一列的 最后一个1表示的是子图当中的第2个图
plt.subplot(212)
plt.plot(x,y,color=‘b‘)
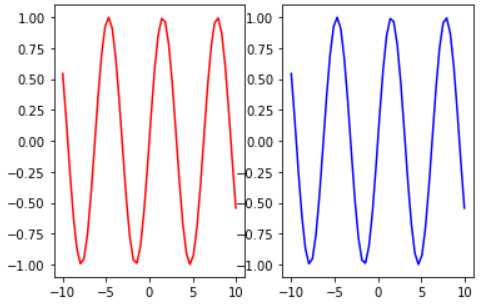
# 211 表示一会要画的图是1行2列的 最后一个1表示的是子图当中的第1个图
plt.subplot(121)
plt.plot(x,y,color=‘r‘)

# 212 表示一会要画的图是1行2列的 最后一个1表示的是子图当中的第2个图
plt.subplot(122)
plt.plot(x,y,color=‘b‘)
# 321 表示一会要画的图是3行2列的 最后一个1表示的是子图当中的第1个图
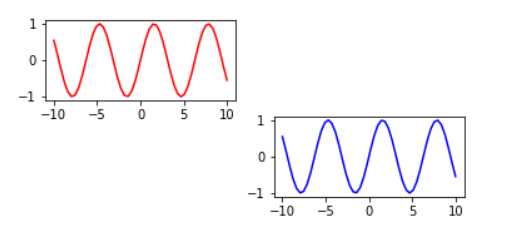
plt.subplot(321)
plt.plot(x,y,color=‘r‘)
# 321 表示一会要画的图是3行2列的 最后一个4表示的是子图当中的第4个图
plt.subplot(324)
plt.plot(x,y,color=‘b‘)
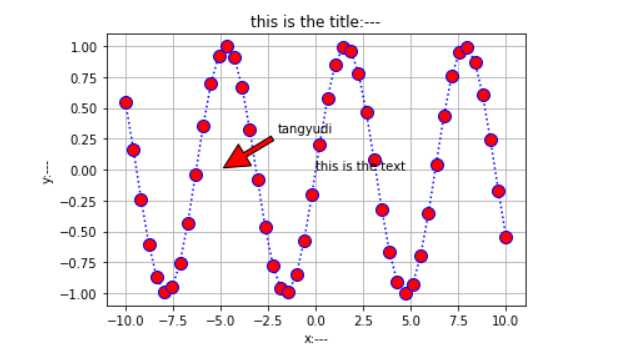
plt.plot(x,y,color=‘b‘,linestyle=‘:‘,marker = ‘o‘,markerfacecolor=‘r‘,markersize = 10)
plt.xlabel(‘x:---‘)
plt.ylabel(‘y:---‘)
plt.title(‘this is the title:---‘)
plt.text(0,0,‘this is the text‘) #(0,0)是text的位置
plt.grid(True) #这个是网格
# xy是箭头指向的位置,xytext是注释的位置,arrowprops是指定箭头的属性
plt.annotate(‘tangyudi‘,xy=(-5,0),xytext=(-2,0.3),arrowprops = dict(facecolor=‘red‘,shrink=0.05,headlength= 20,headwidth = 20))
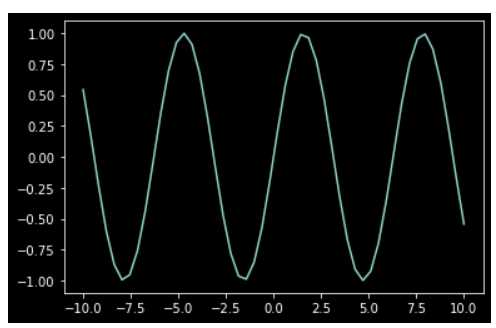
x = np.linspace(-10,10)
y = np.sin(x)
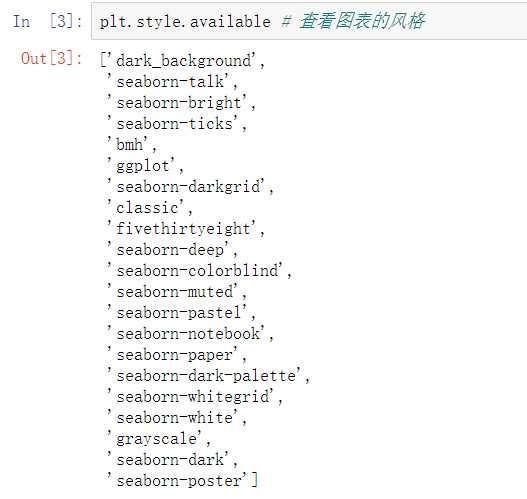
plt.style.use(‘dark_background‘) #给图片指定风格
plt.plot(x,y)
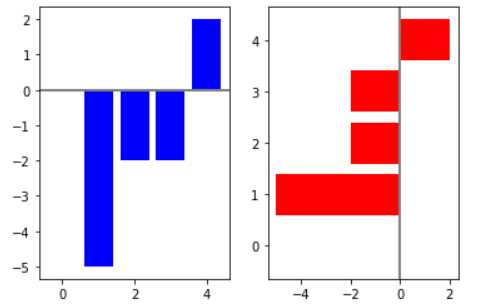
np.random.seed(0) #设置随机数种子
x = np.arange(5)
y = np.random.randint(-5,5,5)
fig,axes = plt.subplots(ncols = 2) # 有两列的子图
v_bars = axes[0].bar(x,y,color=‘blue‘)  #axes[0]代表第一个子图
h_bars = axes[1].barh(x,y,color=‘red‘)
axes[0].axhline(0,color=‘grey‘,linewidth=2) #加一条横线
axes[1].axvline(0,color=‘grey‘,linewidth=2) #加一条竖线
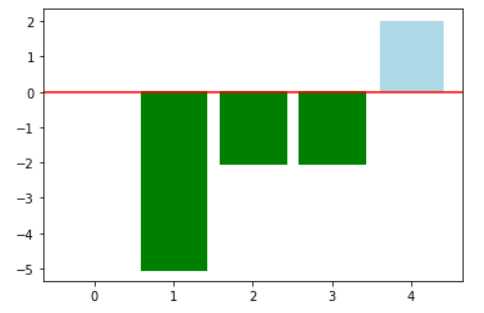
fig,ax = plt.subplots()
v_bars = ax.bar(x,y,color=‘lightblue‘)
# 让值小于0的柱状颜色为green
for bar,height in zip(v_bars,y):   # bar,height为柱状的高度值
    if height < 0:
        bar.set(edgecolor = ‘darkred‘,color = ‘green‘,linewidth = 3)
ax.axhline(0,color = ‘red‘) # 0的地方加一条水平线
标签:use axis 函数 and ima 三次 范围 技术 柱状图
原文地址:https://www.cnblogs.com/nsw0419/p/11618806.html