标签:enforce star 测试 httpd 允许 mit force code cal
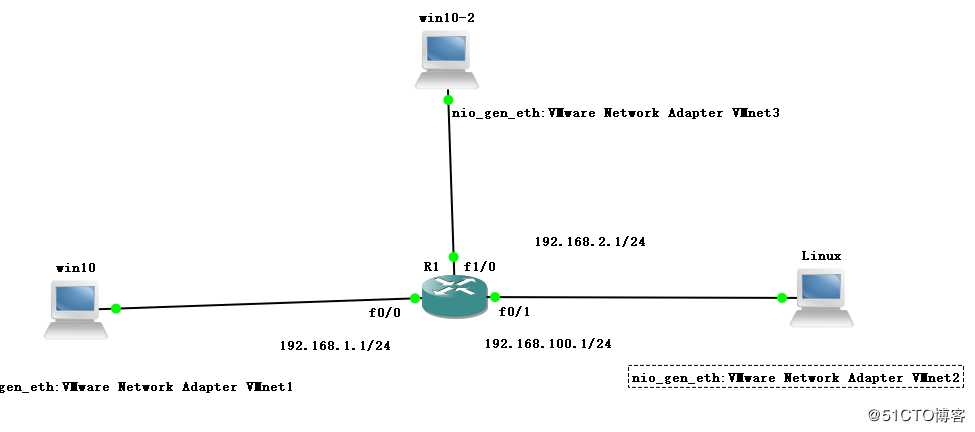
实验环境
- 一台Linux系统做服务器
- 两台pc机
Linux:192.168.100.100
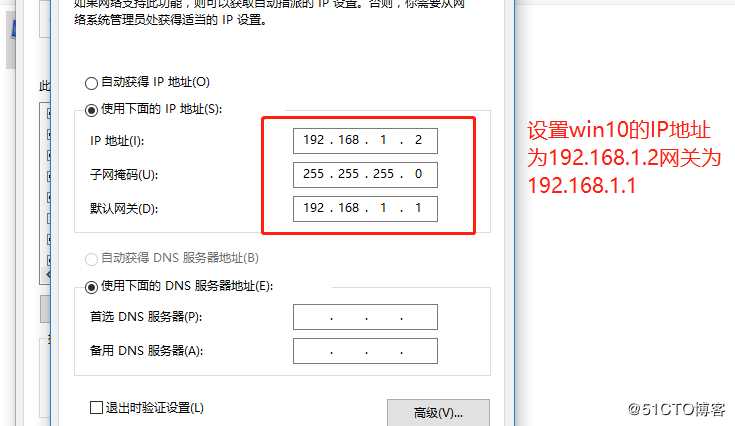
win10:192.168.1.2
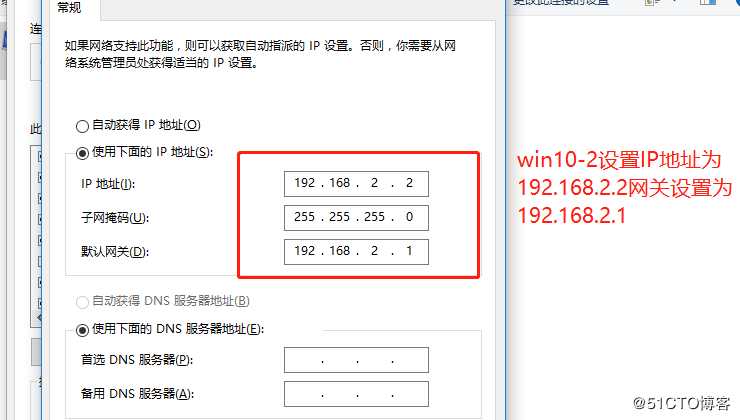
win10-2:192.168.2.2
- 允许win10访问Linux的web服务
- 禁止win10访问Linux的其他服务
- 允许win10访问win10-2主机
[root@localhost ~]# yum install vsftpd -y   ##安装vsftp服务
[root@localhost ~]# yum install httpd -y ##安装http服务[root@localhost~]# vim /etc/sysconfig/network-scripts/ifcfg-ens33
##修改网卡信息
[root@localhost ~]# service network restart ##重启网卡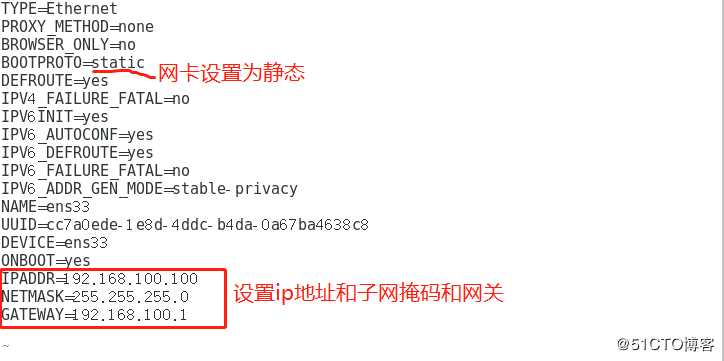
Linux服务器
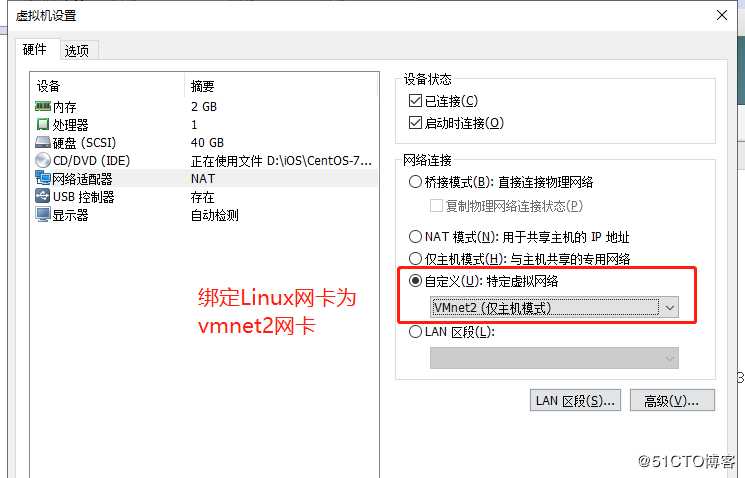
win10
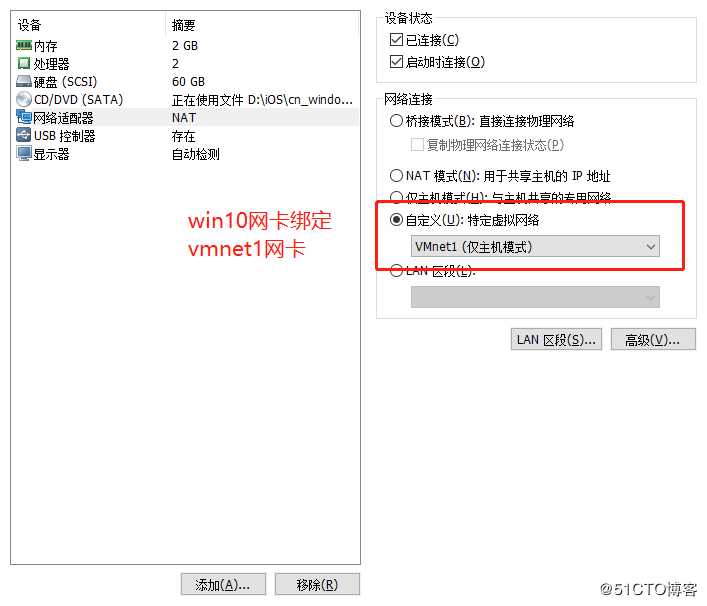
win10-2
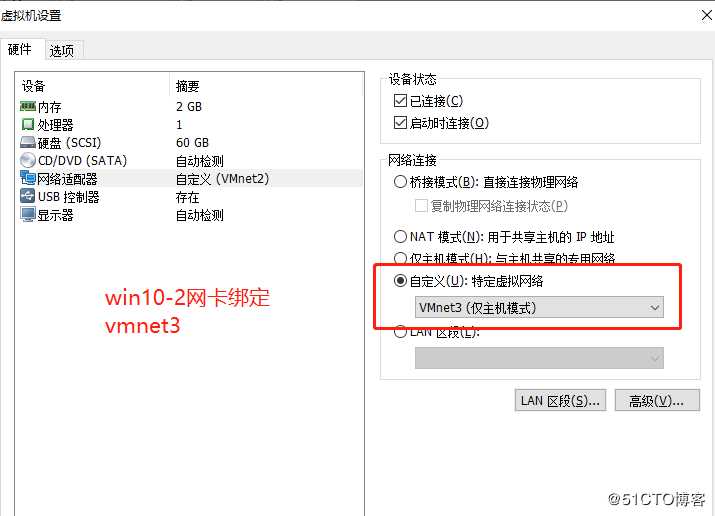
win10配置固定ip和网关
win10-2配置固定ip和网关
[root@localhost ~]# cd /var/www/html/   ##切换到网站的站点中
[root@localhost html]# vim index.html    ##编辑网站信息
[root@localhost html]# systemctl start httpd  ##开启网站服务
[root@localhost html]# systemctl stop firewalld.service   ##关闭防火墙
[root@localhost html]# setenforce 0   ##关闭增强型功能
[root@localhost html]# systemctl start vsftpd   ##开启vsftp服务
[root@localhost html]# cd /var/ftp  ##切换到ftp站点目录下
[root@localhost ftp]# echo "this is test ftp" > ftp.txt  ##创建一个测试文件
[root@localhost html]# netstat -ntap | egrep ‘(21|80)‘
##查看两个服务的端口,看服务服务有没有正常启动
R1#conf t  ##全局模式
R1(config)#int f0/0   ##进入接口f0/0
R1(config-if)#ip add 192.168.1.1 255.255.255.0  ##配置网关
R1(config-if)#no shut   ##开启接口
R1(config-if)#int f0/1
R1(config-if)#ip add 192.168.100.1 255.255.255.0
R1(config-if)#no shut
R1(config-if)#int f1/0
R1(config-if)#ip add 192.168.2.1 255.255.255.0
R1(config-if)#no shut

R1(config)#access-list 100 permit tcp host 192.168.1.2 host 192.168.100.100 eq www
##允许win10访问Linux服务器的网站服务
R1(config)#access-list 100 deny ip host 192.168.1.2 host 192.168.100.100
##禁止win10访问Linux服务
R1(config)#access-list 100 permit ip host 192.168.1.2 192.168.2.0 0.0.0.255
##允许win10访问2.0网段的机器
R1(config)#do show access-li  ##查看控制访问列表
R1(config)#int f0/0   ##进入f0/0接口
R1(config-if)#ip access-group 100 in 应用于接口访问Linux服务器的web服务
访问Linux服务的ftp服务
访问2.0网段的主机
标签:enforce star 测试 httpd 允许 mit force code cal
原文地址:https://blog.51cto.com/14080162/2443131