标签:ping mon $1 更新 configure mysq 安装 serve ted

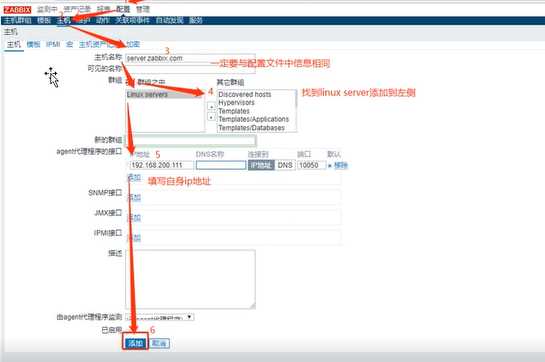


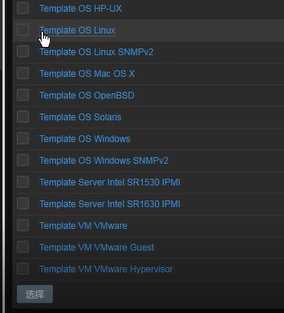
先添加再更新


Windows 解压 zabbix_agents_3.2.0.win.zip
1、首先在 C 盘根目录下创建 zabbix 的文件夹
2、将需要的文件拖到该文件夹内(bin/win64)
3、修改 windows 配置文件(zabbix.agent.win.conf)的三处
Server = 192.168.200.123
ServerActive = 192.168.200.123
Hostname = windows10
完成后保存放到 windows 中
Windows 中启动 zabbix (注意:以下操作请严格安装文档操作否则将会报错)
以管理员省份运行 命令提示符
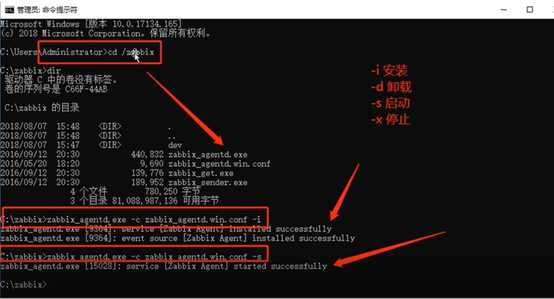
关闭后重新打开一个 cmd 查看

Zabbix 中添加 windows 主机实现监控
和添加自身主机类似
配置 ——> 主机 ——>创建主机
主机名称 :windows10
群组要创建 Windows servers
添加的模板为 Template OS Windows
安装 GNS
先安装 Wireshark-win64-1.12.4.exe 和 SolarWinds-ResponseTimeViewer-v1.0-GNS.exe
在安装 GNS3-1.3.10-all-in-one.exe
添加 router 镜像


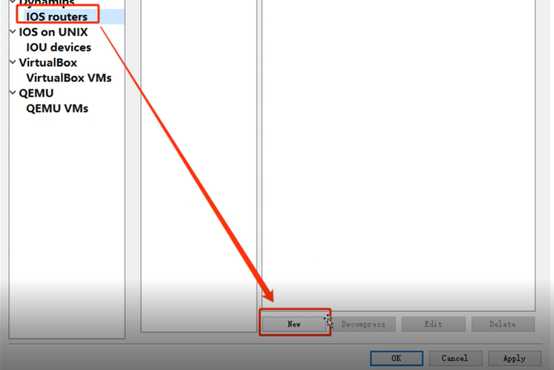


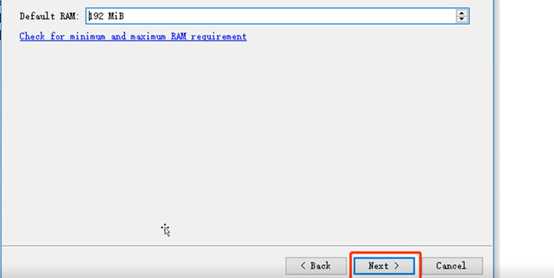
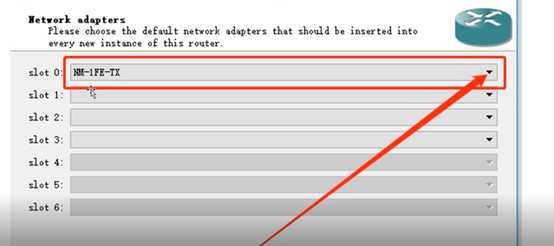
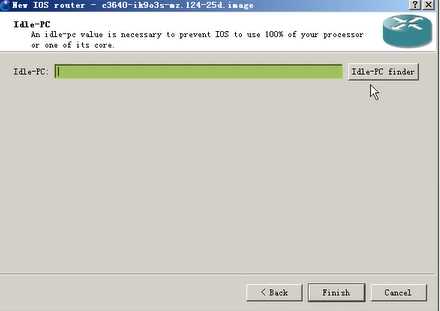
工作中放入一个 router 一个 Cloud1
Cloud1 右击 ——> configure
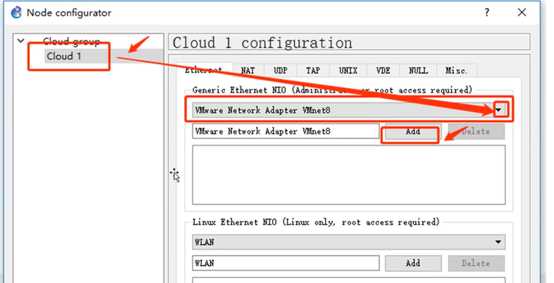


router 右击 ——> Console
网络设备支持 snmp 协议来做监控,首先在交换机上配置 IP 地址,并开启 snmp,主要是设置共同体的值。
conf t
int f0/0
ip add 192.168.200.100 255.255.255.0
no sh
exit
no ip routing
snmp-server community centos RO
snmp-server enable traps
snmp-server host 192.168.200.123 centos 指定共团体名称
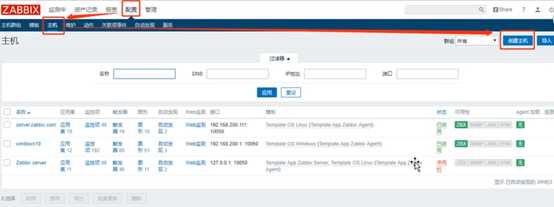
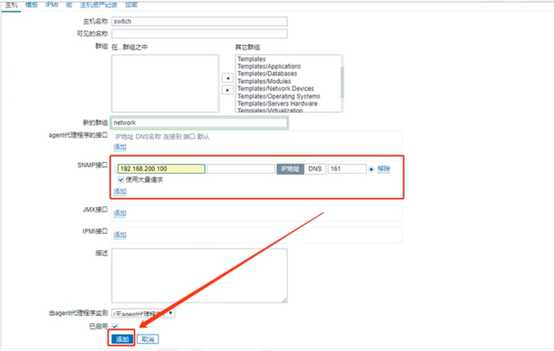
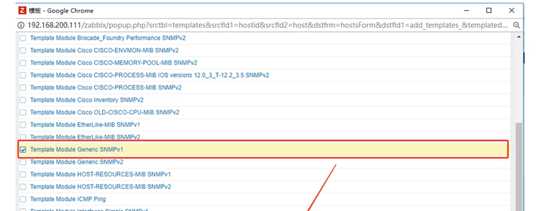
填写共团体名称(不写监控不到)


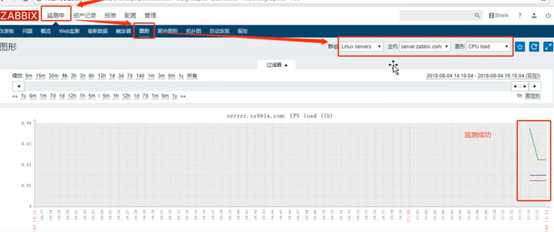
添加 图形


监控项全部添加

Linux-clinet 操作(agent)
源码安装 zabbix
yum -y install libxml2-devel libcurl-devel pcre-devel ntpdate gcc gcc-c++ make //安装依赖包
ntpdate s1a.time.edu.cn //联网时间同步清华大学源
tar xf zabbix-3.4.11.tar.gz -C /usr/src/
cd /usr/src/zabbix-3.4.11/
./configure --prefix=/usr/local/zabbix --enable-agent --with-net-snmp --with-libcurl --with-libxml2 && make -j2 &&make install
cp misc/init.d/tru64/zabbix_agentd /etc/init.d/ //复制启动脚本
vim /etc/init.d/zabbix_agentd
24 DAEMON=/usr/local/zabbix/sbin/zabbix_agentd //更改为安装路径
chmod +x /etc/init.d/zabbix_agentd //添加执行权限
cd
useradd -M -s /sbin/nologin zabbix //创建程序用户
chown -R zabbix:zabbix /usr/local/zabbix/ //授权安装目录
cd /usr/local/zabbix/
mkdir logs
chown -R zabbix:zabbix logs/
cp /usr/local/zabbix/etc/zabbix_agentd.conf{,.bak}
vim /usr/local/zabbix/etc/zabbix_agentd.conf
PidFile=/tmp/zabbix_agentd.pid
Server=127.0.0.1,192.168.200.123
ServerActive=192.168.200.123
Hostname=server.zabbix.com
LogFile=/usr/local/zabbix/logs/zabbix_agentd.log
Include=/usr/local/zabbix/etc/zabbix_server.conf.d/*.conf
UnsafeUserParameters=1
UserParameter=mysql.version,mysql -V
UserParameter=mysql.status[*],/usr/local/zabbix/etc/chk_mysql.sh $1
UserParameter=mysql.ping,mysqladmin -uroot -p123123 -P3306 -h192.168.200.124 ping | grep -c alive
service zabbix_agentd start
Zabbix agent started.
netstat -lnpt | grep 10050
tcp 0 0 0.0.0.0:10050 0.0.0.0:* LISTEN 10374/zabbix_agentd
Zabbix 添加 Linux 主机
同添加自身主机类似
配置——>主机——> 创建主机
主机名称:agent.zabbix.com
IP地址:192.168.200.124
标签:ping mon $1 更新 configure mysq 安装 serve ted
原文地址:https://www.cnblogs.com/2567xl/p/11792980.html