标签:数据 public cto stl 项目 增删改 identity 属性 电话
ORM表示对象关系映射 在面向对象的软件开发中 通过ORM 就可以将对象映射到关系型数据库中 也就是建立实体类对象和数据库之间的联系 通过操作对象就可以直接操作数据库
JPA实际上是一种规范 并没有给出实际的实现 实际可以这样去理解 我们之前学得jdbc实际上也是一种规范 jdbc并没有给出具体的实现 而是所有的关系型数据库如果想去操作数据库必须遵从这个规范
像oracle mysql都有这种规范的具体实现 而我们在更改数据库的时候 只需要换一个连接驱动 还是使用这种规范 具体的代码并不需要做大幅度的修改 JPA也是这样 它有很多种的实现方式 比如说 toplink
hibernate等等
入门小案例:
创建一个jpa数据库 并创建一张custom表
CREATE TABLE cst_customer (
cust_id bigint(32) NOT NULL AUTO_INCREMENT COMMENT ‘客户编号(主键)‘,
cust_name varchar(32) NOT NULL COMMENT ‘客户名称(公司名称)‘,
cust_source varchar(32) DEFAULT NULL COMMENT ‘客户信息来源‘,
cust_industry varchar(32) DEFAULT NULL COMMENT ‘客户所属行业‘,
cust_level varchar(32) DEFAULT NULL COMMENT ‘客户级别‘,
cust_address varchar(128) DEFAULT NULL COMMENT ‘客户联系地址‘,
cust_phone varchar(64) DEFAULT NULL COMMENT ‘客户联系电话‘,
PRIMARY KEY (cust_id)
) ENGINE=InnoDB AUTO_INCREMENT=1 DEFAULT CHARSET=utf8;
在创建相应的实体类 这个地方不做代码的粘贴了 只需要每个字段进行对应 然后提供相应的setter和getter方法 然后为了测试的方便 可以自动生成一个toString()方法
接下来 我们就需要进行项目环境的搭建了
创建一个maven工程 并导入相应的jar包坐标
<project.build.sourceEncoding>UTF-8</project.build.sourceEncoding>
<project.hibernate.version>5.0.7.Final</project.hibernate.version>
<dependencies>
<!-- junit -->
<dependency>
<groupId>junit</groupId>
<artifactId>junit</artifactId>
<version>4.12</version>
<scope>test</scope>
</dependency>
<!-- hibernate对jpa的支持包 -->
<dependency>
<groupId>org.hibernate</groupId>
<artifactId>hibernate-entitymanager</artifactId>
<version>${project.hibernate.version}</version>
</dependency>
<!-- c3p0 -->
<dependency>
<groupId>org.hibernate</groupId>
<artifactId>hibernate-c3p0</artifactId>
<version>${project.hibernate.version}</version>
</dependency>
<!-- log日志 -->
<dependency>
<groupId>log4j</groupId>
<artifactId>log4j</artifactId>
<version>1.2.17</version>
</dependency>
<!-- Mysql and MariaDB -->
<dependency>
<groupId>mysql</groupId>
<artifactId>mysql-connector-java</artifactId>
<version>5.1.6</version>
</dependency>
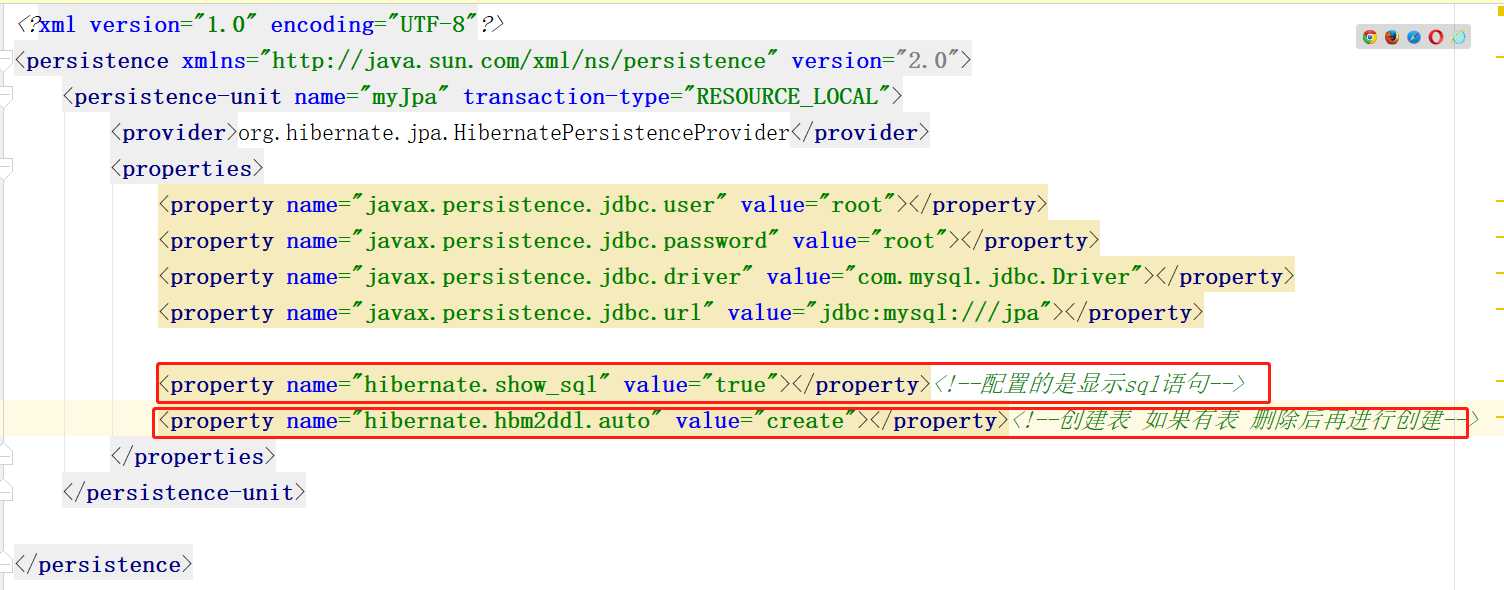
</dependencies>编写相应的配置信息 在resources目录下建立一个META-INF目录 然后在该目录下创建一个persistence.xml文件 这个是核心配置文件
文件种需要配置JPA规范的服务提供商 并且配置相关的数据库信息 驱动 Url地址 用户名 密码 以及jpa提供者的相关配置
再在实体类中配置实体类和表的对应关系 以及属性名和字段名的映射关系
@Entity //声明是实体类
@Table(name = "cst_customer") //实体类与表对应
public class Customer {
@Id//主键配置
@GeneratedValue(strategy = GenerationType.IDENTITY)//主键自增长
@Column(name = "cust_id")//实体类属性名和字段名相对应
private Long custId;
@Column(name = "cust_name")
private String custName;

@Column(name = "cust_source")
private String custSource;

@Column(name = "cust_level")
private String custLevel;

@Column(name = "cust_industry")
private String custIndustry;

@Column(name = "cust_phone")
private String custPhone;

@Column(name = "cust_address")
private String custAddress;

public String getCustName() {
    return custName;
}

public void setCustName(String custName) {
    this.custName = custName;
}

public Long getCustId() {
    return custId;
}

public void setCustId(Long custId) {
    this.custId = custId;
}

public String getCustSource() {
    return custSource;
}

public void setCustSource(String custSource) {
    this.custSource = custSource;
}

public String getCustLevel() {
    return custLevel;
}

public void setCustLevel(String custLevel) {
    this.custLevel = custLevel;
}

public String getCustIndustry() {
    return custIndustry;
}

public void setCustIndustry(String custIndustry) {
    this.custIndustry = custIndustry;
}

public String getCustPhone() {
    return custPhone;
}

public void setCustPhone(String custPhone) {
    this.custPhone = custPhone;
}

public String getCustAddress() {
    return custAddress;
}

public void setCustAddress(String custAddress) {
    this.custAddress = custAddress;
}

@Override
public String toString() {
    return "Customer{" +
            "custId=" + custId +
            ", custName='" + custName + '\'' +
            ", custSource='" + custSource + '\'' +
            ", custLevel='" + custLevel + '\'' +
            ", custIndustry='" + custIndustry + '\'' +
            ", custPhone='" + custPhone + '\'' +
            ", custAddress='" + custAddress + '\'' +
            '}';
}
}
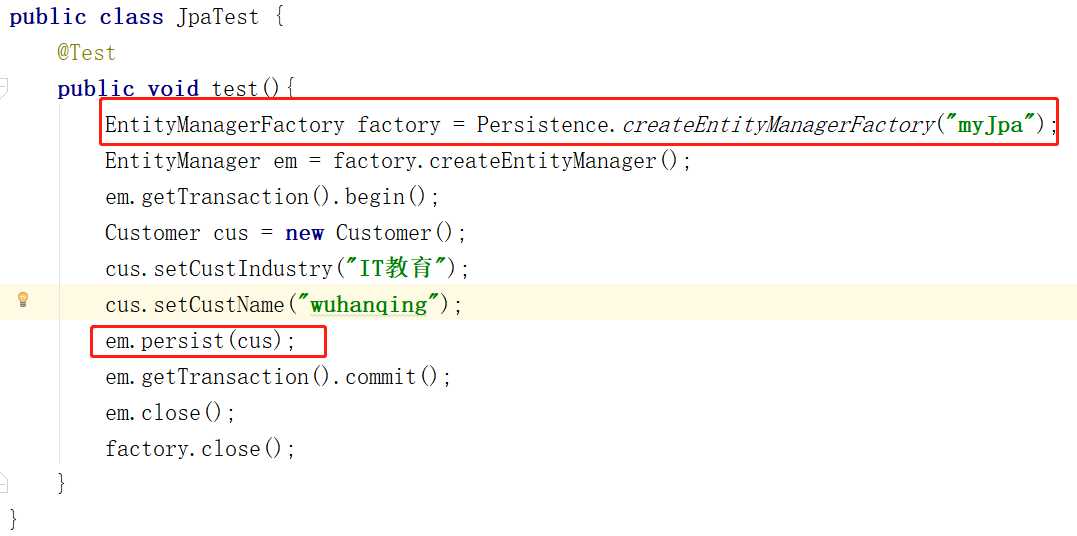
最后编写测试类:主要分为六个部分
1,通过加载配置文件中的持久化单元创建实体管理类工厂
2,通过工厂创建实体管理类
3,开启事务(增删改需要)
4,通过实体管理类执行相关操作(增删改查)
5,提交事务(回滚事务)
6,关闭资源
测试结果:控制台打印

控制台的打印跟配置有关 因为前面persistence.xml中配置的是
所以存在表的话就会先进行删除再进行创建
数据库中的信息也保存了

标签:数据 public cto stl 项目 增删改 identity 属性 电话
原文地址:https://www.cnblogs.com/phantom576/p/11965221.html