码迷,mamicode.com
首页 > 其他好文 > 详细

【高可用架构】用Nginx实现负载均衡(三)

时间:2019-12-04 16:07:44      阅读:118      评论:0      收藏:0      [点我收藏+]

标签:server   fastcgi   进入   home   ams   etc   utf-8   inux   html   

前言


在上一篇,已经用Envoy工具统一发布了Deploy项目代码。本篇我们来看看如何用nginx实现负载均衡

负载均衡器IP

192.168.10.11

【高可用架构】系列链接:待部署的架构介绍

演示


配置应用服务器

首先,需要将上一篇部署的两台应用服务器,都能够单独访问

配置192.168.10.12、192.168.10.18上nginx的config

# vi /etc/nginx/config.d/dev.deploy.goods.conf
server {
   listen       80;
   server_name  dev.deploy.goods;

   index index.html index.htm index.php;

   location / {

        rewrite ^/(.*)$ /index.php/$1 last;
        try_files $uri $uri/ /index.php?$query_string;
   }

   location ~ (.+\.php)(.*)$ {
        root "/var/www/Deploy/public";
        fastcgi_split_path_info ^(.+\.php)(.+)$;
        fastcgi_pass unix:/var/run/php-fpm/php7-fpm.sock;
        fastcgi_index index.php;
        include fastcgi_params;
        fastcgi_param SCRIPT_FILENAME $document_root$fastcgi_script_name;
        fastcgi_param PATH_INFO $fastcgi_path_info;

        fastcgi_intercept_errors off;
        fastcgi_buffer_size 16k;
        fastcgi_buffers 4 16k;
        fastcgi_connect_timeout 300;
        fastcgi_send_timeout 300;
        fastcgi_read_timeout 300;
   }
}

重启nginx

配置win的hosts

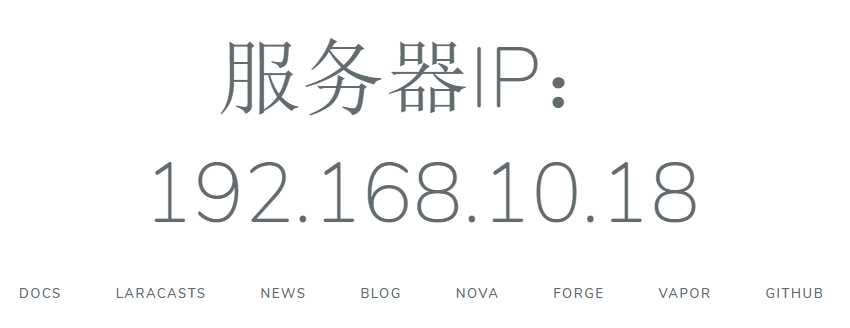
192.168.10.18 dev.deploy.goods # 开发机也是这个域名,大家可以换一个,这里暂时去掉

访问成功

技术图片

已同样的方式配置12机

配置负载均衡器

进入192.168.10.11虚拟机

配置config

upstream deploy_proxy {                                                  
                                                                         
    server 192.168.10.12;                                                
    server 192.168.10.18;                                                
}                                                                        
                                                                         
server {                                                                 
        listen 80;                                                       
        server_name dev.deploy.goods;                                    
                                                                         
        index index.html index.htm index.php;                            
                                                                         
        charset utf-8;                                                   
                                                                         
                                                                         
        location = /favicon.ico {access_log off; log_not_found off;}     
        location = /robots.txt {access_log off; log_not_found off;}      
                                                                         
        sendfile off;                                                    
        client_max_body_size 100m;                                       
                                                                         
        location / {                                                     
                                                                         
                proxy_set_header Host dev.deploy.goods; # 域名要和APP服务器设置的一样                
                proxy_pass http://deploy_proxy; # 上面设置的deploy_proxy
        }                                                                
        #ssl_certificate        /etc/nginx/ssl/homestead.app.crt;        
        #ssl_certificate_key    /etc/nginx/ssl/homestead.app.key;        
}                                                                                                                                                    

重启nginx配置

配置win的hosts(记得去掉之前设置的域名对应)

192.168.10.11 dev.deploy.goods

访问http://dev.deploy.goods, 不断刷新,你会发现IP在轮询的变

至此,负载均衡器也部署成功了,下一篇就要实现redis主从结构了,在此之前,可以提前看下【linux系统】的redis安装

【高可用架构】用Nginx实现负载均衡(三)

标签:server   fastcgi   进入   home   ams   etc   utf-8   inux   html   

原文地址:https://www.cnblogs.com/SexyPhoenix/p/11983310.html

(0)
(0)
   
举报
评论 一句话评论(0
登录后才能评论!
© 2014 mamicode.com 版权所有  联系我们:gaon5@hotmail.com
迷上了代码!