标签:自己 启动级别 ble inetd 协议数据包 界面 运行级别 登陆 tst

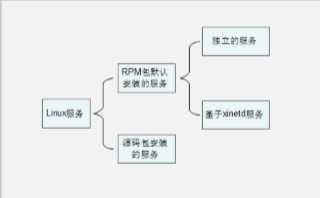
这些服务是通过 RPM 包安装的,可以被服务管理命令识别。又分为两种子分类:
不能直接通过系统命令启动,但可以进行配置实现系统命令启动。
(我们使用yum安装的apache服务进行演示)
[root@centos ~]# /etc/init.d/httpd start
Starting httpd: httpd: apr_sockaddr_info_get() failed for centos
httpd: Could not reliably determine the server's fully qualified domain name, using 127.0.0.1 for ServerName
                                                           [  OK  ]
[root@centos ~]# service 独立服务名 start|stop|restart|…[root@centos ~]# chkconfig [--level 运行级别] [独立服务名] [on|off]
#选项:
--level:
设定在哪个运行级别中开机自启动(on),或是关闭自启动(off)
[root@centos ~]# chkconfig --level 2345 httpd on [root@centos ~]# vi /etc/rc.d/rc.local
touch /var/lock/subsys/local /etc/rc.d/init.d/httpd start 
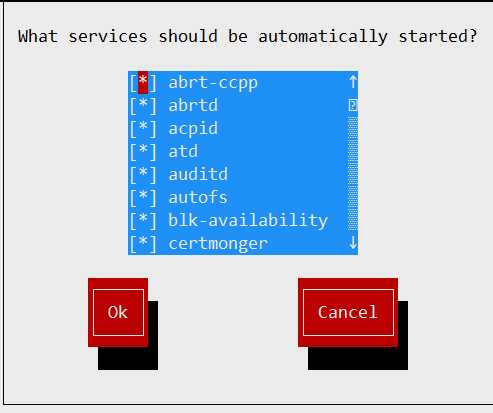
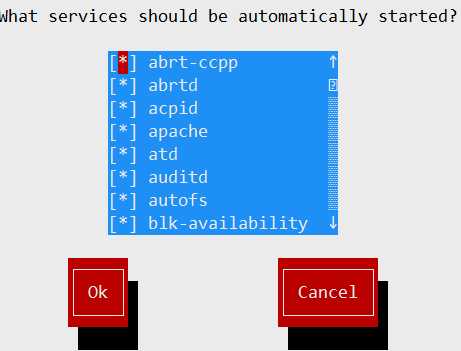
[root@centos ~]# ntsysv
上下键:在不同服务之间移动
空格键:选定或取消服务的自启动。
tab 键:在不同项目间切换
F1 键:显示服务的说明我们使用 telnet 服务来举例,telnet 服务是用来进程系统远程管理的,端口 23。不过需要注意的是 telnet 的远程管理数据在网络当中是明文传输,非常不安全。在实际生产环境中,不会使用,我们这里只是举例而已。
[root@centos ~]# yum install telnet -y
[root@centos ~]# vim /etc/xinetd.d/telnet

service telnet
{
        flags           = REUSE   标志为REUSE,代表tcp/ip socket 可重用
        socket_type     = stream  使用tcp协议数据包
        wait            = no      允许多个连接同时连接
        user            = root     启动服务的用户为 root
        server          = /usr/sbin/in.telnetd   启动脚本
        log_on_failure  += USERID     登陆失败后,记录用户id
        disable         = yes      默认服务不使用,我们如果要使用的话,需要将yes改为no
}


#启动telnet服务,使用chkconfig --list 查看
[root@centos ~]# chkconfig --list
....
xinetd based services:
    chargen-dgram:  off
    chargen-stream: off
    daytime-dgram:  off
    daytime-stream: off
    discard-dgram:  off
    discard-stream: off
    echo-dgram:     off
    echo-stream:    off
    rsync:          off
    tcpmux-server:  off
    telnet:         on
    time-dgram:     off
    time-stream:    off
[root@centos ~]# chkconfig 服务名 on|off
[root@centos ~]# chkconfig telnet on
telnet 是基于 xinetd 的服务,没有自己的运行级别,是依靠 xinetd 服务的运行级别,所以不能添加 --level 参数[root@centos ~]# /usr/local/apache/bin/apachectl start|stop|restart|… # 源码包服务启动管理 root@centos ~]# vi /etc/rc.d/rc.local # 修改自启动文件
touch /var/lock/subsys/local /usr/local/apache/bin/apachectl start 1)安装源码包的 apache 服务
[root@centos ~]# tar -zxvf httpd-2.4.41.tar.gz
[root@centos ~]# cd httpd-2.4.41
#先安装依赖
yum install pcre  gcc gcc-c++ expat-devel zlib
#源码包 2.4.*版本中默认没有集成 apr 的依赖包,所以需要提前解决依赖问题,直接下载就行
cp -a apr-1.7.0/ /root/httpd-2.4.41/srclib/apr
cp -a apr-util-1.6.1 /root/httpd-2.4.41/srclib/apr-util
[root@centos httpd-2.4.41]# ./configure --prefix=/usr/local/apache --sysconfdir=/usr/local/apache/etc --with-included-apr
make && make install
2)启动apache服务
[root@centos ~]# /usr/local/apache/bin/apachectl start
[root@centos ~]# netstat -tlunp | grep 80
tcp        0      0 :::80                       :::*                        LISTEN      45839/httpd
# 启动源码包的 apache ,查看端口确定已经启动
3)、让源码包的 apache 服务能被 service 命令管理启动
[root@centos ~]# ln -s /usr/local/apache/bin/apachectl  /etc/init.d/apache
#service 命令其实只是在 /etc/init.d/ 目录中查找是否有服务的启动脚本,所以我们只需要做个软链接把源码包的启动脚本链接到 /etc/init.d/ 目录中,就能被 service 命令管理了。我把软链接文件起名为 apache ,不过注意这不是 RPM 包的 apache。

[root@centos rc.d]# service apache stop
# 虽然 RPM 包的 apache 被卸载,但是 service 命令也能够生效。
4)、让源码包的 apache 服务能被 chkconfig 命令管理自启动
[root@localhost ~]# vim /etc/init.d/apache
在其中添加如下两行
# chkconfig: 2345 88 88
           启动级别  启动顺序   关闭顺序  #任意,不与其他服务冲突就行
# description:  apache  chkconfig script
                    描述信息         #任意
[root@centos rc.d]# chkconfig --add apache
# 让 chkconfig 命令能够管理源码包安装的 apache
[root@centos rc.d]# chkconfig --list | grep apache apache
[root@centos rc.d]# chkconfig --list |grep apache
apache          0:off   1:off   2:on    3:on    4:on    5:on    6:off

此时,已经可以使用chkconfig,管理apache自启动,并且启动级别,就是我们所写的。
5)、让 ntsysv 命令可以管理源码包 apache
ntsysv 命令其实是和 chkconfig 命令使用同样的管理机制,也就是说 ntsysv 已经可以 进行源码包 apache 的自启动管理了。

6)chkconfig 添加与删除服务
chkconfig [选项] [服务名] 选项:
--add: 把服务加入 chkconfig 命令的管理
--del: 把服务从 chkconfig 命令的管理中删除 标签:自己 启动级别 ble inetd 协议数据包 界面 运行级别 登陆 tst
原文地址:https://www.cnblogs.com/hjnzs/p/12010930.html