标签:out jupyter 修改 自己 open 安装与配置 成功 google false
推荐使用miniconda,相比于anaconda更加简洁,下载连接:https://mirrors.tuna.tsinghua.edu.cn/anaconda/miniconda/
pip install jupyterlab
jupyter notebook --generate-config
会生产一个配置文件 默认路径C:\Users\用户名\.jupyter\jupyter_notebook_config.py
修改其中的几个配置项 并取消前面的注释
ipython
In [1]: from notebook.auth import passwd
In [2]: passwd()
Enter password:
Verify password:
Out[2]: ‘sha1:f704b702aea2:01e2bd991f9c7208ba177b46f4d10b6907810927‘
# 配置启动目录
c.NotebookApp.notebook_dir = ‘E:/Projects‘
# 配置chrom的本地启动功能,让lab像IDE一样在本地打开
c.NotebookApp.browser = ‘C:/Program Files (x86)/Google/Chrome/Application/chrome.exe --app=%s‘
# 将ip设置为*,意味允许任何IP访问
c.NotebookApp.ip = ‘*‘
# 这里的密码就是上边我们生成的那一串
c.NotebookApp.password = ‘sha1:f704b702aea2:01e2bd991f9c7208ba177b46f4d10b6907810927‘
# 服务器上并没有浏览器可以供Jupyter打开
c.NotebookApp.open_browser = False
# 监听端口设置为8888或其他自己喜欢的端口
c.NotebookApp.port = 8888
# 允许远程访问
c.NotebookApp.allow_remote_access = True
jupyter-lab
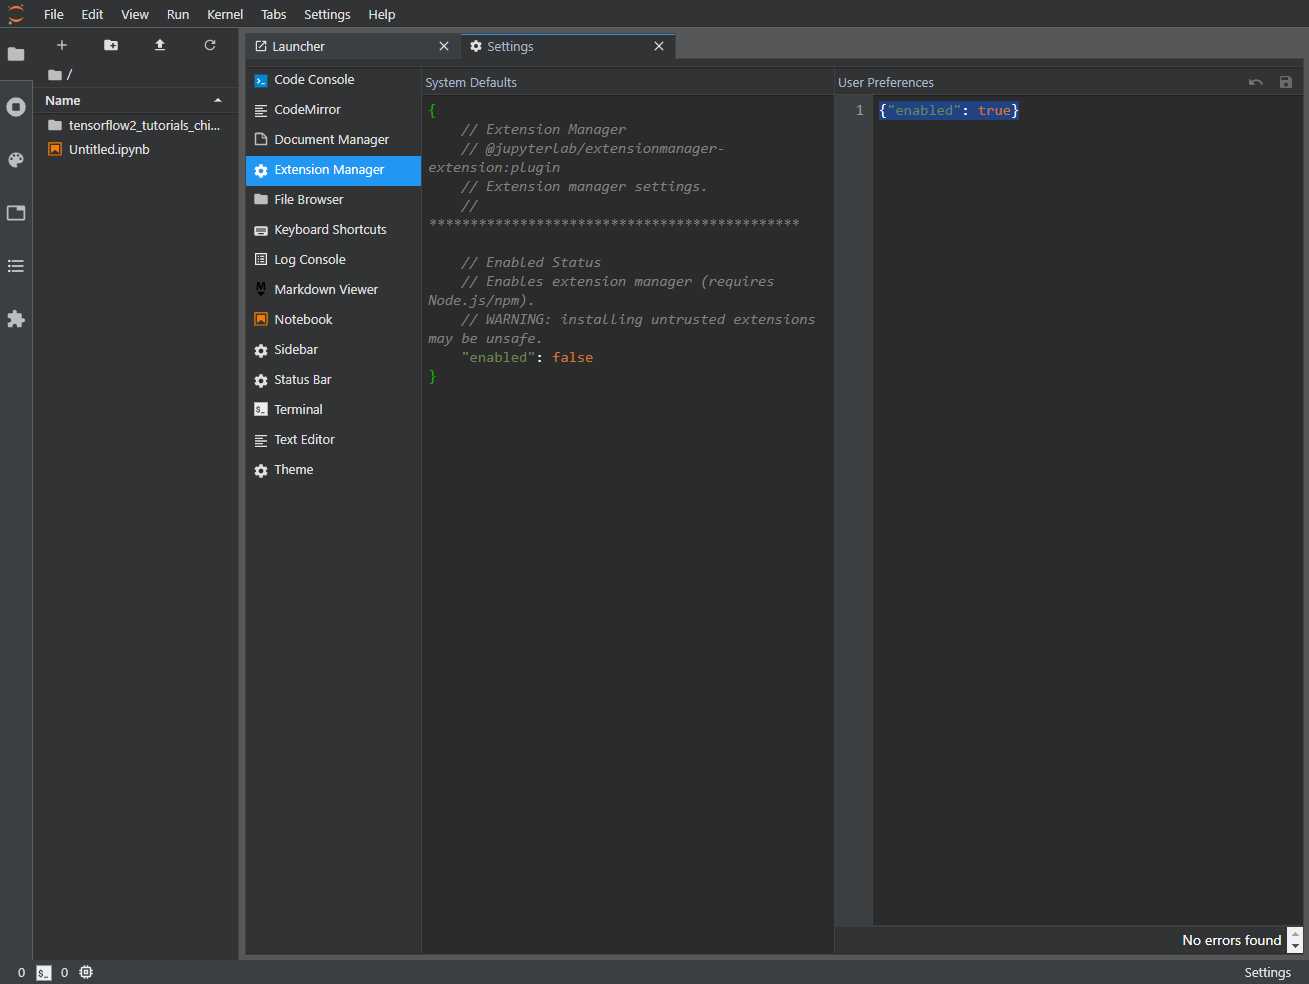
打开:settings->Advanced Settings Editor
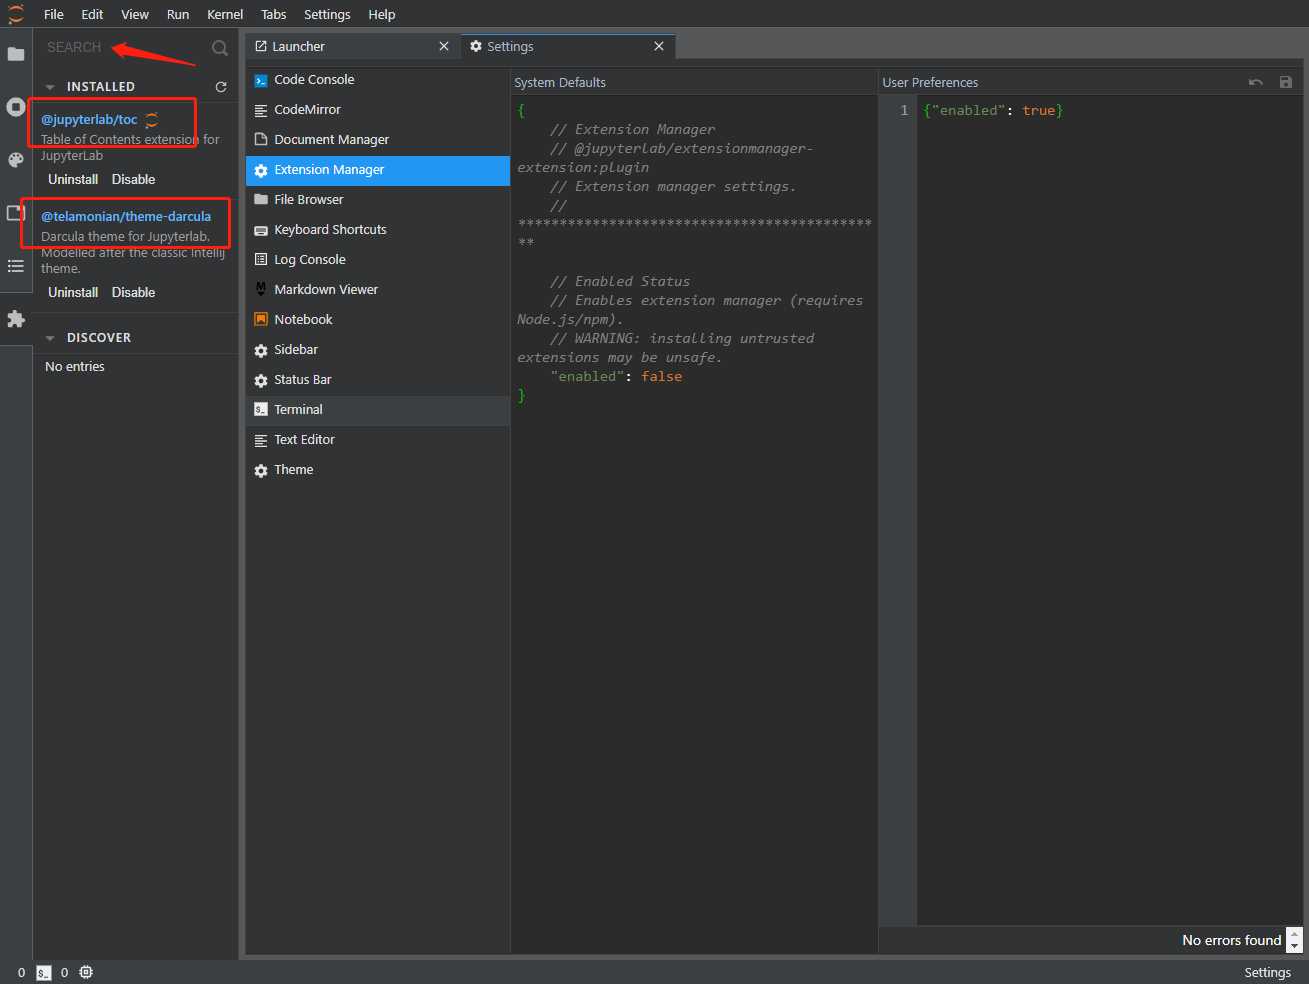
右侧填写:{"enabled": true},开启插安装插件:

在搜素栏中搜索对于的插件,点击安装即可,build成功后需要重新加载lab

conda安装虚拟环境后 需要在进入虚拟环境安装一些jupyter所必须的模块,该模块为nb_conda
conda install nb_conda
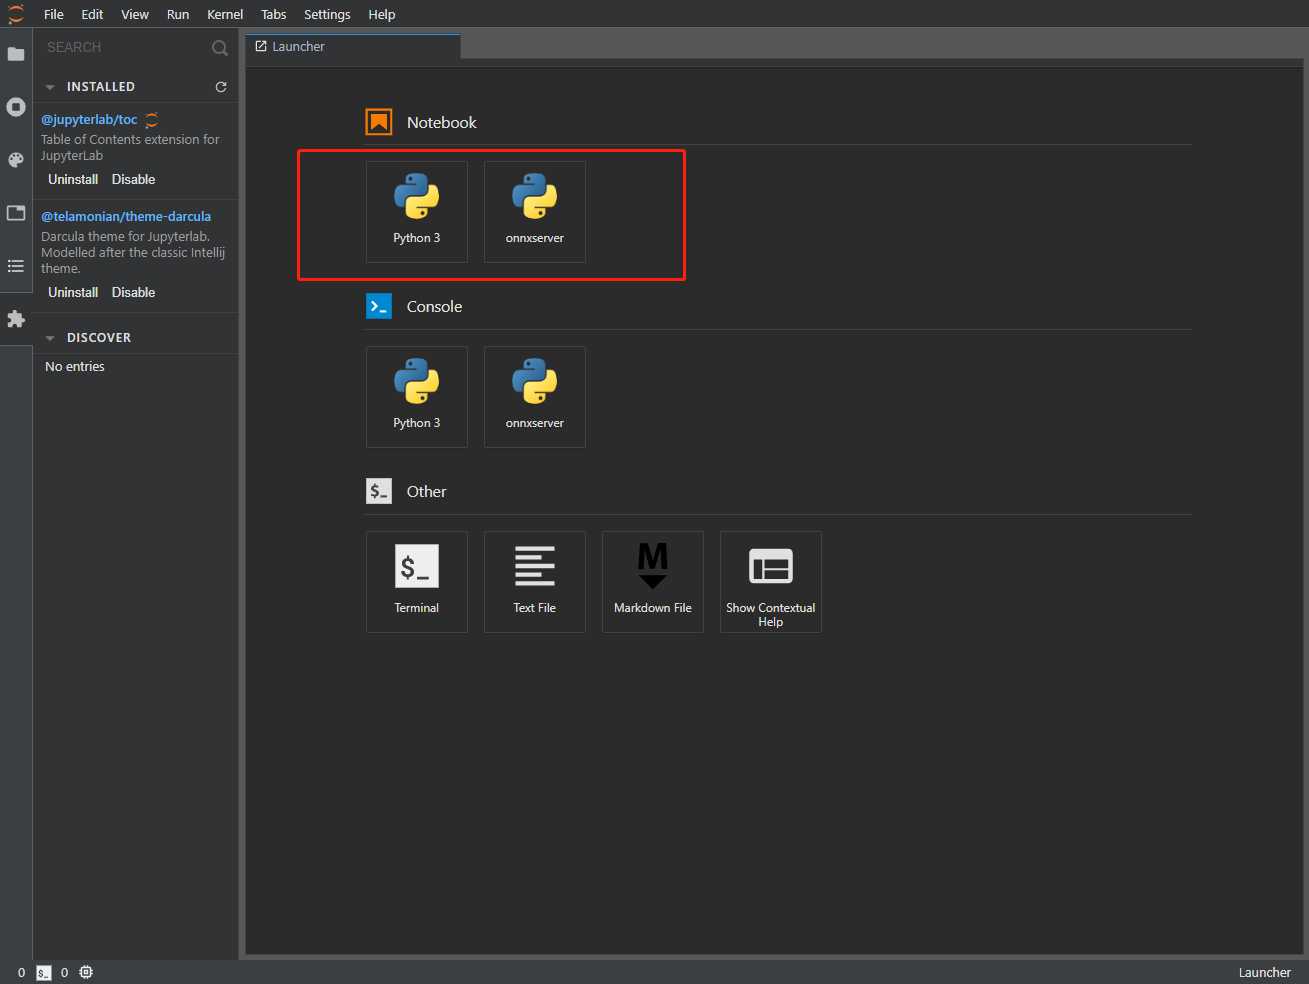
然后需要将虚拟环境的信息写入到jupyter配置文件 安装nb_conda后ipython会作为依赖自动安装
ipython kernel install --user --name your_name
重新打开lab 会显示新的环境

标签:out jupyter 修改 自己 open 安装与配置 成功 google false
原文地址:https://www.cnblogs.com/gollong/p/12031012.html