标签:执行 启动 src mys lease host remote pass index
一、搭建DHCP服务,为局域网内用户提供10.1.1.0/24网段的IP,且租约期默认为48小时yum install -y dhcp*[root@localhost dhcp]# vim dhcpd.conf
option domain-name "example.org";
option domain-name-servers ns1.example.org, ns2.example.org;
default-lease-time 172800;
max-lease-time 172800;
log-facility local7;
subnet 10.1.1.0 netmask 255.255.255.0 {
range 10.1.1.100 10.1.1.200;3.启动服务并验证:
systemctl start dhcp
dhclient -d
二、在上述实验基础上,实现DHCP中继:
# 开启路由转发功能
vim /etc/sysctl.conf
net.ipv4.ip-forward=1
sysctl -p
# 启动dhcp中继服务
dhcrelay dhcp_server_ip
中继服务实际使用中,基本没有必要使用。其他网络的主机另外新建一个dhcp服务就好,没有必要非得使用中继
三、借助Ansible Playbook自动化搭建LNMP环境(可借助yum)
1.实验主机:
ansible主机:172.20.10.6
webservers:172.20.10.3
appservers:172.20.10.4
2.ansible主机免密钥认证
(1)
[root@localhost playbooks]# ssh-keygen
Generating public/private rsa key pair.
Enter file in which to save the key (/root/.ssh/id_rsa):
Enter passphrase (empty for no passphrase):
Enter same passphrase again:
Your identification has been saved in /root/.ssh/id_rsa.
Your public key has been saved in /root/.ssh/id_rsa.pub.
The key fingerprint is:
SHA256:LFUqZ3zNLyVoJzwgIo+LzGwHhd2YCnKh6kOl6IZQcZ4 root@localhost
The key‘s randomart image is:
+---[RSA 2048]----+
|  *o* . . .      |
|ooo@ + o = +     |
|+o+.E . * B = .  |
|*++.   * o + +   |
|=B..  . S   . .  |
|B .    .     .   |
|.=               |
|. .              |
|                 |
+----[SHA256]-----+
(2)
[root@localhost] ssh-copy-id 172.20.10.3
[root@localhost]# ssh-copy-id 172.20.10.4
3.ansible配置文件
[webservers]
172.20.10.3
[appservers]
172.20.10.4
4.定义playbook剧本:
[root@localhost playbooks]# vim lnmp.yml
---
- hosts: webservers
  remote_user: root

  tasks:
    - name: install nginx
      yum:  name=nginx
    - name: config
      copy: src=/data/nginx.conf  dest=/etc/nginx/nginx.conf
      tags: conf
      notify: restart nginx
    - name: start nginx
      service: name=nginx state=started enabled=yes

  handlers:
    - name: restart nginx
      service: name=nginx state=restarted

- hosts: appservers
  remote_user: root

  tasks:
    - name: install services
      yum: name={{ item }}
      with_items:
        - mariadb
        - mariadb-server
        - php
        - php-fpm
        - php-mysql
    - name:  php-fpm  config
      copy: src=/data/www.conf  dest=/etc/php-fpm.d/www.conf
      notify: restart php-fpm
    - name: start php-fpm
      service: name=php-fpm state=started enabled=yes
    - name : start mysql
      service: name=mariadb  state=started enabled=yes
    - name : config mysql
      shell: mysqladmin -uroot password "centos"
    - name: config php-index-file
      copy: src=/data/index.php  dest=/var/www/html/
    - name: config php-mysql-file
      copy: src=/data/mysql.php  dest=/var/www/html/

  handlers:
    - name: restart php-fpm
      service: name=php-fpm state=restart
(5)执行结果: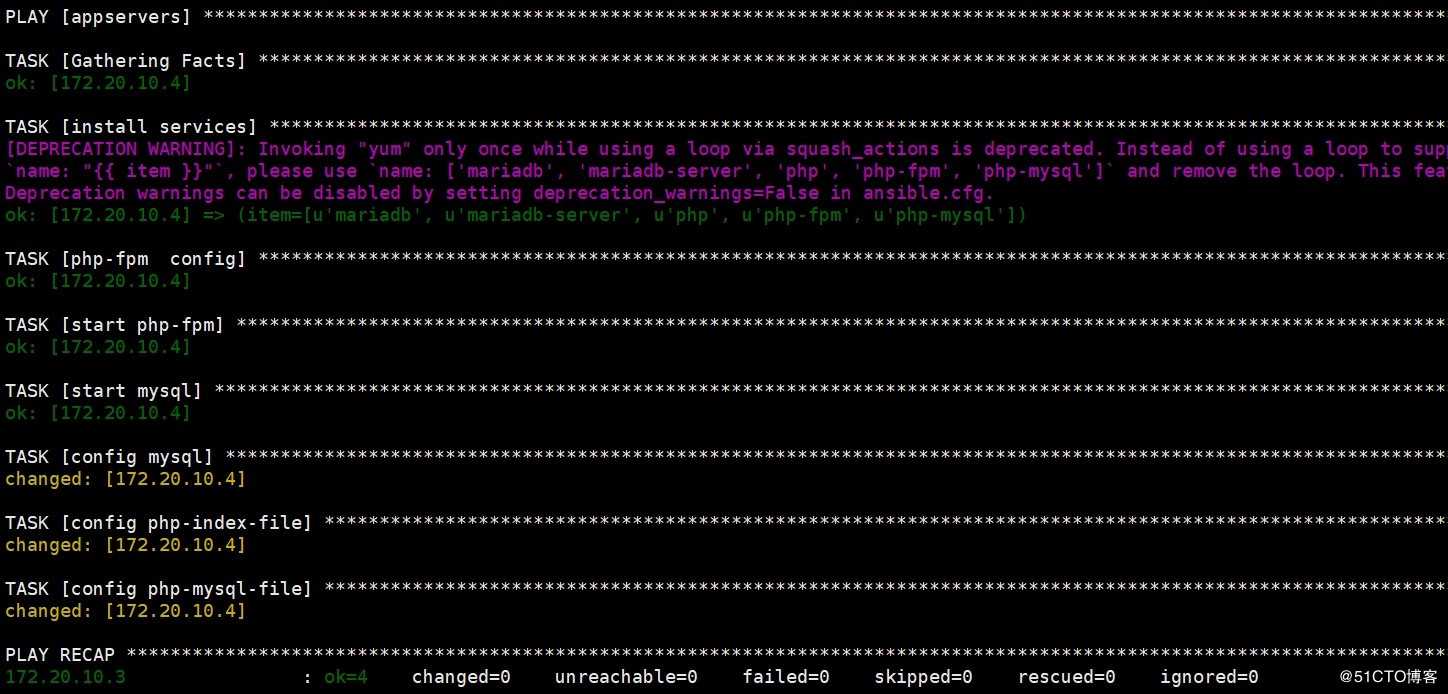
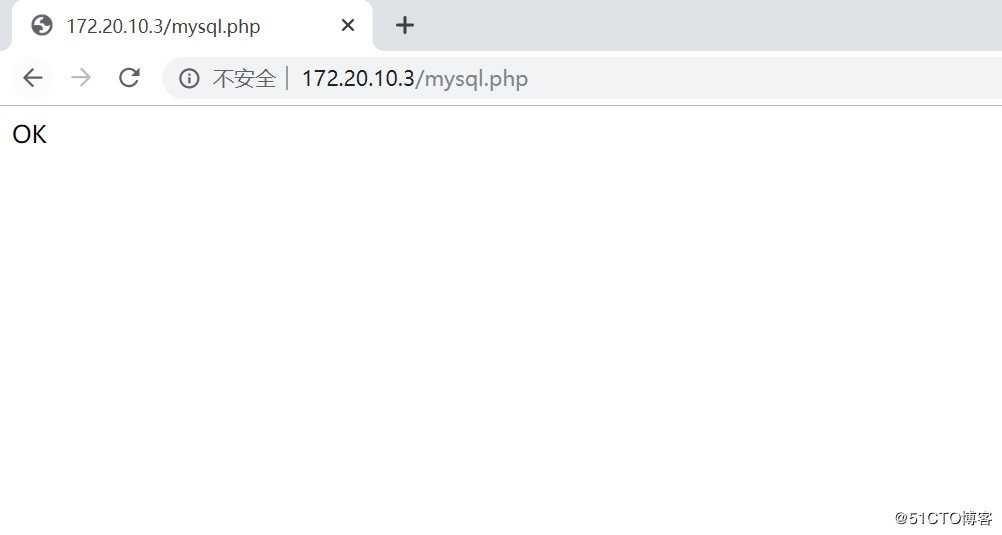
(6)测试: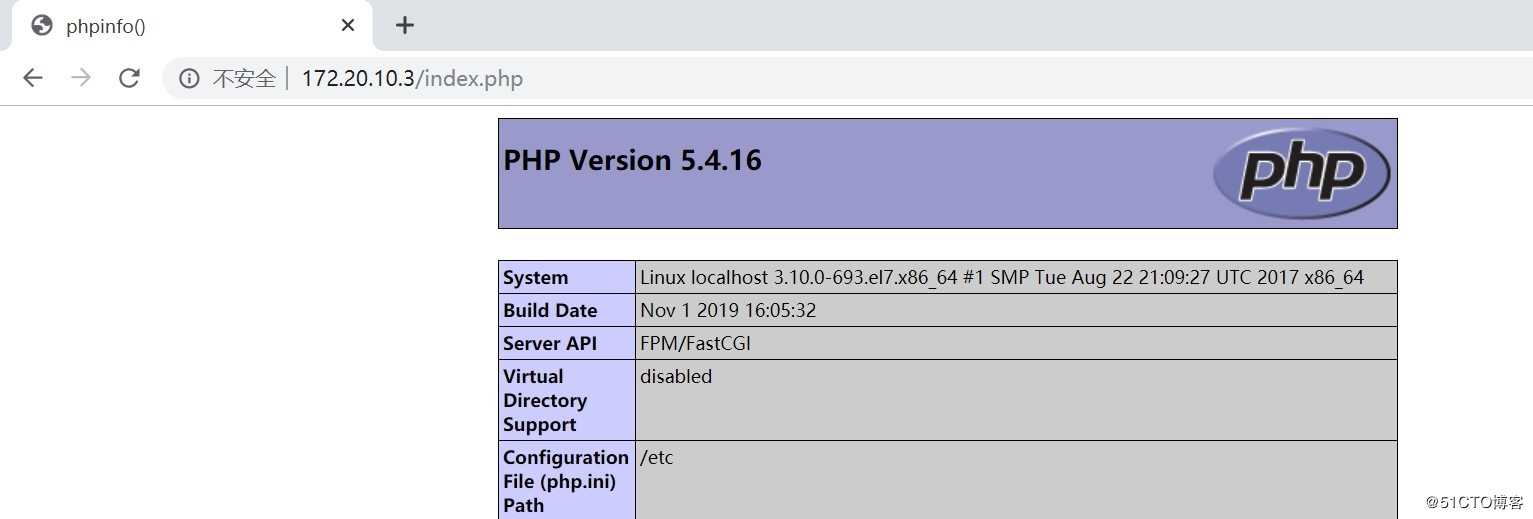

四、采用Ansible Role方式自动化搭建LNMP
1.实验主机:
ansible主机:172.20.10.6
webservers:172.20.10.3
appservers:172.20.10.4
2.ansible主机roles目录: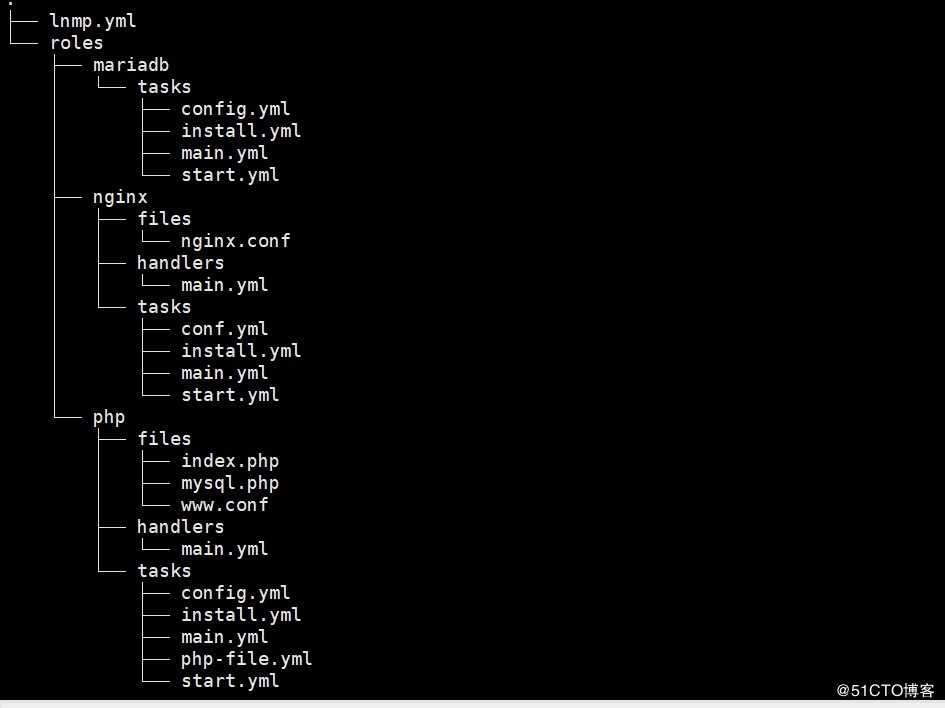
3.执行结果为: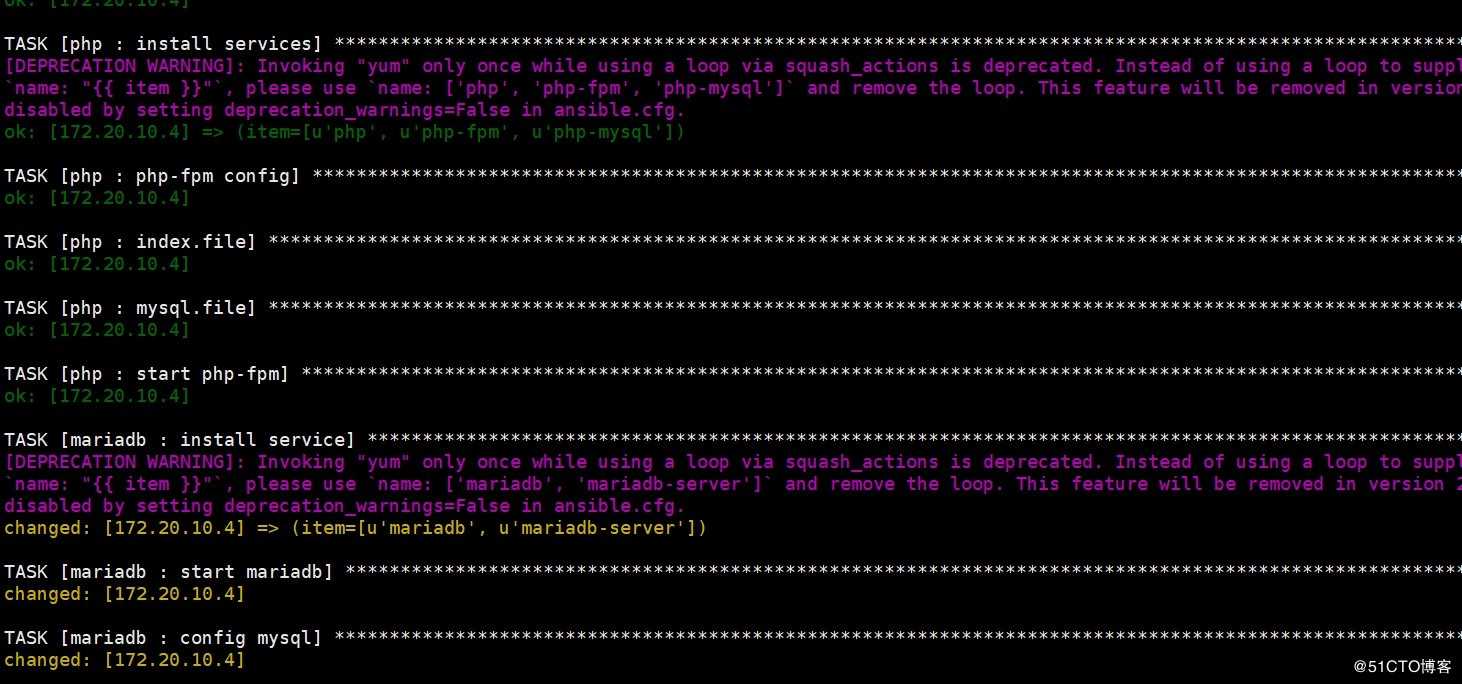
4.访问测试为: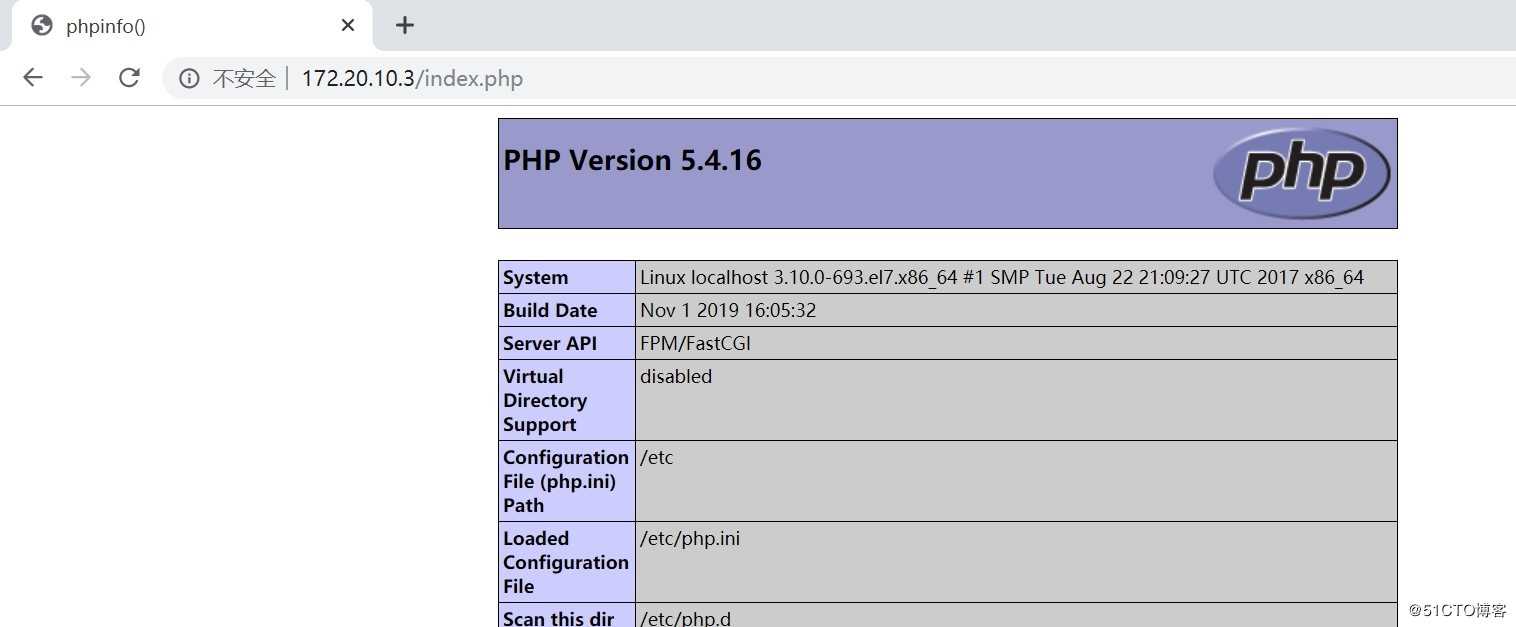
标签:执行 启动 src mys lease host remote pass index
原文地址:https://blog.51cto.com/14418331/2458561