标签:drawer 效果 == 文件的 names 取出 浏览器 hang update
投入前端开发也有1年的时间了,我还是很菜.在开发中还是很多技巧以及经验不够,写文章也是文笔不行,不过好在写的内容意思大概都能看懂.这次就来介绍一下我在开发过程中遇到的一些问题以及处理技巧.
两月前刚开始试用umi这个React的框架,使用AntD Pro创建好项目后,着实熟悉了几天,不过熟悉这个框架后,就觉得阿里的大佬还是牛.佩服.
事情是这样的,我们能够在AndD Pro的在线预览上看到能够动态切换主题.而实际拉下来的模板中却没有这个功能.我就开始了对比源码.
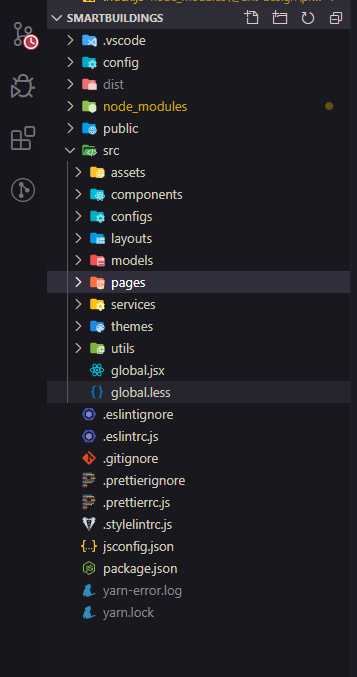
算了,先上一下项目目录结构吧,不然说起来不知所云.被我精简后的项目结构大概就是这样.删掉了,很多用于语法验证的ESLINT库等,使用VS插件提供支持,这么做的好处就是写代码的时候就能进行验证,格式化,而不是编译和提交的时候去搞这一堆事情.
回到主题,我发现源码中的layouts中的BasicLayout中缺少了,SettingDrawer的引用.所以这里我们自己把他加上,并放在页面中
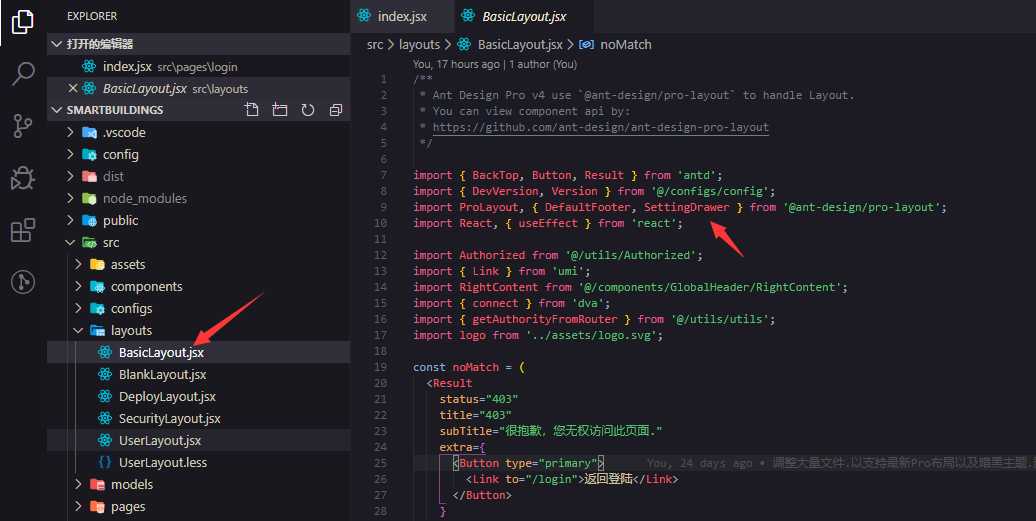
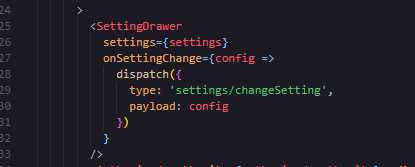
在model中的setting中使用默认的切换主题的代码就能实现动态切换主题了.
以为到这里就完了?
嘿嘿,其实并没有.
你会发现这个东西,不管你怎么切换主题,界面是没有反应的,只有默认主题,这.....心里肯定是崩溃的.
所以我们还需要做一些处理.
首先按照官方的默认主题配置中写好想要的默认主题.就是这个default.config文件.名字可能和官方不太一样,因为我自己这个项目我改了很多文件名的.
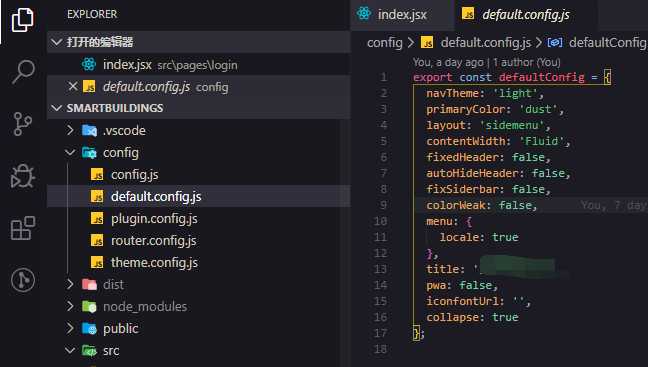
这个文件的作用就是告诉umi框架默认主题就是这个样的,
然后我们去命令行工具添加几个好东西.
首先我们先添加
export const themeConfig = {
  theme: [
    { key: ‘dark‘, fileName: ‘dark.css‘, theme: ‘dark‘ },
    { key: ‘dust‘, fileName: ‘dust.css‘, modifyVars: { ‘@primary-color‘: ‘#F5222D‘ } },
    { key: ‘volcano‘, fileName: ‘volcano.css‘, modifyVars: { ‘@primary-color‘: ‘#FA541C‘ } },
    { key: ‘sunset‘, fileName: ‘sunset.css‘, modifyVars: { ‘@primary-color‘: ‘#FAAD14‘ } },
    { key: ‘cyan‘, fileName: ‘cyan.css‘, modifyVars: { ‘@primary-color‘: ‘#13C2C2‘ } },
    { key: ‘green‘, fileName: ‘green.css‘, modifyVars: { ‘@primary-color‘: ‘#52C41A‘ } },
    { key: ‘geekblue‘, fileName: ‘geekblue.css‘, modifyVars: { ‘@primary-color‘: ‘#2F54EB‘ } },
    { key: ‘purple‘, fileName: ‘purple.css‘, modifyVars: { ‘@primary-color‘: ‘#722ED1‘ } },

    { key: ‘dust‘, theme: ‘dark‘, fileName: ‘dark-dust.css‘, modifyVars: { ‘@primary-color‘: ‘#F5222D‘ } },
    { key: ‘volcano‘, theme: ‘dark‘, fileName: ‘dark-volcano.css‘, modifyVars: { ‘@primary-color‘: ‘#FA541C‘ } },
    { key: ‘sunset‘, theme: ‘dark‘, fileName: ‘dark-sunset.css‘, modifyVars: { ‘@primary-color‘: ‘#FAAD14‘ } },
    { key: ‘cyan‘, theme: ‘dark‘, fileName: ‘dark-cyan.css‘, modifyVars: { ‘@primary-color‘: ‘#13C2C2‘ } },
    { key: ‘green‘, theme: ‘dark‘, fileName: ‘dark-green.css‘, modifyVars: { ‘@primary-color‘: ‘#52C41A‘ } },
    { key: ‘geekblue‘, theme: ‘dark‘, fileName: ‘dark-geekblue.css‘, modifyVars: { ‘@primary-color‘: ‘#2F54EB‘ } },
    { key: ‘purple‘, theme: ‘dark‘, fileName: ‘dark-purple.css‘, modifyVars: { ‘@primary-color‘: ‘#722ED1‘ } }
  ],
  min: true, // 是否压缩css
  isModule: true, // css module
  ignoreAntd: false, // 忽略 antd 的依赖
  ignoreProLayout: false, // 忽略 pro-layout
  cache: true // 不使用缓存
};
写好这个文件后,就可以在config中配置主题了.接下来我直接贴图.
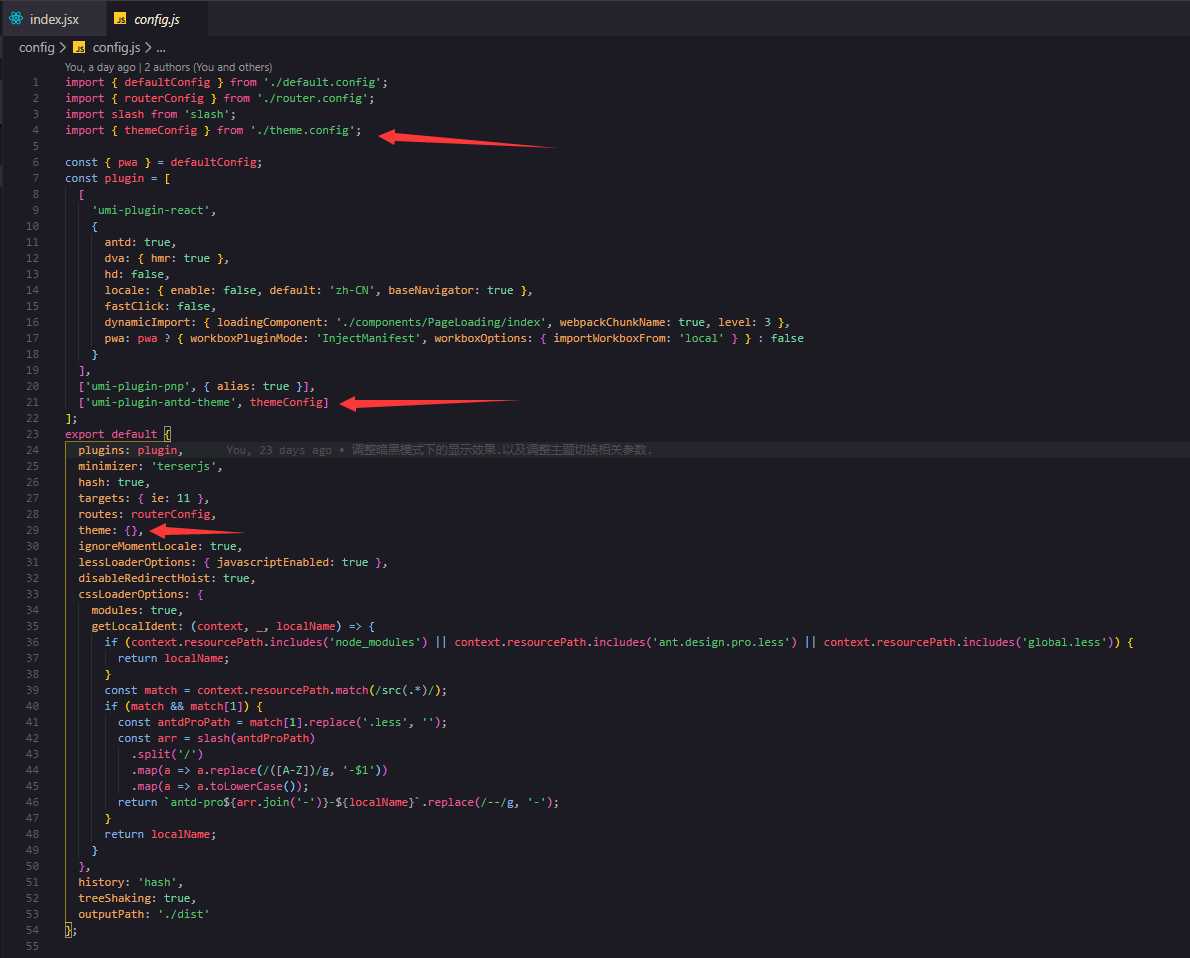
import { defaultConfig } from ‘../../config/default.config‘;

const updateColorWeak = colorWeak => {
  const root = document.getElementById(‘root‘);
  if (root) {
    root.className = colorWeak ? ‘colorWeak‘ : ‘‘;
  }
};

const themeData = JSON.parse(localStorage.getItem(‘smart-theme‘));

const SettingModel = {
  namespace: ‘settings‘,
  state: themeData || defaultConfig,
  reducers: {
    changeSetting(state = defaultConfig, { payload }) {
      const { colorWeak, contentWidth } = payload;
      if (state.contentWidth !== contentWidth && window.dispatchEvent) {
        window.dispatchEvent(new Event(‘resize‘));
      }
      updateColorWeak(!!colorWeak);
      localStorage.setItem(‘smart-theme‘, JSON.stringify({ ...state, ...payload }));
      return { ...state, ...payload };
    }
  }
};
export default SettingModel;
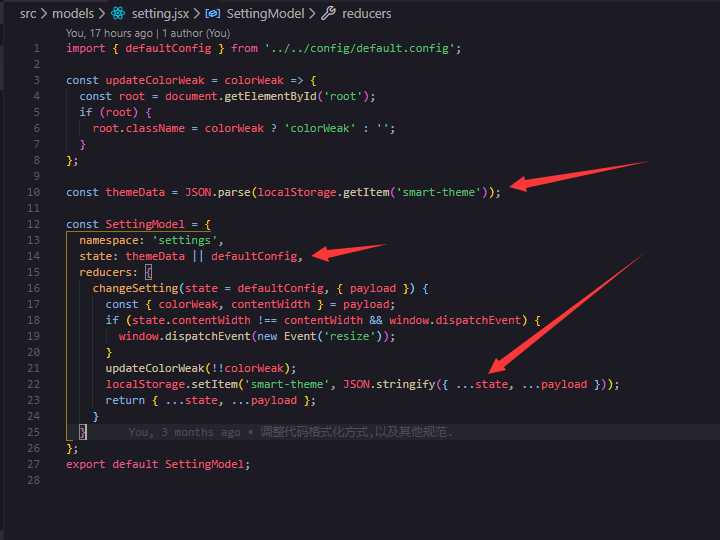
我的改动实际上就是如图的三个地方,首先在修改后返回样式之前将样式存到localStorage,由于他是个对象,所以需要转成字符串.然后再取出来并且转成字符串,以后在每一次state返回的时候,默认返回localStrage中的配置信息,若是不存在就返回默认的.
到这里我们就能愉快的进行在生产环境切换主题了.
ヾ(≧▽≦*)oヾ(≧▽≦*)oヾ(≧▽≦*)o 至此,我们的在线主题切换就全部完成了,结合官方默认的主题就能支持暗黑模式了.
然鹅......你以为完了???其实还没有,因为还有一个问题.官方的默认暗黑主题,表格被选中后的背景色还是白色.那么你在黑色的主题下,用白色的背景,效果就是下面这样
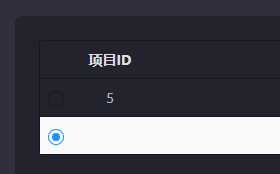
显示效果是不是很棒,完全不知道数据是什么.而且亮瞎眼.??
所以我们还需要对官方提供的主题配置做点手脚.
那就是在所有的黑色主题的配置中加入自定义的配置
export const themeConfig = {
  theme: [
    { key: ‘dust‘, fileName: ‘dust.css‘, modifyVars: { ‘@primary-color‘: ‘#F5222D‘ } },
    { key: ‘volcano‘, fileName: ‘volcano.css‘, modifyVars: { ‘@primary-color‘: ‘#FA541C‘ } },
    { key: ‘sunset‘, fileName: ‘sunset.css‘, modifyVars: { ‘@primary-color‘: ‘#FAAD14‘ } },
    { key: ‘cyan‘, fileName: ‘cyan.css‘, modifyVars: { ‘@primary-color‘: ‘#13C2C2‘ } },
    { key: ‘green‘, fileName: ‘green.css‘, modifyVars: { ‘@primary-color‘: ‘#52C41A‘ } },
    { key: ‘geekblue‘, fileName: ‘geekblue.css‘, modifyVars: { ‘@primary-color‘: ‘#2F54EB‘ } },
    { key: ‘purple‘, fileName: ‘purple.css‘, modifyVars: { ‘@primary-color‘: ‘#722ED1‘ } },
    { key: ‘dark‘, fileName: ‘dark.css‘, theme: ‘dark‘, modifyVars: { ‘@table-selected-row-bg‘: ‘#30303d !important‘ } },
    { key: ‘dust‘, theme: ‘dark‘, fileName: ‘dark-dust.css‘, modifyVars: { ‘@primary-color‘: ‘#F5222D‘, ‘@table-selected-row-bg‘: ‘#30303d !important‘ } },
    { key: ‘volcano‘, theme: ‘dark‘, fileName: ‘dark-volcano.css‘, modifyVars: { ‘@primary-color‘: ‘#FA541C‘, ‘@table-selected-row-bg‘: ‘#30303d !important‘ } },
    { key: ‘sunset‘, theme: ‘dark‘, fileName: ‘dark-sunset.css‘, modifyVars: { ‘@primary-color‘: ‘#FAAD14‘, ‘@table-selected-row-bg‘: ‘#30303d !important‘ } },
    { key: ‘cyan‘, theme: ‘dark‘, fileName: ‘dark-cyan.css‘, modifyVars: { ‘@primary-color‘: ‘#13C2C2‘, ‘@table-selected-row-bg‘: ‘#30303d !important‘ } },
    { key: ‘green‘, theme: ‘dark‘, fileName: ‘dark-green.css‘, modifyVars: { ‘@primary-color‘: ‘#52C41A‘, ‘@table-selected-row-bg‘: ‘#30303d !important‘ } },
    { key: ‘geekblue‘, theme: ‘dark‘, fileName: ‘dark-geekblue.css‘, modifyVars: { ‘@primary-color‘: ‘#2F54EB‘, ‘@table-selected-row-bg‘: ‘#30303d !important‘ } },
    { key: ‘purple‘, theme: ‘dark‘, fileName: ‘dark-purple.css‘, modifyVars: { ‘@primary-color‘: ‘#722ED1‘, ‘@table-selected-row-bg‘: ‘#30303d !important‘ } }
  ],
  min: true, // 是否压缩css
  isModule: true, // css module
  ignoreAntd: false, // 忽略 antd 的依赖
  ignoreProLayout: false, // 忽略 pro-layout
  cache: true // 不使用缓存
};
经过以上的一系列步骤和调整,终于能过够正常的在线切换主题,并且刷新也不会造成恢复默认了.
接下来是一个效果图.

使用React+Umi+Ant Design Pro实现生产环境动态切换主题,支持暗黑主题
标签:drawer 效果 == 文件的 names 取出 浏览器 hang update
原文地址:https://www.cnblogs.com/dygood/p/12072096.html