标签:uid 主从机 strong body lsp local bit 关闭 哪些

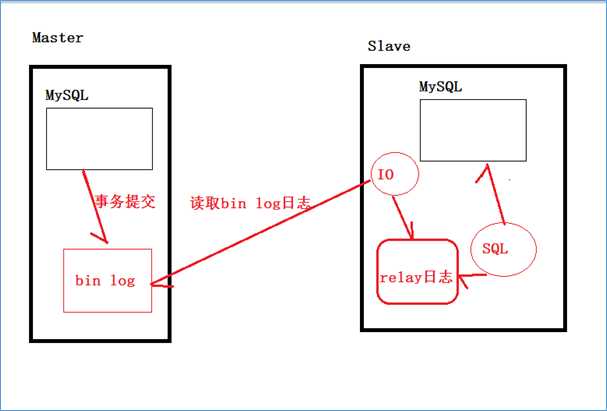
查看binlog日志: mysqlbinlog 文件名称
1、检查防火墙当前的状态
service iptables status
2、永久关闭实验机的防火墙
chkconfig iptables off
3、打开防火墙
chkconfig iptables on
4、设置后不会立即生效,需要重启系统
reboot
第一步:修改my.conf文件:
在[mysqld]段下添加:
#启用二进制日志

log-bin=mysql-bin

#服务器唯一ID,一般取IP最后一段

server-id=133
第二步:重启mysql服务
service mysqld restart
第三步:建立帐户并授权slave(登录到MySQL)
mysql>GRANT FILE ON *.* TO ‘root‘@‘%‘ IDENTIFIED BY ‘123456‘;

mysql>GRANT REPLICATION SLAVE, REPLICATION CLIENT ON *.* to ‘root‘@‘%‘ identified by ‘root‘;

mysql>GRANT REPLICATION SLAVE ON *.* to ‘root‘@‘%‘ identified by ‘root‘;

#一般不用root帐号,“%”表示所有客户端都可能连,只要帐号,密码正确,此处可用具体客户端IP代替,如192.168.145.226,加强安全。
刷新权限
mysql> FLUSH PRIVILEGES;
查看mysql现在有哪些用户
mysql>select user,host from mysql.user;
第四步:查询master的状态
mysql> show master status;
第一步:修改my.conf文件
[mysqld]
server-id=135
第二步:删除UUID文件
|
错误处理: 如果出现此错误: Fatal error: The slave I/O thread stops because master and slave have equal MySQL server UUIDs; these UUIDs must be different for replication to work. 因为是mysql是克隆的系统所以mysql的uuid是一样的,所以需要修改。 |
|
解决方法: 删除/var/lib/mysql/auto.cnf文件,重新启动服务。 |
第三步:重启并登录到MySQL进行配置从服务器
mysql>change master to master_host=‘192.168.10.133‘,master_port=3306,master_user=‘root‘,master_password=‘root‘,master_log_file=‘mysql-bin.000001‘,master_log_pos=569
注意语句中间不要断开,master_port为mysql服务器端口号(无引号),master_user为执行同步操作的数据库账户,“120”无单引号(此处的120就是show master status 中看到的position的值,这里的mysql-bin.000001就是file对应的值)。
第四步:启动从服务器复制功能
mysql>start slave;
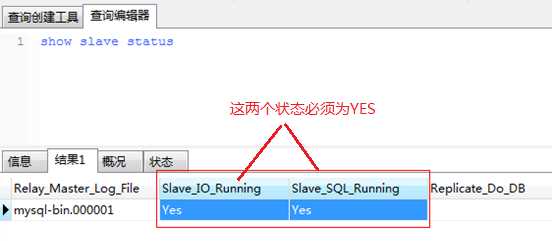
第五步:检查从服务器复制功能状态:
mysql> show slave status

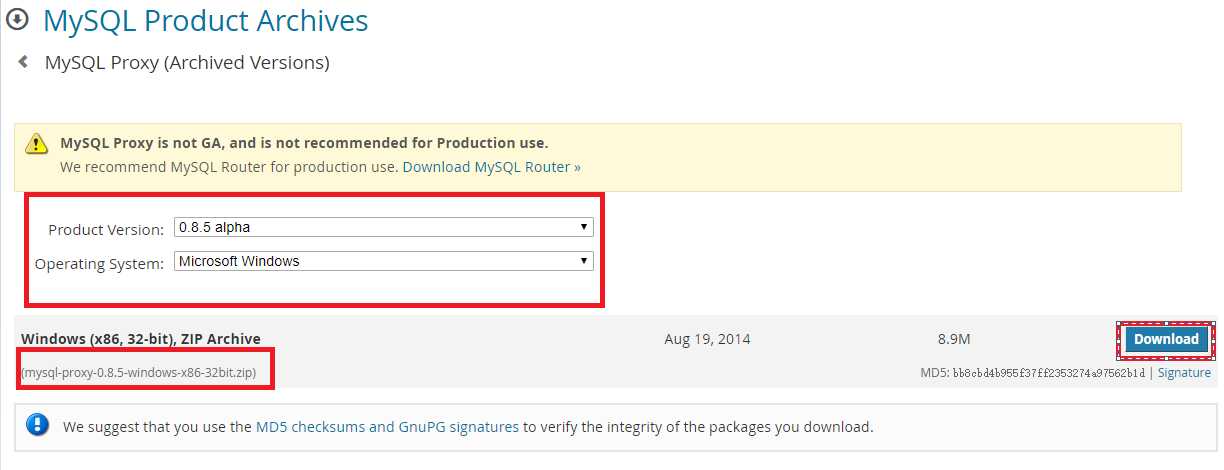
下载地址:https://downloads.mysql.com/archives/proxy/

创建mysql-proxy.cnf文件

修改mysql-proxy.cnf文件的权限
chmod
修改rw-splitting.lua脚本

启动命令
./mysql-proxy --defaults-file=mysql-proxy.cnf配置文件的地址
注意事项:如果没有配置profile文件的环境变量,则需要去拥有mysql-proxy命令的目录通过./mysql-proxy进行启动。
在其他客户端,通过mysql命令去连接MySQL Proxy机器
mysql -uroot -proot -h192.168.10.134 -P4040
标签:uid 主从机 strong body lsp local bit 关闭 哪些
原文地址:https://www.cnblogs.com/dzlj/p/12121652.html