标签:pytho one ini img _for none 设置 通过 wait方法
通过dispath方法,进入三大认证:
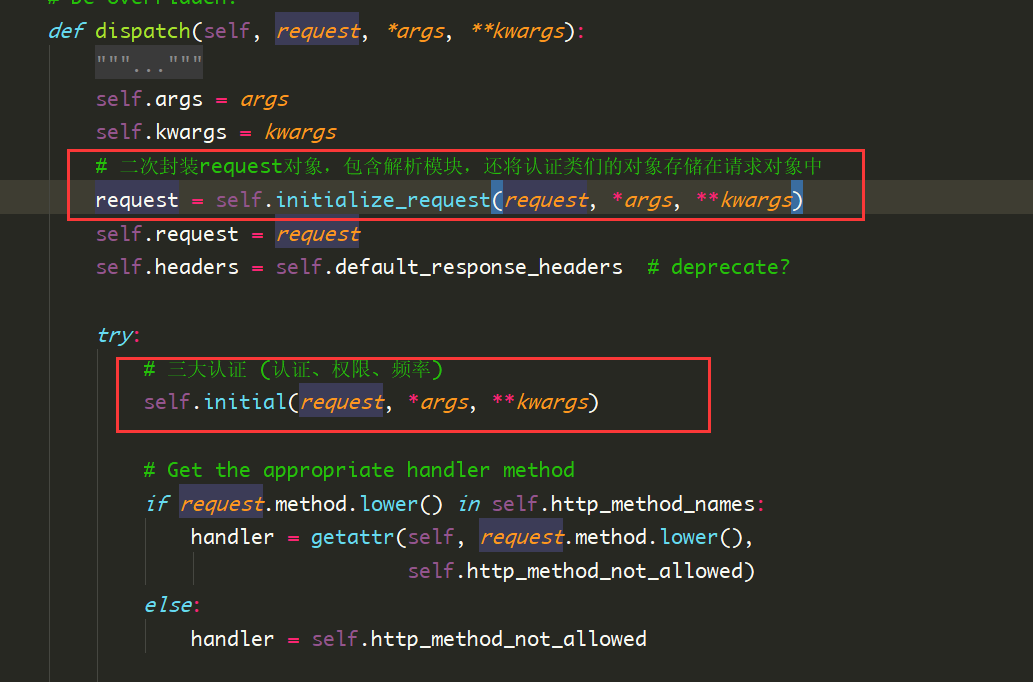
首先看一下请求模块,进入request
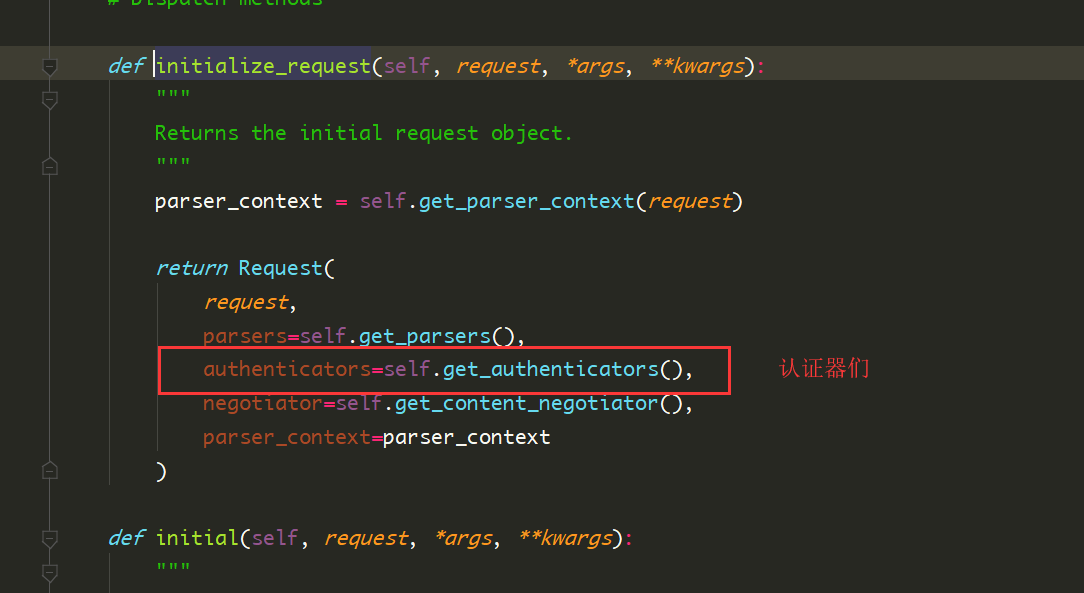
进入get_authenticators 方法

可以知道,请求模块二次封装request对象,包含解析模块,还将认证类们的对象存储在请求对象中。
进入三大认证
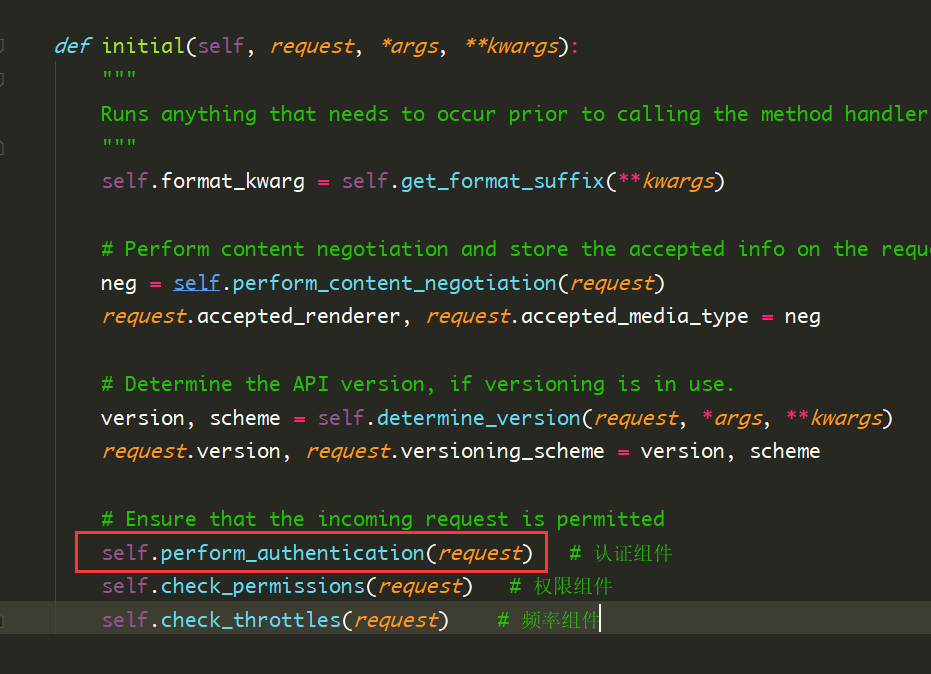
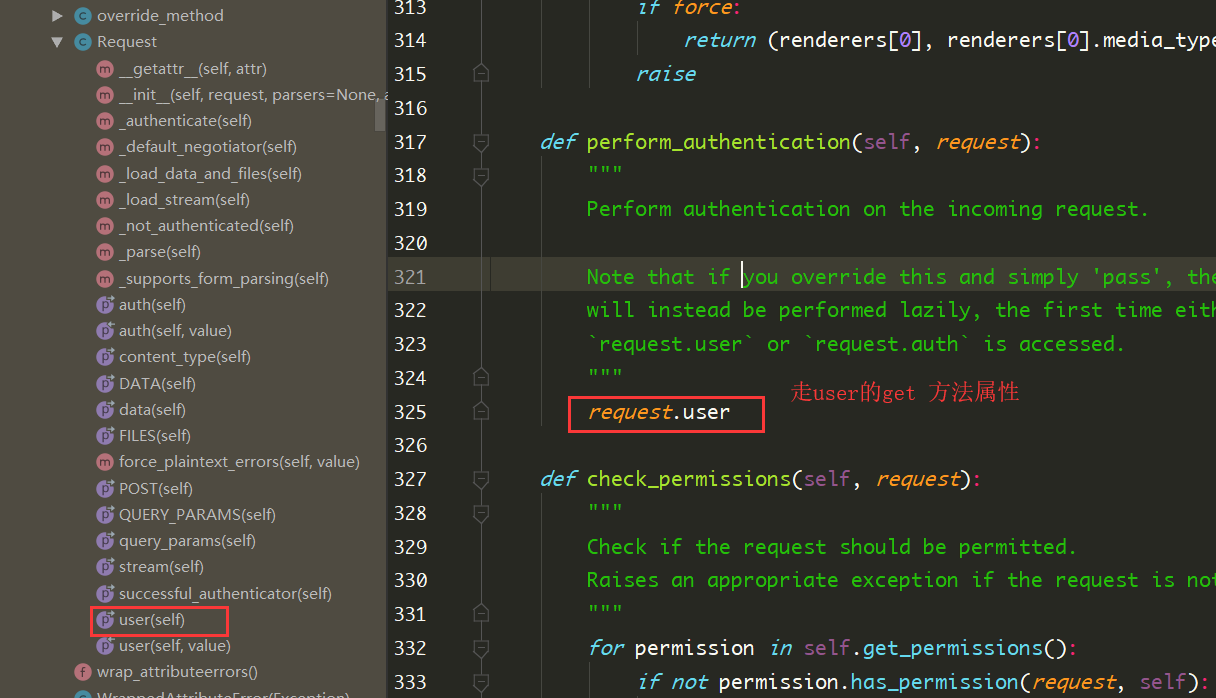
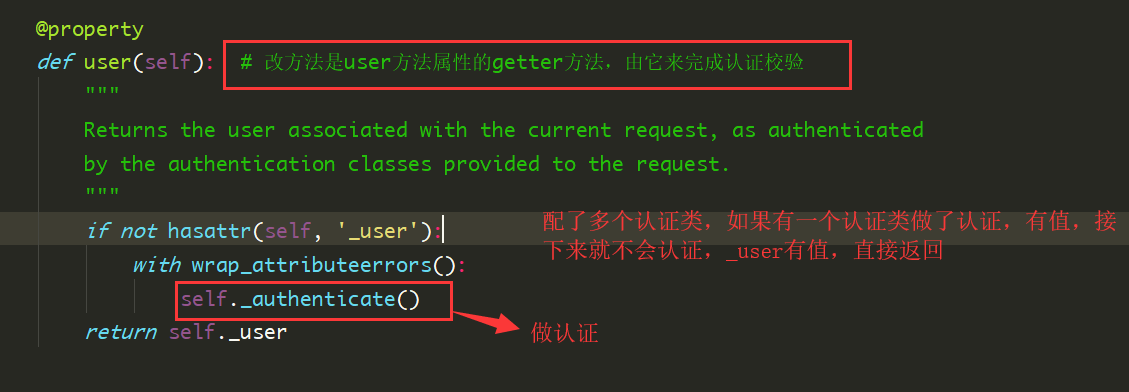
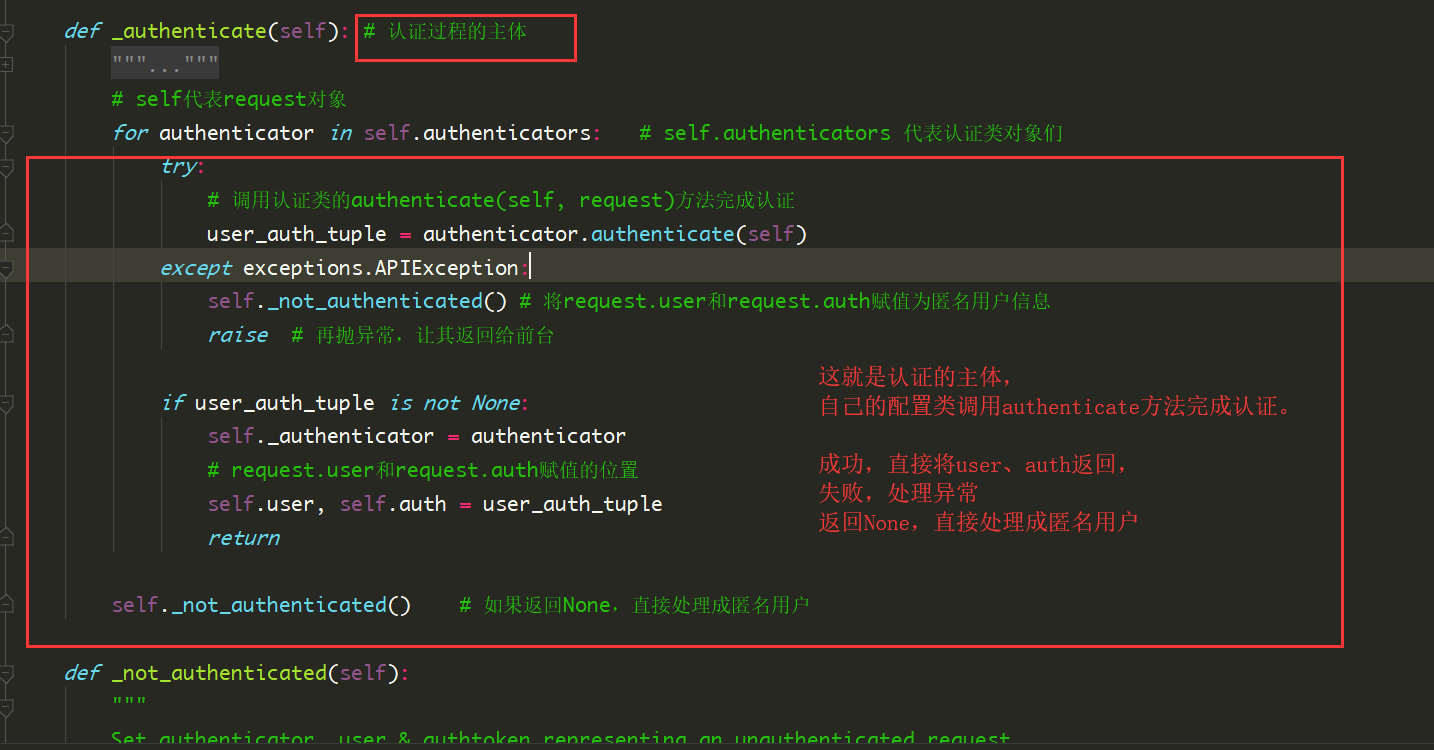
遍历一个个认证器,完成一个个认证类,每一个配置的认证类都要调用authenticate方法完成认证。返回值是user和auth组成的元组。
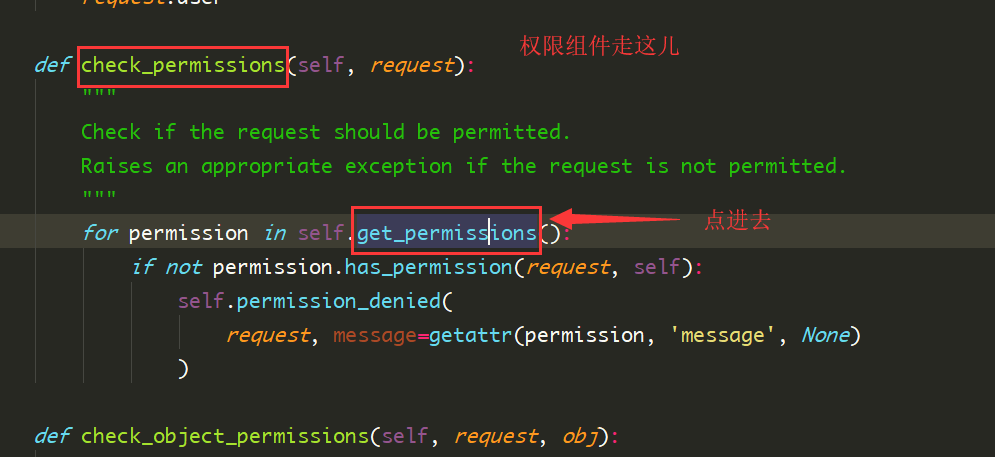
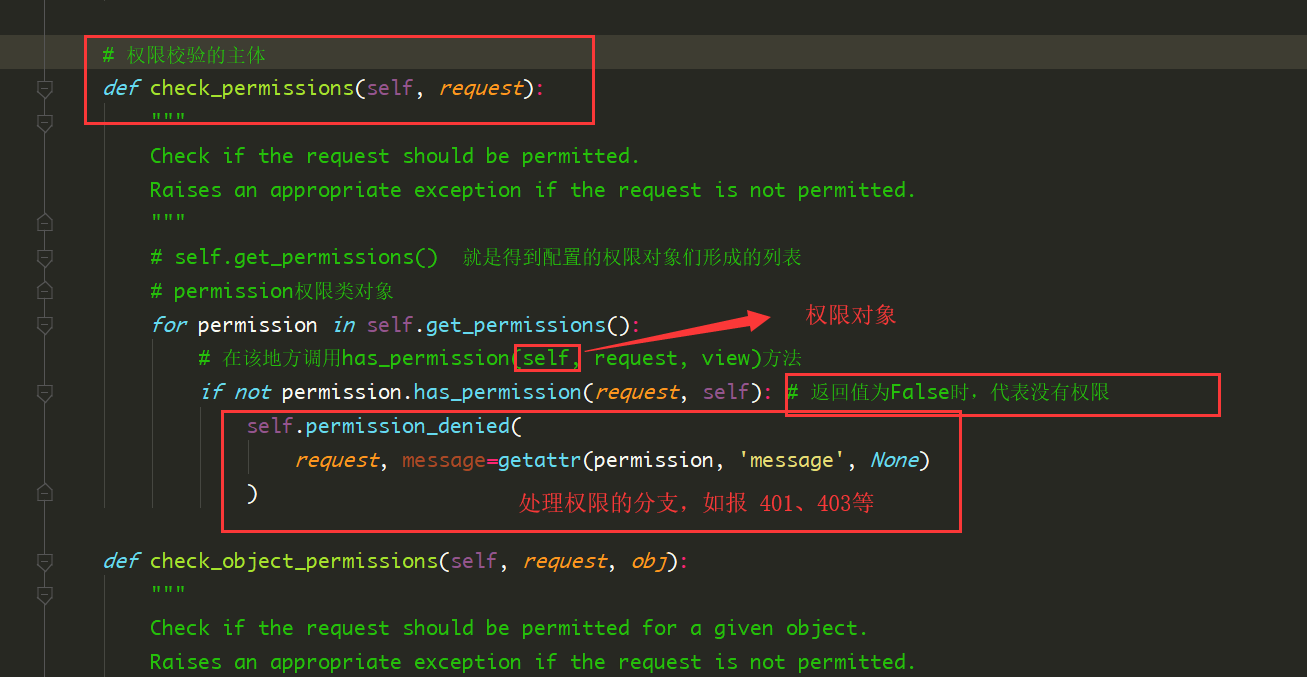
通过dispatch方法 进入频率组件
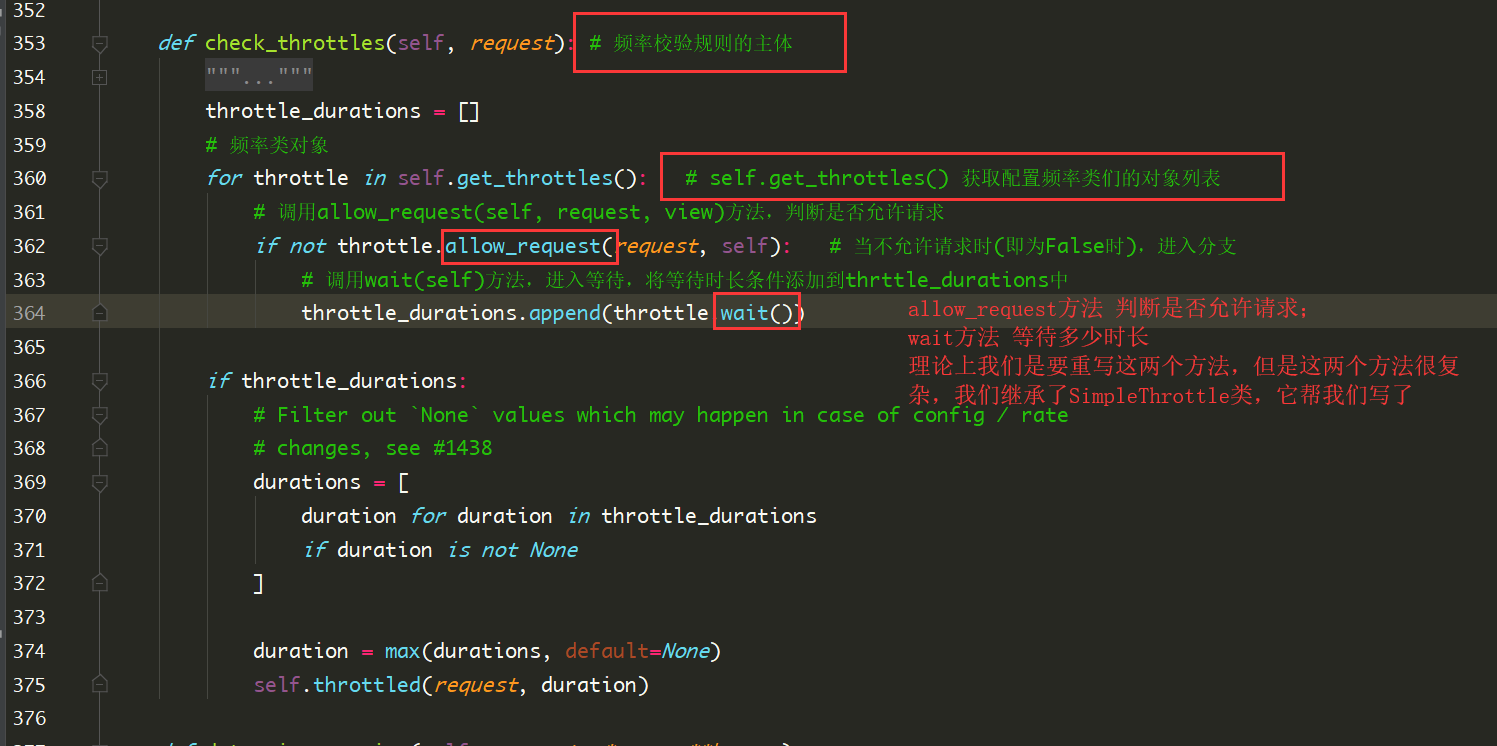
然后看SimpleRateThrottle类,有allow_request和 wait 方法。SimpleRateThrottle继承BaseThrottle,BaseThrottle也有allow_request和 wait两个方法,但它没写,需要自己写。
所以我们继承SimpleRateThrottle类,它帮我们写了allow_request和 wait两个方法
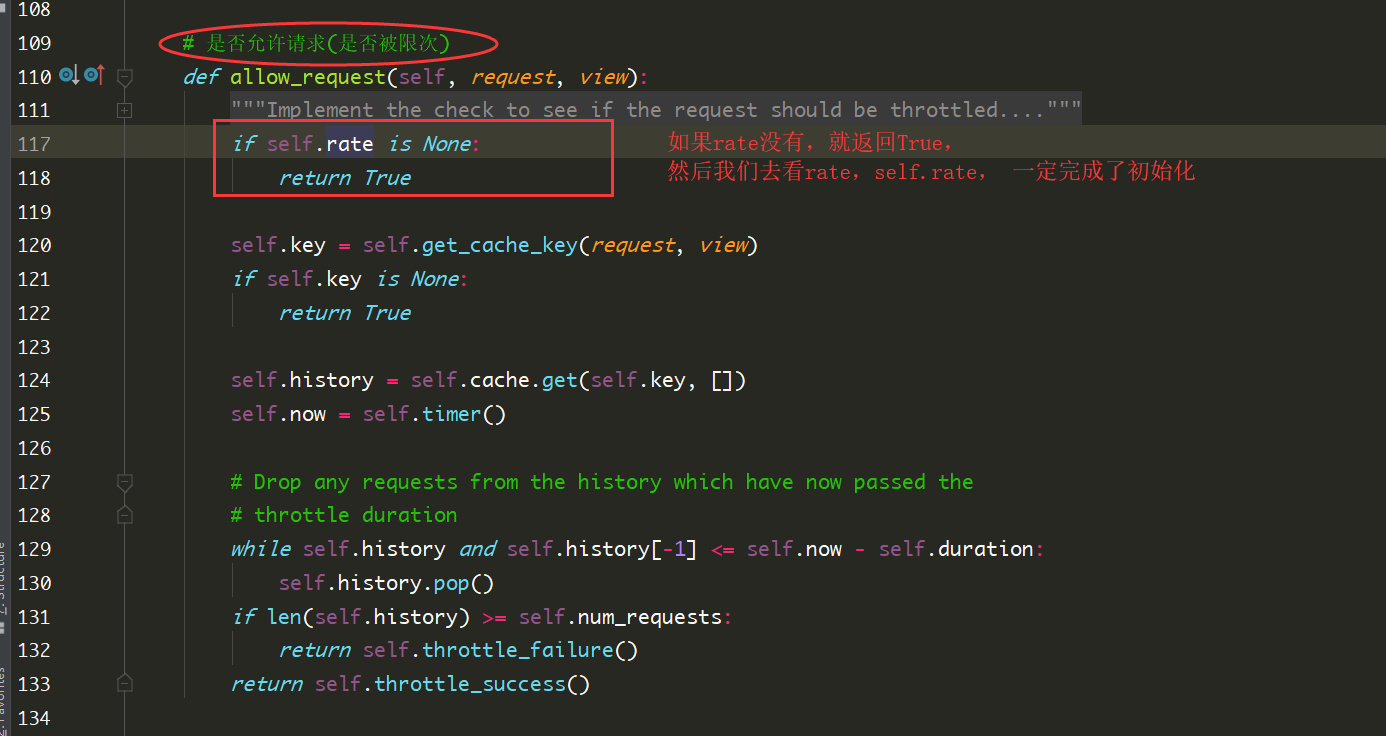

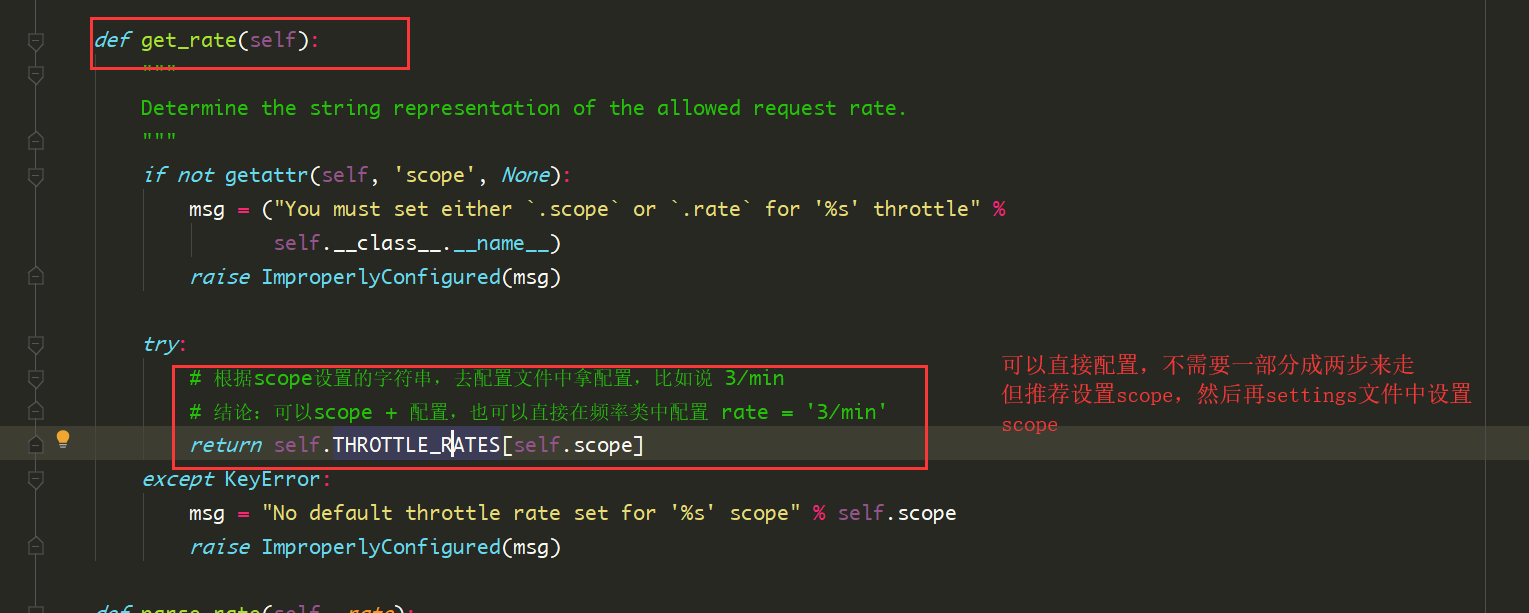
# 可以直接在自定义频率类中配置rate,这就是要动源码了
rate = '3/min'

# 但是推荐在自定义频率类中配置scope属性,然后再在settings文件中设置scope
class MobileReateThrottle(SimpleRateThrottle):
    scope = 'mobile'
    def get_cache_key(self, request, view):
        if not request.user.is_authenticated or not request.user.mobile:
            return None   # 匿名用户   没有电话号的用户都不限制

        return self.cache_format % {
            'scope': self.scope,
            'ident': request.user.mobile
        }


# settings文件
REST_FRAMEWORK = {
    # 频率组件,频率类一般做局部配置,但是频率调节在settings中配置
    'DEFAULT_THROTTLE_RATES': {
        'user': '5/min',   # 登录用户限制
        'anon': '3/min',   # 匿名用户限制,
        'mobile': '1/min'
    },

}

来到上面的__init__方法中

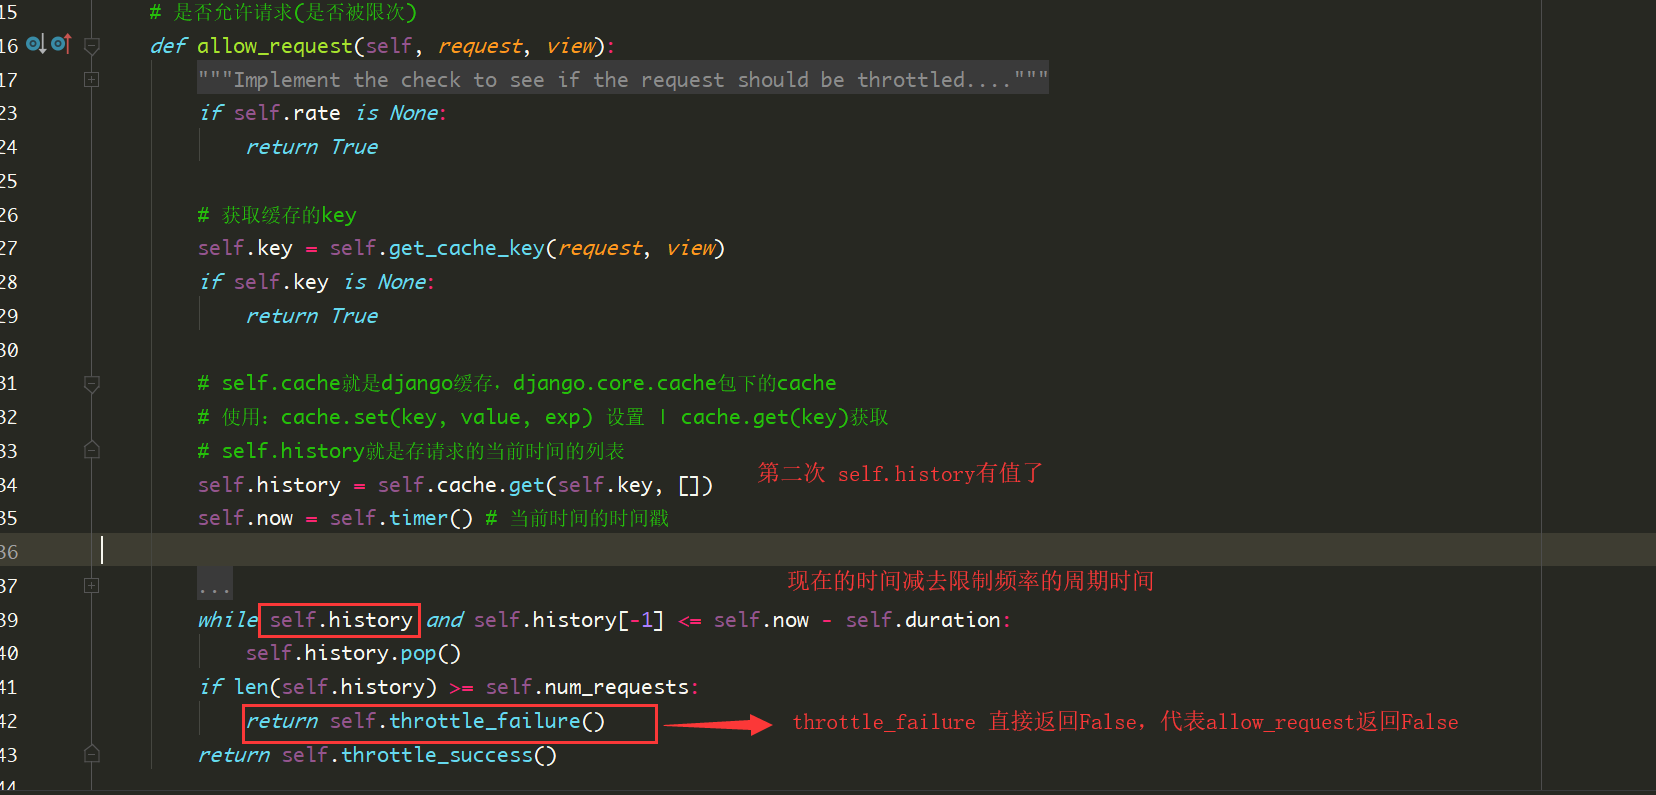
回到allow_request
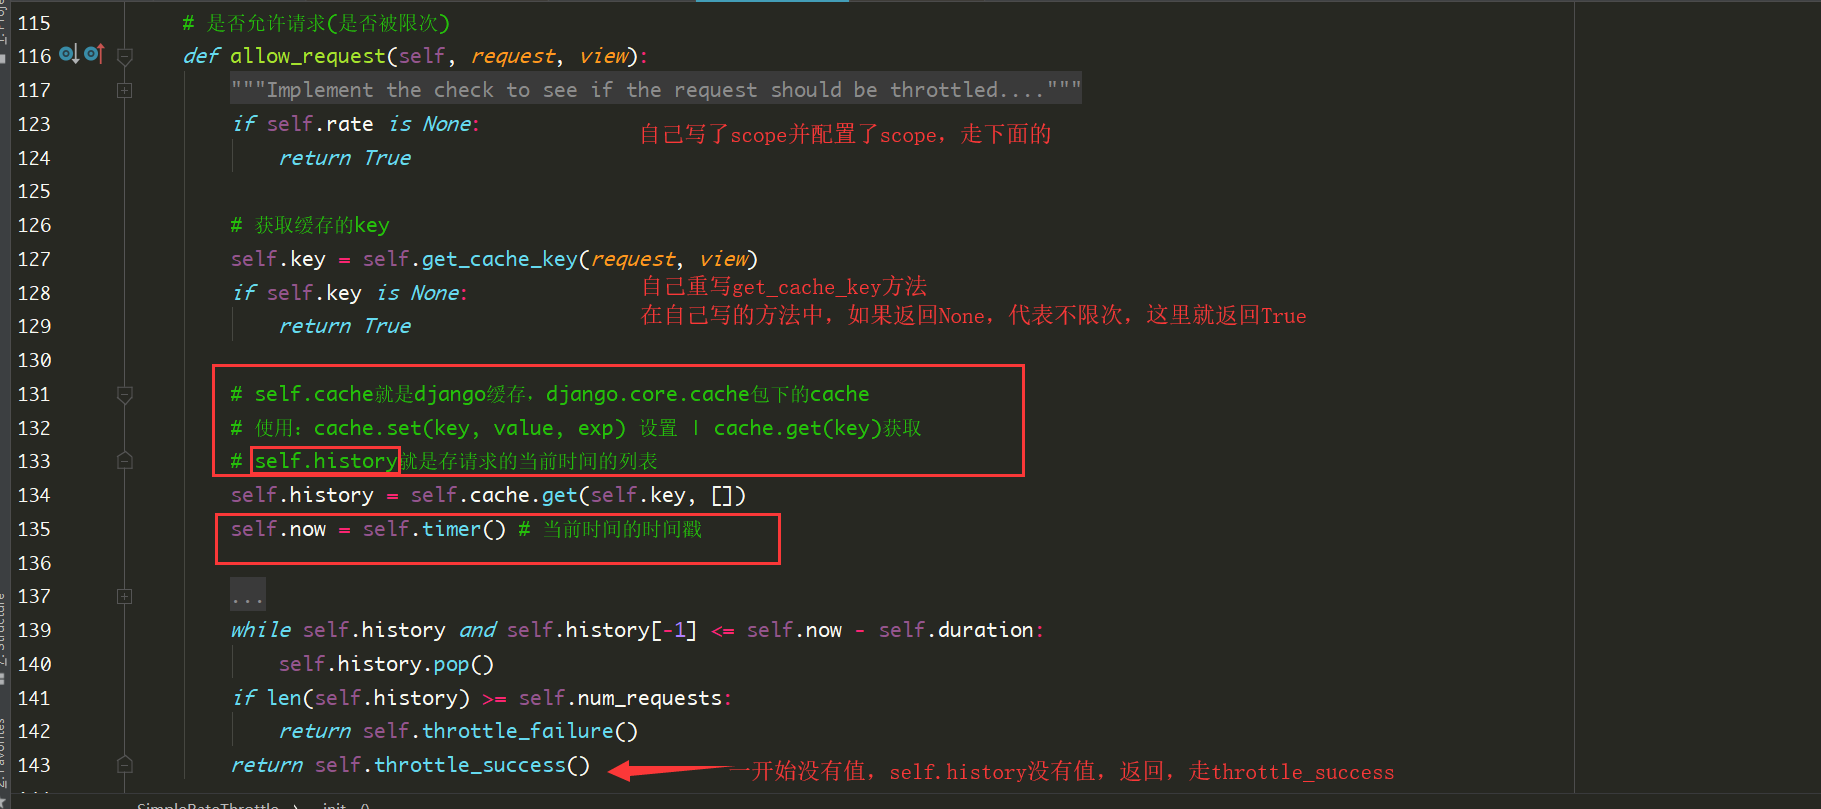
cache.set(key, value, exp) 设置过期缓存,exp设为0,代表缓存不过期
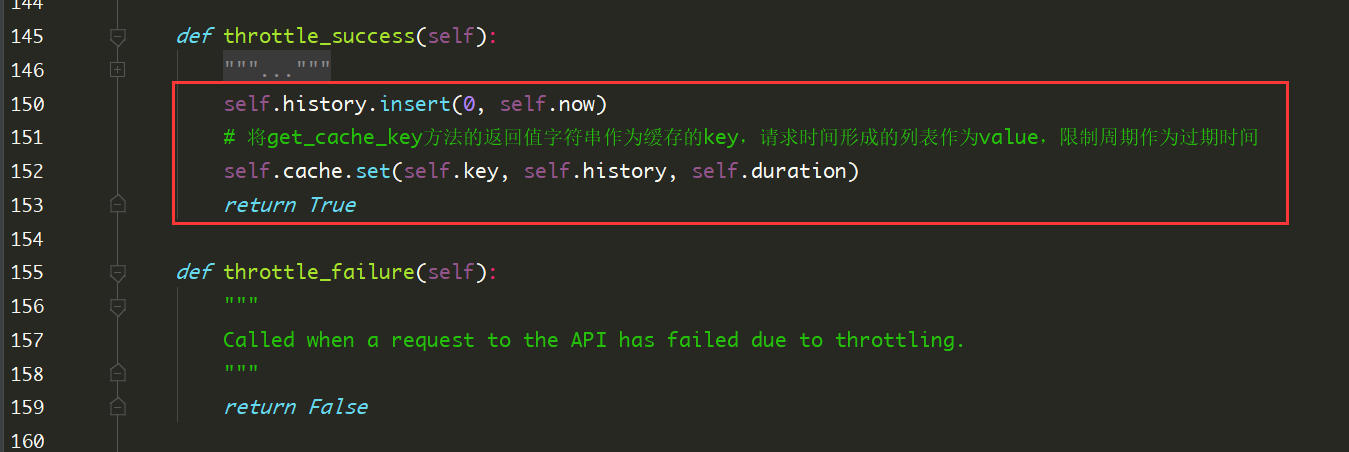
请求一次,将时间保存一次,保存在self.history中
根据请求时间形成的列表长度判断是否限次

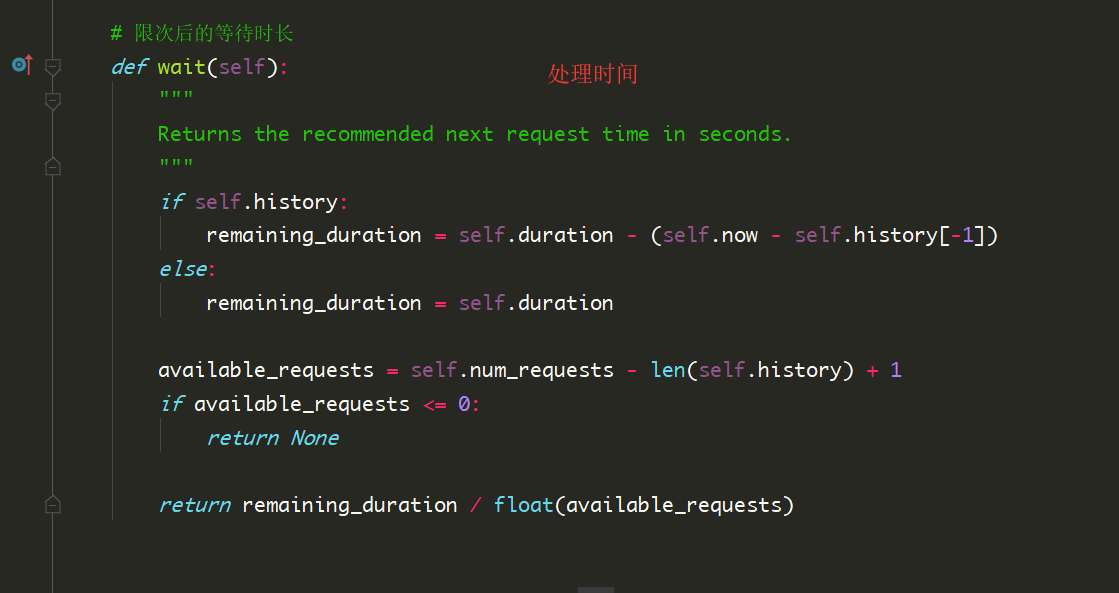
进入wait方法
标签:pytho one ini img _for none 设置 通过 wait方法
原文地址:https://www.cnblogs.com/setcreed/p/12153408.html