标签:css geojson const map ini als action 构建 data

接下来创建一个新的Angular项目。待创建完毕后,切换到项目文件夹,用npm安装deck.gl的两个库@deck.gl/core与@deck.gl/layers
npm install @deck.gl/core @deck.gl/layers
这是官方教程的推荐方法。但我在安装时遇到了npm报错:“只能将“@deck”作为命令的参数。要在表达式中引用变量,请使用“$deck””,把npm更新到新版后还是不支持这个命令。所以我就手动在项目文件package.json的dependencies中手动添加了这两个库,然后使用npm安装
    "@deck.gl/core": "~7.2.3",
    "@deck.gl/layers": "~7.2.3",
npm install
安装完毕后,我们首先在Index文件里添加mapbox要用的样式
<link href=‘https://api.tiles.mapbox.com/mapbox-gl-js/v0.51.0/mapbox-gl.css‘ rel=‘stylesheet‘ />
然后找到模版文件app.component.html,把下面这个复制到里面,替换新工程创建时自动生成的丑八怪(听说Angular下个版本就要换掉这个生成的模版了,新模版好看很多)
<div id="container">
  <div id="map"></div>
  <canvas id="deck-canvas"></canvas>
</div>
然后找到TS文件,还是清空,把下面的代码复制进去
import { Component, OnInit } from ‘@angular/core‘;
import { Deck } from ‘@deck.gl/core‘;
import { GeoJsonLayer, ArcLayer } from ‘@deck.gl/layers‘;
import mapboxgl from ‘mapbox-gl‘;

@Component({
  selector: ‘app-root‘,
  templateUrl: ‘./app.component.html‘,
  styleUrls: [‘./app.component.css‘]
})
export class AppComponent implements OnInit {
  title = ‘ngDeckGL‘;
  ngOnInit(): void {
    // 数据集来源
    const AIR_PORTS =
      ‘https://d2ad6b4ur7yvpq.cloudfront.net/naturalearth-3.3.0/ne_10m_airports.geojson‘;

    const INITIAL_VIEW_STATE = {
      latitude: 51.47,
      longitude: 0.45,
      zoom: 4,
      bearing: 0,
      pitch: 30
    };

    // 贴上自己在MapBox申请到的帐号
    mapboxgl.accessToken = ‘贴上自己在MapBox申请到的帐号‘; // eslint-disable-line

    // 地图样式设定
    const map = new mapboxgl.Map({
      container: ‘map‘,
      style: ‘mapbox://styles/mapbox/light-v9‘,
      // Note: deck.gl will be in charge of interaction and event handling
      interactive: false,
      center: [INITIAL_VIEW_STATE.longitude, INITIAL_VIEW_STATE.latitude],
      zoom: INITIAL_VIEW_STATE.zoom,
      bearing: INITIAL_VIEW_STATE.bearing,
      pitch: INITIAL_VIEW_STATE.pitch
    });

    // 可视化数据集投影
    const deck = new Deck({
      canvas: ‘deck-canvas‘,
      width: ‘100%‘,
      height: ‘100%‘,
      initialViewState: INITIAL_VIEW_STATE,
      controller: true,
      onViewStateChange: ({ viewState }) => {
        map.jumpTo({
          center: [viewState.longitude, viewState.latitude],
          zoom: viewState.zoom,
          bearing: viewState.bearing,
          pitch: viewState.pitch
        });
      },
      layers: [
        new GeoJsonLayer({
          id: ‘airports‘,
          data: AIR_PORTS,
          // Styles
          filled: true,
          pointRadiusMinPixels: 2,
          opacity: 1,
          pointRadiusScale: 2000,
          getRadius: f => 11 - f.properties.scalerank,
          getFillColor: [200, 0, 80, 180],
          // Interactive props
          pickable: true,
          autoHighlight: true,
          onClick: info =>
            // eslint-disable-next-line
            info.object && alert(`${info.object.properties.name} (${info.object.properties.abbrev})`)
        }),
        new ArcLayer({
          id: ‘arcs‘,
          data: AIR_PORTS,
          dataTransform: d => d.features.filter(f => f.properties.scalerank < 4),
          // Styles
          getSourcePosition: f => [-0.4531566, 51.4709959], // London
          getTargetPosition: f => f.geometry.coordinates,
          getSourceColor: [0, 128, 200],
          getTargetColor: [200, 0, 80],
          getWidth: 1
        })
      ]
    });
  }
}
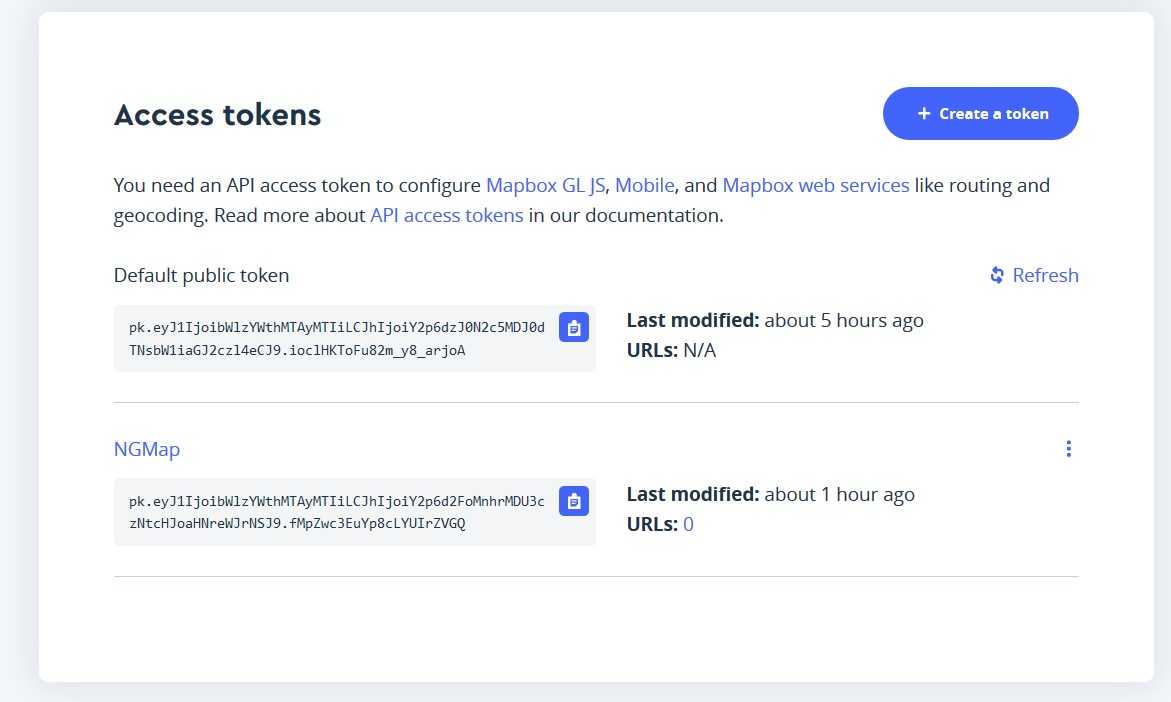
上面重要的参数基本上都有注释,有一定基础的朋友基本上都能看懂代码什么意思,所以就不逐个介绍了。作为一篇介绍性质的文章,我们也无须关心其中每行的意思。唯一要做的就是把mapbox的token替换成刚刚注册的自己的token。做完以后保存,启动项目就可以咯
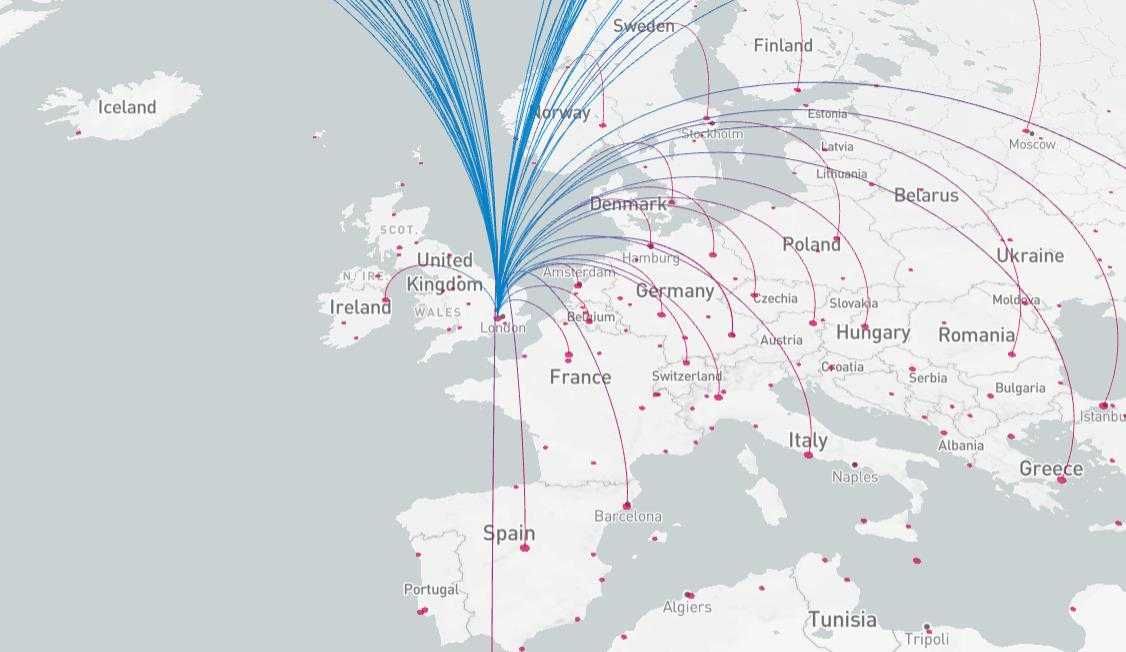
此时朋友们应该能看到数据投影了,但是地面上却是白茫茫一片,没有地图存在。这是为什么呢?因为我们没有设定好模版文件的css样式。数据视图把本应位于其下的地理视图挤没了。我们把模版文件的CSS改成下面这样,设定这两个视图均为100%宽高,就能看到最终成果咯
#container {
  position: fixed;
  top: 0;
  left: 0;
  right: 0;
  bottom: 0;
}
#container > * {
  position: absolute;
  top: 0;
  left: 0;
  width: 100%;
  height: 100%;
}

标签:css geojson const map ini als action 构建 data
原文地址:https://www.cnblogs.com/misaka10212/p/12207730.html