标签:default javascrip document component 功能 start 展示 tar style
一、在非create-react-app创建的项目,使用JSX需要注意的问题
1.1 入门的时候,要引入Babel,并将<script>标签加上type=‘text/babel‘的属性。
1.2 将JSX引入项目,需要安装node.js,
第1步:运行npm init -y
第2步:运行npm install babel-cli@6 babel-preset-react-app@3
安装完成后,运行
npx babel --watch src --out-dir . --presets react-app/prod
注:npx是npm 5.2+附带的打包运行程序工具
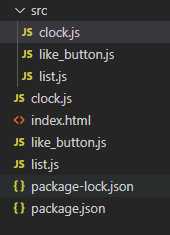
上述命令会将src目录下所有js文件用Babel转移后的结果文件添加至根目录下。
二、react中状态和生命周期的使用
以官网教程中的时钟为例
class Clock extends React.Component{
    constructor (props) {
        super(props);
        this.state = {
            date: new Date()
        };
    }
    render () {
        return (
            <div>
                <h1>hello world</h1>
                <h2>it is {this.state.date.toLocaleString()}</h2>
            </div>
        )
    }
}

function tick () {
    ReactDOM.render(
        <Clock />,
        document.querySelector(‘#test‘)
    )
}

setInterval(tick, 1000);
上述代码实现了展示时钟的功能,但却不能实现组件的销毁。而要实现销毁,需要用到生命周期。
我们希望在第一次将其呈现到DOM 时设置一个计时器Clock。这在React中称为“安装”。
我们也想在每次删除由产生的DOM时清除该计时器Clock。这在React中称为“卸载”。
class Clock extends React.Component{
    constructor (props) {
        super(props);
        // this.state={} can only in constructor
        this.state = {
            date: new Date()
        };
    }
    componentDidMount () {
        this.timeId = setInterval(
            () => this.tick(),
            1000);
    }
    componentWillUnmount () {
        clearInterval(this.timeId);
    }
    tick () {
     // 这里用的是this.setState()。还有一种形式this.setState((state,props) => {....});
        this.setState({
            date: new Date()
        })
    }
    render () {
        return (
            <div>
                <h1>hello world</h1>
                <h2>it is {this.state.date.toLocaleString()}</h2>
            </div>
        )
    }
}

ReactDOM.render(
    <Clock/>,
    document.querySelector(‘#clock‘)
);
组件可以选择将其状态作为道具传递给其子组件,如Clock将其state.date传给了<h2>.
<h2>it is {this.state.date.toLocaleString()}</h2>
这通常称为“自上而下”或“单向”数据流。任何状态始终归某个特定组件所有,并且从该状态派生的任何数据或UI都只会影响树中“其下方”的组件。
三、构建工具选择
作为一个入门者,选择create-react-app
npx create-react-app 项目名称
cd 项目名称
npm start
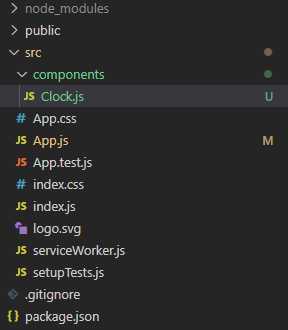
四、create-react-app创建的工程中使用自定义组件
我们用create-react-app创建的react工程,在src目录下创建components文件夹,并新建Clock.js文件。
代码:
import React from ‘react‘;

class Clock extends React.Component{
    constructor (props) {
        super(props);
        // this.state={} can only in constructor
        this.state = {
            date: new Date()
        };
    }
    componentDidMount () {
        this.timeId = setInterval(
            () => this.tick(),
            1000);
    }
    componentWillUnmount () {
        clearInterval(this.timeId);
    }
    tick () {
        this.setState({
            date: new Date()
        })
    }
    render () {
        return (
            <div>
                <h1>hello world</h1>
                <h2>it is {this.state.date.toLocaleString()}</h2>
            </div>
        )
    }
}


export default Clock
四、在App.js中引入

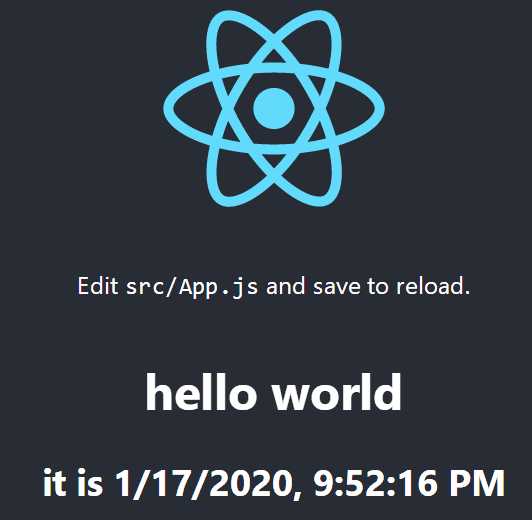
展示下效果:
标签:default javascrip document component 功能 start 展示 tar style
原文地址:https://www.cnblogs.com/ceceliahappycoding/p/12207410.html