标签:utf-8 auth init end cross test arm epo git
之前没有学过tensorflow,所以使用tensorflow来对mnist数据进行识别,采用最简单的全连接神经网络,第一层是784,(输入层),隐含层是256,输出层是10
,相关注释卸载程序中。
  1 #!/usr/bin/env python 3.6
  2 #_*_coding:utf-8 _*_
  3 #@Time    :2020/2/12 15:34
  4 #@Author  :hujinzhou
  5 #@FileName: mnist.py
  6
  7 #@Software: PyCharm
  8 import tensorflow as tf
  9 import tensorflow.examples.tutorials.mnist.input_data as input_data
 10 import matplotlib.pyplot as plt
 11 import numpy as np
 12 from time import time
 13 mnist=input_data.read_data_sets("MNIST_data/",one_hot=True)#通过tensorflow下载mnist数据集
 14 """图片的显示"""
 15 def plot_image(image):
 16     plt.imshow(image.reshape(28,28),cmap=‘binary‘)#tensorflow中的数据是将图片平铺成一列的存储,
 17                                                   # 所以显示的时候应该reshape成28*28
 18     plt.show()
 19 """查看多项数训练数据images与labels"""
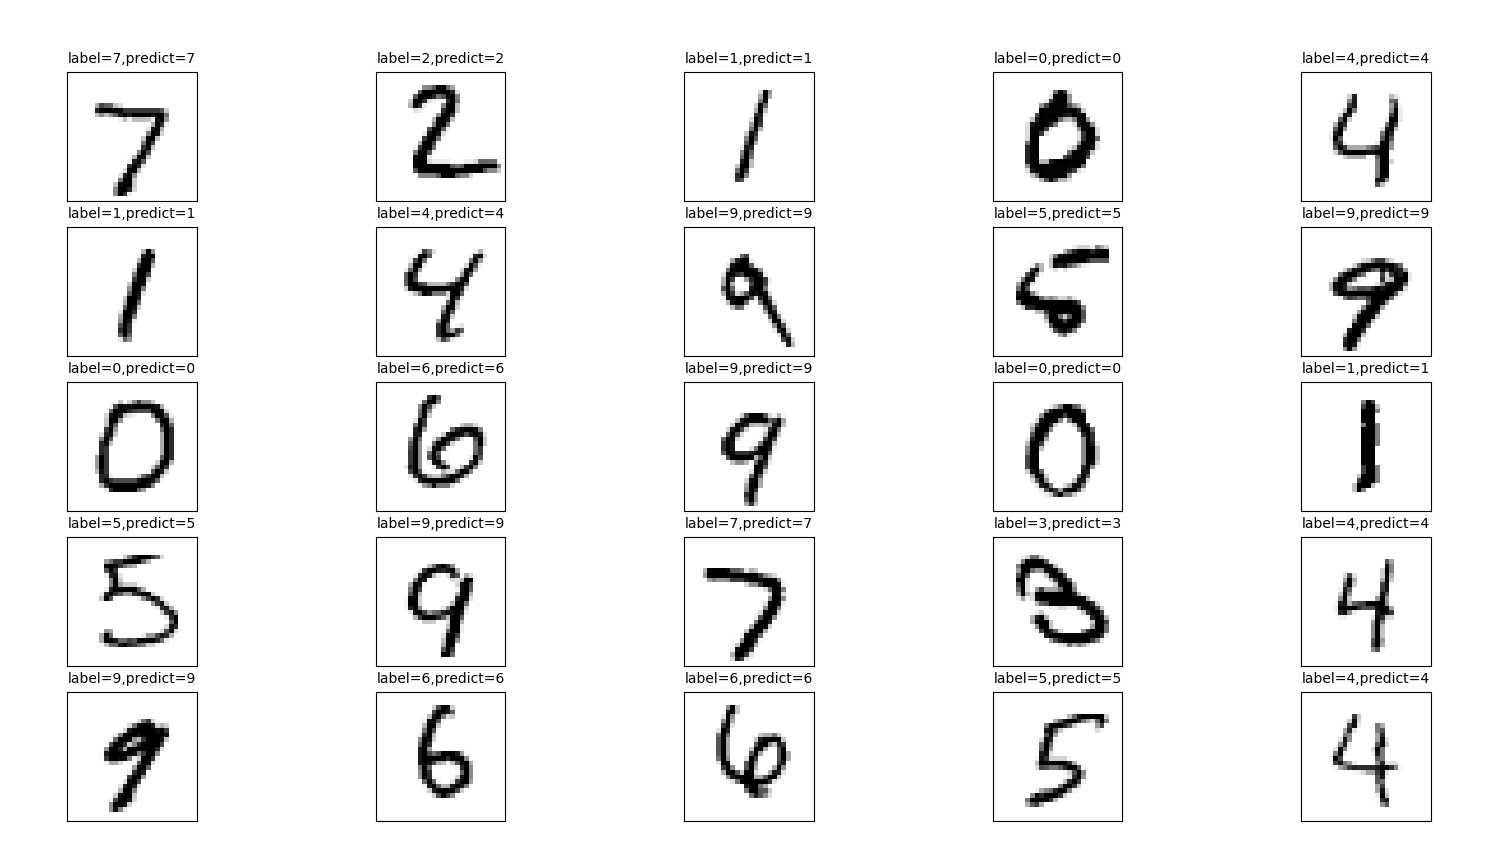
 20 def plot_images_labels_prediction(images,labels,prediction,idx,num):#idx表示要显示的第idx个图像从idx~idx+25
 21     fig=plt.gcf()
 22     fig.set_size_inches(25,25)#设置显示尺寸
 23     if num>25:num=25
 24     for i in range(0,num):
 25         ax=plt.subplot(5,5,i+1)#一次显示多个子图
 26         ax.imshow(np.reshape(images[idx],(28,28)),cmap=‘binary‘)#将第idx个图像数据reshape成28*28的numpy并显示
 27         title="label="+str(np.argmax(labels[idx]))#设置图像的title,将onehot码转为数值码
 28         """如果有预测的prediction,则重新写title"""
 29         if len(prediction)>0:
 30             title+=",predict="+str(prediction[idx])
 31         ax.set_title(title,fontsize=10)
 32         ax.set_xticks([]);ax.set_yticks([])#设置xy轴为空,如果不设置则会有标度(像素值)
 33         idx+=1
 34     plt.show()
 35
 36
 37 """构造多层感知机"""
 38 """自己构造感知机"""
 39 # def layer(output_dim, input_dim, inputs, activation=None):
 40 #     W = tf.Variable(tf.random_normal([input_dim, output_dim]))
 41 #     b = tf.Variable(tf.random_normal([1, output_dim]))
 42 #     XWb = tf.matmul(inputs, W) + b
 43 #     if activation is None:
 44 #         outputs = XWb
 45 #     else:
 46 #         outputs = activation(XWb)
 47 #     return outputs
 48
 49 """采用tf包来构造感知机"""
 50 x = tf.placeholder("float", [None, 784])
 51 h1=tf.layers.dense(inputs=x,units=256,activation=tf.nn.relu)
 52 # h1 = layer(output_dim=256, input_dim=784,
 53 #            inputs=x, activation=tf.nn.relu)
 54 y_predict = tf.layers.dense(inputs=h1,units=10,activation=None)
 55 y_label = tf.placeholder("float", [None, 10])
 56 loss_function = tf.reduce_mean(
 57     tf.nn.softmax_cross_entropy_with_logits_v2
 58     (logits=y_predict,
 59      labels=y_label))#计算损失值
 60 optimizer = tf.train.AdamOptimizer(learning_rate=0.001)  61     .minimize(loss_function)#使用优化器反向传播,使得损失量为最小
 62 correct_prediction = tf.equal(tf.argmax(y_label, 1),
 63                               tf.argmax(y_predict, 1))#相等为1,不想等为0,统计正确的个数
 64 accuracy = tf.reduce_mean(tf.cast(correct_prediction, "float"))#精度等于正确个数除以总数
 65 """训练过程"""
 66 train_epoch=30
 67 batch_size=100
 68 loss_list=[];epoch_list=[];accuracy_list=[]
 69 starttime=time()
 70
 71
 72 sess=tf.Session()
 73 sess.run(tf.global_variables_initializer())
 74 for epoch in range(train_epoch):
 75     for i in range(550):
 76         batch_x, batch_y = mnist.train.next_batch(batch_size)
 77         sess.run(optimizer, feed_dict={x: batch_x, y_label: batch_y})#使用55000的训练集进行优化
 78
 79     loss, acc = sess.run([loss_function, accuracy],
 80                          feed_dict={x: mnist.validation.images,
 81                                     y_label: mnist.validation.labels})#验证集进行验证
 82
 83     epoch_list.append(epoch);
 84     loss_list.append(loss)
 85     accuracy_list.append(acc)
 86     print("Train Epoch:", ‘%02d‘ % (epoch + 1), "Loss=",  87           "{:.9f}".format(loss), " Accuracy=", acc)
 88 duration = time() - starttime
 89 print("The process has taken;{:.10f}".format(duration))
 90 fig2=plt.gcf()
 91 fig2.set_size_inches(4,2)#设置显示尺寸
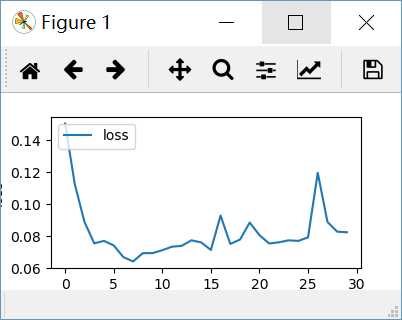
 92 plt.plot(epoch_list,loss_list,label="loss")
 93
 94 plt.ylabel(‘loss‘)
 95 plt.xlabel(‘epoch‘)
 96 plt.legend([‘loss‘],loc=‘upper left‘)
 97 plt.show()
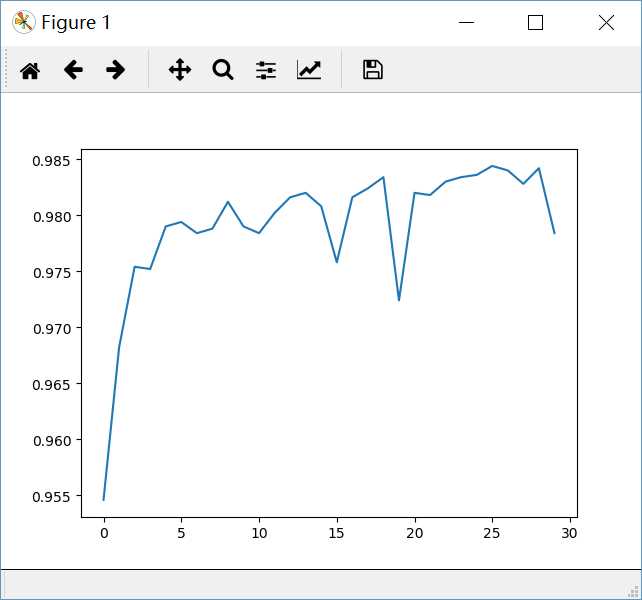
 98 plt.plot(epoch_list,accuracy_list,label=‘acc‘)
 99 plt.show()
100 # sess=tf.Session()
101 # init = tf.global_variables_initializer()
102 # sess.run(init)
103 #注意这个地方,不可以重新设置sess,不可以重新开启回话,重新开启会错误
104 print("acc:",sess.run(accuracy,feed_dict={x:mnist.test.images,y_label:mnist.test.labels}))
105
106 pre_result=sess.run(tf.argmax(y_predict,1),feed_dict={x:mnist.test.images})
107 plot_images_labels_prediction(mnist.test.images,mnist.test.labels,pre_result,0,25)
108 sess.close()


标签:utf-8 auth init end cross test arm epo git
原文地址:https://www.cnblogs.com/hujinzhou/p/guobao_2020_2_13.html