标签:下载 add roo gateway netfilter stop name 完成 ber
环境centos 7
psbc-master 192.168.182.120
1-psbc-node 192.168.182.121
master和node节点执行以下操作
修改主机名
[root@localhost ~]# hostnamectl set-hostname psbc-master
[root@localhost ~]# hostname
psbc-master
[root@localhost ~]# cat /etc/hostname
psbc-master
[root@localhost ~]# view /etc/hosts增加一行
192.168.182.120 psbc-master
2.ip地址设置成静态的
[root@localhost ~]# cat /etc/sysconfig/network-scripts/ifcfg-ens33
TYPE=Ethernet
BOOTPROTO=static
DEFROUTE=yes
PEERDNS=yes
PEERROUTES=yes
#IPV4_FAILURE_FATAL=no
#IPV6INIT=yes
#IPV6_AUTOCONF=yes
#IPV6_DEFROUTE=yes
#IPV6_PEERDNS=yes
#IPV6_PEERROUTES=yes
#IPV6_FAILURE_FATAL=no
#IPV6_ADDR_GEN_MODE=stable-privacy
NAME=ens33
UUID=8c8e7ed0-28e7-44a7-8c74-ab906b19bcaa
DEVICE=ens33
ONBOOT=no
IPADDR=192.168.182.120
NETMASK=255.255.255..0
GATEWAY=192.168.182.1
[root@localhost ~]#
3.DNS配置,根据自己的实际情况填写
[root@localhost ~]# cat /etc/resolv.conf
nameserver 8.8.8.8
nameserver 8.8.4.4
[root@localhost ~]#
4.关闭防火墙
[root@localhost ~]# systemctl stop firewalld
[root@localhost ~]# systemctl disable firewalld
Removed symlink /etc/systemd/system/dbus-org.fedoraproject.FirewallD1.service.
Removed symlink /etc/systemd/system/basic.target.wants/firewalld.service.
[root@localhost ~]# firewall-cmd --state
not running
[root@localhost ~]#
5.设置selinux
[root@localhost ~]# sed -i ‘s/SELINUX=enforcing/SELINUX=disabled/‘ /etc/selinux/config
[root@localhost ~]# cat /etc/selinux/config
SELINUX=disabled
SELINUXTYPE=targeted
[root@localhost ~]#
7.设置主机时间同步
[root@localhost ~]# yum -y install ntpdate
crontab -l自己添加定时任务
0 /1 /usr/bin/ntpdate ntp.aliyun.com
8.swap关闭
[root@localhost ~]# swapoff -a
9.添加网桥过滤
yum install -y bridge-utils.x86_64 安装网桥管理工具包
modprobe br_netfilter 加载br_netfilter模块,
lsmod | grep br_netfilter 使用lsmod查看开启的模块: 
将桥接的IPv4流量传递到iptables的链:
cat > /etc/sysctl.d/k8s.conf << EOF
net.bridge.bridge-nf-call-ip6tables = 1
net.bridge.bridge-nf-call-iptables = 1
vm.swappiness=0
EOF
重新加载所有配置文件 #sysctl --system
或者只重新加载网桥过滤配置文件
10.开启ipvs (如使用默认iptables跳过此步)
yum -y install ipvsadm ipset
[root@localhost modules]# cat > /etc/sysconfig/modules/ipvs.modules<<EOF
#!/bin/bash
modprobe -- ip_vs
modprobe -- ip_vs_rr
modprobe -- ip_vs_wrr
modprobe -- ip_vs_sh
modprobe -- nf_conntrack_ipv4
EOF
[root@localhost modules]#
[root@localhost modules]# chmod 755 /etc/sysconfig/modules/ipvs.modules&& bash /etc/sysconfig/modules/ipvs.modules
[root@localhost modules]# lsmod | grep -e ip-vs -e nf_conntrack_ipv4
nf_conntrack_ipv4 19108 0
nf_defrag_ipv4 12729 1 nf_conntrack_ipv4
nf_conntrack 111302 2 ip_vs,nf_conntrack_ipv4
[root@localhost modules]# 至此基本安装结束,下一步安装几个大的软件
11.安装Docker
Kubernetes默认CRI(容器运行时)为Docker,因此先安装Docker
使用阿里的镜像
wget https://mirrors.aliyun.com/docker-ce/linux/centos/docker-ce.repo -O /etc/yum.repos.d/docker-ce.repo
安装支持库
yum install -y yum-utils device-mapper-persistent-data lvm2
安装指定版本docker-ce
yum -y install --setopt=obsoletes=0 docker-ce-18.06.3.ce-3.el7
启动服务及设置开机启动
systemctl start docker.service && systemctl enable docker.service
修改docker cgroup驱动与k8s一致,使用systemd方式
cat > /etc/docker/daemon.json<<EOF
{
"exec-opts": ["native.cgroupdriver=systemd"],
"log-driver": "json-file",
"log-opts": {
"max-size": "100m"
},
"storage-driver": "overlay2",
"storage-opts": [
"overlay2.override_kernel_check=true"
]
}
EOF
修改完成后 重启服务
systemctl start docker
systemctl status docker 可以查看状态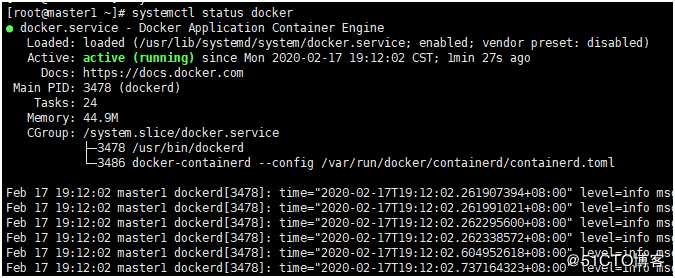
12.部署kubeadm、kubectl、kubelet软件及配置
配置阿里源
cat <<EOF >/etc/yum.repos.d/kubernetes.repo
[kubernetes]
name=Kubernetes
baseurl=https://mirrors.aliyun.com/kubernetes/yum/repos/kubernetes-el7-x86_64
enabled=1
gpgcheck=1
repo_gpgcheck=1
gpgkey=https://mirrors.aliyun.com/kubernetes/yum/doc/yum-key.gpg https://mirrors.aliyun.com/kubernetes/yum/doc/rpm-package-key.gpg
EOF
安装指定版本或者最新版本
安装制定版本
#yum install -y --setopt=obsoletes=0 kubelet-1.17.3-0 kubeadm-1.17.3-0 kubectl-1.17.3-0
安装最新版
#yum install -y kubelet kubeadm kubectl --disableexcludes=kubernetes
主要配置kubelet,如果不配置可能会导致k8s集群无法启动
为了实现docker使用的cgroupdriver与kubelet使用的cgroup的一致性,建议修改如下文件内容
vim /etc/sysconfig/kubelet
KUBELET_EXTRA_ARGS="--cgroup-driver=systemd"
设置开机启动
systemctl enable kubelet.service
这些步骤都需要在master和node上安装。
下面分别介绍master和node配置
master配置
查看k8s需要的镜像文件
[root@psbc-master yum.repos.d]# kubeadm config images list
k8s.gcr.io/kube-apiserver:v1.17.3
k8s.gcr.io/kube-controller-manager:v1.17.3
k8s.gcr.io/kube-scheduler:v1.17.3
k8s.gcr.io/kube-proxy:v1.17.3
k8s.gcr.io/pause:3.1
k8s.gcr.io/etcd:3.4.3-0
k8s.gcr.io/coredns:1.6.5
下载镜像
kubeadm config images list | sed -e ‘s/^/docker pull /g‘ -e ‘s#k8s.gcr.io#registry.cn-hangzhou.aliyuncs.com/google_containers#g‘ | sh -x
修改名称
docker images | grep registry.cn-hangzhou.aliyuncs.com/google_containers | awk ‘{print "docker tag",$1":"$2,$1":"$2}‘ | sed -e ‘s/registry.cn-hangzhou.aliyuncs.com\/google_containers/k8s.gcr.io/2‘ | sh -x
删除原镜像
docker images | grep registry.cn-hangzhou.aliyuncs.com/google_containers | awk ‘{print "docker rmi """$1""":"""$2}‘ | sh -x
执行完的结果,镜像已经准备齐全
接下来初始化master 我用的是这个命令,因为镜像已经提前下载了
[root@psbc-master ~]# kubeadm init \
--apiserver-advertise-address=192.168.182.120 \
--kubernetes-version v1.17.3 \
--service-cidr=10.1.0.0/16 \
--pod-network-cidr=10.244.0.0/16
W0220 09:16:01.502144 2768 validation.go:28] Cannot validate kube-proxy config - no validator is available
W0220 09:16:01.502313 2768 validation.go:28] Cannot validate kubelet config - no validator is available
[init] Using Kubernetes version: v1.17.3
[preflight] Running pre-flight checks
[preflight] Pulling images required for setting up a Kubernetes cluster
[preflight] This might take a minute or two, depending on the speed of your internet connection
[preflight] You can also perform this action in beforehand using ‘kubeadm config images pull‘
[kubelet-start] Writing kubelet environment file with flags to file "/var/lib/kubelet/kubeadm-flags.env"
[kubelet-start] Writing kubelet configuration to file "/var/lib/kubelet/config.yaml"
[kubelet-start] Starting the kubelet
[certs] Using certificateDir folder "/etc/kubernetes/pki"
[certs] Generating "ca" certificate and key
[certs] Generating "apiserver" certificate and key
[certs] apiserver serving cert is signed for DNS names [psbc-master kubernetes kubernetes.default kubernetes.default.svc kubernetes.default.svc.cluster.local] and IPs [10.1.0.1 192.168.182.120]
[certs] Generating "apiserver-kubelet-client" certificate and key
[certs] Generating "front-proxy-ca" certificate and key
[certs] Generating "front-proxy-client" certificate and key
[certs] Generating "etcd/ca" certificate and key
[certs] Generating "etcd/server" certificate and key
[certs] etcd/server serving cert is signed for DNS names [psbc-master localhost] and IPs [192.168.182.120 127.0.0.1 ::1]
[certs] Generating "etcd/peer" certificate and key
[certs] etcd/peer serving cert is signed for DNS names [psbc-master localhost] and IPs [192.168.182.120 127.0.0.1 ::1]
[certs] Generating "etcd/healthcheck-client" certificate and key
[certs] Generating "apiserver-etcd-client" certificate and key
[certs] Generating "sa" key and public key
[kubeconfig] Using kubeconfig folder "/etc/kubernetes"
[kubeconfig] Writing "admin.conf" kubeconfig file
[kubeconfig] Writing "kubelet.conf" kubeconfig file
[kubeconfig] Writing "controller-manager.conf" kubeconfig file
[kubeconfig] Writing "scheduler.conf" kubeconfig file
[control-plane] Using manifest folder "/etc/kubernetes/manifests"
[control-plane] Creating static Pod manifest for "kube-apiserver"
[control-plane] Creating static Pod manifest for "kube-controller-manager"
W0220 09:16:23.046693 2768 manifests.go:214] the default kube-apiserver authorization-mode is "Node,RBAC"; using "Node,RBAC"
[control-plane] Creating static Pod manifest for "kube-scheduler"
W0220 09:16:23.051284 2768 manifests.go:214] the default kube-apiserver authorization-mode is "Node,RBAC"; using "Node,RBAC"
[etcd] Creating static Pod manifest for local etcd in "/etc/kubernetes/manifests"
[wait-control-plane] Waiting for the kubelet to boot up the control plane as static Pods from directory "/etc/kubernetes/manifests". This can take up to 4m0s
[kubelet-check] Initial timeout of 40s passed.
[apiclient] All control plane components are healthy after 41.529559 seconds
[upload-config] Storing the configuration used in ConfigMap "kubeadm-config" in the "kube-system" Namespace
[kubelet] Creating a ConfigMap "kubelet-config-1.17" in namespace kube-system with the configuration for the kubelets in the cluster
[upload-certs] Skipping phase. Please see --upload-certs
[mark-control-plane] Marking the node psbc-master as control-plane by adding the label "node-role.kubernetes.io/master=‘‘"
[mark-control-plane] Marking the node psbc-master as control-plane by adding the taints [node-role.kubernetes.io/master:NoSchedule]
[bootstrap-token] Using token: kva4t0.1wf39usn0tgovs95
[bootstrap-token] Configuring bootstrap tokens, cluster-info ConfigMap, RBAC Roles
[bootstrap-token] configured RBAC rules to allow Node Bootstrap tokens to post CSRs in order for nodes to get long term certificate credentials
[bootstrap-token] configured RBAC rules to allow the csrapprover controller automatically approve CSRs from a Node Bootstrap Token
[bootstrap-token] configured RBAC rules to allow certificate rotation for all node client certificates in the cluster
[bootstrap-token] Creating the "cluster-info" ConfigMap in the "kube-public" namespace
[kubelet-finalize] Updating "/etc/kubernetes/kubelet.conf" to point to a rotatable kubelet client certificate and key
[addons] Applied essential addon: CoreDNS
[addons] Applied essential addon: kube-proxy
Your Kubernetes control-plane has initialized successfully!
To start using your cluster, you need to run the following as a regular user:
mkdir -p $HOME/.kube
sudo cp -i /etc/kubernetes/admin.conf $HOME/.kube/config
sudo chown $(id -u):$(id -g) $HOME/.kube/config
You should now deploy a pod network to the cluster.
Run "kubectl apply -f [podnetwork].yaml" with one of the options listed at:
https://kubernetes.io/docs/concepts/cluster-administration/addons/
Then you can join any number of worker nodes by running the following on each as root:
kubeadm join 192.168.182.120:6443 --token kva4t0.1wf39usn0tgovs95 \
--discovery-token-ca-cert-hash sha256:86cb5dd75d651da58028711de3a01773e56a1cdc1e0970f55470d84dfdea47ad 这个就是node节点加入的时候执行的语句
[root@psbc-master ~]#
然后在执行完环境变量
mkdir -p $HOME/.kube
cp -i /etc/kubernetes/admin.conf $HOME/.kube/config
chown $(id -u):$(id -g) $HOME/.kube/config
安装flannel插件 如果连不上可以网上下载kube-flannel.yaml文件,然后查看里边image需要哪个版本,去阿里搜一下下载,然后将yaml文件上传服务器执行 kubectl apply -f kube-flannel.yaml即可docker pull registry.cn-shanghai.aliyuncs.com/mumuchen/flannel:v0.11.0-arm64
docker tag registry.cn-shanghai.aliyuncs.com/mumuchen/flannel:v0.11.0-arm64 quay.io/coreos/flannel:v0.11.0-amd64
docker rmi registry.cn-shanghai.aliyuncs.com/mumuchen/flannel:v0.11.0-arm64
kubectl apply -f https://raw.githubusercontent.com/coreos/flannel/master/Documentation/kube-flannel.yml

node节点配置
K8s work需要的镜像为
k8s.gcr.io/kube-proxy:v1.17.2
k8s.gcr.io/pause:3.1
k8s.gcr.io/coredns:1.6.5
同样阿里下载
**docker pull registry.cn-hangzhou.aliyuncs.com/google_containers/kube-proxy:v1.17.3
docker pull registry.cn-hangzhou.aliyuncs.com/google_containers/pause:3.1
docker pull registry.cn-hangzhou.aliyuncs.com/google_containers/coredns:1.6.5
docker tag registry.cn-hangzhou.aliyuncs.com/google_containers/kube-proxy:v1.17.3 k8s.gcr.io/kube-proxy:v1.17.3
docker tag registry.cn-hangzhou.aliyuncs.com/google_containers/pause:3.1 k8s.gcr.io/pause:3.1
docker tag registry.cn-hangzhou.aliyuncs.com/google_containers/coredns:1.6.5 k8s.gcr.io/coredns:1.6.5
docker rmi registry.cn-hangzhou.aliyuncs.com/google_containers/kube-proxy:v1.17.3
docker rmi registry.cn-hangzhou.aliyuncs.com/google_containers/pause:3.1
docker rmi registry.cn-hangzhou.aliyuncs.com/google_containers/coredns:1.6.5
为了node节点能使用kubectl,可以从master拷贝过来:
mkdir -p $HOME/.kube
scp root@<master ip>:/etc/kubernetes/admin.conf $HOME/.kube/config
chown $(id -u):$(id -g) $HOME/.kube/config
安装flannel插件见上面
在node节点输入
#
kubeadm join 192.168.182.120:6443 --token kva4t0.1wf39usn0tgovs95 \
--discovery-token-ca-cert-hash sha256:86cb5dd75d651da58028711de3a01773e56a1cdc1e0970f55470d84dfdea47ad
**
至此所有节点已经安装完成。

   最有用的大招:
执行:swapoff -a && kubeadm reset && systemctl daemon-reload && systemctl restart kubelet && iptables -F && iptables -t nat -F && iptables -t mangle -F && iptables -X标签:下载 add roo gateway netfilter stop name 完成 ber
原文地址:https://blog.51cto.com/aklaus/2472629