标签:img 插件 math 游戏 note min blog 说明 自动
复刻死亡之书自动设置摄像机景深git地址:https://gitee.com/asiworld/NoteBook_unity.git
bilibili视频地址:https://space.bilibili.com/15766978
CSDN主页:https://blog.csdn.net/JianShengShuaiest
unity 官方发布了一个demo叫做<死亡之书>,场景是一个森林,里面有一个特别酷的效果,叫做自动对焦,意思就是当我很近的观察一个物体的时候会造成很浅的景深,也就是背景虚化很大,只有对焦的位置上的物体才是清晰的,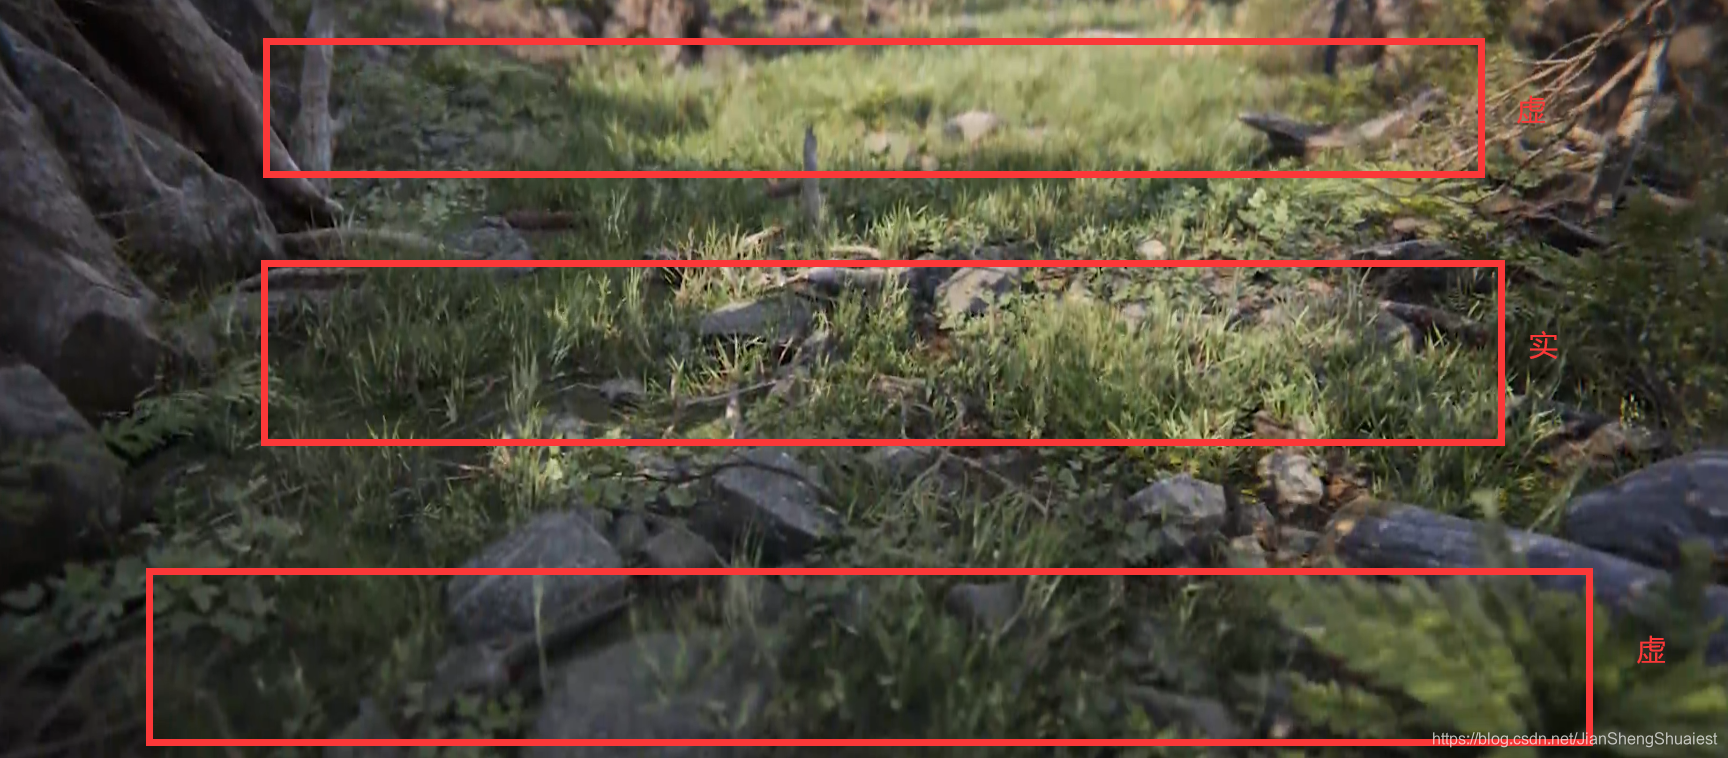
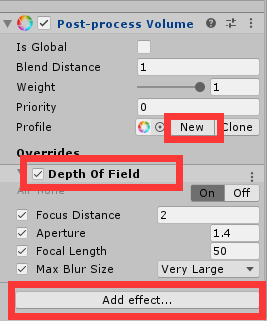
我也做了一个类似的效果,其中主要用到的插件就是官方提供的PostProcessing,现在看一下我复刻的这个功能的效果
可以看到场景中只有一个红色的cube是实景,其他的都是虚化的,
导入死亡之书的时候会报错,解决方法是吧[Min]修改一个[UnityEngine.Min]
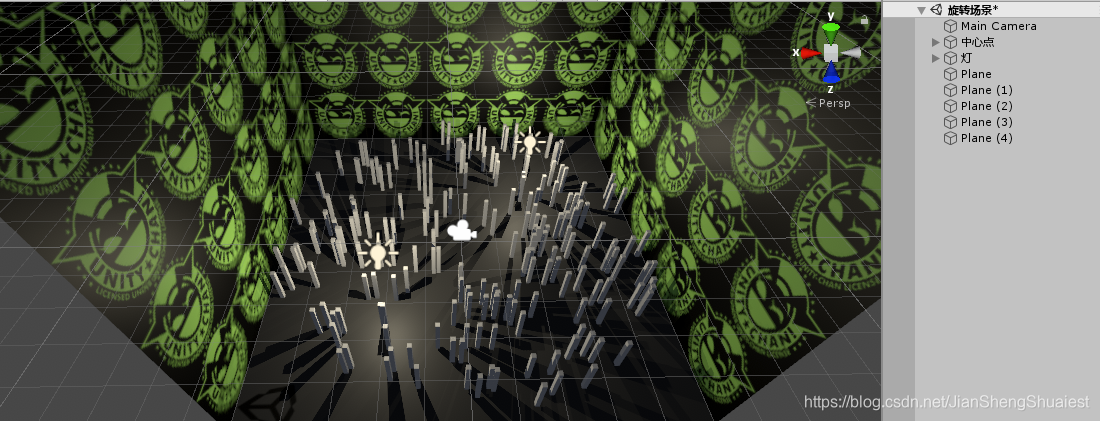
我想的是在一个环境中 有很多竖条状的模型,我们相机在其中旋转,屏幕中间为聚焦模型,摄像机在中间旋转,可以看到聚焦的效果
按照喜欢加入一点灯光会有自己的效果
```c#
using DG.Tweening;
using UnityEngine;
using UnityEngine.Rendering.PostProcessing;
public class SetFocusDistance : MonoBehaviour
{
private Ray ray;
private RaycastHit hit;
private Camera m_camera;
private PostProcessVolume m_PostProcessVolume;
public DepthOfField m_DepthOfField;
public Vector3 m_v3Rotation;
public float smooth = 5.0F;
public MeshRenderer m_meshRenderer;
// Start is called before the first frame update
void Start()
{
m_camera = GetComponent<Camera>();
m_PostProcessVolume = GetComponent<PostProcessVolume>();
m_DepthOfField = m_PostProcessVolume.profile.GetSetting<DepthOfField>();
transform.DORotate(m_v3Rotation, 1.0f).SetLoops(-1, LoopType.Incremental).SetEase(Ease.Linear);
}
// Update is called once per frame
void Update()
{
   ray = Camera.main.ScreenPointToRay(new Vector3(Screen.width / 2, Screen.height / 2));
   if (Physics.Raycast(ray, out hit))//射线发出并碰撞到外壳,那么手臂就应该朝向碰撞点
   {
       m_DepthOfField.aperture.value = Mathf.Lerp(
           m_DepthOfField.focusDistance.value,
           1.5f,
           Time.deltaTime * smooth);

       Debug.DrawLine(transform.position, hit.point);
       m_DepthOfField.focusDistance.value = Mathf.Lerp(
           m_DepthOfField.focusDistance.value,
           hit.distance + m_camera.nearClipPlane,
           Time.deltaTime * smooth);

       m_meshRenderer = hit.transform.GetComponent<MeshRenderer>();
       if (!DOTween.IsTweening(m_meshRenderer.material))
       {
           m_meshRenderer.material.DOColor(Color.red, 1.0f).SetLoops(2, LoopType.Yoyo);
       }
   }
   else
   {
       m_DepthOfField.aperture.value = Mathf.Lerp(
           m_DepthOfField.focusDistance.value, 20,
           Time.deltaTime * smooth);
       m_DepthOfField.focusDistance.value = Mathf.Lerp(
           m_DepthOfField.focusDistance.value,
           20.0f,
           Time.deltaTime * smooth);
   }
}
}
#### 修改参数
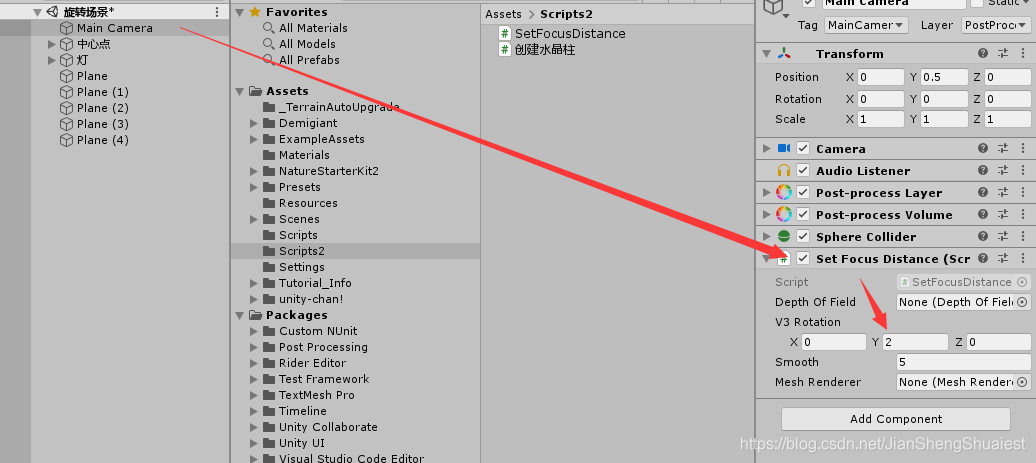
就可以得到一个很炫酷的效果了原理就是相机的一些光圈,对焦,像距等知识,其实可以扩展成一个拍照软件,或者加入到游戏中的关注敌人的概念,下面我就自己做了一个关于拍照的效果.
[外链图片转存失败,源站可能有防盗链机制,建议将图片保存下来直接上传(img-STJCMKQz-1582364876107)(readme.assets/2020-02-22 16-24-3520202221654202.gif)]
标签:img 插件 math 游戏 note min blog 说明 自动
原文地址:https://blog.51cto.com/14642879/2472970