标签:htm 内存 读取文件 col demo 加强 sock void star
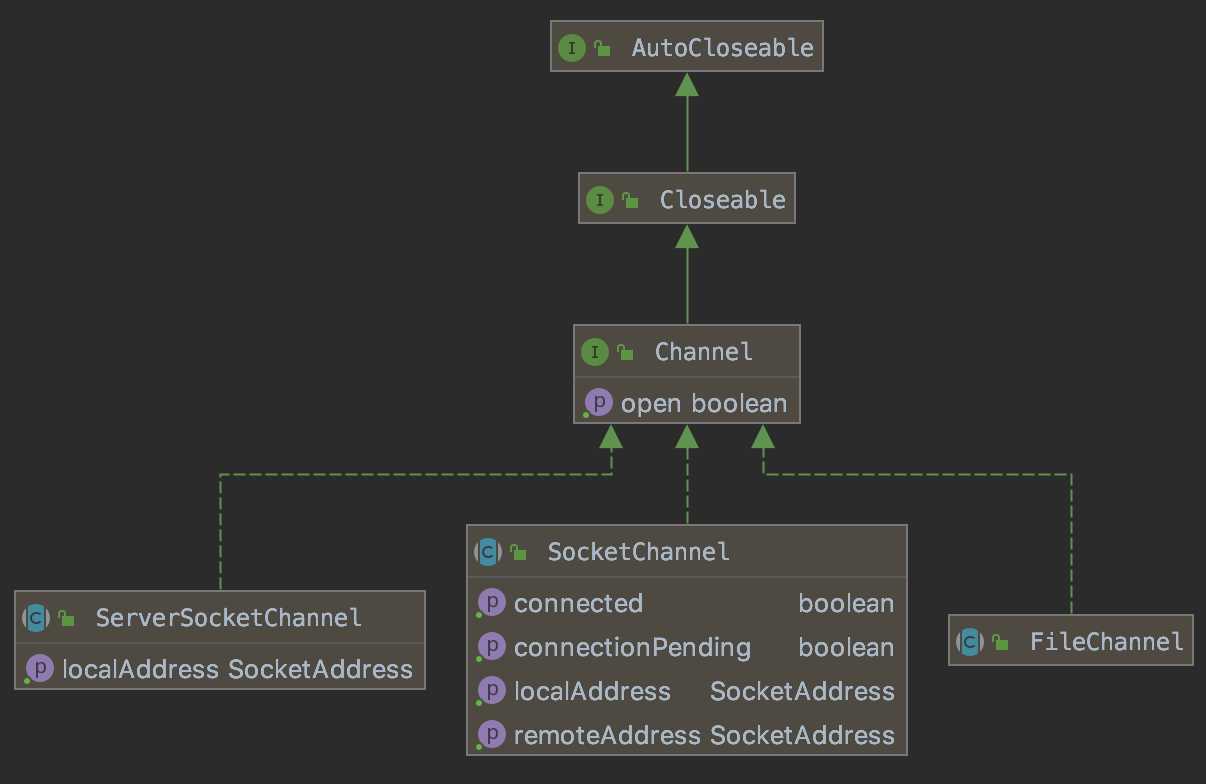
上篇学习了NIO的buffer,继续来学习channel,类图如下(注:为了不让图看起来太复杂,隐藏了一些中间的接口)

Channel派生了很多子接口,其中最常用的有FileChannel(用于文件操作)以及SocketChannel、ServerSocketChannel(用于网络通讯),下面用几段示例代码学习其基本用法:
一、文件写入
1.1 入门示例
public static void fileWriteReadSimpleDemo() throws IOException {
    String filePath = "/tmp/yjmyzz.txt";
    //文件写入
    String fileContent = "菩提树下的杨过";
    FileOutputStream outputStream = new FileOutputStream(filePath);
    FileChannel writeChannel = outputStream.getChannel();

    ByteBuffer byteBuffer = ByteBuffer.allocate(1024);
    byteBuffer.put(fileContent.getBytes());
    byteBuffer.flip();//别忘记了,反转position,否则此时position已经移到最后1个有效字符处,下一行将读不到数据

    //缓冲区的数据,通过channel写入文件
    writeChannel.write(byteBuffer);

    writeChannel.close();

    //文件读取
    File file = new File(filePath);
    FileInputStream inputStream = new FileInputStream(file);
    FileChannel readChannel = inputStream.getChannel();

    //注:这里要重新指定实际大小,否则byteBuffer前面初始化成1024长度,文件内容不足1024字节,
    // 后面的空余部分全是默认0填充,最终转换成字符串时,填充的0,也会转换成不可见字符输出
    byteBuffer = ByteBuffer.allocate((int) file.length());
    readChannel.read(byteBuffer);
    System.out.println(new String(byteBuffer.array()));
    readChannel.close();
}
FileOutputStream类中内嵌了一个FileChannel的实例,通过getChannel()方法可以获取引用。写文件缓冲区初始化时,如何设置正确的大小,这个不太好掌握,设置太大浪费内存,设置太小又装不下,正确姿势可参考下面的示例2
1.2 缓冲区不够大时循环写入
    public static void writeFileDemo() throws IOException {
        String fileContent = "菩提树下的杨过(http://yjmyzz.cnblogs.com/)\n\n" +
                "送柴侍御\n" +
                "【作者】王昌龄 【朝代】唐\n" +
                "沅水通波接武冈,送君不觉有离伤。\n" +
                "青山一道同云雨,明月何曾是两乡。\n";
        //故意设置一个很小的缓冲区,演示缓冲区不够大的情况
        ByteBuffer byteBuffer = ByteBuffer.allocate(5);
        String filePath = "/tmp/yjmyzz.txt";
        FileOutputStream outputStream = new FileOutputStream(filePath);
        FileChannel writeChannel = outputStream.getChannel();

        //将文件内容,按缓冲区大小拆分成一段段写入
        byte[] src = fileContent.getBytes();
        int pages = (src.length % byteBuffer.capacity() == 0) ? (src.length / byteBuffer.capacity())
                                                                : (src.length / byteBuffer.capacity() + 1);
        for (int i = 0; i < pages; i++) {
            int start = i * byteBuffer.capacity();
            int end = Math.min(start + byteBuffer.capacity() - 1, src.length - 1);
            for (int j = start; j <= end; j++) {
                byteBuffer.put(src[j]);
            }
            byteBuffer.flip();
            writeChannel.write(byteBuffer);
            //记得清空
            byteBuffer.clear();
        }
        writeChannel.close();
    }
注意:文件读取时,直接通过File对象的length可以提前知道缓冲的大小,能精确指定Buffer大小,不需要类似这么复杂的循环处理。
二、文件复制
    public static void copyFileDemo() throws IOException {
        String srcFilePath = "/tmp/yjmyzz.txt";
        File srcFile = new File(srcFilePath);
        String targetFilePath = "/tmp/yjmyzz.txt.bak";
        FileInputStream inputStream = new FileInputStream(srcFile);
        FileOutputStream outputStream = new FileOutputStream(targetFilePath);

        FileChannel inputChannel = inputStream.getChannel();
        FileChannel outputChannel = outputStream.getChannel();

        //文件复制
        ByteBuffer buffer = ByteBuffer.allocate((int) srcFile.length());
        inputChannel.read(buffer);
        buffer.flip();
        outputChannel.write(buffer);

        //也可以用这一行,搞定文件复制(推荐使用)
//        outputChannel.transferFrom(inputChannel, 0, srcFile.length());

        inputChannel.close();
        outputChannel.close();
    }

三、文件修改
场景:某个文件需要把最后1个汉字,修改成其它字。先写一段代码,生成测试用的文件
    public static void writeLargeFile() throws IOException {
        String content = "12345678-abcdefg-菩提树下的杨过\n";
        String filePath = "/tmp/yjmyzz.txt";
        FileOutputStream outputStream = new FileOutputStream(filePath);
        FileChannel writeChannel = outputStream.getChannel();

        ByteBuffer buffer = ByteBuffer.allocate(128);
        buffer.put(content.getBytes());
        for (int i = 0; i < 10; i++) {
            buffer.flip();
            writeChannel.write(buffer);
        }
        writeChannel.close();
    }
运行完后,测试文件中的内容如下:
12345678-abcdefg-菩提树下的杨过
12345678-abcdefg-菩提树下的杨过
12345678-abcdefg-菩提树下的杨过
12345678-abcdefg-菩提树下的杨过
12345678-abcdefg-菩提树下的杨过
12345678-abcdefg-菩提树下的杨过
12345678-abcdefg-菩提树下的杨过
12345678-abcdefg-菩提树下的杨过
12345678-abcdefg-菩提树下的杨过
12345678-abcdefg-菩提树下的杨过
3.1 常规方法示例
    public static void modify1() throws IOException {
        String filePath = "/tmp/yjmyzz.txt";
        File file = new File(filePath);
        FileInputStream inputStream = new FileInputStream(file);
        FileChannel inputChannel = inputStream.getChannel();
        ByteBuffer buffer = ByteBuffer.allocate((int) file.length());

        byte[] tempBytes = "佛".getBytes();
        inputChannel.read(buffer);
        buffer.flip();
        //修改最后1个汉字
        for (int i = 0; i < tempBytes.length; i++) {
            //最后有一个回车符,然后汉字utf-8占3个字节,所以这里要减4,才是最后1个汉字
            int j = buffer.limit() - 4 + i;
            buffer.put(j, tempBytes[i]);
        }

        FileOutputStream outputStream = new FileOutputStream(filePath);
        FileChannel outputChannel = outputStream.getChannel();
        outputChannel.write(buffer);

        inputChannel.close();
        outputChannel.close();
    }
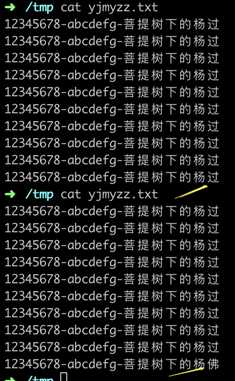
运行完后,从下面的截图可以看到,测试最后1个字,从“过”变成了“佛”:

这个方法,对于小文件而言没什么问题,但如果文件是一个几G的巨无霸,会遇到2个问题:

首先是allocate方法,只接受int型参数,对于几个G的大文件,File.length很有可能超过int范围,无法分配足够大的缓冲。其次,就算放得下,几个G的内容全放到内存中,也很可能造成OOM,所以需要其它办法。
3.2 利用RandomAccessFile及Channel.map修改文件
    public static void modify2() throws IOException {
        String filePath = "/tmp/yjmyzz.txt";
        RandomAccessFile file = new RandomAccessFile(filePath, "rw");
        FileChannel channel = file.getChannel();
        //将最后一个汉字映射到内存中
        MappedByteBuffer mappedByteBuffer = channel.map(FileChannel.MapMode.READ_WRITE, file.length() - 4, 3);

        byte[] lastWordBytes = "新".getBytes();

        //这样就直接在内存中修改了文件,不再需要调用channel.write
        mappedByteBuffer.put(lastWordBytes);

        channel.close();
    }
这个方法相对就高级多了,RandomAccessFile类是File类的加强版,允许以游标的方式,直接读取文件的某一部分,另外Channel.map方法,可以直接将文件中的某一部分映射到内存,在内存中直接修MappedByteBuffer后,文件内容就相应的修改了。

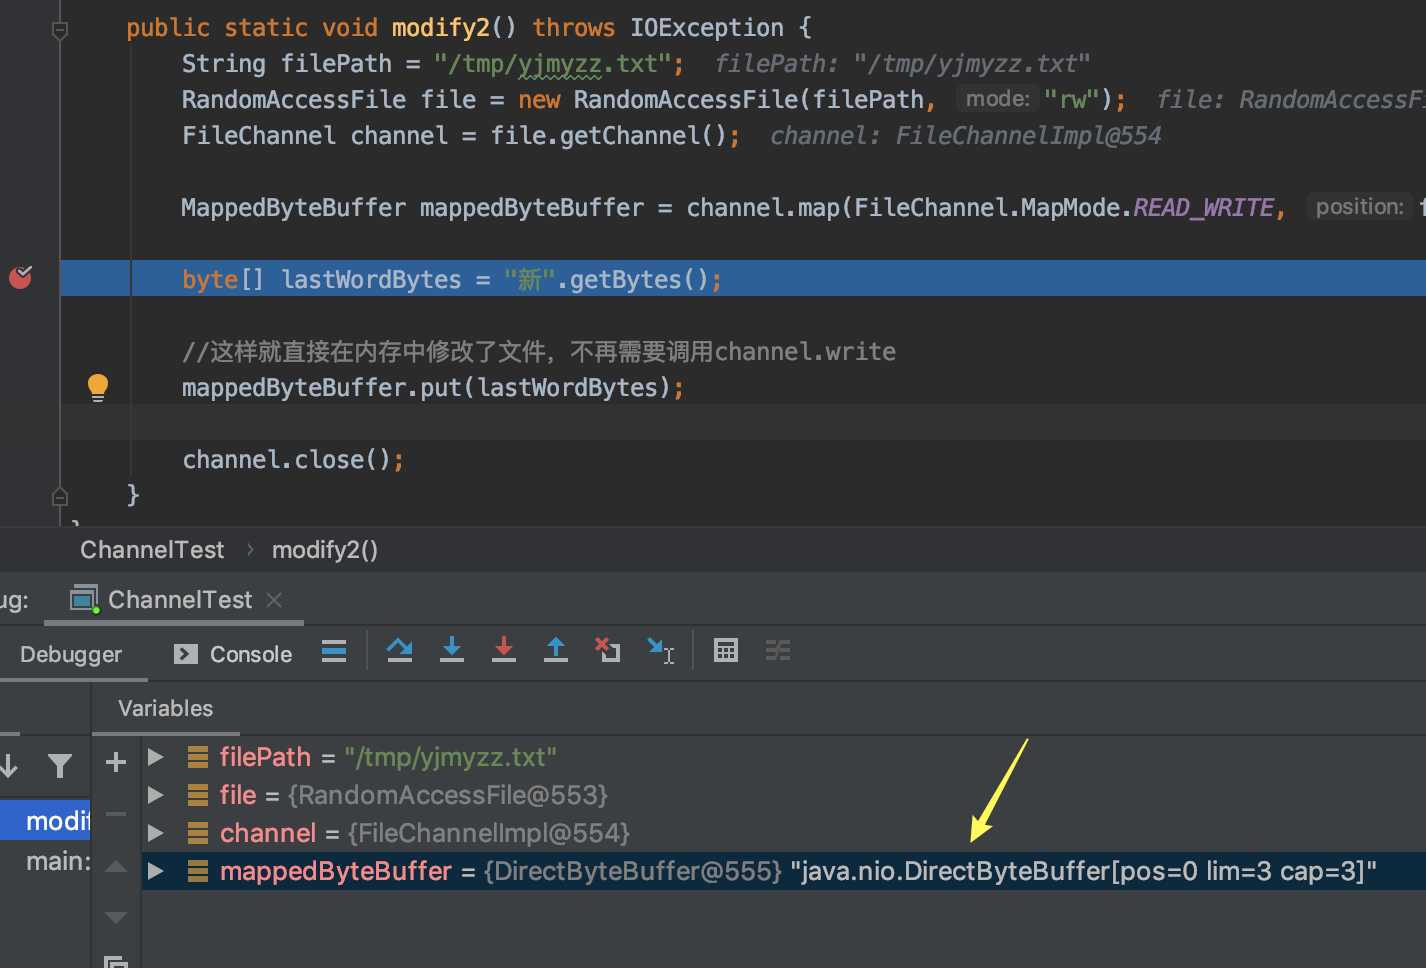
值得一提的是,从上面调试的截图来看,FileChannel.map方法返回的MappedByteBuffer,真实类型是它下面派生的子类DirectByteBuffer,这是“堆外”内存,不在JVM 自动垃圾回收的管辖范围。
参考文章:
https://docs.oracle.com/en/java/javase/13/docs/api/java.base/java/nio/channels/Channel.html
标签:htm 内存 读取文件 col demo 加强 sock void star
原文地址:https://www.cnblogs.com/yjmyzz/p/nio-channel.html