标签:atp 文件 基础 name fir firewalld for systemctl org
squid缓存服务器————反向代理[root@web httpd]# cd /var/www/html/
[root@web html]# ls
[root@web html]# vim index.html
<h1>this is test1 web</h1>2、在前面实验的基础上,新开一台web2服务器:192.168.247.161
[root@localhost ~]# hostnamectl set-hostname web2
[root@localhost ~]# su
[root@web2 ~]#
[root@web2 ~]# systemctl stop firewalld
[root@web2 ~]# setenforce 0
[root@web2 ~]# yum install httpd -y
[root@web2 ~]# cd /var/www/html/
[root@web2 html]# vim index.html
<h1>this is test2 web2</h1>
[root@web2 html]# systemctl start httpd
[root@web2 html]# netstat -natp | grep 80
tcp6       0      0 :::80                   :::*                    LISTEN      17713/httpd
[root@web2 html]# route add -net 192.168.10.0/24 gw 192.168.247.206
3、切换到squid服务器192.168.247.206进行反向代理配置
[root@squid sarg]# vim /etc/squid.conf
# Squid normally listens to port 3128
http_port 192.168.247.206:80 accel vhost vport      //修改
//下面为增加
cache_peer 192.168.247.160 parent 80 0 no-query orginserver round-robinmax_conn=30 weight=1 name=web1
cache_peer 192.168.247.161 parent 80 0 no-query orginserver round-robin max_conn=30 weight=1 name=web2
cache_peer_domain web1 web2 www.yun.com
[root@squid sarg]# netstat -natp | grep 80
tcp6       0      0 :::80                   :::*                    LISTEN      63454/httpd
[root@squid sarg]# systemctl stop httpd
[root@squid sarg]# netstat -natp | grep 80
[root@squid sarg]# service squid restart
正在关闭 squid...
正在启动 squid...
[root@squid sarg]# netstat -natp | grep 80
tcp        0      0 192.168.247.206:80      0.0.0.0:*               LISTEN
4、关闭防火墙和增强性安全功能
[root@squid sarg]# systemctl stop firewalld
[root@squid sarg]# setenforce 0
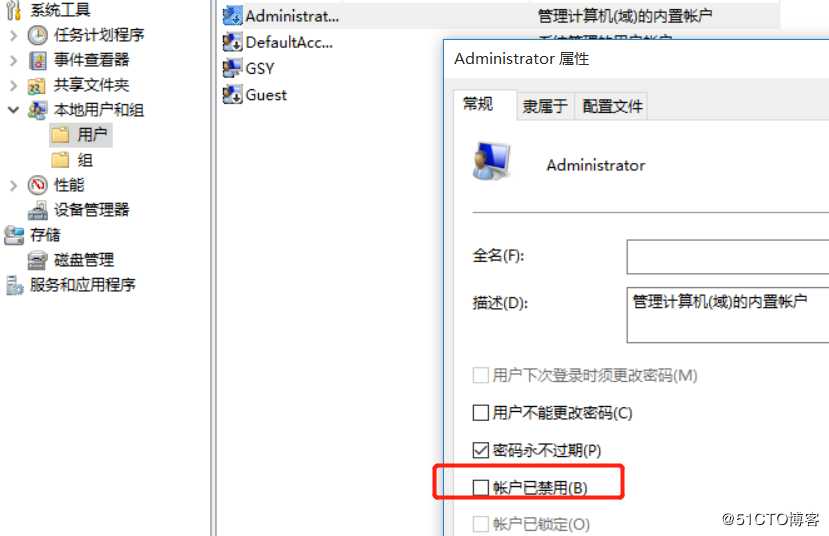
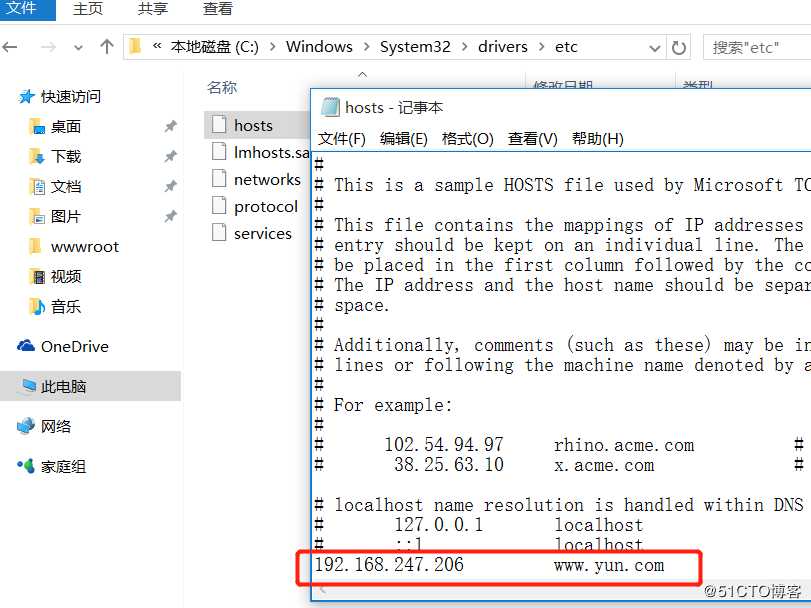
5、修改win10客户机hosts文件,使用administer

然后访问squid

标签:atp 文件 基础 name fir firewalld for systemctl org
原文地址:https://blog.51cto.com/14557905/2485025