标签:自己的 run red 服务 ddr 虚拟内存 x64 count oca
之前有学习使用过Solr。Elasticsearch也是基于Lucene的搜索服务器。它提供了一个分布式多用户能力的全文搜索引擎,基于RESTful web接口。Elasticsearch是用Java开发的,并作为Apache许可条款下的开放源码发布,是当前流行的企业级搜索引擎。设计用于云计算中,能够达到实时搜索,稳定,可靠,快速,安装使用方便。官方客户端在Java、.NET(C#)、PHP、Python、Apache Groovy、Ruby和许多其他语言中都是可用的。
//ES不可以使用root启动,需要创建用户
//创建一个用户组 取名为es
groupadd es

//创建一个用户,将其添加到es组里面
useradd yangk -g es

//为其设置目录权限,我安装的ES是在/yangk/elasticsearch-7.0.1
chown -R yangk:es /yangk/elasticsearch-7.0.1

//切换用户
su 用户

//启动es   -d是后台启动
./elasticsearch -d

//配置其可以远程访问
//修改/yangk/elasticsearch-7.0.1/config/elasticsearch.yml找到 Network
network.host: 0.0.0.0

//在末尾添加,开启跨域访问
http.cors.enabled: true
http.cors.allow-origin: "*"
此时启动的时候还有可能出现以下错误
[1]: max file descriptors [4096] for elasticsearch process is too low, increase to at least [65535]
[2]: max virtual memory areas vm.max_map_count [65530] is too low, increase to at least [262144]
[3]: the default discovery settings are unsuitable for production use; at least one of [discovery.seed_hosts, discovery.seed_providers, cluster.initial_master_nodes] must be configured
第一个问题:
//这个错误,主要是因为linux会限制进程的最大打开文件数

//首先切换到root
su root

//编辑vi /etc/security/limits.conf

//在文件末尾增加
yangk     -     nofile        65536   # 将 yangk替换为自己的用户名
第二个问题:
这个是ES使用的虚拟内存太小,直接调大即可,在 root 用户下执行下面命令:
sysctl -w vm.max_map_count=262144
第三个问题:
还是找到 config/elasticsearch.yml 文件,编辑,找到 Discovery 配置附近,修改

# 取消注释,并修改属性
cluster.initial_master_nodes: ["127.0.0.1"]
配置完之后启动还是出现报错
[INFO ][o.e.b.BootstrapChecks    ] [gFOuNlS] bound or publishing to a non-loopback address, enforcing bootstrap checks
ERROR: [2] bootstrap checks failed
解决方案
//切换到root用户

//修改vi /etc/security/limits.conf。增加
* soft nofile 65536
* hard nofile 131072
* soft nproc 4096
* hard nproc 4096

//修改vi /etc/security/limits.d/XX-nproc.conf
#修改为,这个有可能存在
* soft nproc 4096

//修改 /etc/sysctl.conf   增加
vm.max_map_count=655360

//执行命令
sysctl -p
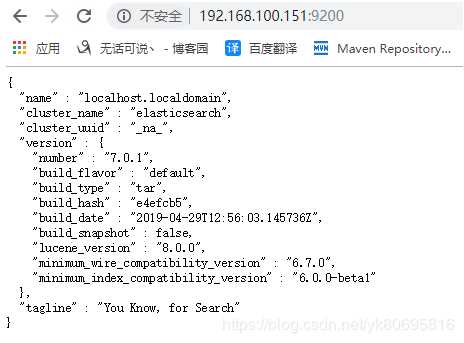
这样就启动成功

下载地址:https://github.com/mobz/elasticsearch-head
这是一个node.js的项目,需要先安装node环境
然后在cmd里面进入elasticsearch-head根目录安装项目所需依赖
//安装grunt
npm install -g grunt-cli

//安装head所需依赖
npm i

//启动项目
run run start 或者 grunt server

//启动项目有可能会出现grunt权限不足等。只需要软连接一下就可以了
ln -s /yangk/node-v8.11.3-linux-x64/bin/grunt  /usr/local/bin/grunt


在elastic search 6.0之后的版本已经对type这个概念逐渐淡化。所以把索引比作数据库中的表,文档比作行更为恰当。
Elasticsearch入门学习(一):安装ES7.0.1
标签:自己的 run red 服务 ddr 虚拟内存 x64 count oca
原文地址:https://www.cnblogs.com/yangk1996/p/12657681.html