实验:本征VLAN抓包
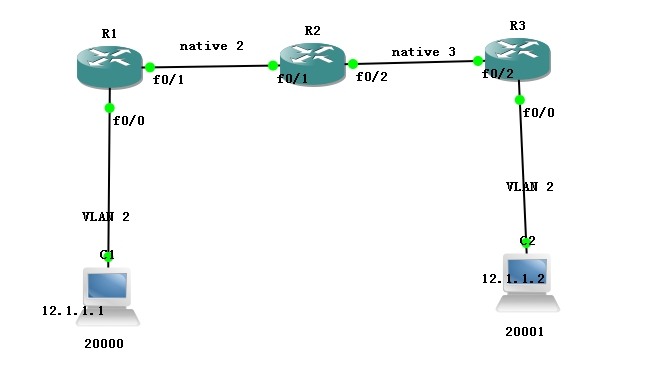
实验拓扑

实验要求
两个PC机在同一个VLAN,使两条线路上的本征VLAN为不同的VLAN,通信后抓包,查看两条线路上的数据帧封装情况
实验步骤
1.在交换机上创建VLAN
R1#vlan database
R1(vlan)#vlan 2
VLAN 2 added:
Name: VLAN0002
R1(vlan)#vlan 3
VLAN 3 added:
Name: VLAN0003
R1(vlan)#exit
APPLY completed.
Exiting....
R2#vlan database
R2(vlan)#vlan 2
VLAN 2 added:
Name: VLAN0002
R2(vlan)#vlan 3
VLAN 3 added:
Name: VLAN0003
R2(vlan)#exit
APPLY completed.
Exiting....
R3#vlan database
R3(vlan)#vlan 2
VLAN 2 added:
Name: VLAN0002
R3(vlan)#vlan 3
VLAN 3 added:
Name: VLAN0003
R3(vlan)#exit
APPLY completed.
Exiting....
2.将与PC机相连的接口放入相应的VLAN
R1(config)#int f0/0
R1(config-if)#switchport access vlan 2
R3(config-if)#int f0/0
R3(config-if)#switchport access vlan 2
3.将交换机相连的接口改成trunk口,并封装802.1q帧,修改本征VLAN,R1和R2之间为native 2,R2和R3之间为native 3
R1(config-if)#int f0/1
R1(config-if)#switchport mode trunk //改接口类型
R1(config-if)#switchport trunk native vlan 2 //修改本征VLAN
R1(config-if)#switchport trunk encapsulation dot1q //封装802.1q帧
R2(config)#int f0/1
R2(config-if)#switchport mode trunk
R2(config-if)#switchport trunk native vlan 2
R2(config-if)#switchport trunk encapsulation dot1q
R2(config-if)#int f0/2
R2(config-if)#switchport mode trunk
R2(config-if)#switchport trunk native vlan 3
R2(config-if)#switchport trunk encapsulation dot1q
R3(config-if)#int f0/1
R3(config-if)#switchport trunk native vlan 3
R3(config-if)#switchport trunk encapsulation dot1q
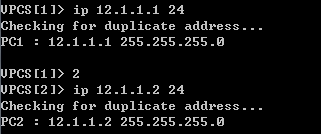
4.给PC机配置IP地址

5.查看通信

6.查看抓的包
(1)R1与R2之间
没有封装802.1q帧
(2)R2与R3之间

原文地址:http://19941205.blog.51cto.com/8873584/1572801