标签:config 退出 touch 代码 只读 strong 必须 启动文件 rem
[root@localhost-Linux ~]# cat /etc/red hat-release
Red Hat Enterprise Linux Server release 7.4.1708 (Core)
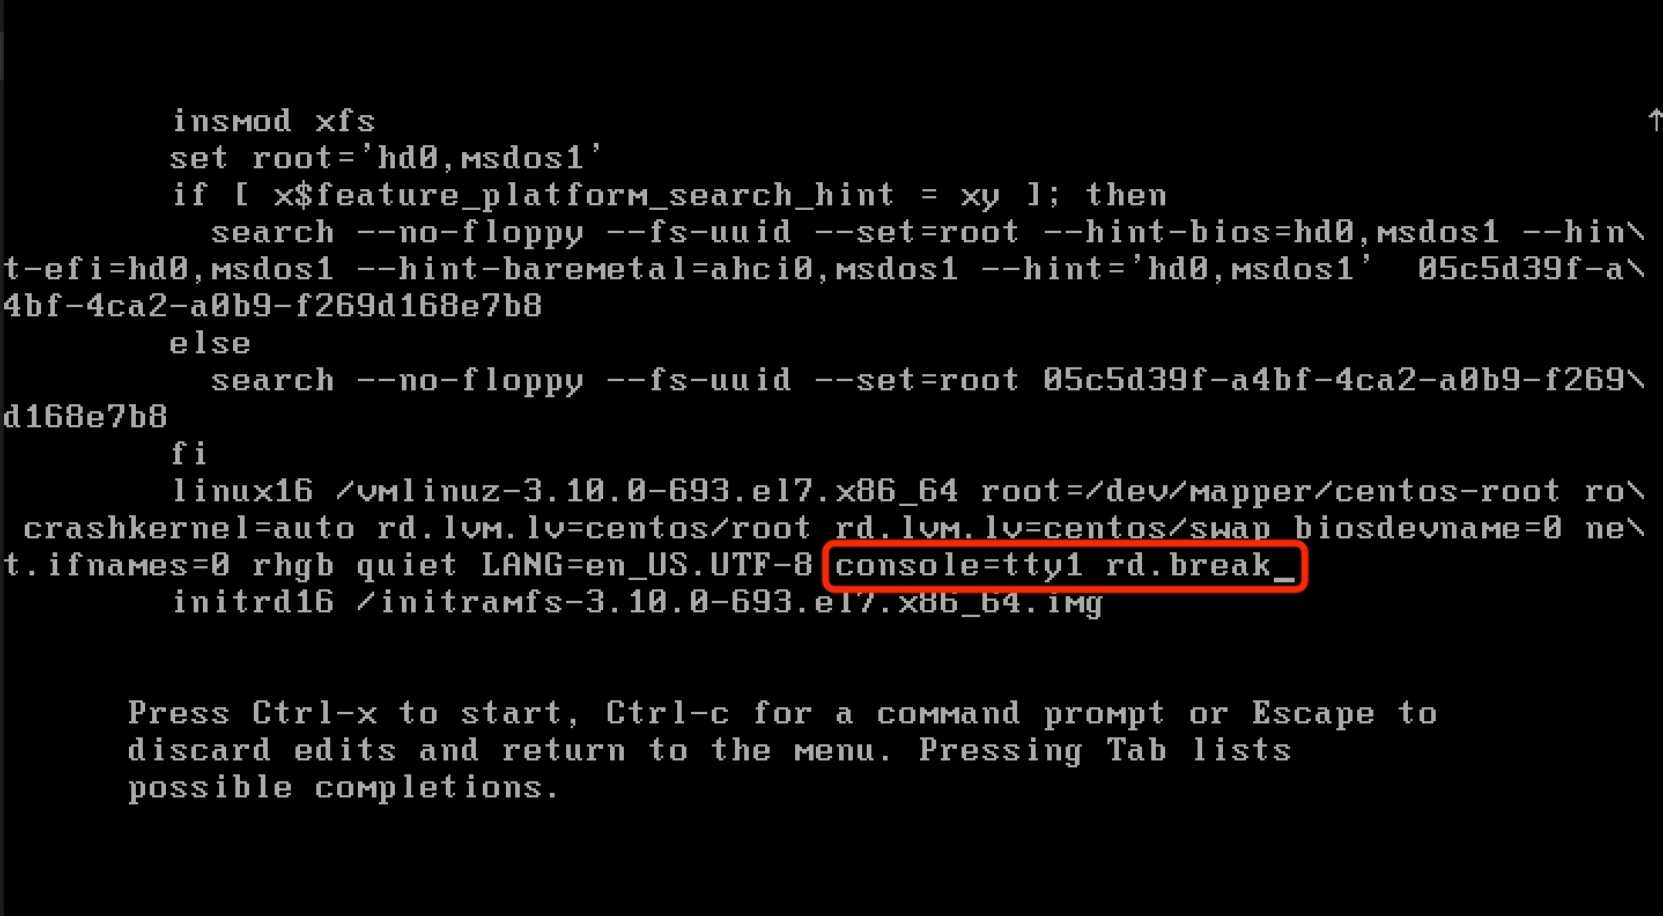
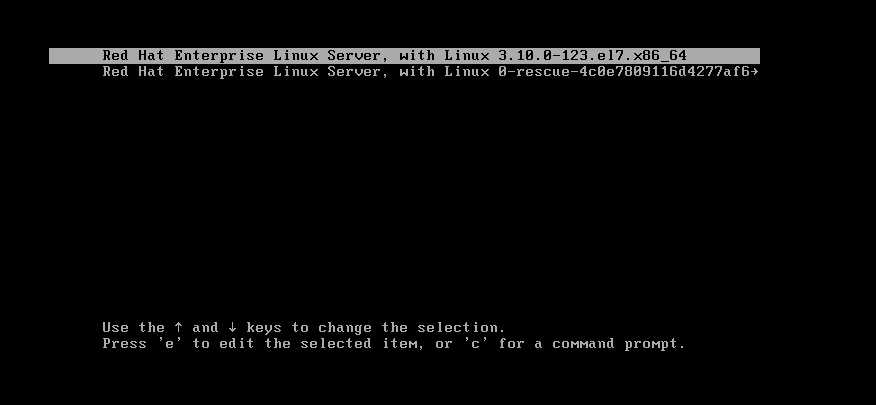
第1步:重启Linux系统主机并出现引导界面时,按下键盘上的e键进入内核编辑界面.
第2步:在 linux16 参数这行的最后面追加 rd.break或init=/sysroot/bin/sh 参数,然后按下 Ctrl + X 组合键来运行修改过的内核程序.
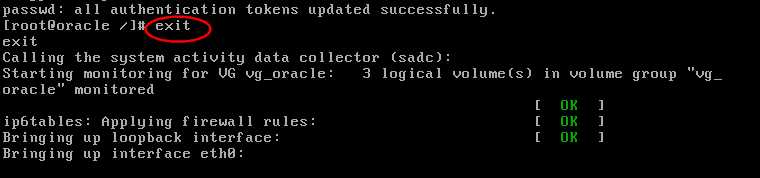
第3步:大约5秒过后,进入到系统的紧急求援模式,依次输入以下命令,等待系统重启操作完毕,然后就可以使用新密码来登录Linux系统了。命令行执行效果如图所示。
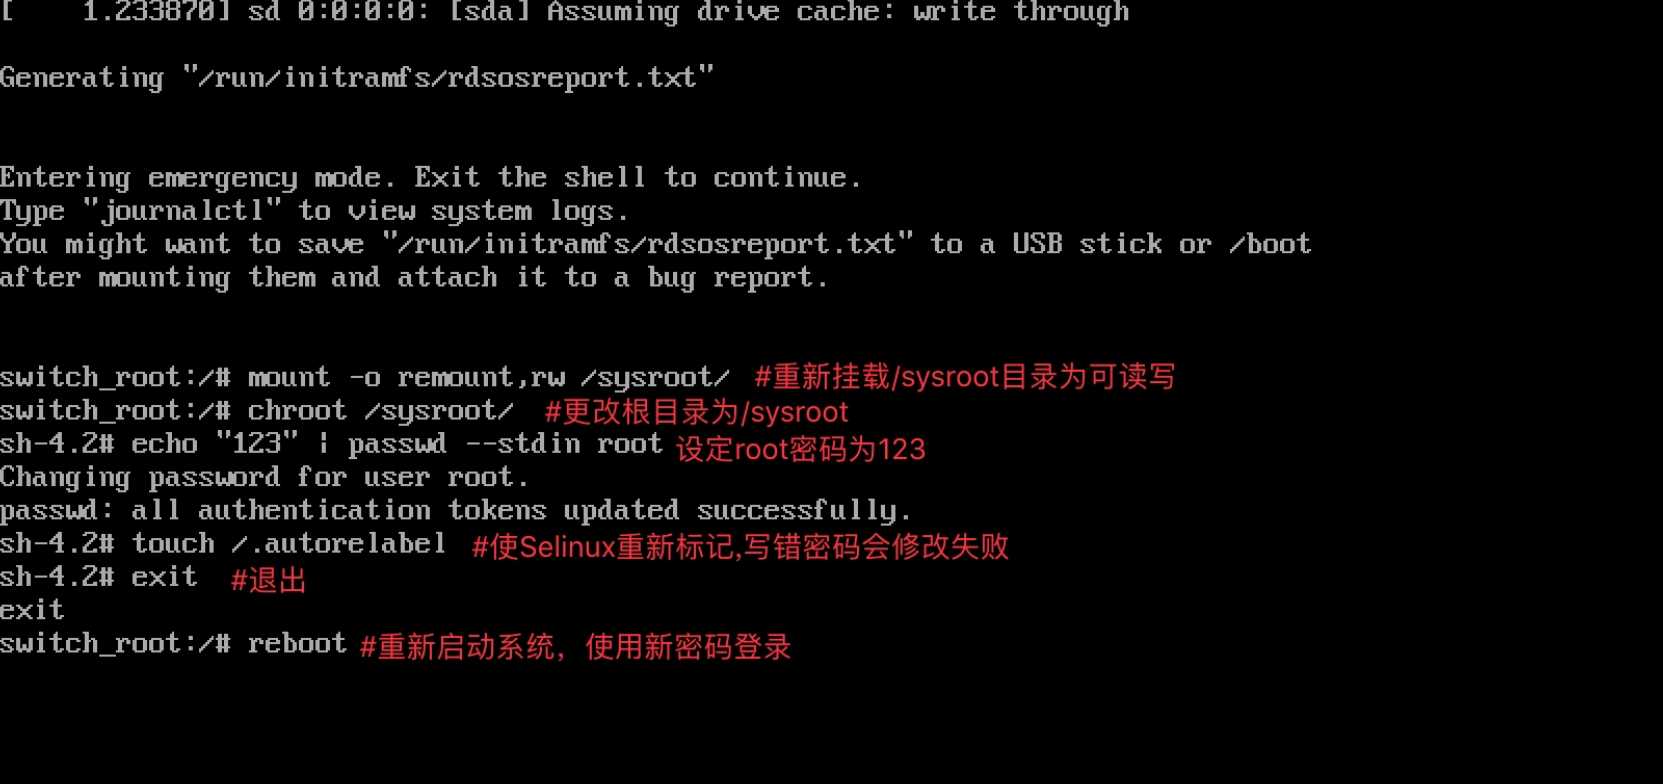
救援模式重置 Linux 系统的 root 管理密码命令如下:
1. mount -o remount,rw /sysroot //以读写的方式重新挂载,因为根在启动时是只读的,而/sysroot才是系统真正的根
2. chroot /sysroot //换根,将系统切换到真正的根目录
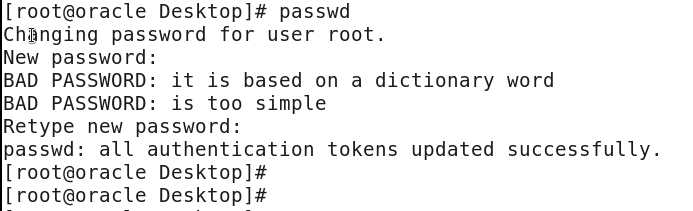
3. echo "123" | passwd --stdin root
4. touch /.autorelabel //如果之前系统启动了selinux,必须执行touch /.autorelabel,否则将无法正常启动系统。
5. exit
6. reboot
sysroot这个目录类似于WindowsPE光盘的目录,是在内存中的。
方法一:
空格键,只有5s
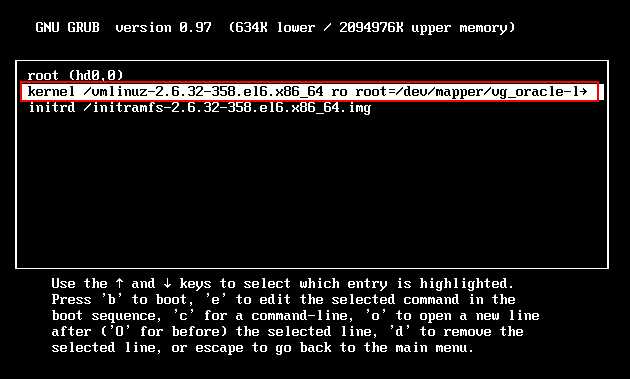
GRUB,是可以编辑的,按 e 编辑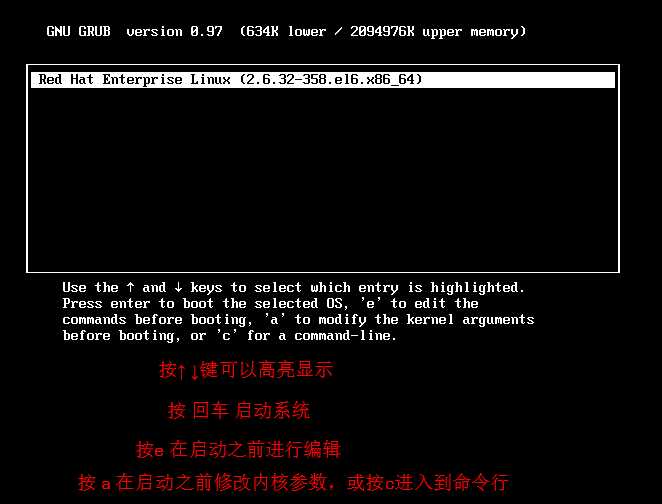
选择kernel,按 e 进行编辑!
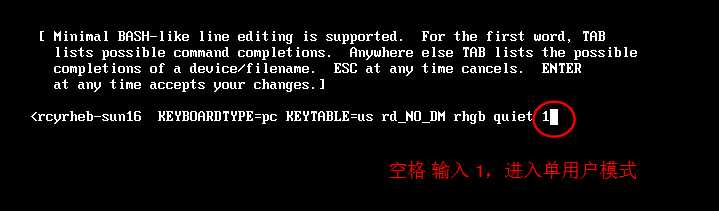
按下空格键,输入 1,进入单用户模式,回车;单用户模式避开了很多服务,网络服务、网页服务等等,所以这个模式是不能够正常使用的.
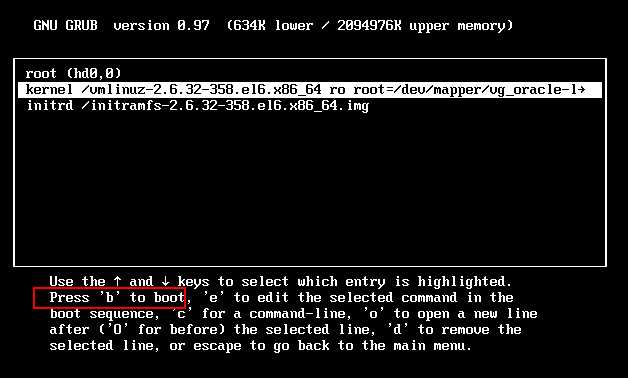
按 b 启动
passwd命令改密码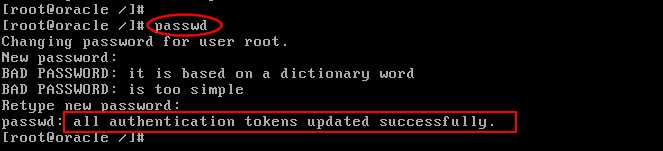
exit 退出
方法二:
? 1. 把/etc/passwd文件中root后面的X去掉,也是不需要验证的。X代表用户是否需要验证。
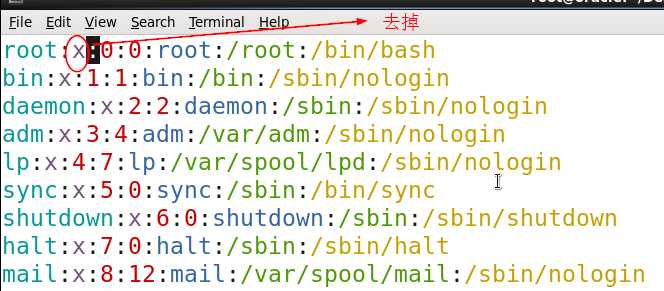
2. 正常进入系统后再使用passwd命令设置新密码
1. 将密码哈希
[root@localhost ~]# grub2-mkpasswd-pbkdf2

[root@localhost ~]# cd /etc/grub.d/

[root@localhost grub.d]# ls

00_header  10_linux  20_linux_xen  20_ppc_terminfo  30_os-prober  40_custom  41_custom  README
2. 随便找一个文件进行编辑,在文本的最末尾写入一段代码,将上面计算的哈希值写入到里面。保存退出
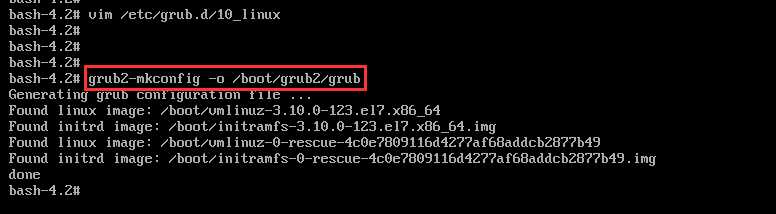
[root@localhost grub.d]# vim 10_linux

3.
[root@localhost ~]# grub2-mkconfig -o /boot/grub2/grub.cfg
Generating grub configuration file ...
Found linux image: /boot/vmlinuz-3.10.0-123.el7.x86_64
Found initrd image: /boot/initramfs-3.10.0-123.el7.x86_64.img
Found linux image: /boot/vmlinuz-0-rescue-4c0e7809116d4277af68addcb2877b49
Found initrd image: /boot/initramfs-0-rescue-4c0e7809116d4277af68addcb2877b49.img
done
-o:output,将修改的配置文件输出到启动文件(/boot/grub2/grub.cfg)里面
4. 重启系统
[root@localhost ~]# reboot
在重启界面按下空格键,停止倒计时,进行测试。
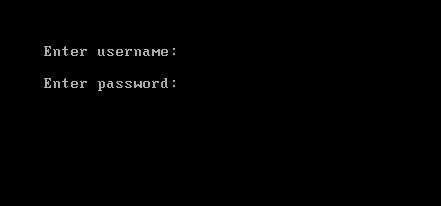
按 e 进入grub,提示输入用户名和密码
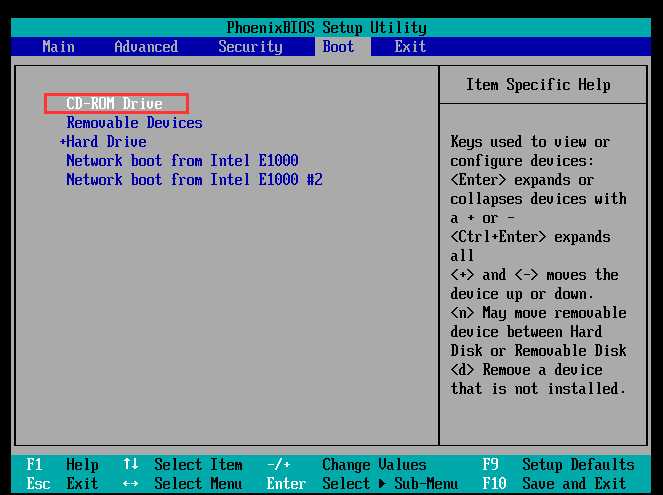
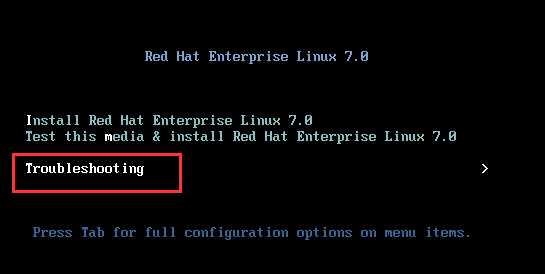
**1. 设置从光盘启动,进入救援模式 (救援模式是光盘中自带的一个mini系统) **
? 注意光盘里面的版本尽量要与当前的Linux版本匹配

2. 选择 continue
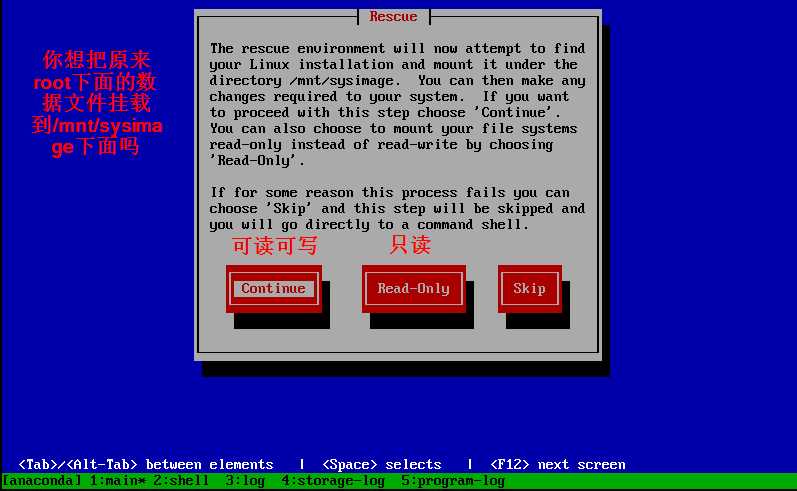
点击两次 ok
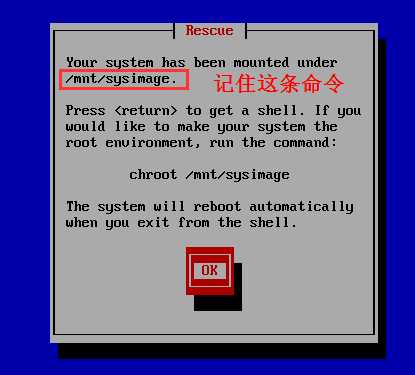
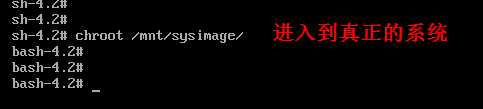
3. 执行命令,切换到真正的系统下 chroot /mnt/sysimage
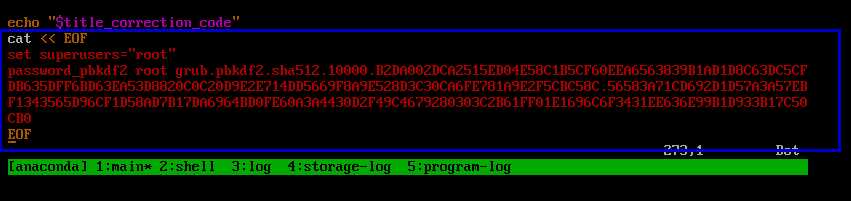
4. 找到被加密的grub配置文件,将配置删除。
grep -rn superusers /etc/grub.d/ #-r:递归 -n:显示行数
搜索 superusers 关键字。


5. 执行命令 grub2-mkconfig -o /boot/grub2/grub 重新读取启动配置文件
6. 输入两次exit 退出当前模式并验证
标签:config 退出 touch 代码 只读 strong 必须 启动文件 rem
原文地址:https://www.cnblogs.com/xz329-blogs/p/12945689.html