标签:ror switch for chdir comm address stat x86_64 多线程
一、实验目的
1.找一个系统调用,系统调用号为学号最后2位相同的系统调用,本人学号最后两位为80,即要测试的系统调用号为80
2.通过汇编指令触发该系统调用
3.通过gdb跟踪该系统调用的内核处理过程
4.重点阅读分析系统调用入口的保存现场、恢复现场和系统调用返回,以及重点关注系统调用过程中内核堆栈状态的变化
二、环境准备
安装开发工具:
sudo apt install build-essential
sudo apt install qemu # install QEMU
sudo apt install libncurses5-dev bison ?ex libssl-dev libelf-dev
下载内核源码:(本人的多线程下载老是出现问题,于是直接去网站下载了linux-5.4.34.tar.xz)
sudo apt install axel
axel -n 20 https://mirrors.edge.kernel.org/pub/linux/kernel/v5.x/ linux-5.4.34.tar.xz
xz -d linux-5.4.34.tar.xz
tar -xvf linux-5.4.34.tar
cd linux-5.4.34
配置内核选项:
make defconfig #Default configuration is based on ‘x86_64_defconfig‘
make menuconfig
#打开debug相关选项
Kernel hacking --->
    Compile-time checks and compiler options --->
        [*] Compile the kernel with debug info
        [*] Provide GDB scripts for kernel debugging [*] Kernel debugging
#关闭KASLR,否则会导致打断点失败
Processor type and features ---->
    [] Randomize the address of the kernel image (KASLR)
编译和运行内核:
make -j$(nproc)
# 测试一下内核能不能正常加载运行,因为没有文件系统最终会kernel panic
qemu-system-x86_64 -kernel arch/x86/boot/bzImage
制作根文件系统:
axel -n 20 https://busybox.net/downloads/busybox-1.31.1.tar.bz2
tar -jxvf busybox-1.31.1.tar.bz2
cd busybox-1.31.1

make menucon?g
#记得要编译成静态链接,不?动态链接库。
Settings  --->
    [*] Build static binary (no shared libs)
#然后编译安装,默认会安装到源码?录下的 _install ?录中。
make -j$(nproc) && make install
制作内存根文件系统镜像:
mkdir rootfs
cd rootfs
cp ../busybox-1.31.1/_install/* ./ -rf
mkdir dev proc sys home
sudo cp -a /dev/{null,console,tty,tty1,tty2,tty3,tty4} dev/
准备init脚本文件放在根文件系统跟目录下(rootfs/init),添加如下内容到init文件:
#!/bin/sh
mount -t proc none /proc
mount -t sysfs none /sys
echo "Wellcome MyOS!"
echo "--------------------"
cd home
/bin/sh
给init脚本添加可执行权限:
chmod +x init
打包成内存根文件系统镜像:
find . -print0 | cpio --null -ov --format=newc | gzip -9 > ../rootfs.cpio.gz
测试挂载根文件系统,看内核启动完成后是否执行init脚本:
qemu-system-x86_64 -kernel linux-5.4.34/arch/x86/boot/bzImage -initrd rootfs.cpio.gz
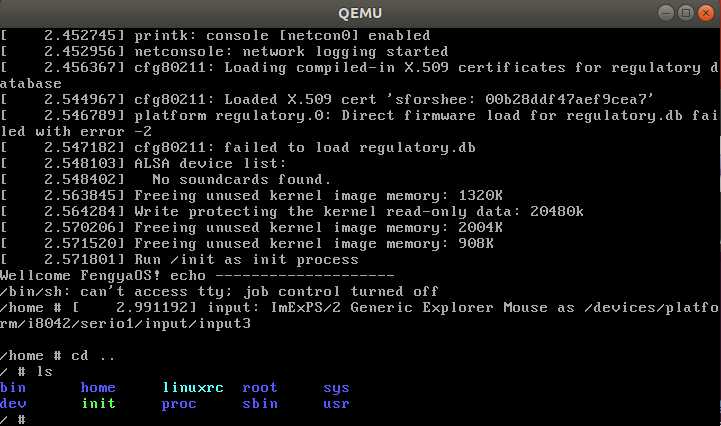
运行结果如下所示:
三、查看系统调用并编写调用汇编代码
1. 打开/linux-5.4.34/arch/x86/entry/syscalls/syscall_64.tbl
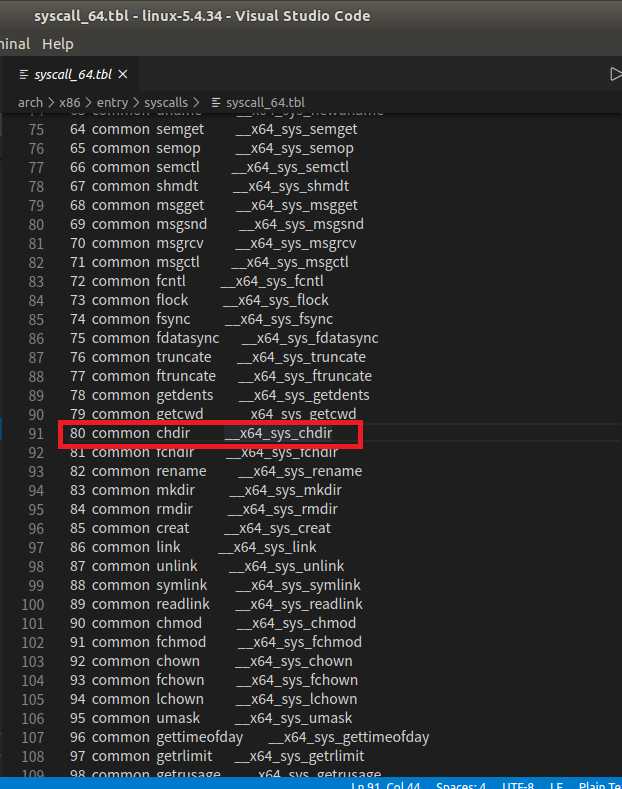
查表可见,系统调用号为80的命令为chdir,作用是改变当前进程的工作路径。
2.编写汇编调用代码
首先写一个非汇编版本的:
#include <stdio.h>
#include <unistd.h>
int main()
{
    char path[30];
    char name[30]="/home/fengya/桌面/Code"; //这个路径必须存在,否则肯定修改路径失败
    int res;
    getcwd(path,30);
    printf("当前工作目录:%s\n",path);
    res=chdir(name);
    if( res == 0 )
    {
        printf("修改工作路径成功\n");
        getcwd(path,30);
        printf("当前工作目录:%s\n",path);
    }
    else
    {
        printf("修改工作路径失败");
        return 1;
    }
}
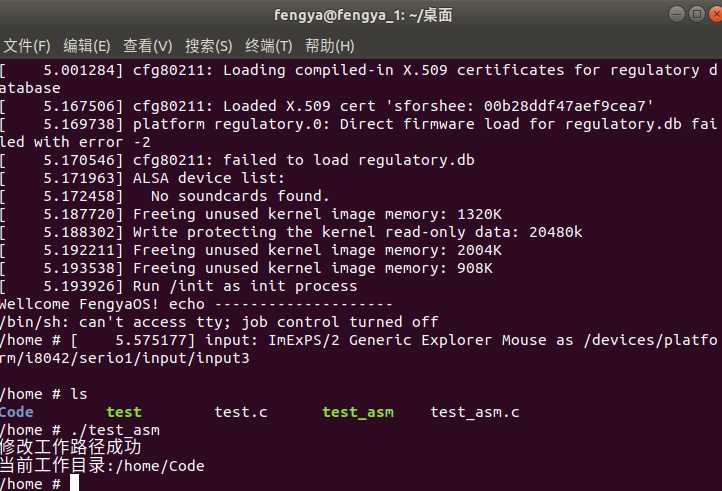
编译运行结果如下所示:

现在将代码中的系统调用换成用汇编代码触发:
#include <stdio.h>
#include <unistd.h>
int main()
{
    char path[30];
    char name[30]="/home/fengya/桌面/Code";
    int res;
    getcwd(path,30);
    printf("当前工作目录:%s\n",path);
    //res=chdir(name);
    asm volatile(
        "movq %1, %%rdi\n\t"  //  参数1
        "movl $0x50,%%eax\n\t" //  传递系统调用号80
        "syscall\n\t"          //  系统调用
        "movq %%rax,%0\n\t"    //  结果存到%0 就是res中
        :"=m"(res) // 输出
        :"a"(name) //输入
    );
    if( res == 0 )
    {
        printf("修改工作路径成功\n");
        getcwd(path,30);
        printf("当前工作目录:%s\n",path);
    }
    else
    {
        printf("修改工作路径失败");
        return 1;
    }
}
编译运行结果如下:

3.将代码放入rootfs/home目录下(注意路径要改成在qemu系统中存在的路径,否则之后运行无法成功修改路径),重新制作根文件系统
?nd . -print0 | cpio --null -ov --format=newc | gzip -9 > ../rootfs.cpio.gz
四、GDB调试与分析
1. 纯命令行启动qemu
qemu-system-x86_64 -kernel linux-5.4.34/arch/x86/boot/bzImage -initrd rootfs.cpio.gz -S -s -nographic -append "console=ttyS0"
此时停留在以下界面

2.打开另一个终端,进入linux-5.4.34文件夹,输入:
gdb vmlinux
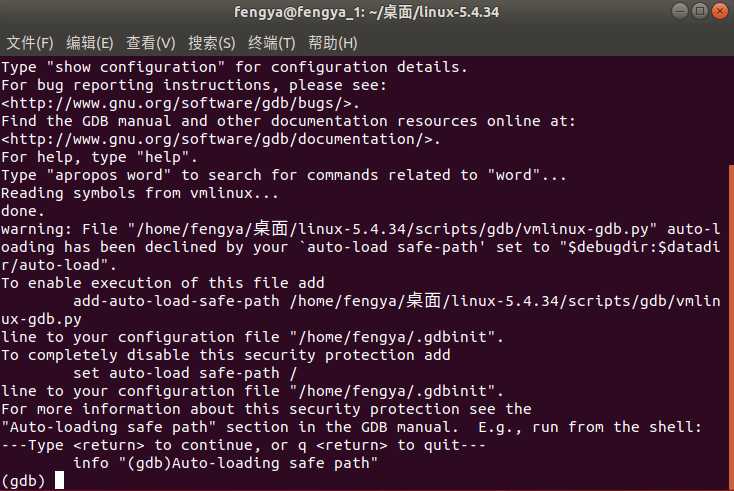
在gdb中运行:
target remote:1234
然后再gdb输入命令c,使得虚拟机继续执行,到初始界面

然后在qemu中测试之前放入的系统调用代码是否可以正常执行:
然后在gdb中给80号系统调用__x64_sys_chdir打上断点:

然后输入c(continue)继续运行,因为系统启动过程中也会多次调用chdir,因此需要多次输入c
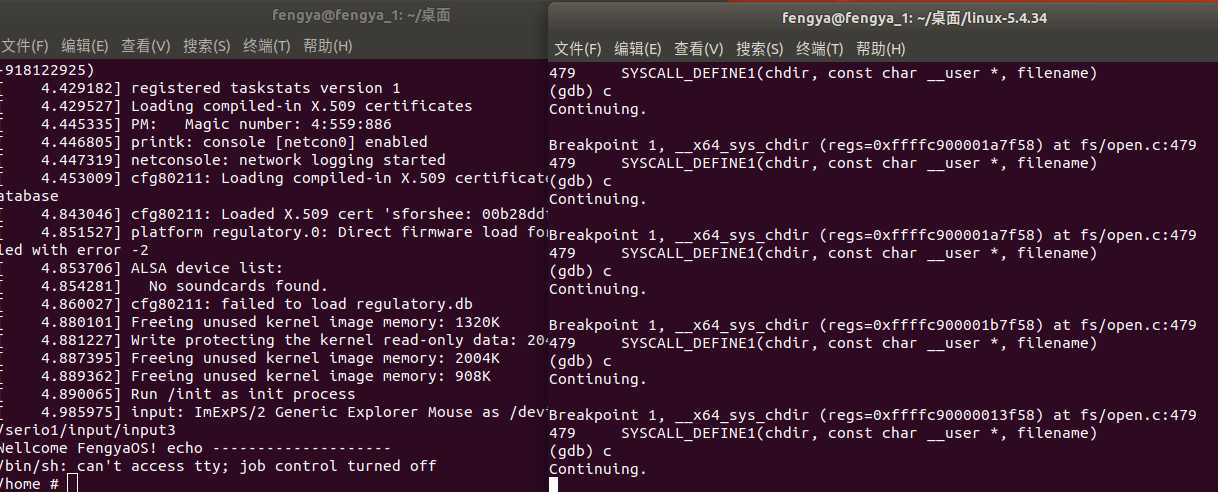
运行编写好的调用系统调用的代码,并进行gdb单步调试(输入n逐行执行)
五、结果分析
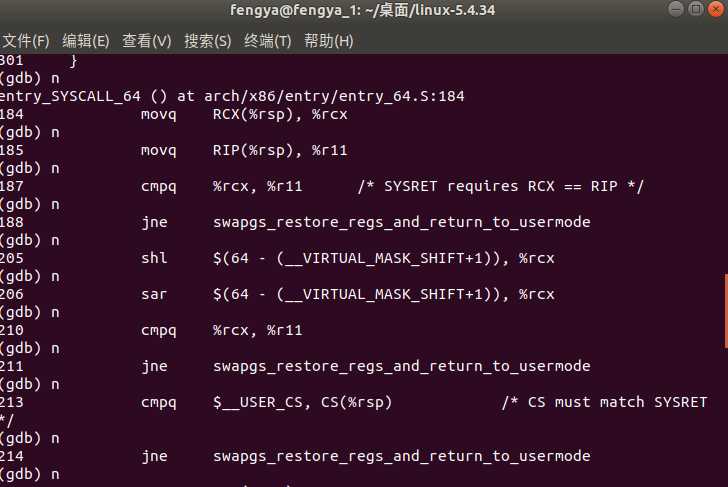
通过断点进行单步调试,运行结果如下所示:
(gdb) n
do_syscall_64 (nr=18446612682183950656, regs=0xffffc900001b7f58)
    at arch/x86/entry/common.c:300
300        syscall_return_slowpath(regs);
(gdb) n
301    }
(gdb) n
entry_SYSCALL_64 () at arch/x86/entry/entry_64.S:184
184        movq    RCX(%rsp), %rcx
(gdb) n
185        movq    RIP(%rsp), %r11
(gdb) n
187        cmpq    %rcx, %r11    /* SYSRET requires RCX == RIP */
(gdb) n
188        jne    swapgs_restore_regs_and_return_to_usermode
(gdb) n
205        shl    $(64 - (__VIRTUAL_MASK_SHIFT+1)), %rcx
(gdb) n
206        sar    $(64 - (__VIRTUAL_MASK_SHIFT+1)), %rcx
(gdb) n
210        cmpq    %rcx, %r11
(gdb) n
211        jne    swapgs_restore_regs_and_return_to_usermode
(gdb) n
213        cmpq    $__USER_CS, CS(%rsp)        /* CS must match SYSRET */
(gdb) n
214        jne    swapgs_restore_regs_and_return_to_usermode
(gdb) n
216        movq    R11(%rsp), %r11
(gdb) n
217        cmpq    %r11, EFLAGS(%rsp)        /* R11 == RFLAGS */
(gdb) n
218        jne    swapgs_restore_regs_and_return_to_usermode
(gdb) n
238        testq    $(X86_EFLAGS_RF|X86_EFLAGS_TF), %r11
(gdb) n
239        jnz    swapgs_restore_regs_and_return_to_usermode
(gdb) n
243        cmpq    $__USER_DS, SS(%rsp)        /* SS must match SYSRET */
(gdb) n
244        jne    swapgs_restore_regs_and_return_to_usermode
(gdb) n
253        POP_REGS pop_rdi=0 skip_r11rcx=1
(gdb) n
entry_SYSCALL_64 () at arch/x86/entry/entry_64.S:259
259        movq    %rsp, %rdi
(gdb) n
260        movq    PER_CPU_VAR(cpu_tss_rw + TSS_sp0), %rsp
(gdb) n
entry_SYSCALL_64 () at arch/x86/entry/entry_64.S:262
262        pushq    RSP-RDI(%rdi)    /* RSP */
(gdb) n
entry_SYSCALL_64 () at arch/x86/entry/entry_64.S:263
263        pushq    (%rdi)        /* RDI */
(gdb) n
entry_SYSCALL_64 () at arch/x86/entry/entry_64.S:271
271        SWITCH_TO_USER_CR3_STACK scratch_reg=%rdi
(gdb) n
273        popq    %rdi
(gdb) n
entry_SYSCALL_64 () at arch/x86/entry/entry_64.S:274
274        popq    %rsp
(gdb) n
entry_SYSCALL_64 () at arch/x86/entry/entry_64.S:275
275        USERGS_SYSRET64
(gdb) n
0x0000000000400ba5 in ?? ()
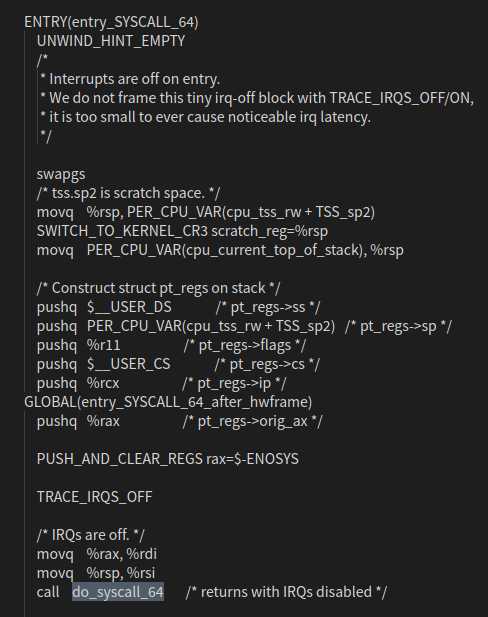
1.汇编指令触发系统调用,找到函数中断入口,执行 entry_SYSCALL_64() ,通过 swapgs 指令保存现场,触发 do_syscall_64 。
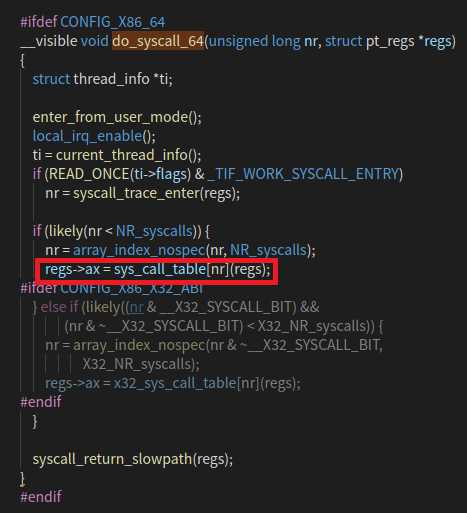
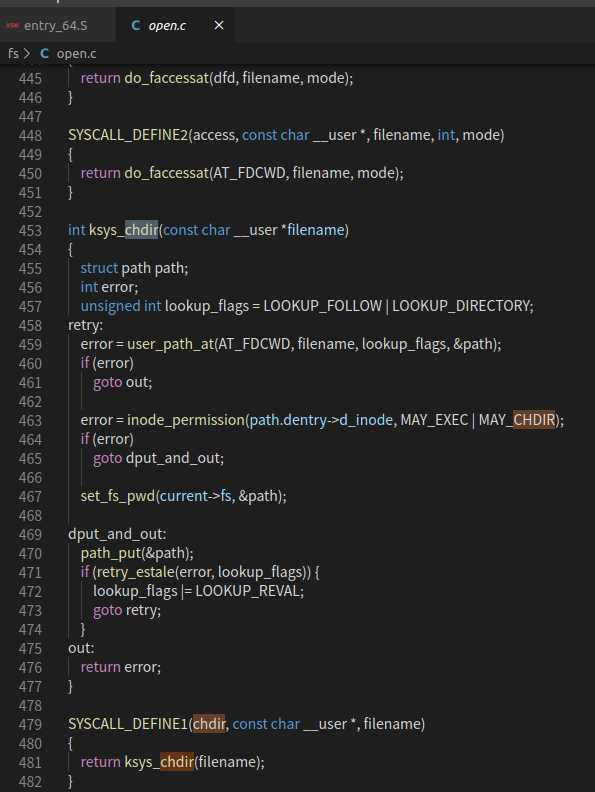
2.通过 do_syscall_64 函数得到了 系统调用号,执行系统调用内容。然后程序跳到 fs/open.c文件,触发了 ksys_chdir() 函数,执行完毕后,又跳回了do_syscall_64 中的 syscall_return_slowpath() ,准备进行现场恢复操作,并准备跳回用户态。
3.最后回到 entry_SYSCALL_64() 执行 popq ,完成堆栈切换。

标签:ror switch for chdir comm address stat x86_64 多线程
原文地址:https://www.cnblogs.com/fengyakk/p/12968934.html